ParallaxUi - UIs Escaping from Flatland
As I mentioned in my last post, one of the guiding principles for the design of 3D in WPF is the consistent and powerful integration with 2D vector graphics, media, imaging, UI, and documents. And, for quite some time, I’ve wanted to write a little demo to show off specific aspects of this.
Here’s the premise: You know those nice user interfaces we’ve all been looking at for the last 25 years – be they Windows, MacOS, Motif, NeXT, OpenLook, Irix, etc? They’ve only improved over the years, looking nicer and nicer. But we’ve always only viewed them head-on, and only see what they have to offer from one side. What if we were able to walk around and look at them from an angle? Or from behind them? What do our familiar interfaces look like when we do that?
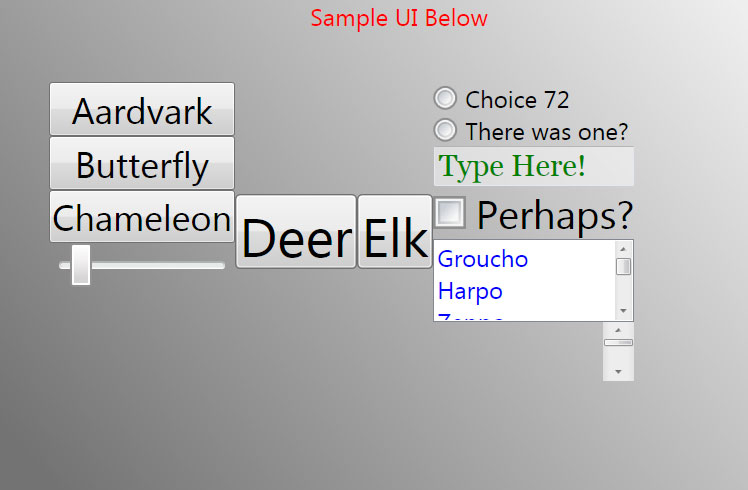
For instance, consider this sample interface (clearly I’m not a UI designer, so if someone wants to provide me with some XAML for a more pleasant interface with similar variety, please send it my way):

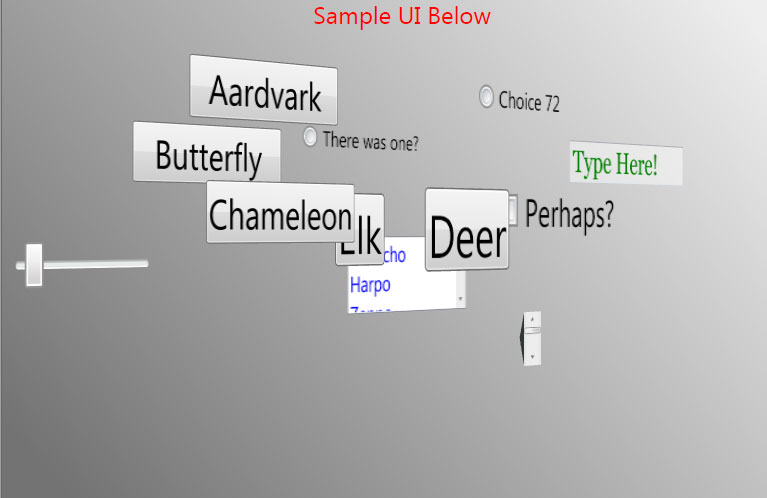
But what happens if we escape from Flatland, just by a little bit? Looks like our UI actually exists in 3-space after all, with different depth to the different UI elements. Who knew?

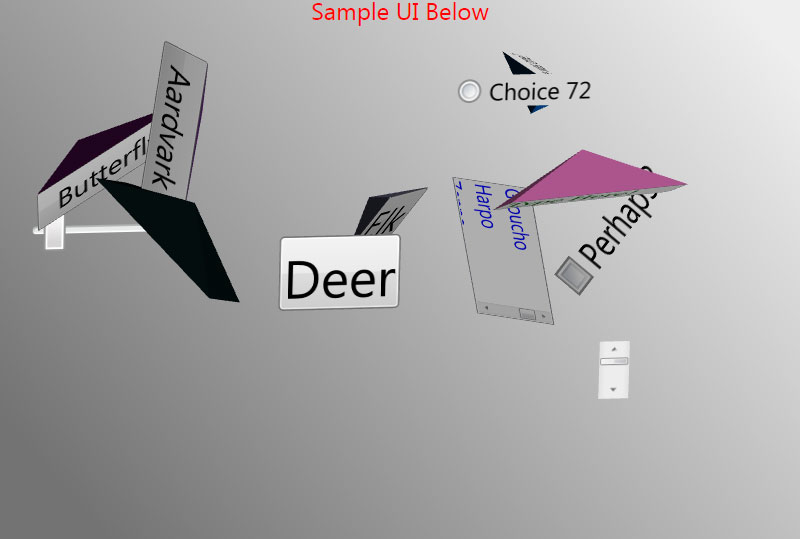
And rotating farther the other way, we start to see what’s behind our UI elements:

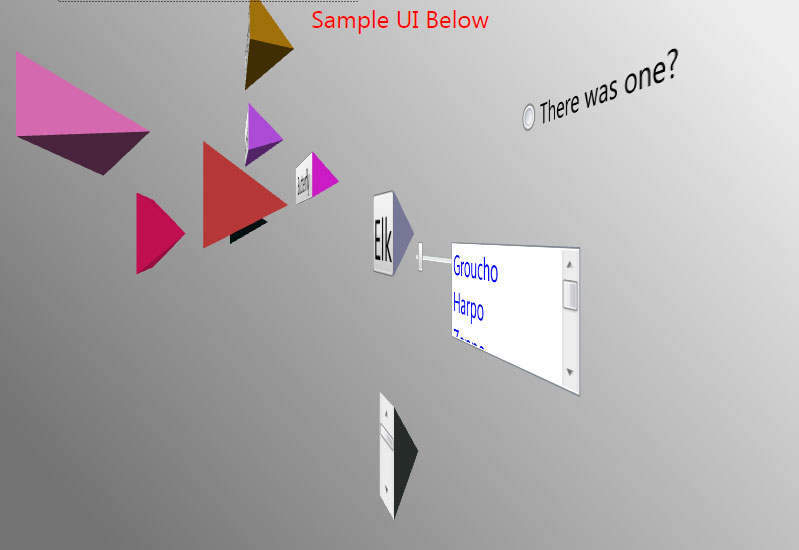
What does this knowledge let us do with our interfaces? Well, for one thing, transitioning from one UI state into another state can always be a pleasing operation when done well. However, with 2D UI’s, the stuff that makes up transitions is typically limited to 2D transformations like rotation in the plane, skewing, translation, etc. Once we “realize” that our 2D UI’s actually exist in 3-space, we can create much more interesting transitions. This next screenshot is from just such a transition (but I strongly recommend you run the app to see the 3D “implode” transition in action – it’s far better than looking at a static picture):

Uhh, what’s going on here?
ParallaxUi Decorator
The above are screenshots from this XAML Browser Application (.xbap) . Run it yourself! [4/2/07 - Problems with this XBAP have been reported on 64bit Windows Vista, and on XP with IE7. Both are being investigated.] Play with the different controls up top to change view and invoke transitions. The “implode” transitions are random, so doing them a bunch of times shows a great deal of variety. (The XBAP is embedded in an HTML frameset in order to restrict the size of the surface, since lower end machines running WPF don’t perform well with 3D on very large surfaces.)
The app centers around a custom WPF Decorator that I call ParallaxUi. It’s called this, because the parallax effect occurs when an observer moves relative to a set of objects that he perceived to have a certain relationship to each other, only to find that their relationship changes with his motion. Wikipedia has a good explanation of parallax. This is the motion that’s observed in the app when the rotation slider is moved, and our UI starts to rotate in 3-space, revealing that its components have depth placement to them.
In WPF, a Decorator surrounds a single child element, and in XAML, the use of the custom ParallaxUi looks like this:
<Page …
xmlns:plxui="clr-namespace:ParallaxUi;assembly=ParallaxUi" >
...
<!-- Just adding the ParallaxUi decorator enables the transitions we see here. -->
<plxui:ParallaxUi Name="plx" RevolutionsFactor=… SpeedFactor=… >
<!-- This child is the UI that's controlled by the ParallaxUi Decorator -->
<DockPanel>
<-- more XAML comprising the UI under “parallax” view -->
...
</DockPanel>
</plxui:ParallaxUi>
...
</Page>
The exposed ParallaxUi element, named “plx” here, exposes properties that control the behavior of the “implode”, as well as a Rotation3D property to let the user of the element set up arbitrary 3D rotations. It also exposes methods to invoke both a 3D transition and a 2D transition. Here’s how the ParallaxUi Decorator works:
- It’s initialized by constructing a 3D scene as a big Model3DGroup and adding some lights.
- It then traverses its child and recursively looks for FrameworkElements and descends into Panels and Decorators. For each FrameworkElement it finds:
- It determines the size and position relative to ParallaxUi, and scales and positions a simple quadrilateral mesh to exactly superimpose with the 2D element. It also chooses a random z-value for where to place the element in z.
- It creates a DiffuseMaterial from a VisualBrush of the FrameworkElement that was found and attaches it to the mesh in a GeometryModel3D.
- It does the same with a tetrahedron to be used as the “back” of the element, picking a random color for the material, and transforms that with the same transform.
- It adds these GeometryModel3D’s to the overall Model3DGroup being constructed.
- We create a Viewport3D, assign in the Model3DGroup constructed above, and assign it a camera that is perfectly spatially aligned with the 2D content of the child of the decorator.
- Now, when the Rotation dependency property is changed away from 0, we have the ParallaxUi decorator now display the Viewport3D with an appropriately modified Camera. When it goes back to 0 rotation, the ParallaxUi swaps in the original child.
- (The astute reader may notice from the last point that when the controls are being shown in 3D they won’t be interactive. We could use the techniques referenced in my last post to make this interactive, but as this is meant for demonstration and for quick transitions, there’s not much of a need to do so.)
- The “3D Implode” technique then just becomes a matter of animating position and rotation properties on each of the transforms that went into the GeometryModel3D for the elements.
- The “Twist Transition In” button is handled outside of ParallaxUi, just as an animation that manipulates the Rotation3D that ParallaxUi exposes.
That’s the basics of how this works. I really wanted to post it to further drive home how simple it is to do 2D/3D sorts of interplay, and hopefully help catalyze some interesting and cool uses along those lines. That’s all for this post, but I plan on a few followup posts to a) post the code after I get a little bit of a chance to clean it up; and b) talk about some of the more interesting technical challenges in getting this app to work, so that others can leverage those as well.