Azure ARM templates–Tips on using Outputs
Introduction
Continuing the series on ARM templates, here we are going to explore another variation of using the OUTPUTS section. In the previous blog post I already showed how to extract values you passed into the template via parameters. Here we are going to see a slightly advanced usage.
Objective
We want to be able to print at the end of the ARM deployment using OUTPUTS section certain properties of the deployment we did with the ARM template. You would do this to confirm that the ARM deployment did indeed do what you wanted it to do, and as well as to perhaps pipe the output onto a subsequent command and do further operations on it.
Reference
To go the full schema definition that the ARM template relies on refer here
https://azure.microsoft.com/en-us/documentation/articles/resource-group-authoring-templates/
JSON file and named resources being created
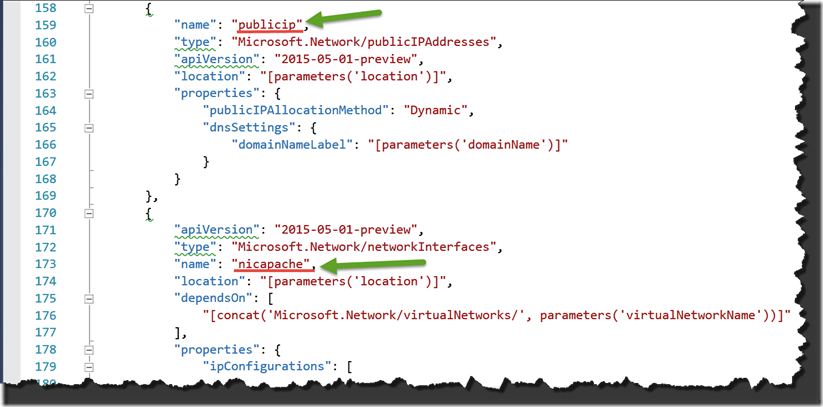
In this example we are interested in outputting the full property set of the resources we are creating. For instance in the below snippet a IPAddress and a network interface resource specification named as “publicip” and “nicapache” are being requested, and once this resource gets created it also has a set of properties associated with it. In the output section the full property list will be printed out, because we are outputting by referring to the entire object. The full template file is attached to this post at the end.
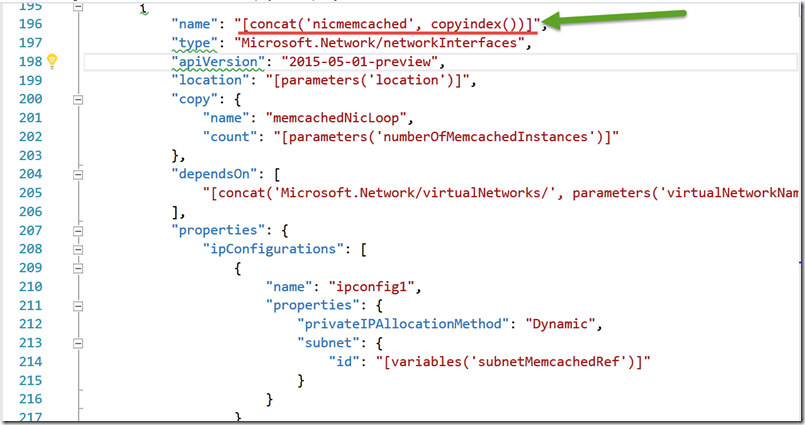
You can also see the other (two) named networkInterface resource being requested twice – via the copyindex() function, looped by the count parameter, which is set to 2. They get named as “nicmemchached0” and “nicmemcached1” , where 0 and 1 get appended to “nicmemcached” via the concat() function.
OUTPUT section of JSON file
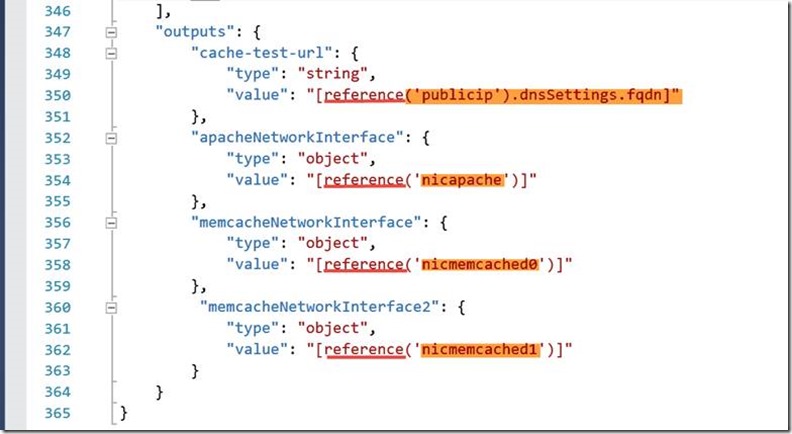
Here in the outputs section the full set of properties of the network interface are being printed. As you can see all named resources are “referenced” by their resource name in the outputs section.
In the above snippet, you can also see the reference to the two named resources in the OUTPUTS section, “nicmemchached0” and “nicmemcached1” in the template file, where 0 and 1 get appended by the copyindex() function, looped by the count parameter, which is set to 2.
Reference - Output section’s schema allowed in ARM template
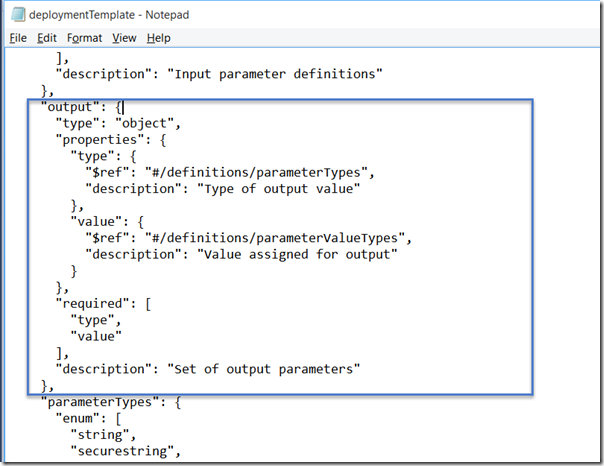
The following is the schema definition for the OUTPUTS section that will be acceptable for API version 2015-01-01. So your output specification should at a minimum confirm to the below schema definition. It tells how you can format and what is needed. Note that as the product evolves, one can expect this to also evolve to accommodate additional features.
Executing the ARM based deployment via a PowerShell
It should be noted that PS is passing the ARM template to the underlying ARM cells in the background. This should NOT be confused with actually using PS to do deployments as you normally would. Once you get the ARM template worked out correctly you could repeatedly fire it, whereas if you had an imperative PS script, you cannot as it would error and say the resource already exists. This will not be the behavior you see when you use ARM templates. In general as a best practice you should use ARM templates to do your sophisticated deployments as they are repeatable and consistent, which is not the case with using straight PS in an imperative manner.
Step#1 – Create a ResourceGroup
In my case I named it TestARMOUTPUT. Currently I used WestUS as the location. If sometimes the underlying resource or feature/capability you want to use is NOT rolled out in a specific region, then you want to deploy to a region the capability has been turned on. Eventually every Azure region is likely to have all of the capabilities.
New-AzureResourceGroup -Name TestARMOUTPUT -location "West US" -force
Step#2 – Deploy the ARM template into your resource group
Now deploy the resources you specified in the ARM template using the resource group you created previously.
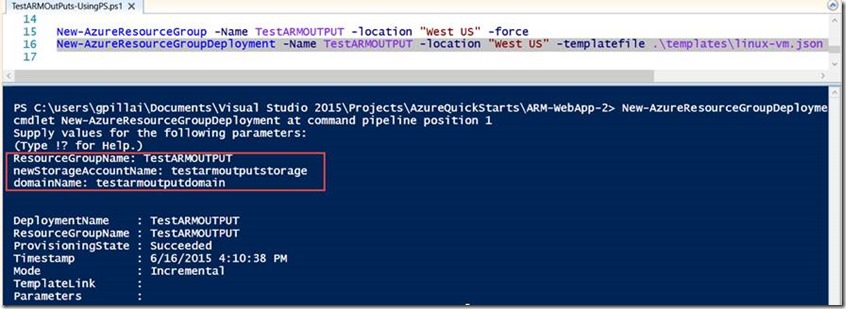
New-AzureResourceGroupDeployment -Name TestARMOUTPUT -location "West US" -templatefile .\templates\linux-vm.json
It will ask for your response to a few parameters and one has to enter them. You can choose your own identifier names, instead of what is shown below.
OUTPUT on executing the deployment using the ARM template
Once the template execution starts going, if there are any errors you have to correct them till it runs through to the end to completion. Incidentally you will see the OUTPUTS section gets printed ONLY if the template gets executed successfully. Otherwise you will not see it. This is another good reason to use OUPUTS as it confirms the template did get executed successfully.
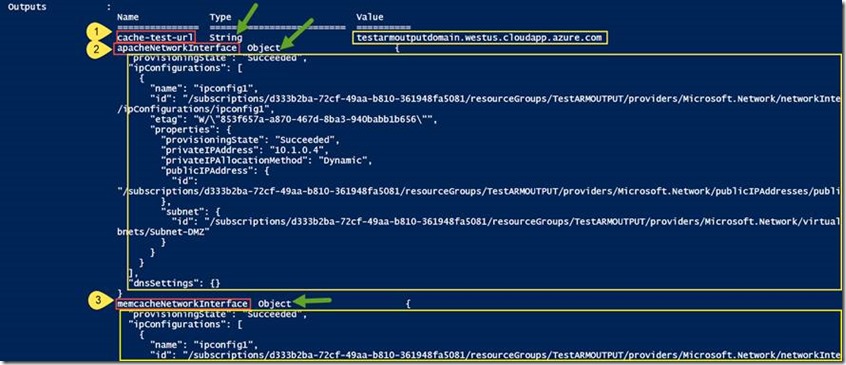
The following is the output window, with all of the four values that were requested by the OUTPUTS section of the ARM template (the complete template is attached to this post).
You can see the Name, Type and Value of the resources printed out as requested in the Template. There are 4 outputs, with their names (in red), type (in green) and actual value (in yellow) highlighted below.
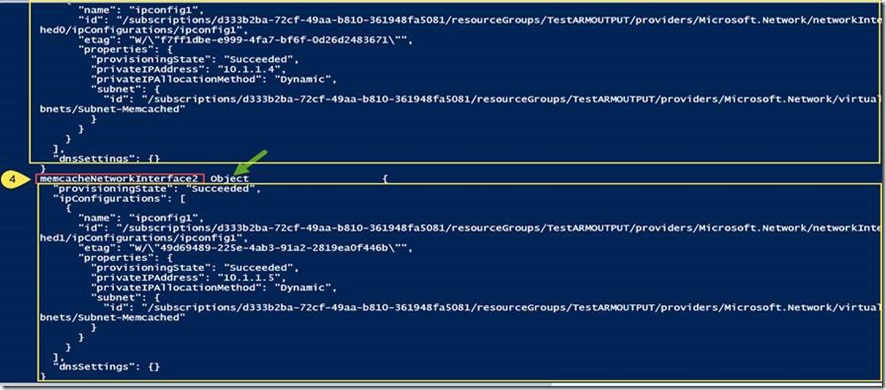
Snipping continued.
As you can see above the two nic-interfaces on their own IP Addresses have been created, one on the IP address 10.1.1.4 and another on 10.1.1.5 where the PrivateIPAddresses are listed.
Portal View
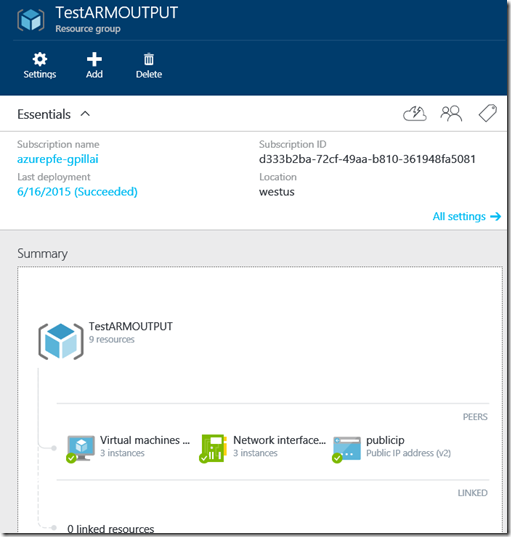
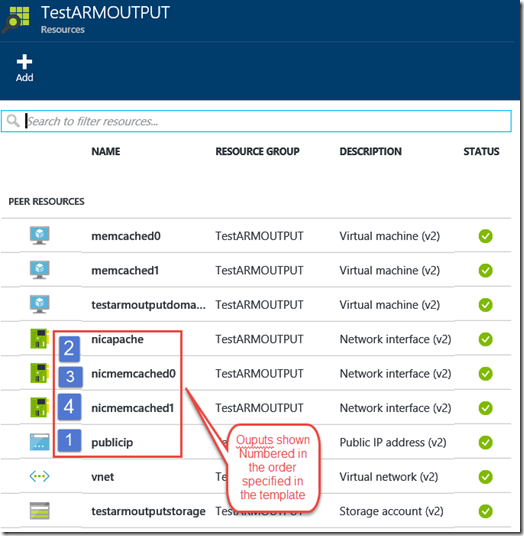
Now if you go the portal you can view the resources you created in the Resources blade as shown below.
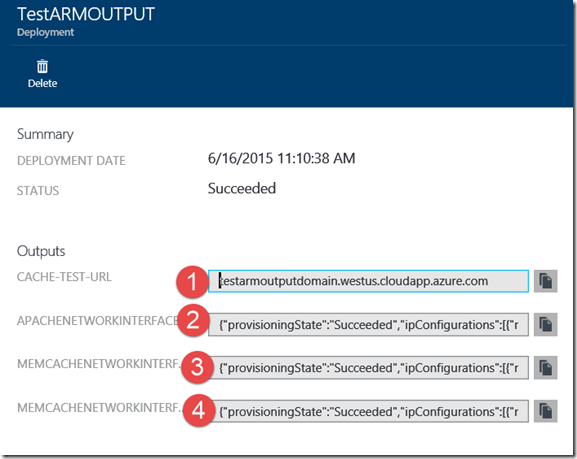
And if you click through to the deployment history you can see the OUTPUTS clearly and you can copy the entire text out if needed as shown below.
Credits
I worked with Microsoft Principal Group SW Eng. Mgr. Charles Lamanna to get the source for this blog post and he also helped clarify.
LiveJournal Tags: Azure ARM Template OUTPUT ARM Template Output
