InstallShield and Team Build on TFS
Introduction
Original post on 3/4/2014.
[Update 4/18/2014: This blog was published on 3/4/2014. As of today ie 4/18/2014 the Product Team in response to UserVoice complaints has brought back support for Visual Studio Installer projects. You can download the extension from the VS Gallery page.]
I had the necessity to get Install Shield (IS) working from Team Build and posting this as others might find this useful. My recommendations would be to use WiX for doing Builds as WiX based projects are supported from Visual Studio (VS) 2013, where the earlier version of Setup Projects are no longer supported in VS 2013. However there are plenty of Folks who are still using IS and have invested in using IS for quite some more time, before they can transition over and this post will provide some help. I see the main difficulty with using WiX as not having a GUI based tool to easily hand edit the XML file that can drive the packaging. Whereas with IS, the GUI provides an easy way to drag and drop your files and other Registry settings so you can allow IS to generate the XML file that can be then fed as input to the candle.exe and light.exe executables.
Pre-Requisites
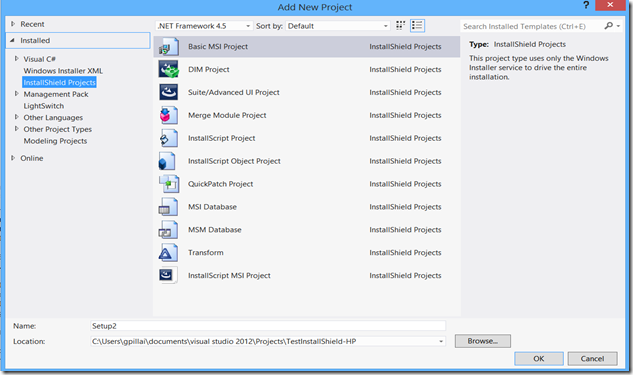
First you must have IS downloaded and installed on your Client Developer Desktop ( your VS machine). Then you of course need TFS installed along with a Build Server running Team Build Service. Having an installation of VS 2012 will also be helpful, though not necessary as you can create the IS based setup project straight from VS 2012 itself. This is more of a convenience (see below in VS 2012). You can’t do this from VS 2013 though, ie you cannot create the Setup Project for IS from your VS 2013.
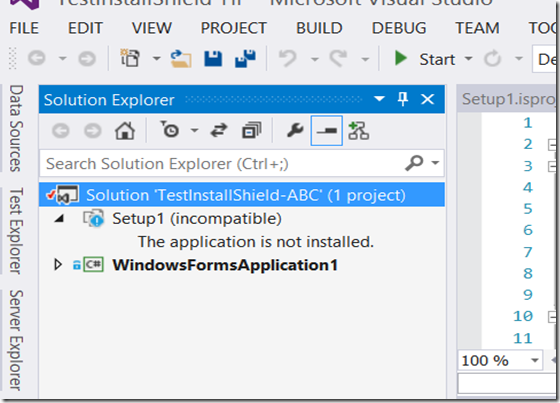
It might be possible though to create the IS’s Packaging project from the IS console and then take that Project and get it added to the Visual Studio Solution. However when you load it in VS 2013, it wont show up OR rather load the IS project (“incompatible” as shown below). As you can see the IS based Setup1 is not getting loaded by VS 2013.
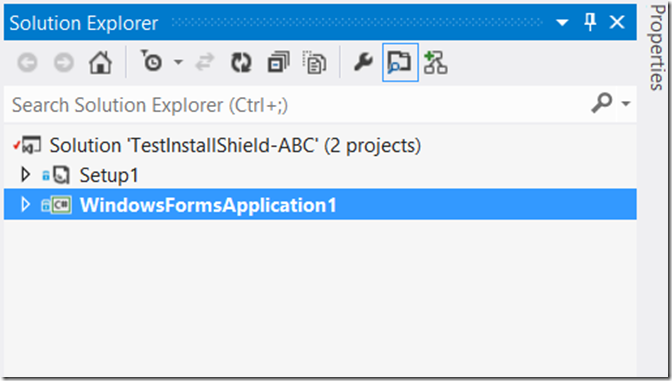
Whereas the same solution which contains the same Setup Project will get loaded correctly in VS 2012 (see below). This is because the “Setup Projects” have been deprecated in VS 2013 .(see update note at top)
Now coming back to the problem at hand, the following are the steps to do.
- First the solution must compile and build on your Visual Studio Client. For this I suggest use your VS 2012 Client to verify that you can build and package the Solution and then test it. This assumed you know how to create the IS based Setup package. Create one, preferably sitting underneath your TOP level solution along with the rest of the projects.
- Next on your Build Server if you are running TFS 2012 or 2013, install the Install Shield components on the Build Server.
- For TFS 2012 and 2013 based Builds, there is another twist to this as the Default Build Template will not accept the IS based solution. For this the workaround is to use the Build Process template based on https://tfsbuildextensions.codeplex.com/
- Import the above Build Template and then set this as the default Build Template. After doing that, create a Team Build Definition that Builds the solution that contains your IS project.
- Fire the Build. It should *TRY* to build and then the come out with errors such as the below.
- ERROR You will get an error saying that error saying InstallShield.Tasks.dll was not found or could not be loaded.
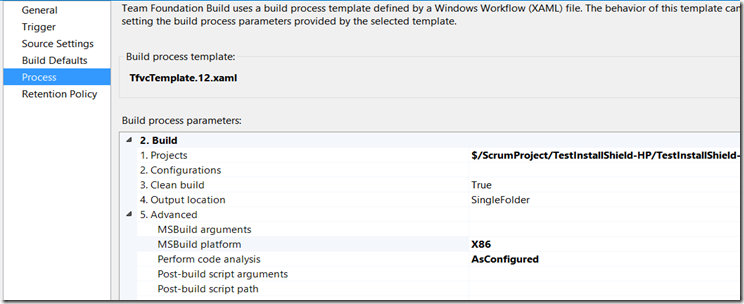
For this set the MSBuild Platform on your Build Definition to “X86” as shown below.
7. ERROR You will get another error saying that InstallShield Licence has expired. This will happen only if your BuildService is running with a local account such as “NT_AUTHORITY\Network Service”. Set your Build Service to run with a domain account and this error will go away. Retry the Build.
8. You should now see the Package built and dropped in your Output Folder of the Build DROP location (you will specify this in your build definition) in the DISK folder.
Test it by running the Setup from that folder to correctly install your product.


