File Bound Generator
An other new addition to the Visual Studio Team System 2008 Database Edition - Power Tools release is the File Bound Generator. This data generator grovels through files inside a directory or optionally through its subdirectories, based on some search filter you provide and loads the content of the file in to a column value. The file content is either represented as text or as binary data. The generator is shared-instancing enabled, which means that the same file can be bound to multiple columns inside the same row while having to load it only once.
Let walk through an example which leverages the file bound generator to load data in to a table.
Step 0: Install the Power Tools
You first need to install the latest Power Tools for Visual Studio Team System 2008 Database Edition.
Step 1: Create a new project and add a table
The first step is to create a new database project, in this example I am using a SQL Server 2005 project named "testdb", since I want to leverage the NVARCHAR(MAX) and VARBINARY(MAX) data types, otherwise use NTEXT and IMAGE instead.
After having created the project add a new table which we will name [dbo].[files] with the following shape:
1: CREATE TABLE [dbo].[files]
2: (
3: [file_id] int identity not null,
4: [file_name] nvarchar(256) not null,
5: [file_text] nvarchar(max) null,
6: [file_bin] varbinary(max) null,
7: );
After you created the project and the table, make sure that you build and deploy project.
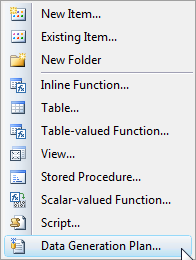
Step 2: Create a new Data Generation Plan
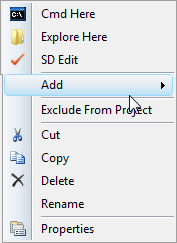
Next add a new Data Generation Plan, by right clicking on the Data Generation Plan folder in Solution Explorer and choose: "Add... New Item... Data Generation Plan"

This will add a new Data Generation Plan to your project and automatically bind the columns of the tables inside your project to the default data generator.
Step 3: Create some test input
In order to create some test files we can load and also demonstrate how shared-instancing works I am using the following batch file:
1: @rem CreateFiles.cmd
2: @echo off
3:
4: for /L %%I in (1, 1, 1000) do call :CREATE %%I
5: goto END
6:
7: :CREATE
8: @echo filename%1.txt > filename%1.txt
9:
10: :END
Create a folder, for example C:\TEST, create or copy the CreateFiles.cmd file in to the directory you just created and run the batch file. This will create a 1000 files with sequential names and the content of the file being the file name so we can use it for correlation purposes.
Step 4: Configure the File Bound Generator
The default configuration of the plan will look like this:
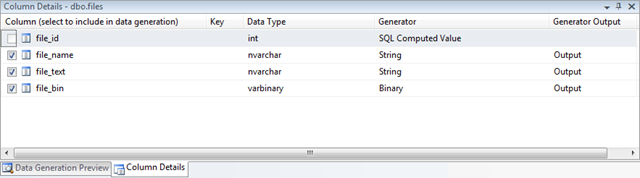
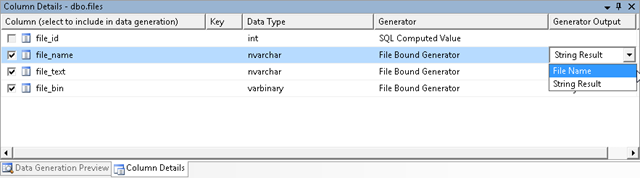
The next step is to assign file bound generator to the file_name, file_text and file_bin columns.
After you assigned the generator you need to set the Generator Output, by default the generator binds to the coercion type, so the file_name and file_text will bind to String Result since they are NVARCHAR columns, the file_bin column will by default bind to the Binary Result since its type is of VARBINARY.
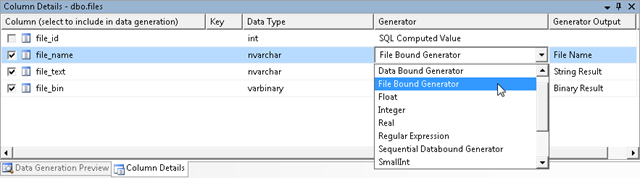
We want the file_name column to bind to the name of the file we are importing, which means you need to change the Generator Output to File Name, the other columns are bound to the output that we need.
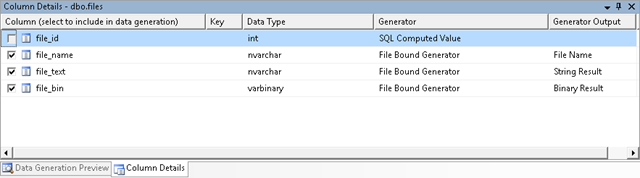
Bind the generator output to the columns, bind file_name to File Name, file_text to String Result and file_bin to Binary Result
The end result should look like this:
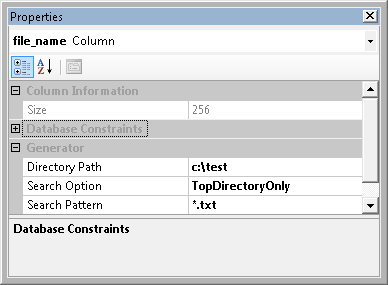
Next step is to configure generators for the 3 columns that we assigned to the file bound generator. If you want shared-instancing to work you need to make sure that the generator configuration of all 3 columns assigned to the file bound generator is identical.
Configuring the columns:
Step 5: Execute the Data Generation Plan
Now that we have configured the generators for all columns in the files table, we can generate some data, by executing the Data Generation Plan. Before we do this change the numbers of rows to be generated for the files table from 50 to 1000, to match the number of files we generated. Then hit F5, to execute the plan.
Step 6: Display the results
Once the executing is finished, open up the T-SQL editor and execute the following query.
1: SELECT *
2: FROM [dbo].[files]
3: ORDER BY [file_id]
The results:
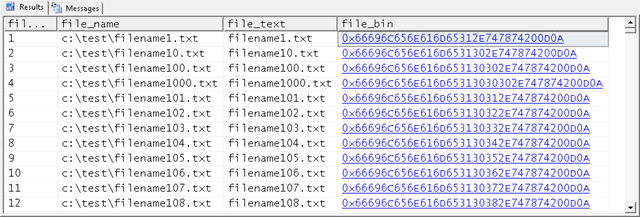
If you click on the first binary entry for file_id = 1 you will find that the filename in the binary content matches the file_name and file_text.

Conclusion
The File Bound Generator allows you to load the content of files in to your database and the shared-instancing functionality makes sure that you can pull the absolute file path in to an other column in the same row when generating test data.
-GertD