Database References
Service Release 1 for Visual Studio Team Edition for Database Professionals introduces the concept of "database references" which allows you to represent and resolve 3 and/or 4-part name usage inside a database project. Database references are conceptually the same as assembly references inside a C# or VB.NET projects; they allow you to reference objects from your database project that live inside an other namespace (database). Database references can be established between two or more database projects or between a database project and a dbmeta file or a combination of the two using project and dbmeta references.
A dbmeta file is a new output introduced in Service Release 1, it is a single file that describes the schema represented in a database project, this representation can be used to resolve references to objects living inside that project without the need to have access to the project (dbmeta files are analogs to asmmeta files in the .NET world). Adding a database references automatically updates the project dependencies, so that the referenced project builds before the referencing project.
Example: Creating a database reference
Lets walk through the steps to creating and using database references. We are going to create a project and load the AdventureWorks schema in to this. Add a second project to the solution, to which we add objects that reference AdventureWorks. At first hand this will cause an error and some warnings because the references cannot be resolved. Then we will add a database reference between the projects and fix-up the 3-part names references to leverage the database reference. The result will be that the error and warnings will disappear as expected.
Step 1: Create a database project
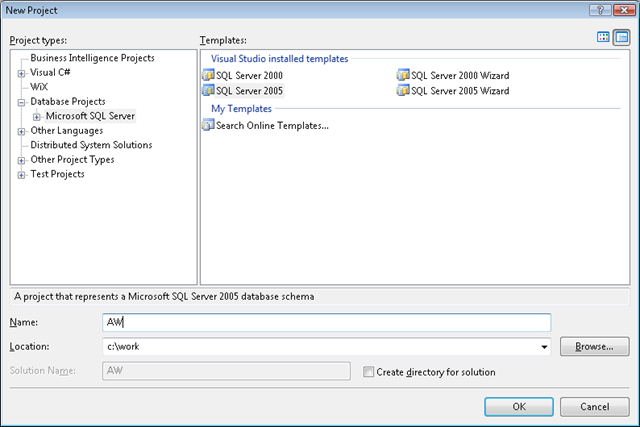
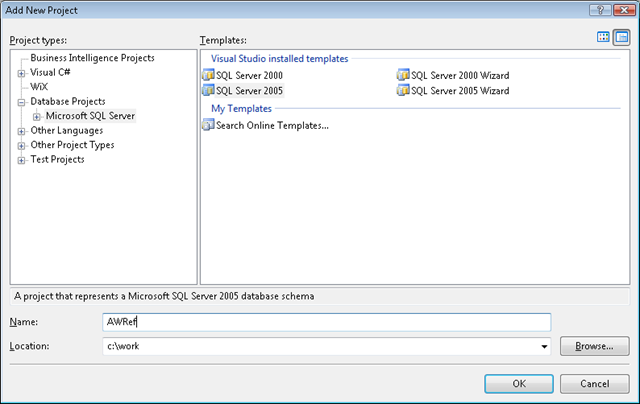
First we will create a new database project using File -> New -> Project..., in the New Project dialog choose Database Projects -> Microsoft SQL Server -> SQL Server 2005, name the project AW.
Step 2: Import schema
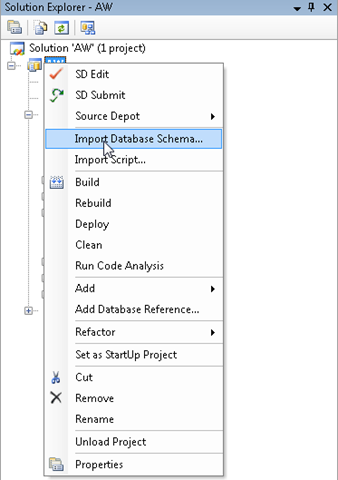
In order to get something we can reference, we will import the AdventureWorks schema using: right-click on the AW database node, choose "Import Database Schema..."
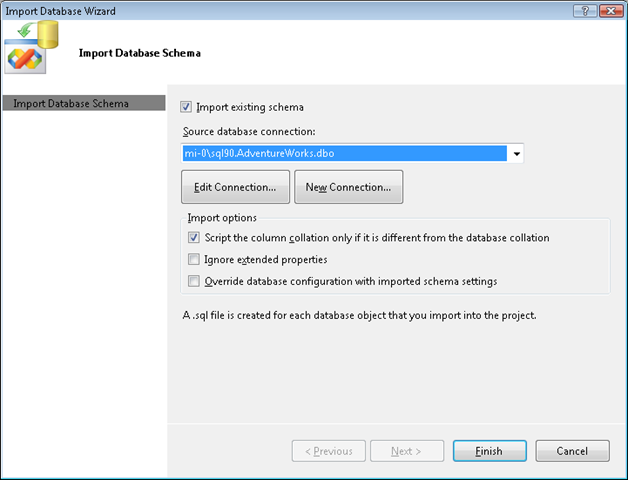
If needed create a connection that points to an existing instance of AdventureWorks on a SQL Server 2005 server, select the connection in the "Import Database Wizard" dialog and hit Finish.
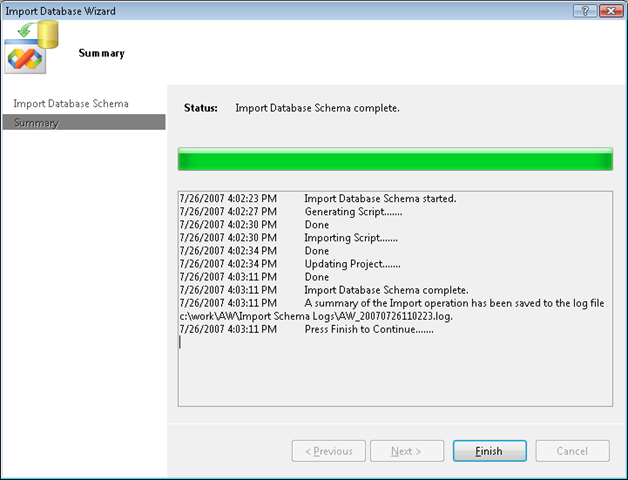
Now we have a project that reflects all the schema objects as exist inside the AdventureWorks database. We can browse through the schema using Schema View or visualize the files that are created as result of the "Import Database Schema" using the Solution Explorer.
Step 3: Add second database project to the solution
Lets add a second database projects, which we will name AWRef, using File -> Add -> Project... in the New Project dialog choose Database Projects -> Microsoft SQL Server -> SQL Server 2005, name the project AWRef.
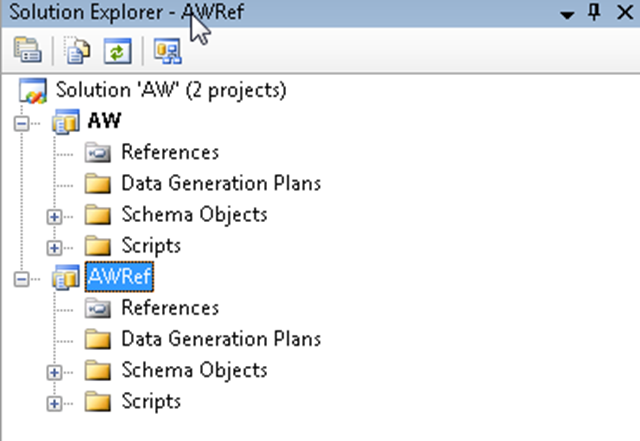
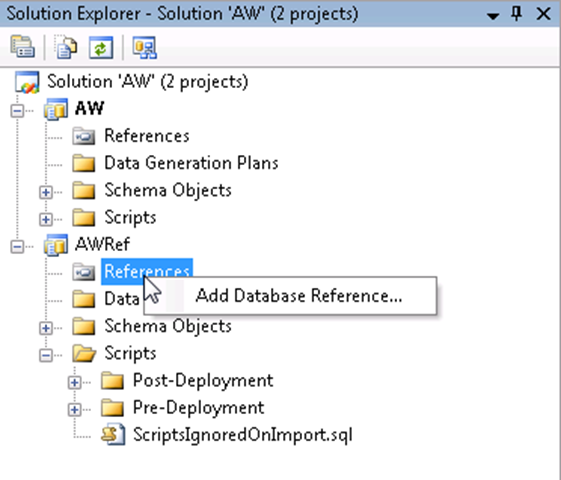
After we added the second project we should see something like this inside the Solution Explorer.
Step 4: Import objects in to second project
Next we will add two new schema objects to the AWRef project which are both referencing the AdventureWorks database. We will add a view and a procedure, since procedures are deferred name resolved and view mandate that the object(s) referenced are existing at the time of creation, hence these two objects will test the two different use cases demonstrating resolving both hard and soft references across a database boundary.
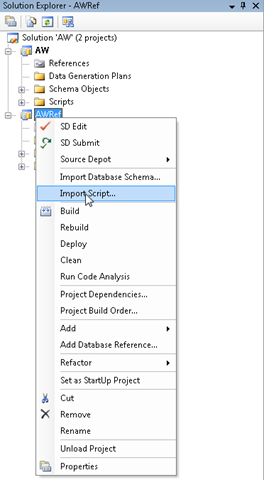
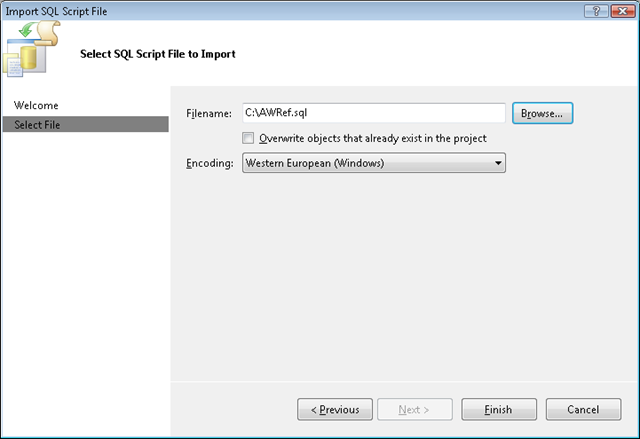
Download the AWRef.sql script file and save it to C:\ or some other location (as long as you remember where:). This script file contains the definition of the VIEW and the PROCEDURE we are going to add. We will add the objects by using "Import Script", using: right click on the AWRef project node choose "Import Script..." point to the location where you saved the AWRef.sql file and hit Finish.
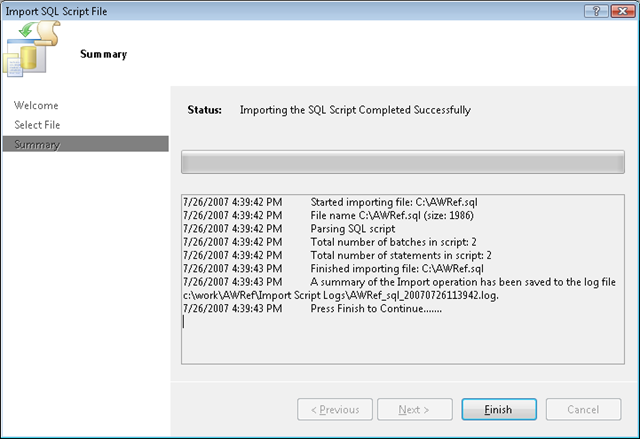
The import causes the two new objects to be added to our project; a VIEW named [dbo].[rvSalesPerson] and a PRCOEDURE named [dbo].[ruspUpdateEmployeeLogin]. If you check your "Error List" in Visual Studio you will find that we now have 1 error and 26 warnings.
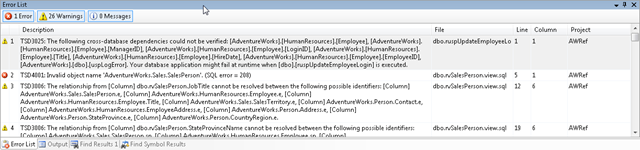
NOTE: You might not have an error, because you have a local copy of AdventureWorks on your local SQL Server instance which is used for design time validation.
Step 5: Add database reference
So far we have been setting up our environment, now it is time to start using Database References. In order to resolve the cross database references in the AWRef project to the AdventureWorks database we need to add a database reference in the AWRef project to the AW project, since it contains the definition of the AdventureWorks database.
NOTE: The key thing to understand is that the reference is made to the content of the schema container, not to the name of the scheme container. In other words it does not matter that the project is named AW, as long as the content of the project matches the objects referenced in this case AdventureWorks.
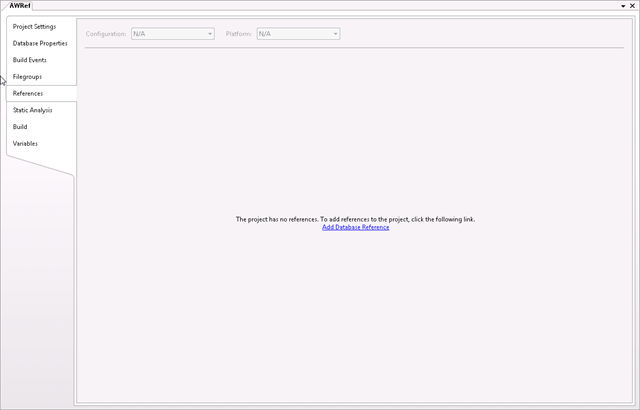
We can add references in two ways: through the project property pages or via the Solution Explorer References node.
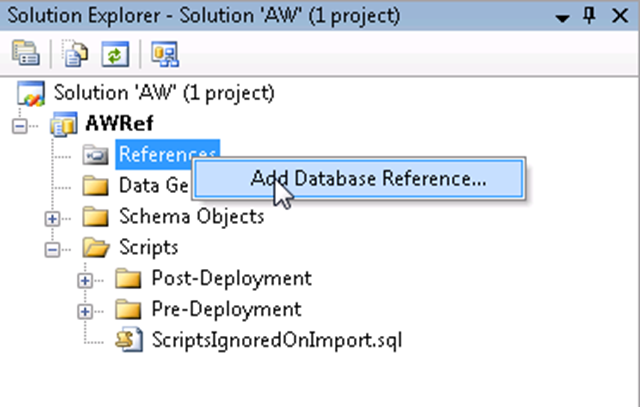
We will add the reference by right clicking on the References node in Solution Explorer of the AWRef project
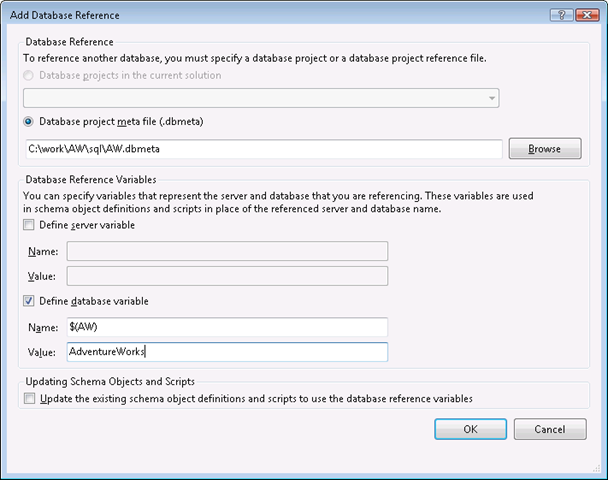
This brings up the Add Database Reference dialog, where you can select another database project which is part of the same solution or point to a dbmeta file.
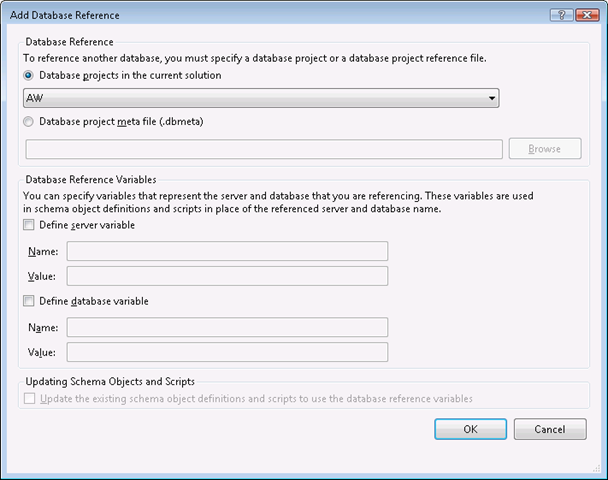
After you defined the which entity you want to add a reference to you need to define server and/or database variable names and values that will be used to abstract the 3 or 4-part name references. If the database reference is used to represent a database to database reference on the same instance, you only need to specify a database variable, specifying a server variable will actually causes a failure, causing the 3-part name reference not to be resolved. When you need to model a 4-part linked server reference, you need to specify both a server and a database variable.
In this case we are only dealing with a database, 3-part name reference, so we create a database variable name $(AW) and a value AdventureWorks
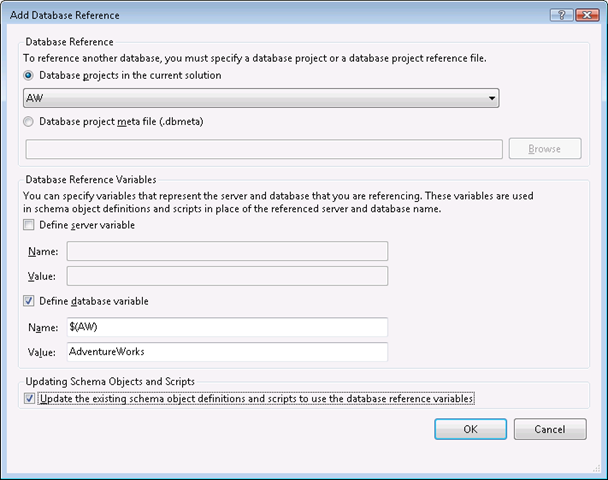
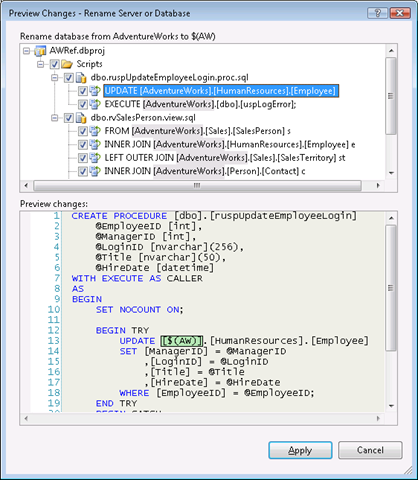
We also check the check-box at the bottom of the dialog named "Update the existing schema object definitions and scripts to use the database reference variables". This will kickoff a special refactoring of the code, which will find all 3-part name references in this case that are using [AdventureWorks].[<schema_name>].[<object_name>]. Like rename refactoring this will show a dialog which highlights all changes, like this:

Choose Apply to make all the changes suggested by the refactoring step. If you go back to the project property page named References you will see the definition of the database reference, the variable definition and variable value and a pointer to the dbmeta file. Creating a project to project reference is an indirect method of assigning a dbmeta file.
Step 6: Check the project dependencies
Now that we have setup the project to project reference, check the build dependency by right clicking on the solution file and choosing "Project Dependencies".
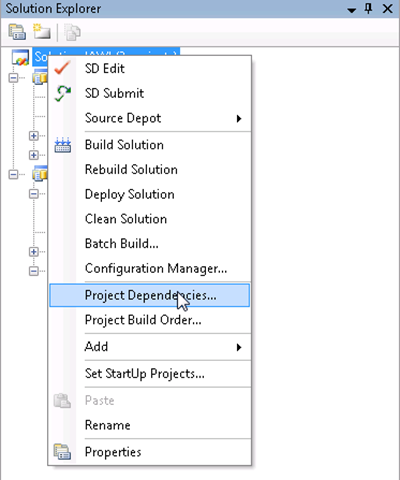
This will show you the Project Dependencies dialog which hosts two tabs, one display which project depends on which and a second tab displaying the Build Order.

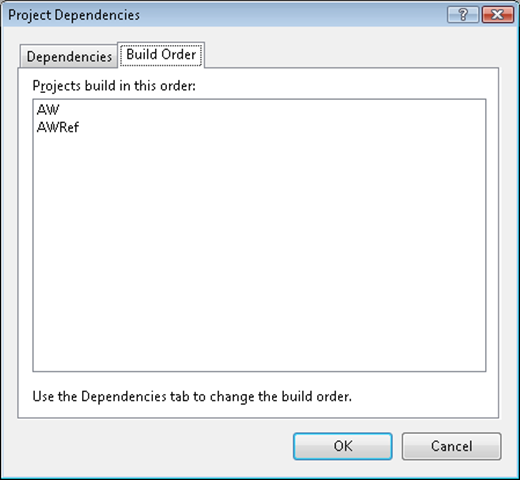
As you can see, adding the project reference, automatically changed the project dependencies and the build order.
Step 7: Update the 3/4-part name references
The refactoring step, launched from the Add Reference dialog has changed the T-SQL code, so that all references to [AdventureWorks] are replaced with [$(AW)] instead. The stored PROCEDURE therefore looks now like this:
1: CREATE PROCEDURE [dbo].[ruspUpdateEmployeeLogin]
2: @EmployeeID [int],
3: @ManagerID [int],
4: @LoginID [nvarchar](256),
5: @Title [nvarchar](50),
6: @HireDate [datetime]
7: WITH EXECUTE AS CALLER
8: AS
9: BEGIN
10: SET NOCOUNT ON;
11:
12: BEGIN TRY
13: UPDATE [$(AW)].[HumanResources].[Employee]
14: SET [ManagerID] = @ManagerID
15: ,[LoginID] = @LoginID
16: ,[Title] = @Title
17: ,[HireDate] = @HireDate
18: WHERE [EmployeeID] = @EmployeeID;
19: END TRY
20: BEGIN CATCH
21: EXECUTE [$(AW)].[dbo].[uspLogError];
22: END CATCH;
23: END;
If you would have forgotten to check the check-box your can always launch the same refactoring step via the Refactoring menu by choosing the "Rename Server/Database Reference..." refactoring. You can use this same refactoring type to undo the change and refactor variable reference back in to literals.
NOTE: The variables used to identify 3 or 4-part names must to be placed between square brackets or double quotes. Failing to do so will result in a parser error (TSD2010) like this:
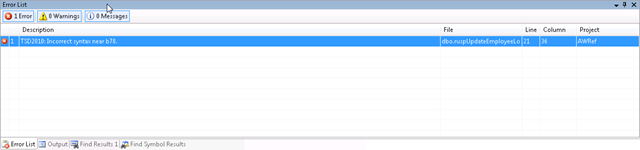
Even though we added the reference and change the T-SQL code to reference the variables instead of the literal database name, we still have the error and warning. This is because we have not build the solution, so the dbmeta file for the AW.dbproj has not been created yet.
So lets execute the remain step: BUILD the solution. After we have build the solution all errors and warnings have been resolved and we are ready to rock and roll!
Step 8: Replace project reference with dbmeta reference (optional)
No what if we do not want to use project to project references? We can add a reference directly to a dbmeta file. In order to create a dbmeta file you first have to create and build a project. Build will generate a <project>.sql and a <project>.dbmeta file. If this project does not change, or you do not want or simply cannot provide access to the project, you simply make the dbmeta file available and add the reference to that instead.
In this step we will remove the project to project reference and replace it with a dbmeta reference.
First we remove the reference from the AWRef project, by right clicking on the AW References node in Solution Explorer and choosing Remove.
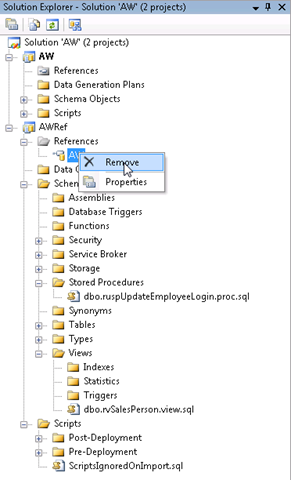
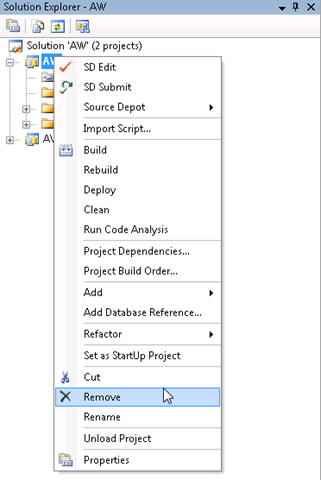
After that will remove the AW project from the solution, by right clicking on the AW database node in Solution Explorer and choosing "Remove".
Now we can no longer reference the project and we will add back a dbmeta reference instead, by right clicking on the References node in Solution Explorer again and choosing "Add Database Reference..."
This brings up the same Add Database Reference dialog again, but we no longer have the ability to select an other project. Instead we select the AW.dbmeta file which is still on disk, since we did build the AW project once before. We define the variable $(AW) with the value AdventureWorks and we click OK.
We do not have to refactor the code, since all 3-part references have already been changed in to variable references.
Restrictions
Since we added this functionality in a service release, we have some restrictions, below you will find an overview of the most important ones with an explanation on why these restrictions exist in the current system.
- Cyclic references: we do not support cyclic references. For example project A references project B and project B references A. We currently cannot support this because we cannot determine the correct build order in a guaranteed fashion (which project to build first) and since we always build the full database and cannot perform partial builds, cyclic references would result in to infinite builds.
- Only 3 or 4-part names are resolved, dynamic queries using for example OpenQuery, OpenRowset or OpenDataSource can not be resolved because the shape of the output can only be determined by executing the actual query against the actual targeted data source. Database references do not solve all causes for warnings and errors cause by cross database references, only those caused by explicit 3 and 4-part name usage, not for any of the dynamic query executions strategies.
- Self references are not allowed, in other words a database project cannot not establish a reference to its self. The underlying reason is that database reference contribute to a different namespace then the current project.
- You can not use the same database reference to resolve 3 and 4-part names at the same time; a database reference either contributes objects to a 4-part or a 3-part namespace. In real life you can have a linked server pointing to a local database on the same instance, this means you can reference objects in that database in two ways: through a 3-part name: SELECT * FROM D.S.T and through a 4-part name: SELECT * FROM SVR.D.S.T. If you have this situation you either have to change all your code to use a single access path, or you need two references.
- Variables used to identify 3 or 4-part name references need to be placed between square brackets or double quotes, to prevent parser errors.
Wrapping up:
Now we are at the end of our exploration of database references, we have seen how we can define and use them. How can use project to project references and project to dbmeta references. We have also seen that in order to leverage the database references you need to change the T-SQL code making the 3 or 4-part name reference to use variables instead of literals. There is a huge advantage of using variables, because it will now allow you to deploy your database to any possible name combination, where before this information was hard coded in the T-SQL code.
We hope this new functionality improves your abilities to use VSDBPro.
-GertD
Software Architect "DataDude"