Routing Cases by Sentiment with Cognitive Services Text Analytics
In our last post, we saw how we could leverage the sentiment analysis capabilities of the Cognitive Services Text Analytics API to automatically detect the sentiment of activities and information during customer interactions, and to automate actions in the agent experience based on the detected sentiment.
In this post, we will bring those same sentiment analysis capabilities of the Text Analytics API into the workflow of Dynamics CRM, to allow us to make decisions using sentiment on the server-side.
Dynamics CRM offers robust workflow capabilities to enable the automation of business processes. By making sentiment detection available within these automated processes, we can use customer sentiment as a decision-making factor in process automation. This allows for more efficient and effective processes such as:
- Routing of new negative-sentiment cases to a different queue or team
- Auto-escalating of cases in event of negative sentiment
- Programmatic capture of the sentiment of virtually any text-based communications, for ongoing reporting and analytics
This post will focus on creating a Custom Workflow Activity that calls the Text Analytics API to determine the sentiment of any text input, then using that activity within a Workflow process to automatically route negative-sentiment cases to a Tier 2 queue.
We will build on the sample code available in these two resources:
- Create a custom workflow activity on MSDN, and the associated code samples in the CRM SDK
- The Text Analytics API quick start guide in the Cognitive Services documentation
Pre-requisites
The pre-requisites for building and deploying our custom workflow activity include:
- An instance of Dynamics CRM Online
- You can request a trial of Dynamics CRM Online here
- The Dynamics CRM SDK for CRM 2016
- A subscription and key for the Cognitive Services Text Analytics API
- As of the time of writing, you can obtain a free subscription to this preview service by logging in with your Microsoft account here, and requesting a new trial of the “Text Analytics - Preview” product
- Visual Studio 2015
- Microsoft .NET Framework 4.5.2
Building our Custom Workflow Activity
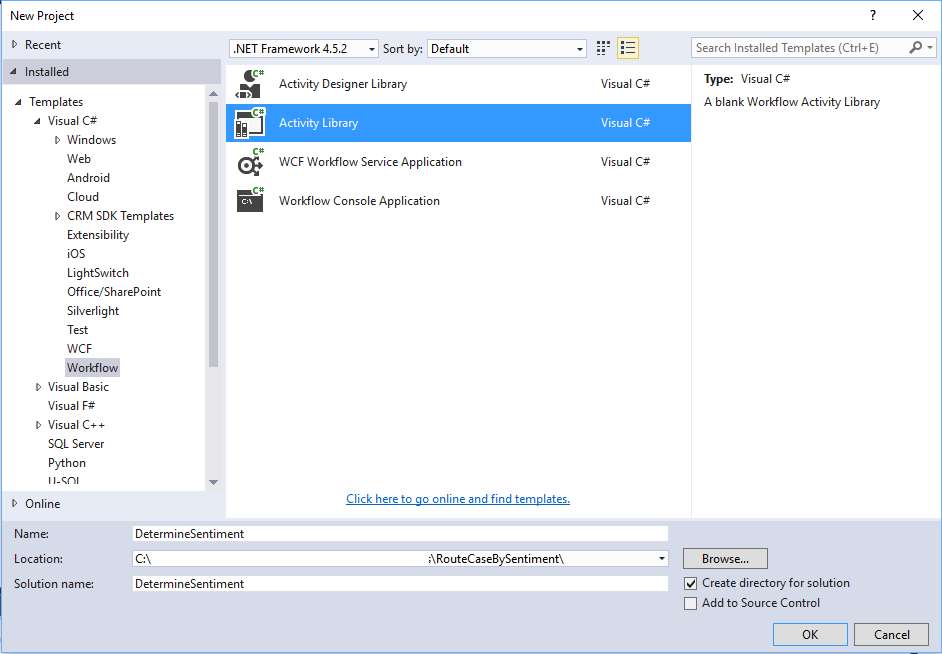
In Visual Studio 2015, we will first create a new project by selecting Workflow under Visual C# in the Installed Templates pane, and then select Activity Library. We will name our project DetermineSentiment:
In our Project Properties, on the Application tab, we specify .NET Framework 4.5.2 as the target framework.
Adding References
We add references to our project by right-clicking the DetermineSentiment project in the Solution Explorer, and adding the following:
- Microsoft.Xrm.Sdk
- Microsoft.Xrm.Sdk.Workflow
- System.Net
- System.Net.Http
- System.Runtime.Serialization
Note that the Microsoft.Xrm.Sdk and Microsoft.Xrm.Sdk.Workflow assemblies are found within the Dynamics CRM SDK.
Adding a Data Contract for the Text Analytics API
To facilitate interacting with the Text Analytics API, we add a new item to our project: a Visual C# class which we will name TextAnalytics.JSON.cs. We will populate this file with the JSON data contracts for the REST Services outlined in the Text Analytics API documentation.
[snippet slug=usdsentiment_datacontract lang=c-sharp]
Adding Our C# Code
Following the instructions outlined in the Dynamics CRM documentation, we delete the Activity1.xaml file in the project, and Add a new Class to the project, which we name DetermineSentiment.cs.
To our new class, we:
- add some using statements
- make the class inherit from the CodeActivity class and give it a public access modifier
- add functionality to the class by adding an Execute method
[snippet slug=sentimentactivity_using lang=c-sharp]
We define our input and output parameters for our custom activity:
inputText as our input parameter
- this is the string of text that we will determine the sentiment of
sentimentScore as our output parameter
- this is the sentiment score of the input text as determined by the Text Analytics API
[snippet slug=sentimentactivity_parameters lang=c-sharp]
In our Execute method, we set our Text Analytics API key, default our sentiment score result to -1, then retrieve our text to analyze from the context that we received. Assuming we have a non-empty string, we call the GetSentiment method to obtain a calculated sentiment score.
We then set our sentimentScore output parameter:
[snippet slug=sentimentactivity_execute lang=c-sharp]
In our GetSentiment method, we receive the string to evaluate and our Text Analytics API key as input parameters.
We build and issue our request to the Text Analytics API via the HttpClient object.
We add our API subscription key to the headers of the request, and create some basic JSON data to send in our request body. We do some basic string cleaning on our input string, to prepare our string for use within the body of our JSON data.
Note that the Text Analytics API is capable of receiving multiple ‘documents’ with the request, but we will send just a single one.
We receive our response, and use our data contract to serialize the response. We check for errors, and determine whether we have received any results in our response. If we have a valid score returned by the API, we will return that score. Otherwise, we will return a value of -1.
[snippet slug=sentimentactivity_getsentiment lang=c-sharp]
Before compiling our assembly, we sign it. In the project properties, under the Signing tab, we select Sign the assembly and provide a key file name.
We are now ready to compile the assembly by Building the solution.
Registering our Assembly
We now need to register our custom workflow activity assembly on our Dynamics CRM Online instance. To do that, we will use the Plug-in Registration Tool. This tool is available in the Dynamics CRM SDK.
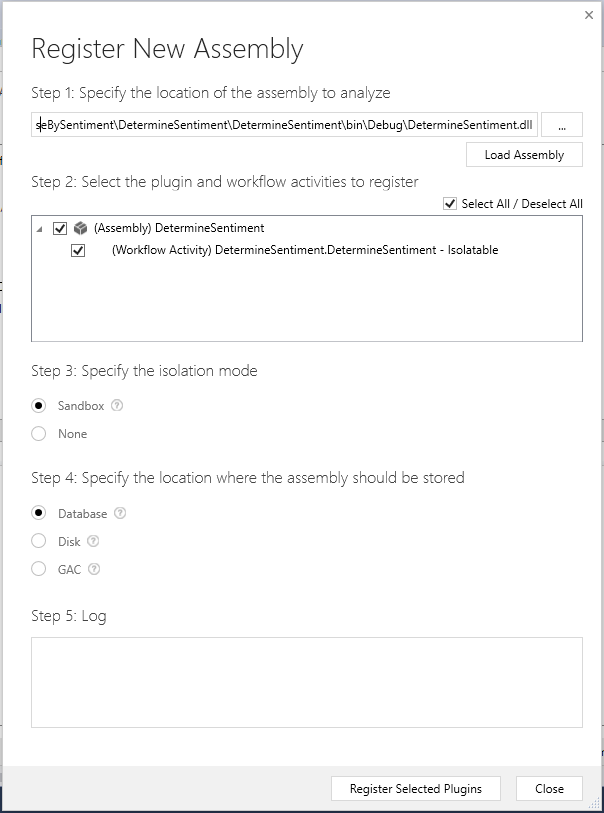
Following the instructions in the documentation, we launch the tool, and authenticate using our administrator credentials for CRM. We then select Register New Assembly from the Register menu.
In the resulting dialog box, we choose the location of our compiled assembly (which should be in the DetermineSentiment\bin\Debug folder). We select our assembly and our workflow activity for registration. We specify Sandbox as the isolation mode, and Database as the storage location. Finally, we click Register Selected Plugins:
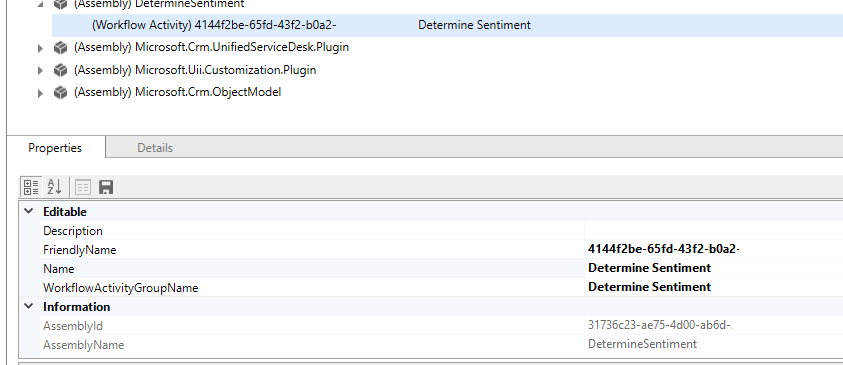
We can also edit some of the properties of our workflow activity, such as the Name and the WorkflowActivityGroupName, to give more identifiable names:
We now have a custom workflow activity that will allow us to determine the sentiment of virtually any text-based information in CRM, and use that as a part of our business processes.
Routing Cases based on Sentiment
In our example, we will use our custom workflow activity to create a new workflow process that will determine the sentiment in the Case Description of a newly created case, and if the sentiment expressed is significantly negative, will add the case to a Tier 2 escalation queue. In cases created from emails with Automatic Case Creation Rules, or via a CRM Portal, the case description of a new case will typically be populated with text written and submitted by the customer.
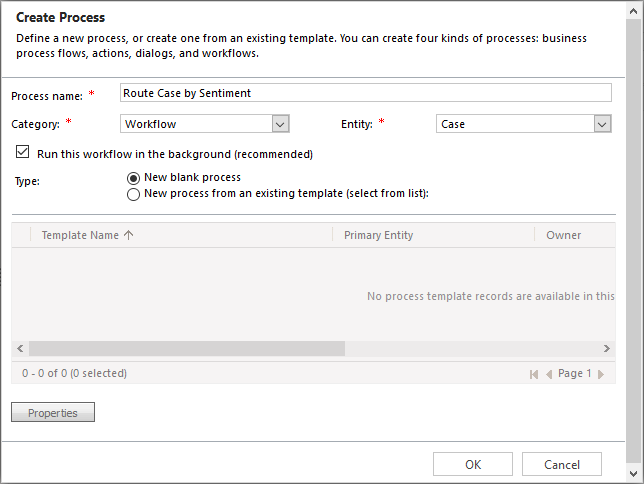
Logged in to the CRM web client with our administrator credentials, we navigate to Settings > Customizations > Customize the System. We choose Processes from the left navigation, and choose New.
We specify that we are creating a Workflow type of process that is applicable to the Case entity, running in the background:
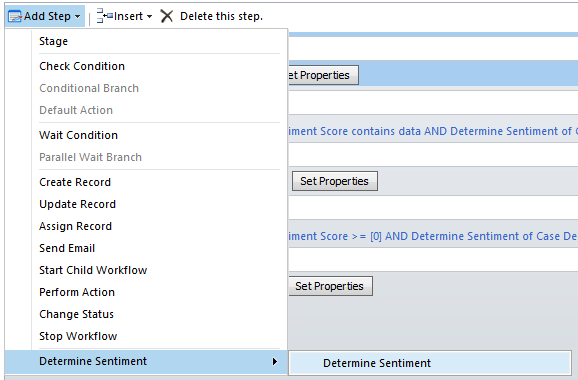
When defining our process logic, we can now access our Determine Sentiment action from the Add Step menu:
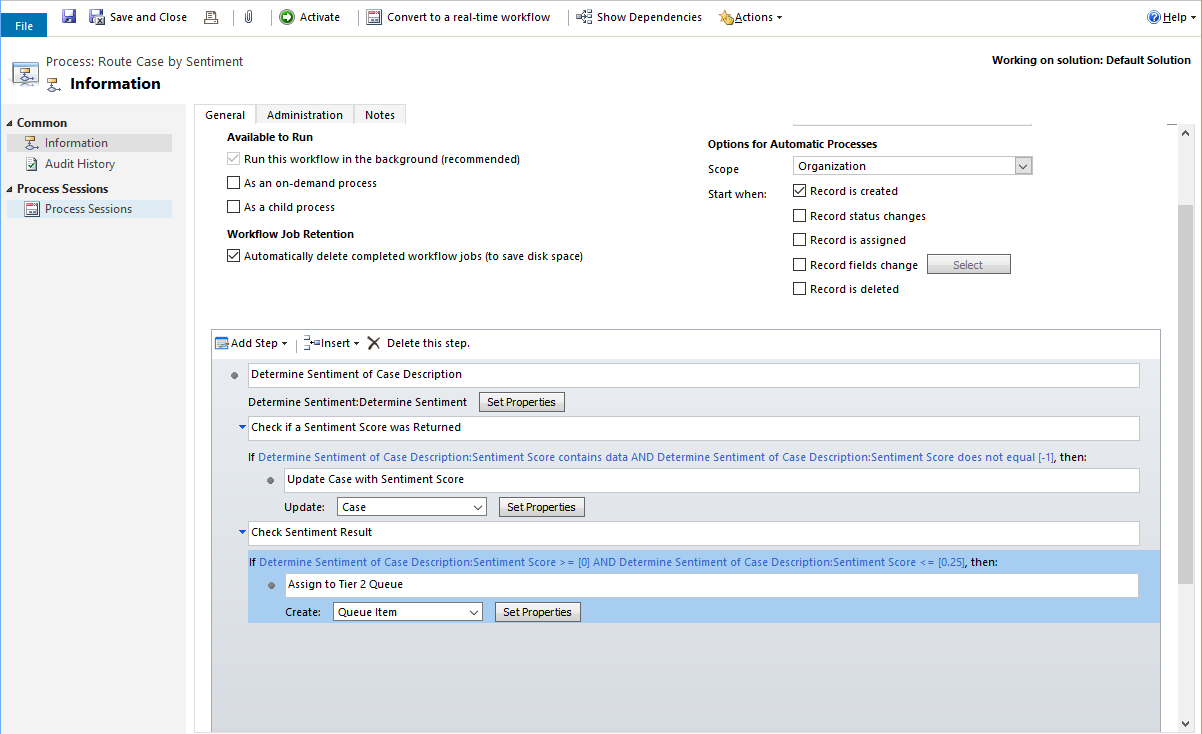
We continue to design our process such that it is activated when a record is created, and we define our complete logic as described below:
- we check the sentiment of the Case Description using our custom action
- (optional) if a score is returned, and it does not equal -1, then we will update a custom property of the case, so we can visualize the determined sentiment
- if the sentiment score is between 0 and 0.25, representing a negative sentiment on the sentiment scale from 0 to 1, then we will Create a new Queue Item
After we Save and Activate our process, we are now ready to test it.
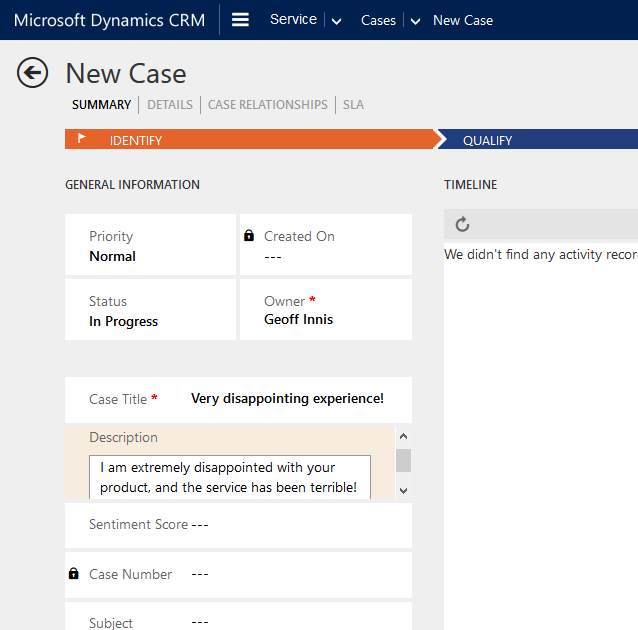
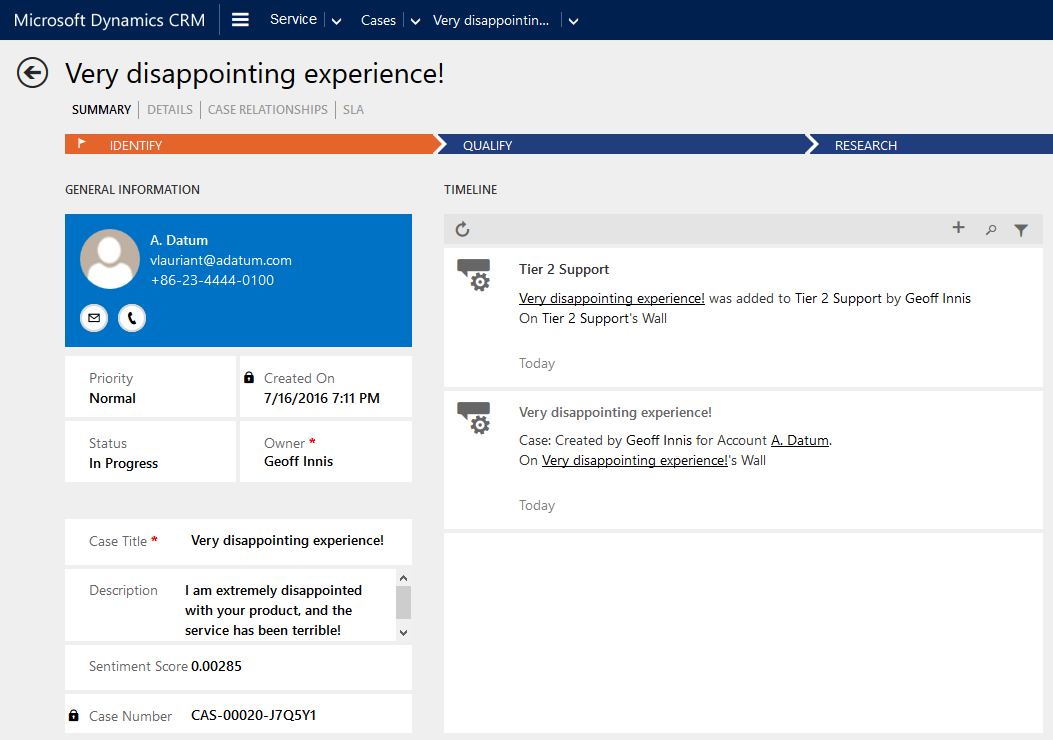
We will test our new process with the custom action by creating a new case, with negative sentiment expressed in the Description:
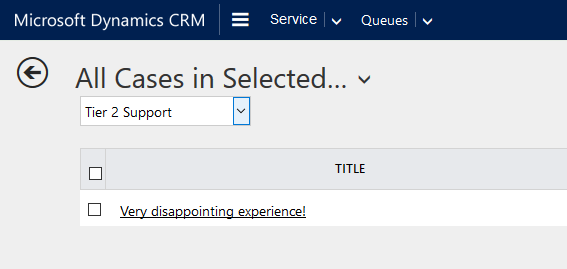
A brief time after saving our case, we can check our Tier 2 Queue, and as expected, our new case has been added to the queue:
When we open the case, we can also see what the calculated sentiment score was, in our custom field on the form:
The full code for the Custom Workflow Activity can be downloaded here.