Continuous Integration (Test) using VSO & VNext Build through GIT
Below process will help to understand GIT integration with VSO for CI.
We will be going through the below topics.
- VS TS Account creation
- GIT Integration with VSO
- Build Definition in VSO
- CI Configuration
- Test Implementation in CI
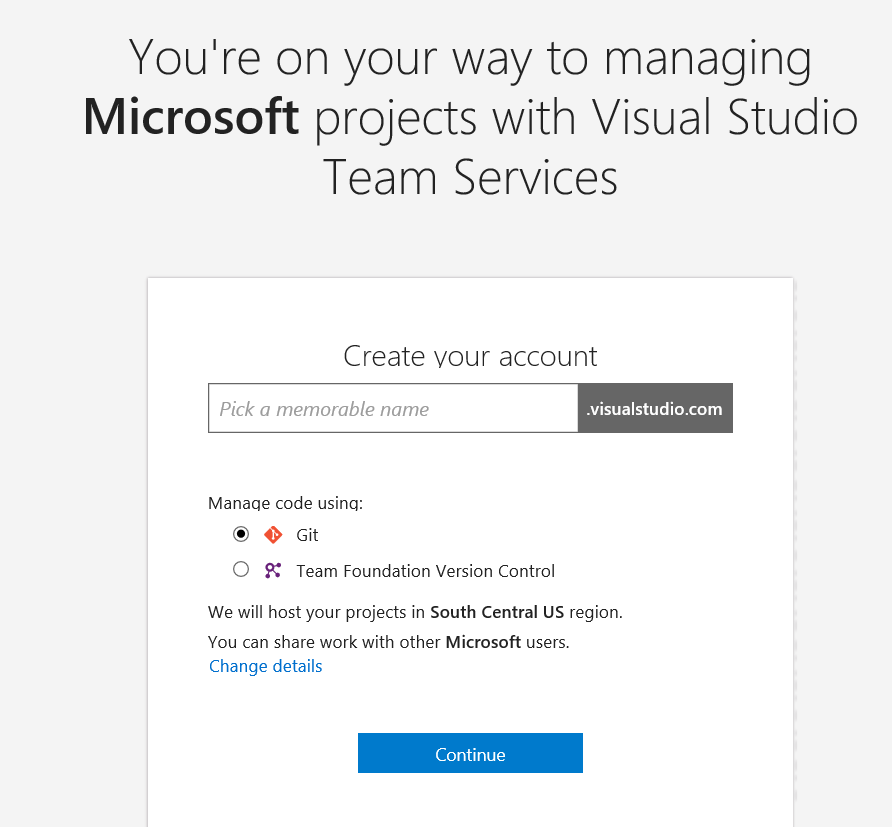
1. Create a new VS Team service account @ https://www.visualstudio.com/
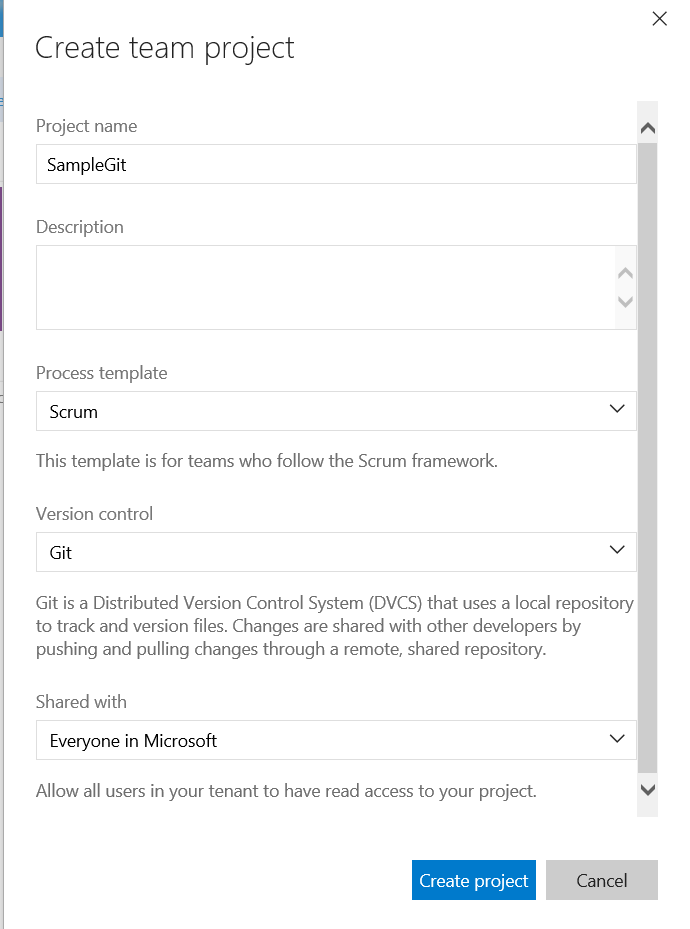
2. Create a team project
3. Use a sample web application.
4. Open GitHub shell and run the below commands.
a. git init (initialize the git)
b. git config --global user.email “youremailaccount”
c. git config --global user.name “username”
d. git remote add origin “url” (enter the url you get after you do step 2, clone url)
e. git add *.* (add all the files to the git)
f. git commit -m Init (commit with message as Init)
g. git push –all
sometimes git push--all throws error when you have github configured in your local (“Updates were rejected because the remote contains work that you do”). So, to eliminate these errors, use
h. git pull --all
and
i. git push -f origin origin_name usually when you’re doing first time, branch name is “master”.
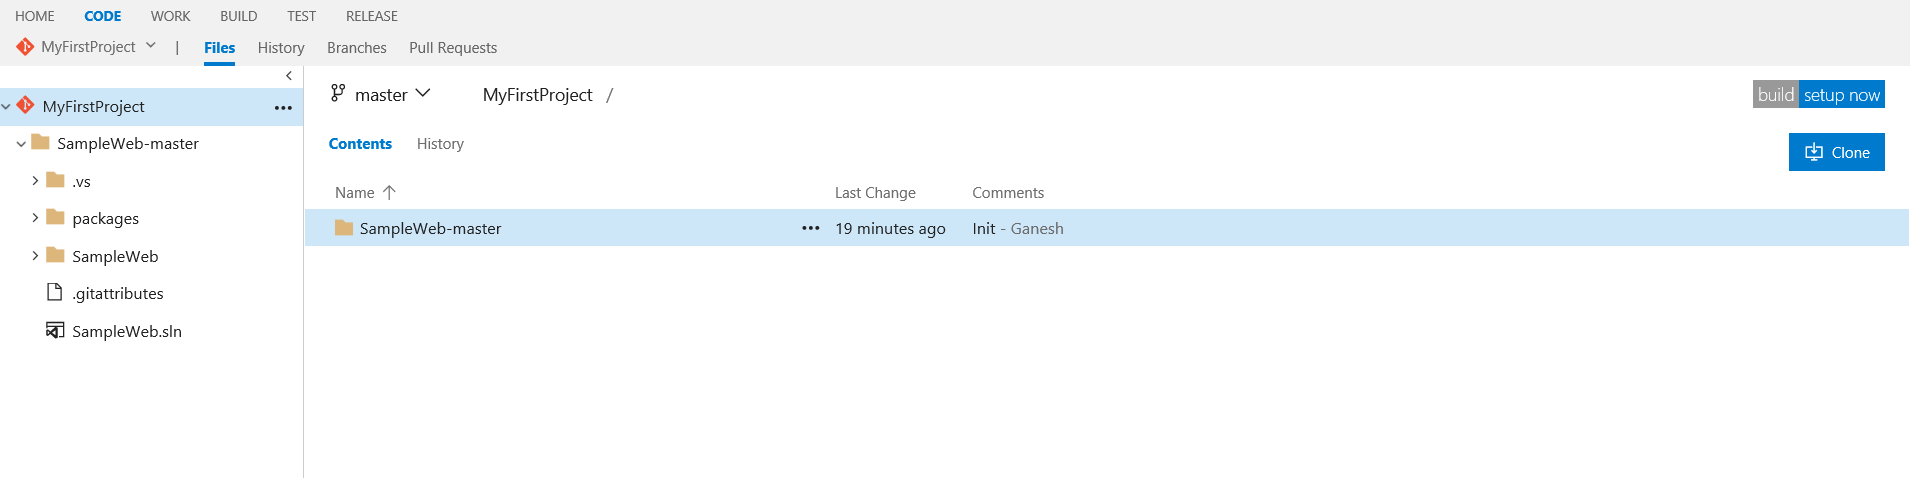
After the i'th step, you can find the code in your team code.
5. Continuous Integration
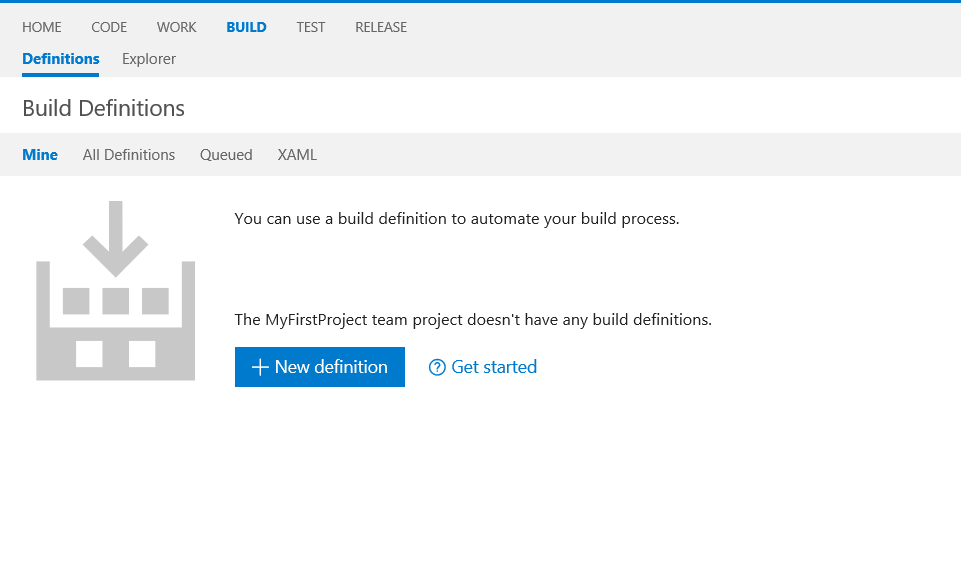
a. Creating a build definition – click on Build tab in the top. This will guide you through the process of creating a new build.
b. Click on new definition in the above screen. Choose Visual Studio option for build and running the tests.
We select a default set of build definition which has selected set of tasks. Select Visual studio and Click Next.

c. Select the desired project in the below tab and select the continuous integration check box (for queuing the build whenever there is a check in).
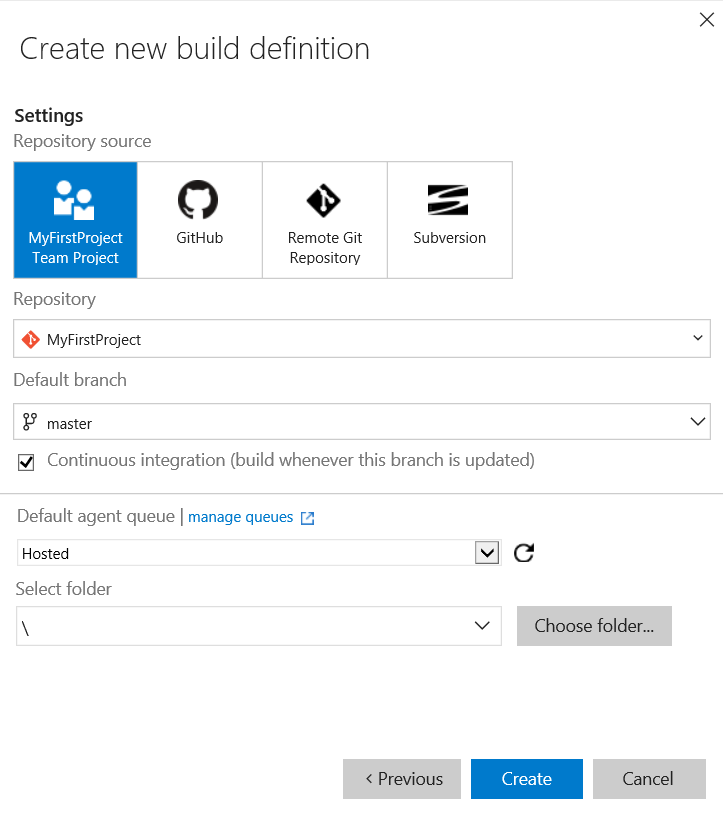
d. You can view the below screen once the create button is clicked. In this, you can configure the build.
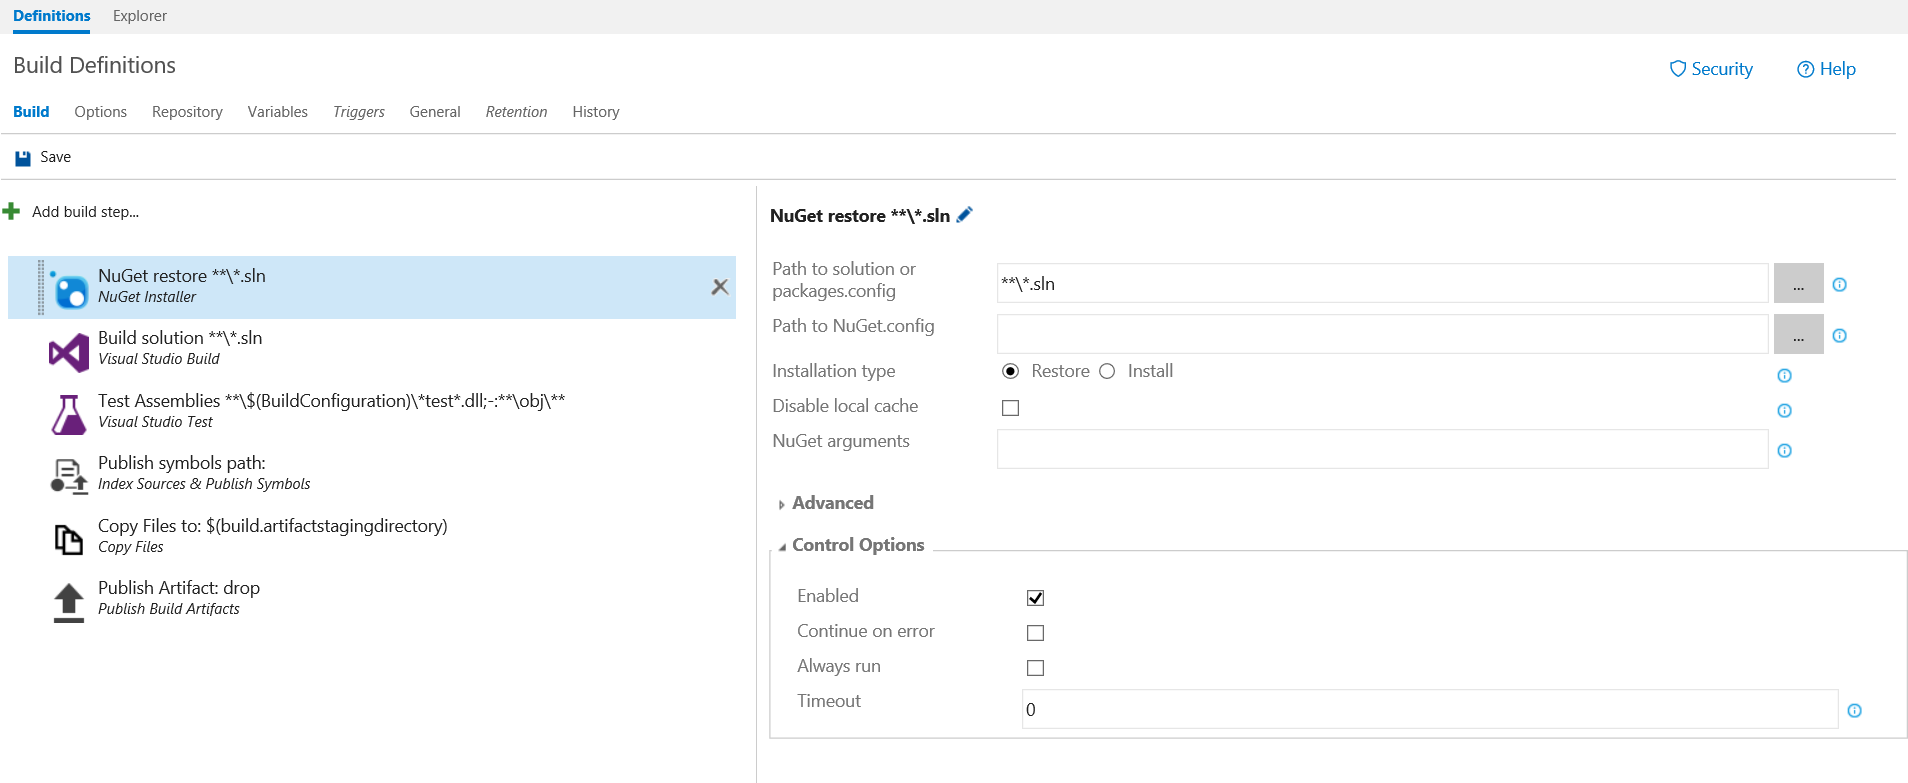
Build Tab (which helps to select the solution, run unit tests etc)
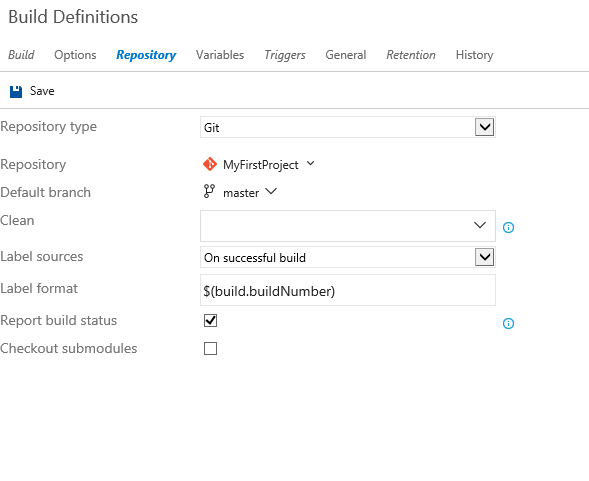
Repository Tab. Select the project repository and you can label the sources for tracking purpose.
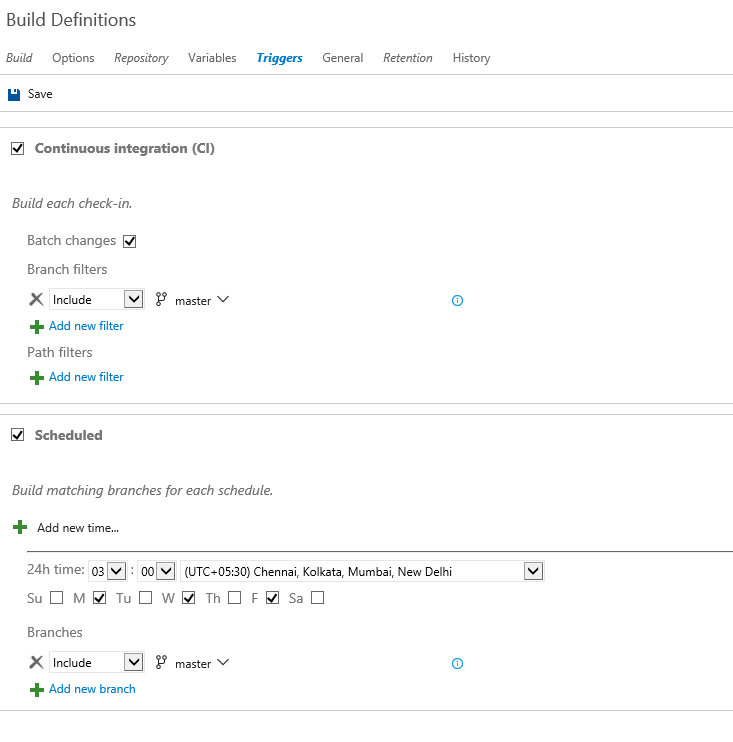
Triggers Tab (select the checkbox CI for enabling continuous Integration). One can schedule the build based on the time frame mentioned.
Build Tab with Build Solution -> with Advanced 
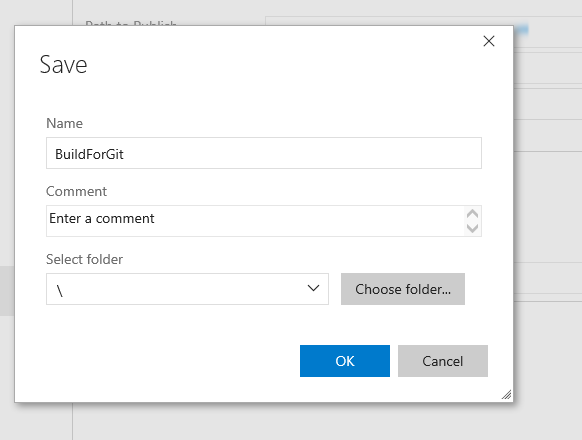
Save the Build.
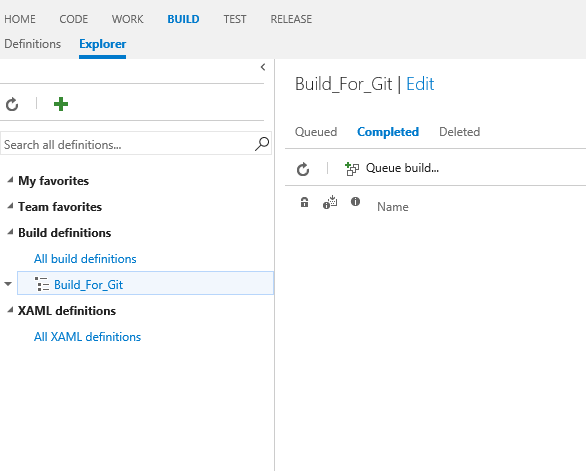
After adding the build, you can see the build definition in the explorer.
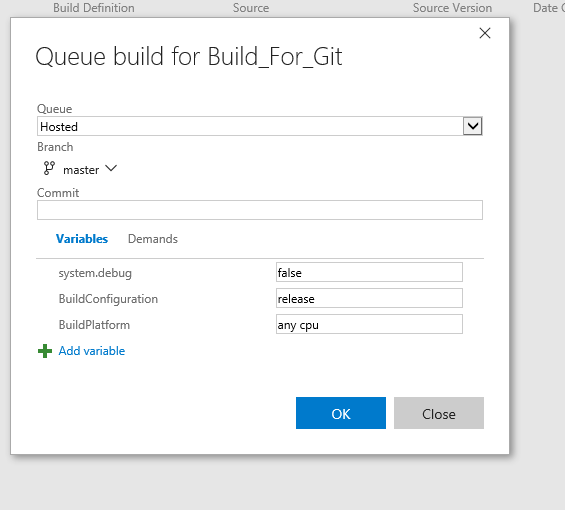
Click on Queue new build.
You can view the build status once completed with or without errors.
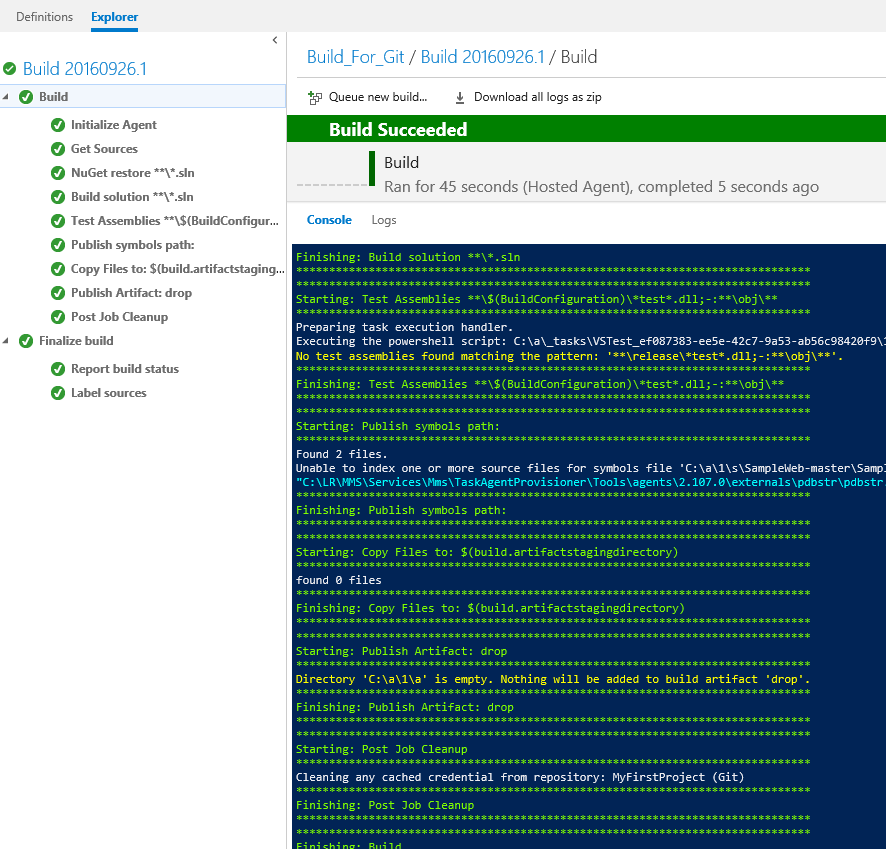
CI - Testing (done with vsts repository)
Once the build is done, you can integrate with codedui/selenium web tests by configuring a CI build like below.
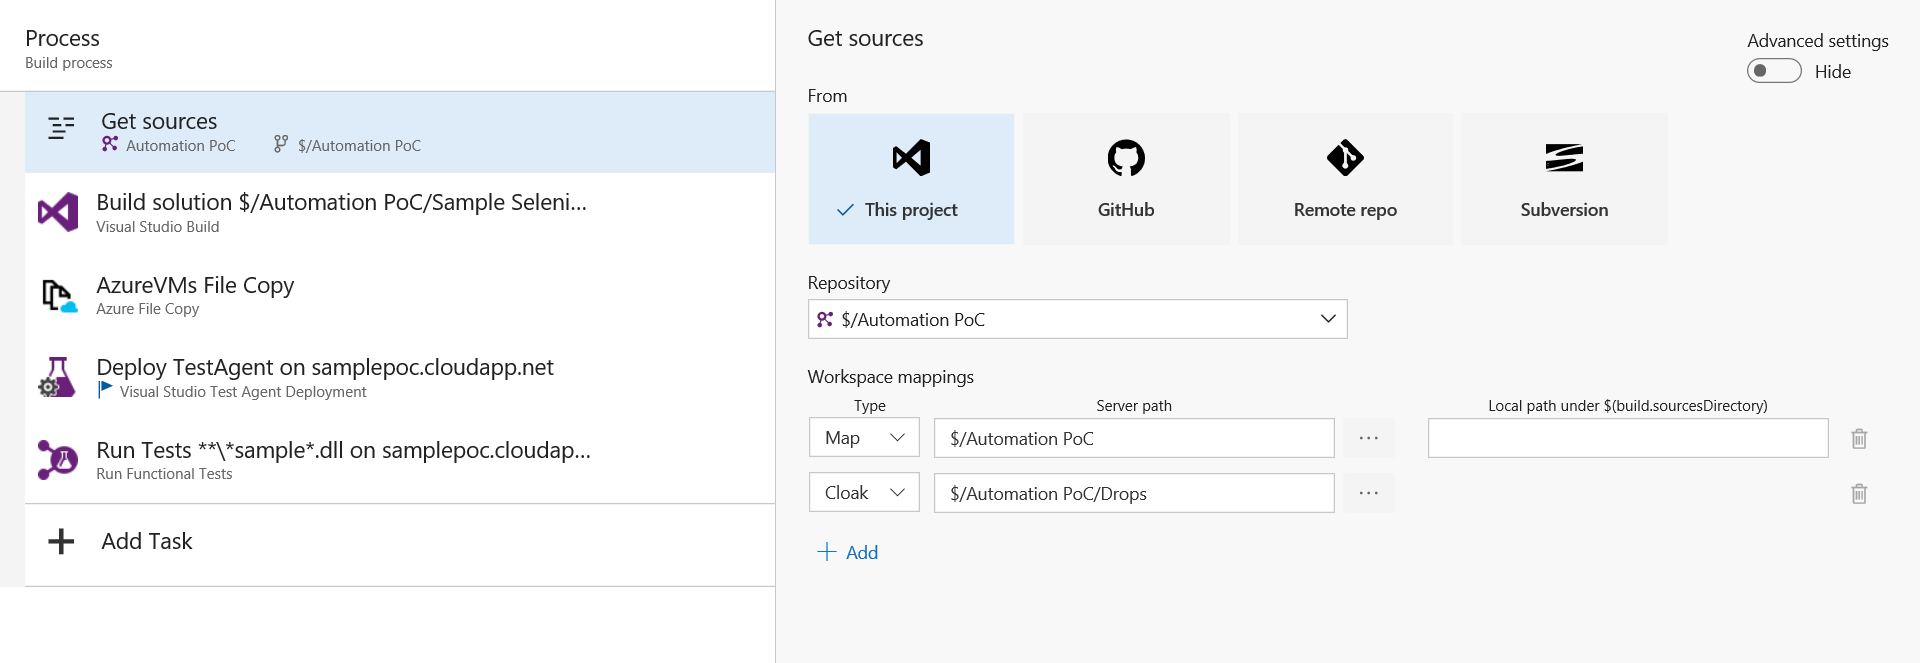
- Get Sources (If your using TFS/Git), please choose the appropriate ones from the below which will grab the resource from the particular repository.
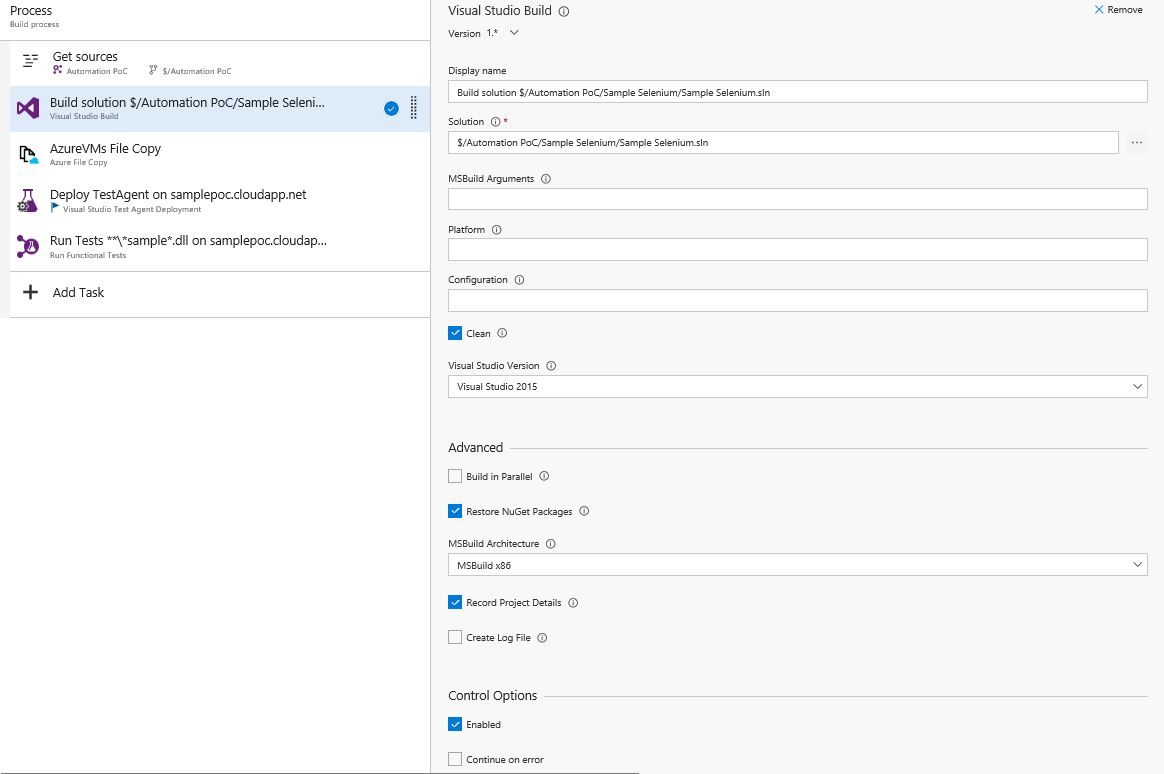
2. Build the Automation Solution.
Here you select the automation solution( developed in codedui/selenium) from the VSTS. Select an appropriate VS Version for building the solution.
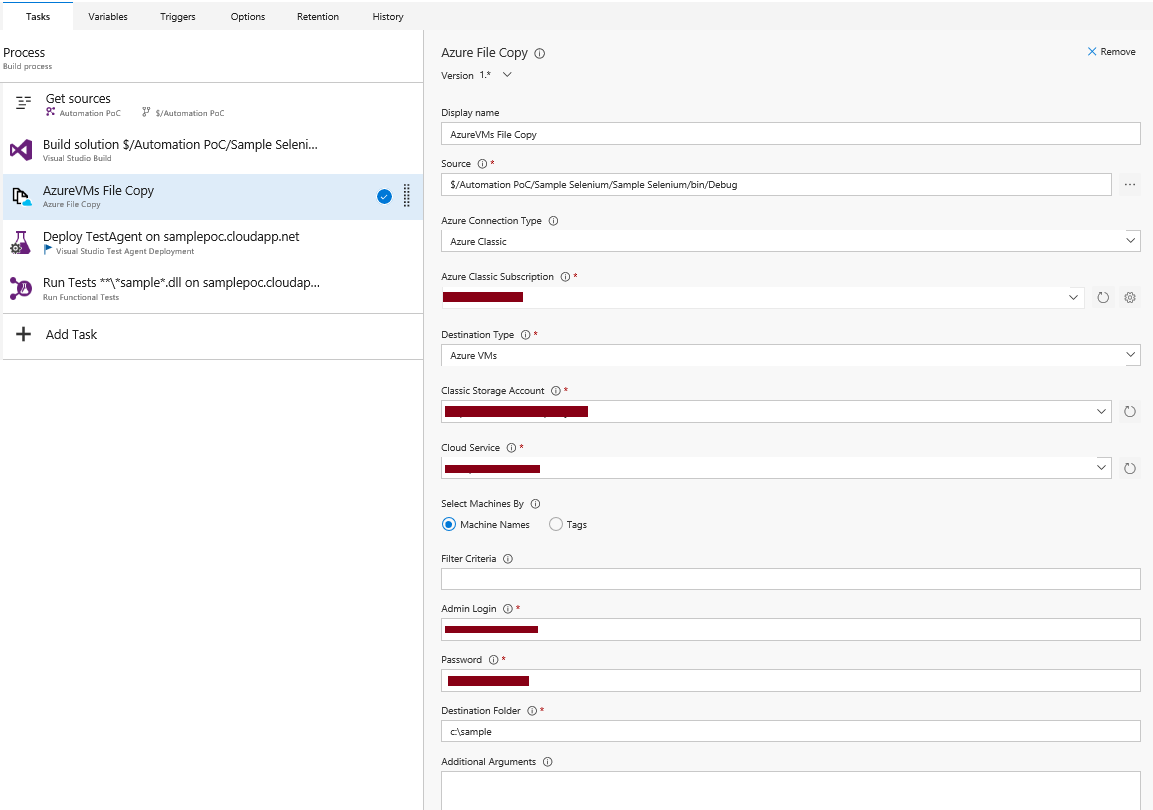
3. Azure VM Copy
As we build the solution, we need to copy the output of it(the so called dll etc.) to a Virtual Machine where the test agent will run the automated tests using the output libraries. Need to be careful when entering the Subscription ID/Storage Account & Cloud Service to which the VM is mapped and the credentials. We also need to enter the destination folder where the dll's will be saved. The source here is always the build server dll's available in Debug folder of a solution (as mentioned in Source)
4. Deploy Test Agent
This is a one time job to deploy the test agent onto the Virtual Machine. Need to provide the Machine name(VM) as either FQDN with Port number or the cloud service name.

The option 'Update test agent' should be selected for the first time for the agent to download the test agent onto the VM. (by default the test agent will be stored in c:\testagent

5. Run the Functional Tests
Once the Test Agent is deployed, the test cases or the test assemblies has to be run. Here we mention the machine details, the test drop location where the DLL's are saved and user selects the existing test plan/suite.

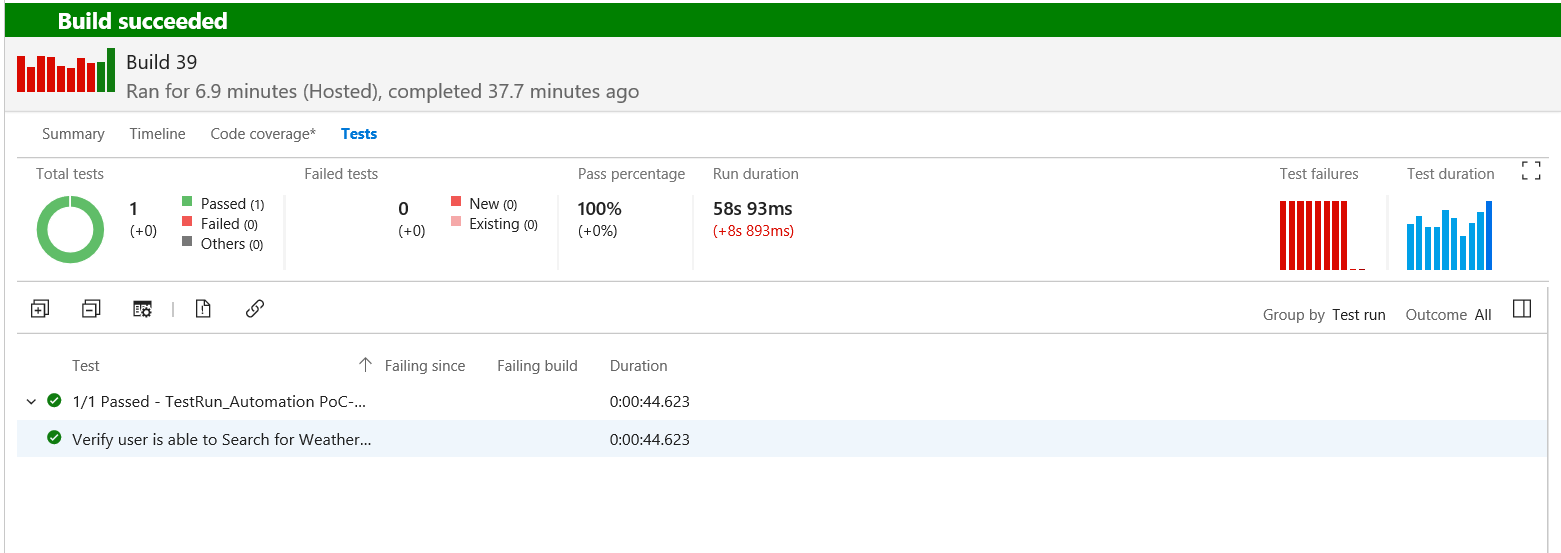
Once the build is succeeded, all the test cases in the test plan will be run and the plan will be updated accordingly. Results can be found in the build details.
Sample Report.
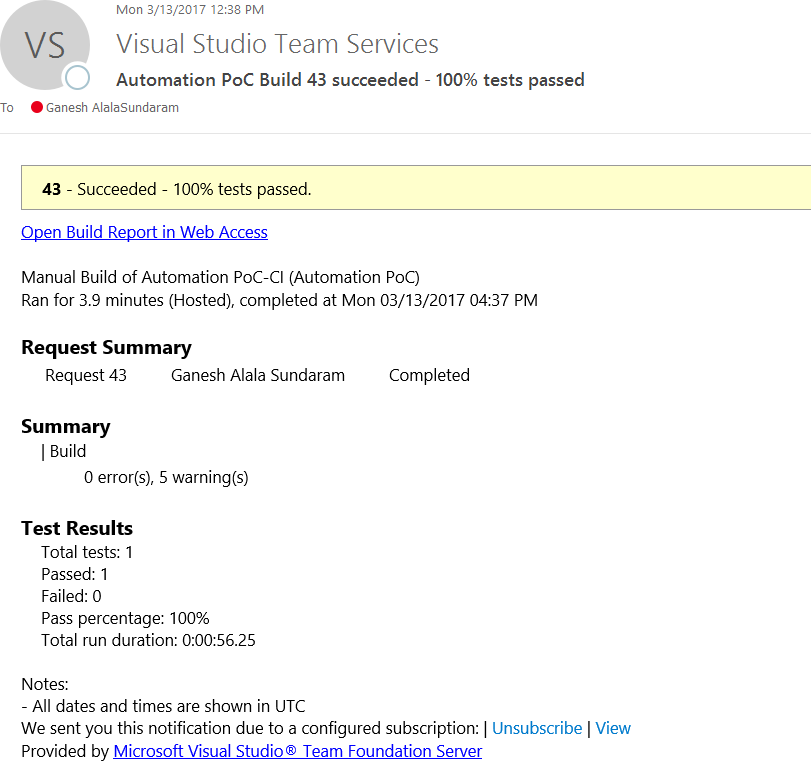
Automated Build Mailer.
Once the build is completed, you can receive an email automatically about the status of the run. To configure this.
Goto settings->notifications 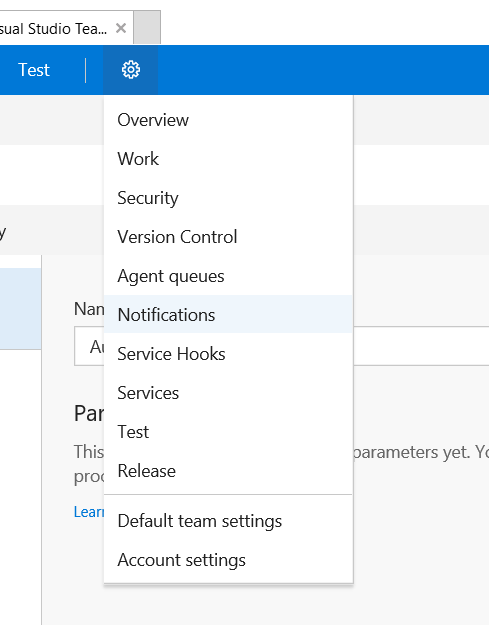
Click on New Subscription 
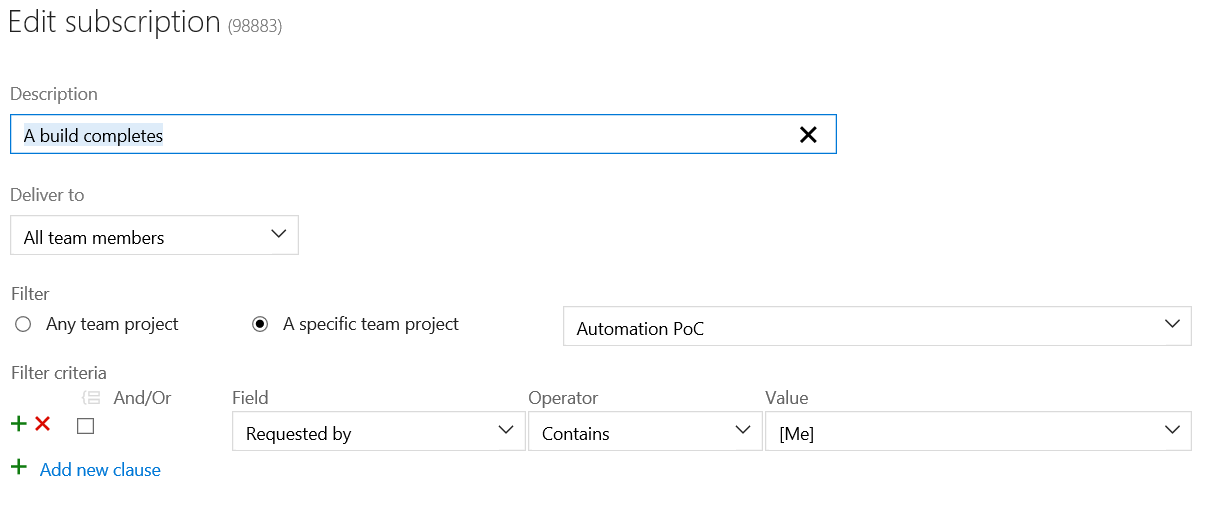
The Configuration looks like something this below.
Sample Email Content