Steps for setting up a custom identity of an IIS 6 application pool
From time to time, I always have to show someone how to setup an IIS application pool to use a service / domain account under IIS 6 / Windows 2003. There are several places on the MSDN where you can find part of the procedure, but I have decided to just give everyone a simple X step walkthrough on how you can get this done.
1. Create a service account:
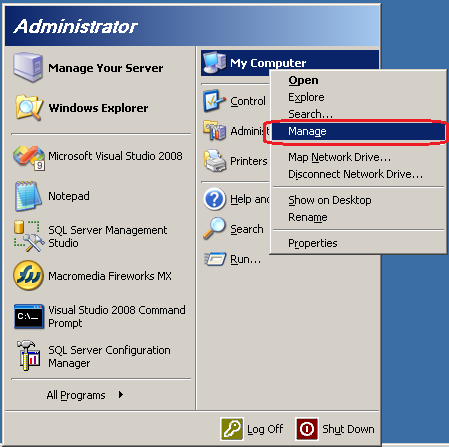
Either on the Windows 2003 server that you are using, or on the Active Directory the server is part of, go into the User Management Snap-in of the MMC. If you are doing this locally on the server, the easiest way to do so is to just right click on the My Computer icon on the Windows Start Menu:
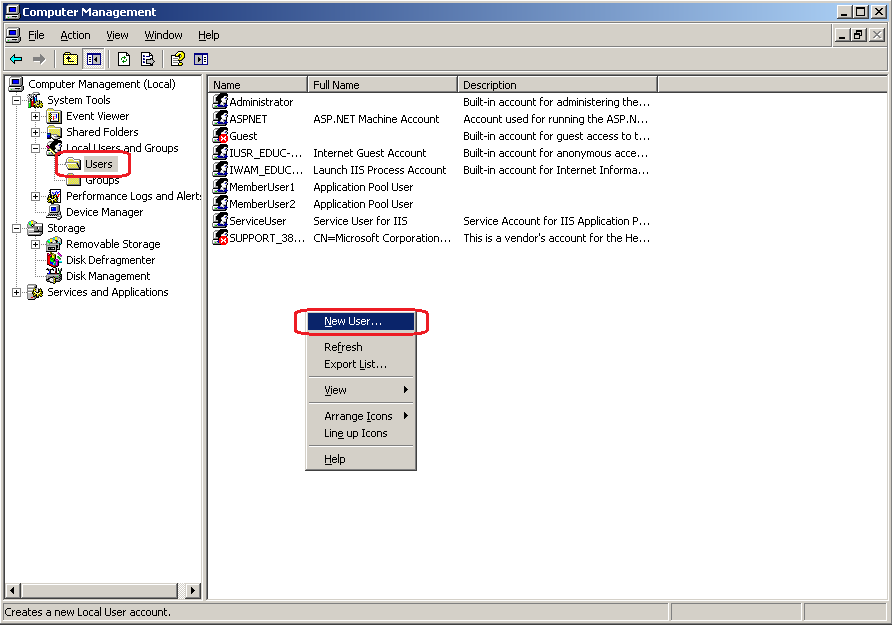
Once inside the User Management snap-in, go ahead a select the Users icon from the hierarchical tree on the left side of the console to display all local users, and then right click in the right hand side pane and chose the 'New User' context menu item.
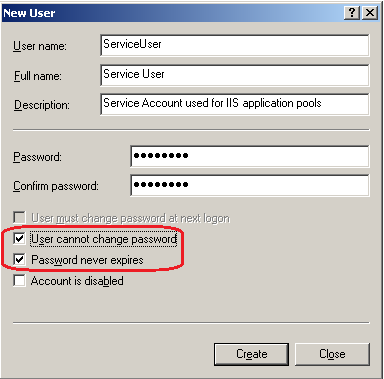
Fill in the New User dialog box with a username that is relevant to you. Make sure however that you uncheck the 'User must change password at next logon' checkbox and check the 'User password never expires' and 'User cannot change password' checkboxes. This will prevent the password from expiring and then disabling your application pool out of the blue one day, and will also keep application code from accidentally changing the service account user password.
2. Grant the service account the required privileges:
Now for the IIS related part. Up to now, the user account you have created is by default only part of the 'Users' group on the server. This does not give the account sufficient privileges to run an IIS application pool. To add the necessary privileges two steps are necessary:
2.1 Make the user account part of the IIS_WPG group
The IIS_WPG group (short for IIS Worker Process Group) is a special group that gets created when IIS is installed on the server. It has special file system permissions to certain folders (like the Temporary ASP.net Files folder). Hence making the service account part of this group will bypass the fact that you would have to grant the account special privileges to several paths in the file system explicitly.
To add the service account to the IIS_WPG group, right click on the account in the Users and Groups snap-in of the MMC and click on the 'Properties' context menu item that appears. Go to the 'Member Of' tab and then click the 'Add' button, type in IIS_WPG and then confirm your choice.

Note: In IIS 7 /Windows 2008 and IIS 7.5 / Windows 2008 / R2, this is done automatically for you by IIS when you configure a service account as an application pool identity. Furthermore, this is done on the fly, so the user is only added to the IIS_IUSRS group (that replaces IIS_WPG) when the application pool is launched and not before.
2.2 Allow the service account to 'Run as a service'
Since IIS application pools run in the non-interactive desktop, where most Windows services are found, we need to grant the service account we have selected for the task, the privilege to log on to this desktop as opposed to the interactive desktop that you and I are used to seeing.
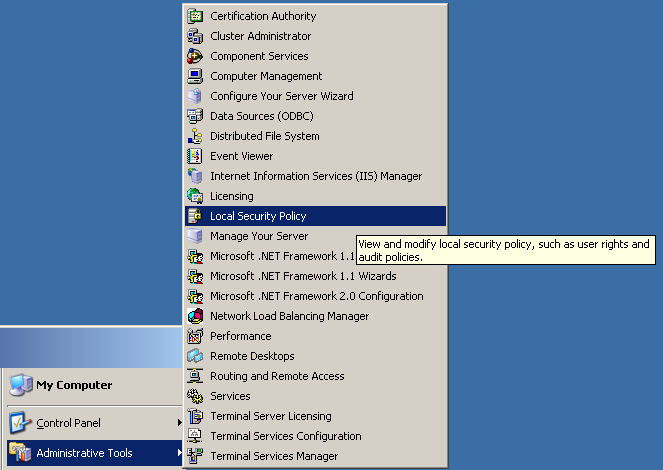
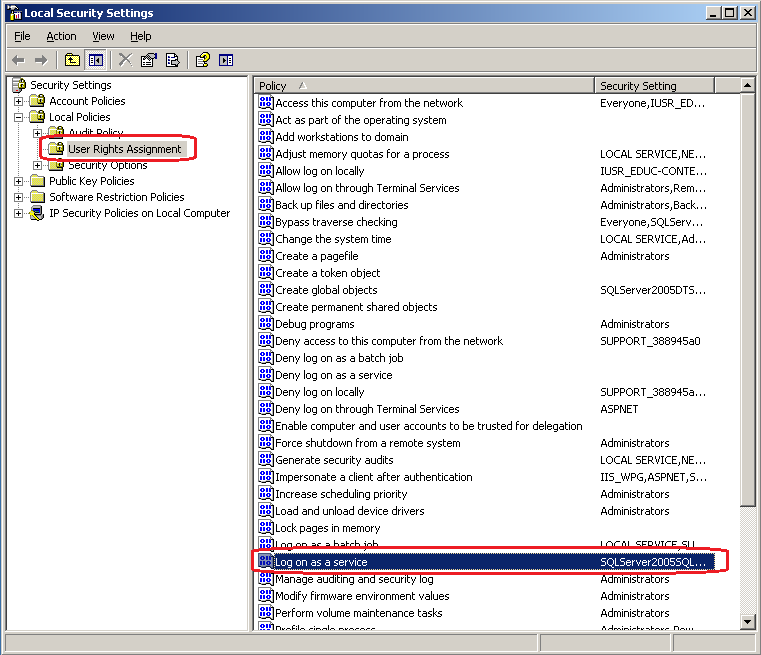
To do so, launch the Local Security Policy editor found under the 'Administrative Tools' of Windows 2003.
Inside the Local Security Policy editor, select 'User Rights Assignment' from the hierarchy in the left pane, and the select the 'Log On as a Service' from the right pane. Double click this item to reveal its properties.
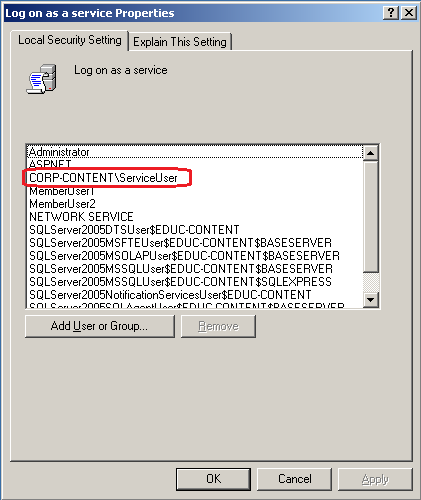
Once in the properties window, click the 'Add User or Group' button and then type in the name of your desired service account and confirm it. Make sure you see the name amongst the list of accounts and groups present in the list shown in the properties window.
Note: As before, this step is taken care of directly by IIS when doing the maneuver in IIS 7 or IIS 7.5.
3. Setup the service account as an application pool identity:
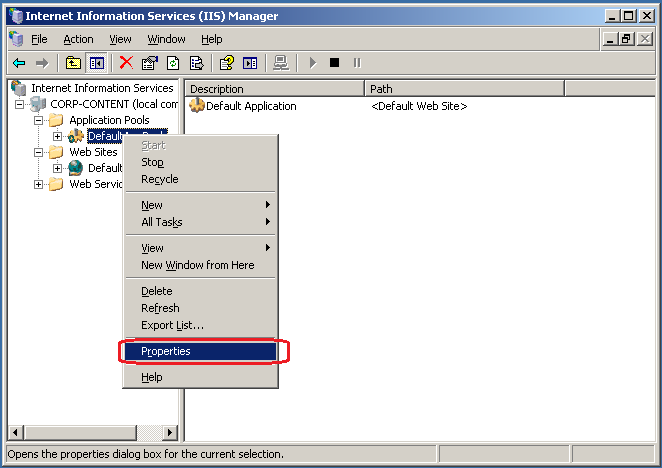
The last task is to setup the account to run the desired application pool in IIS. To achieve this launch the IIS management console, and the right click on the name of the desired application pool in the hierarchy shown in the left pane, then select the 'Properties' item from the context menu.
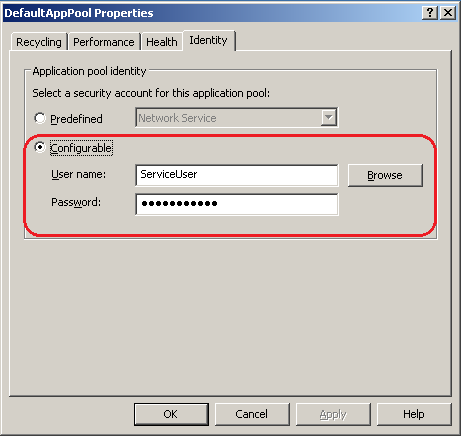
In the Properties window of the IIS Application pool, select the 'Identity Tab' and then enter the name and password of the service account. Once done, IIS will prompt you to re-enter the password again. The password is stored in encrypted format in the IIS metabase. Hence if the password for the account were to be changed, the account password would become desynchronized from the one present in the IIS metabase, thus no longer allowing the pool to start. Hence the importance of unchecking the 'User must change password at next logon' checkbox and checking the 'User password never expires' and 'User cannot change password' checkboxes.
4. Start the application pool
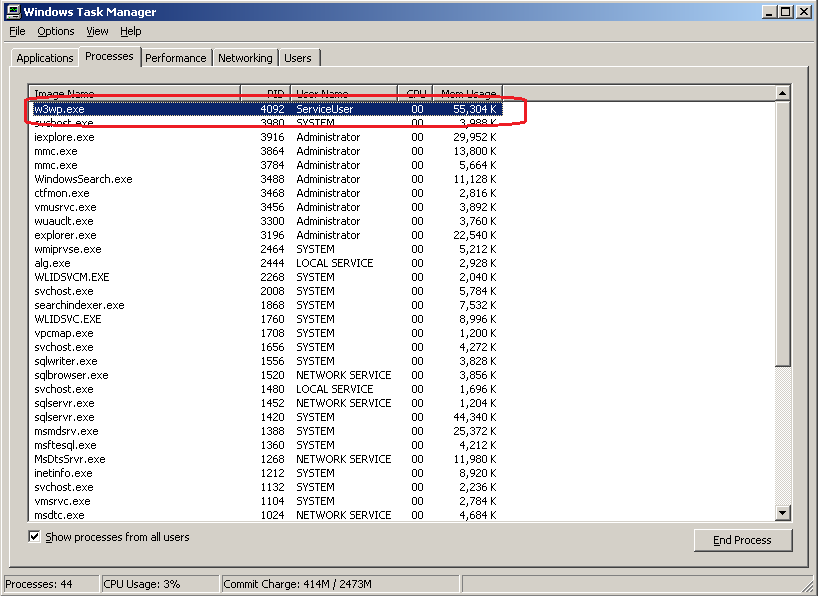
Access a site that is hosted on the application pool in question to start the IIS pool up after the changes have been applied. Open a Task manager window on the Windows 2003 server and look at the processes tab – if you can spot one (or more if you are using web-gardens) w3wp.exe processes that are running under the service account identity, then you have correctly configured your application pool.
by Paul Cociuba - ASP.net Engineer
Follow what I read via Linqto.me