One NAV 2017 on Azure - Loaded please...
There is a huge difference in ordering a baked potato and a loaded baked potato.
The potato is the same, but it just becomes so much better will all the add-ons.
So, how would you like your NAV 2017 on Azure?
NAV 2017 on Azure, Loaded please...
of course:-)
This blog post is a visual walkthrough of how to setup NAV 2017 on Azure, Loaded. It consists of a LOT of screenshots explaining what to do...
For assistance on easier navigation, I have added links to the sections here:
- Setup your NAV 2017 DEMO environment
- Install the Self Signed Certificate
- Access NAV 2017 using the Web Client
- Add NAV 2017 to the Waffle Menu
- Create a PowerBI dashboard with data from NAV
- Embedding PowerBI
- Configure the Outlook/Office Add-in
- Setup Email
- Setup Email Logging
- Do you want to Edit In Excel
- Create your PowerApps
- Create a Flow
- Access NAV 2017 via a SharePoint Portal
- View a world map of your customers
- Connect your Phone or Tablet to NAV 2017
- Access NAV 2017 using the Windows Client
- Connect to your Virtual Machine
- That was easy
You can also choose to go through the entire story-like post right here:
Setup your NAV 2017 DEMO environment
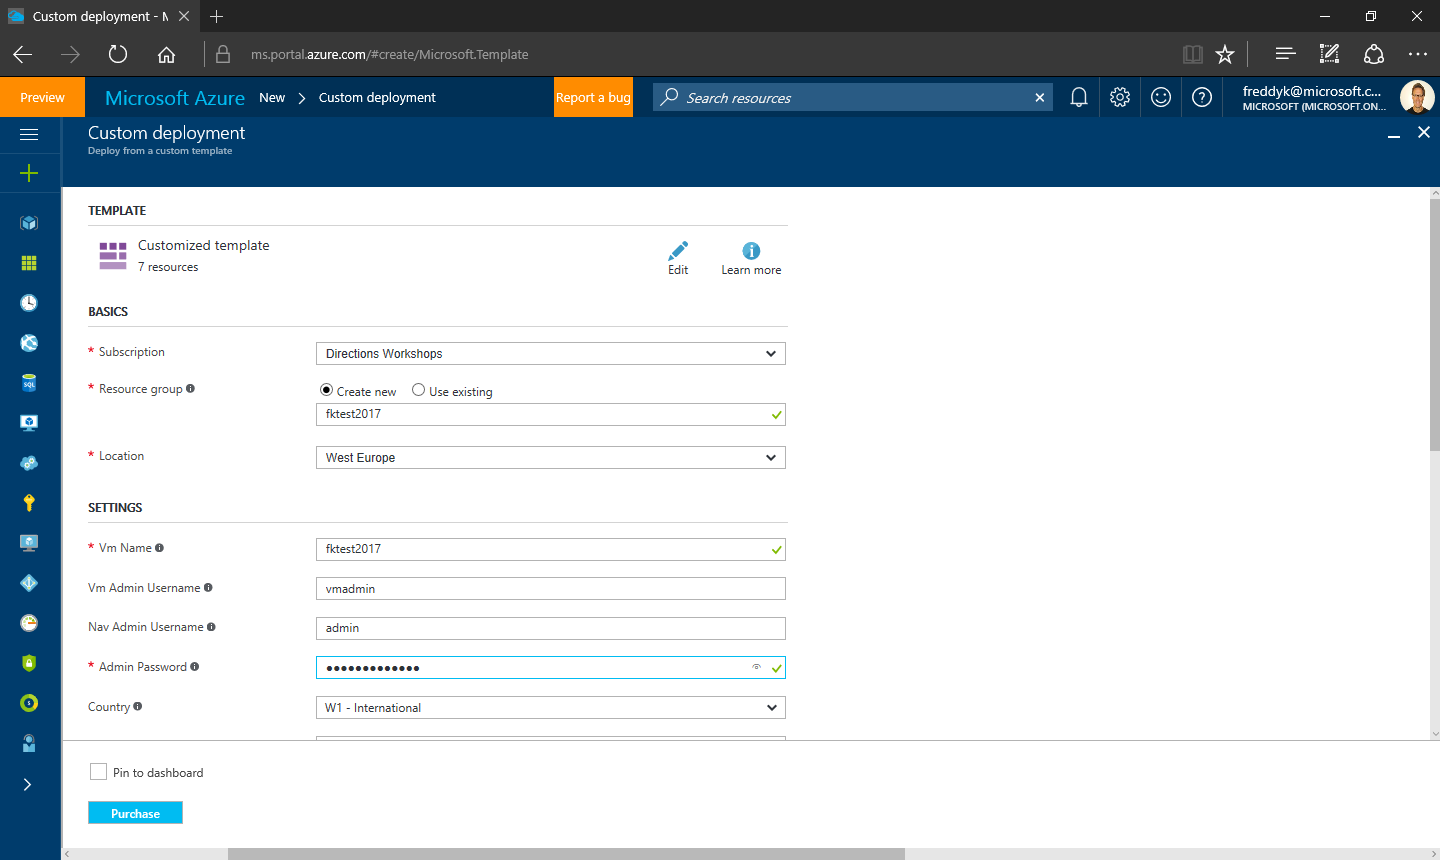
Go to https://aka.ms/navdemodeploy 
The system will redirect you to the new Azure Portal, and you will be asked to login and fill out a quesionnaire. You need to at least fill out Resource Group, VM Name and the admin password.
In order to get your NAV 2017 Fully Loaded, you also want to fill out the BingMaps Key (get one here), select Yes to ClickOnce, select yes to PowerBI and type in the administrator username (email) and password for the Office 365 where you want to integrate NAV 2017. Also say Yes to allow NAV to create a Portal with NAV 2017 Content.
Accept the terms and check Pin to dashboard.
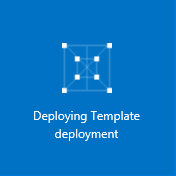
Now deployment will start and in approx. 10 minutes you will be looking at this:
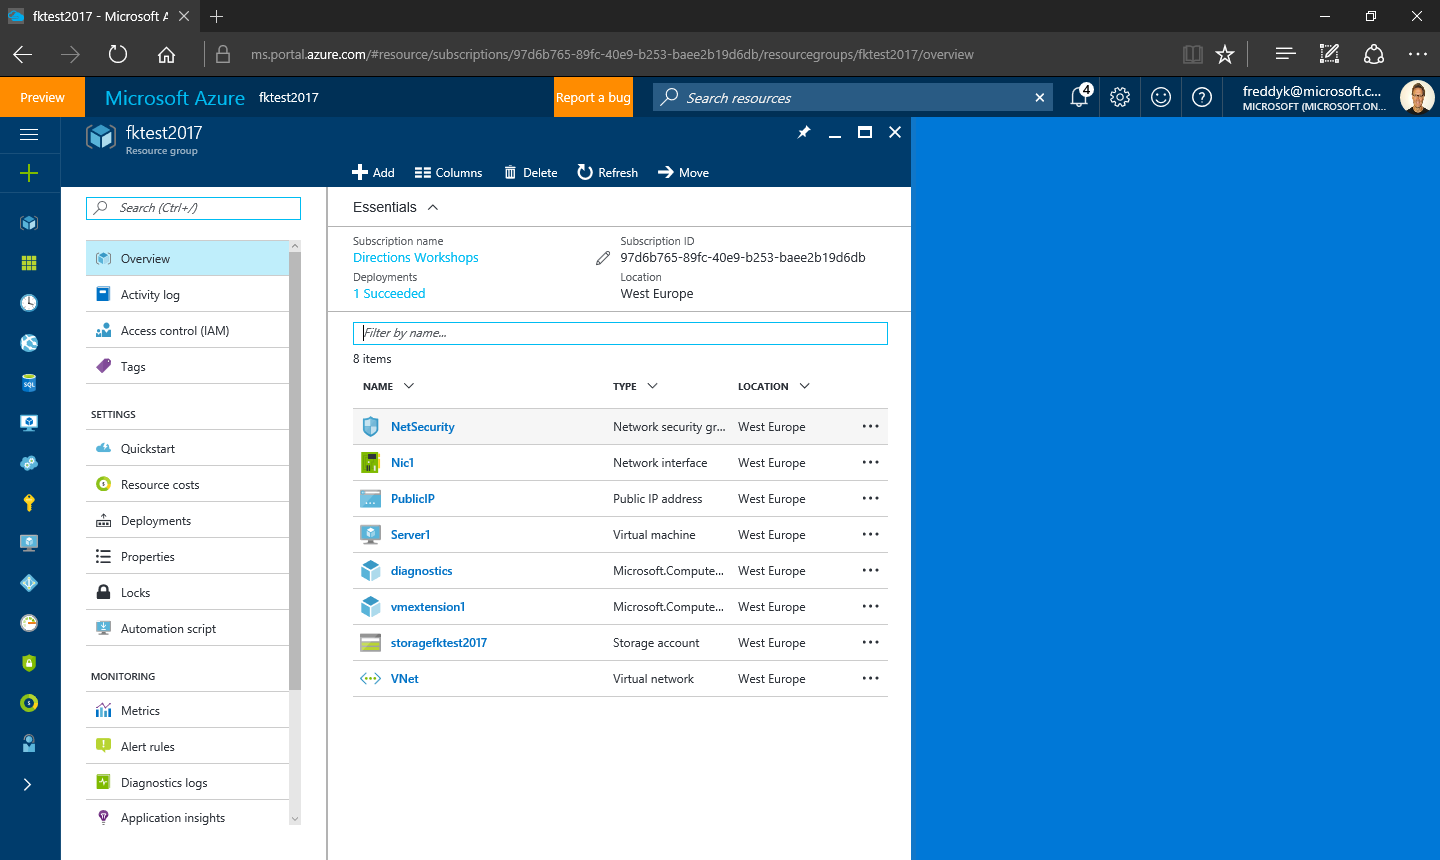
When Deployment is done, the new Portal will show the deployment and display 1 Succeeded. In the unlikely event it should say 1 Failed, you can click on the link to see what went wrong. It isn't easy, but you will probably get there. Then remove the Resource Group and try again:
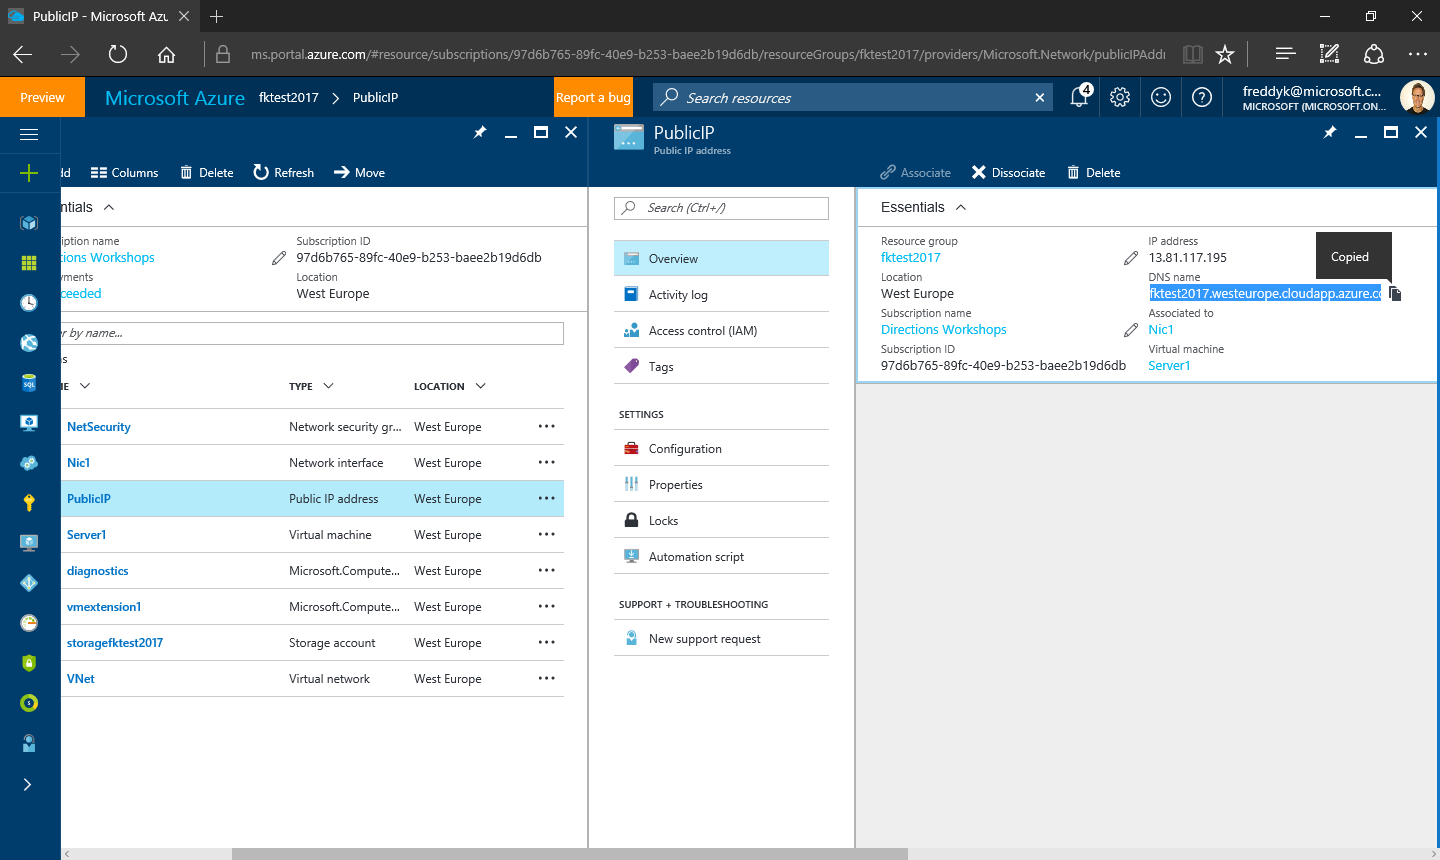
When you click the Public IP line, the portal will show the DNS name. Click the DNS Name and copy it to the clipboard:
Open a new Tab in the browser and navigate to the URL. The browser will probably show you this:
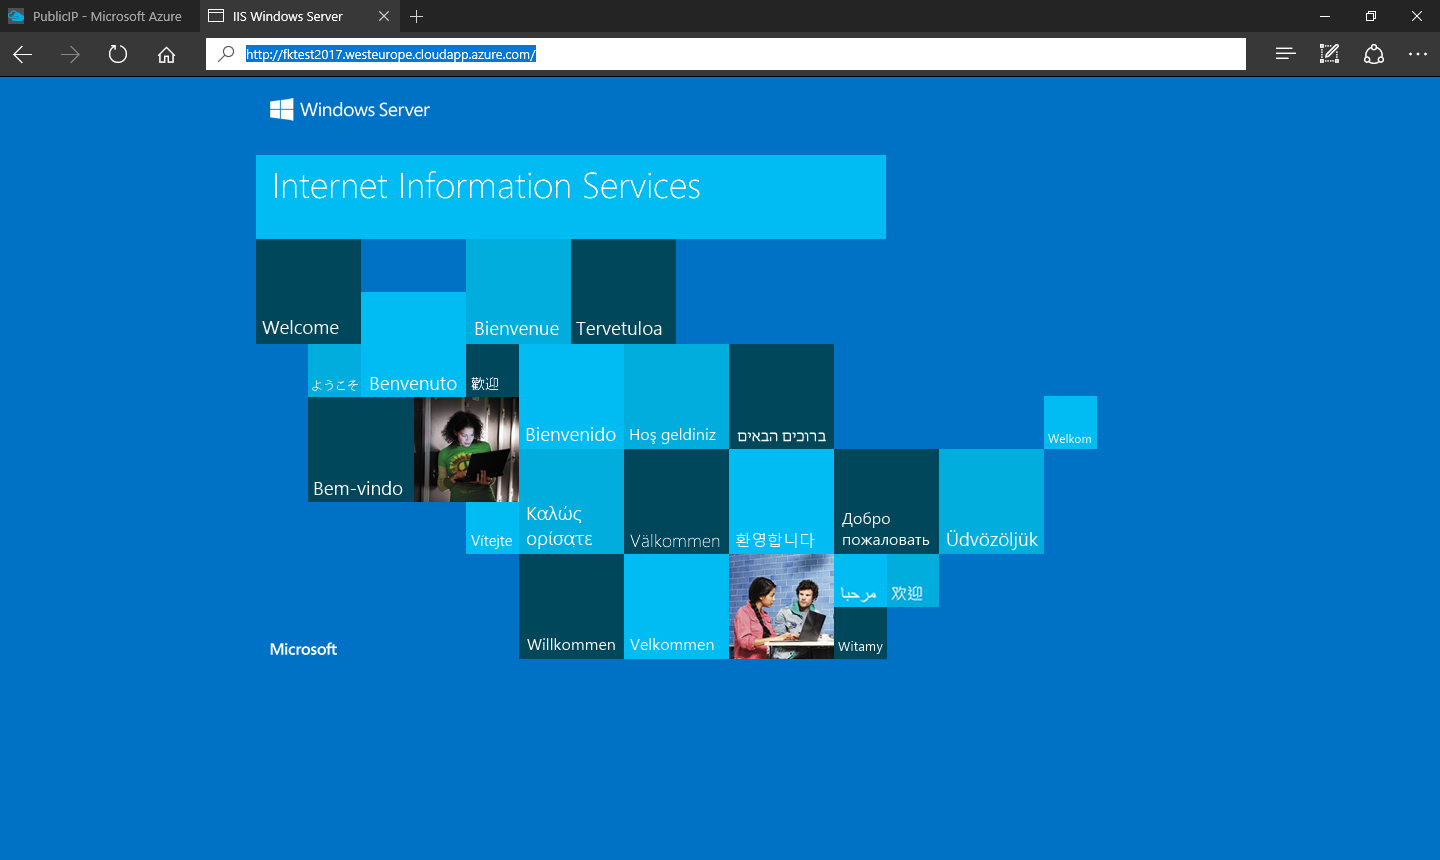
But after you refresh a few times, you should end up having the landing page:

The landing page here tells you that Installation is still running and you can view the installation status by clicking the link on the right:
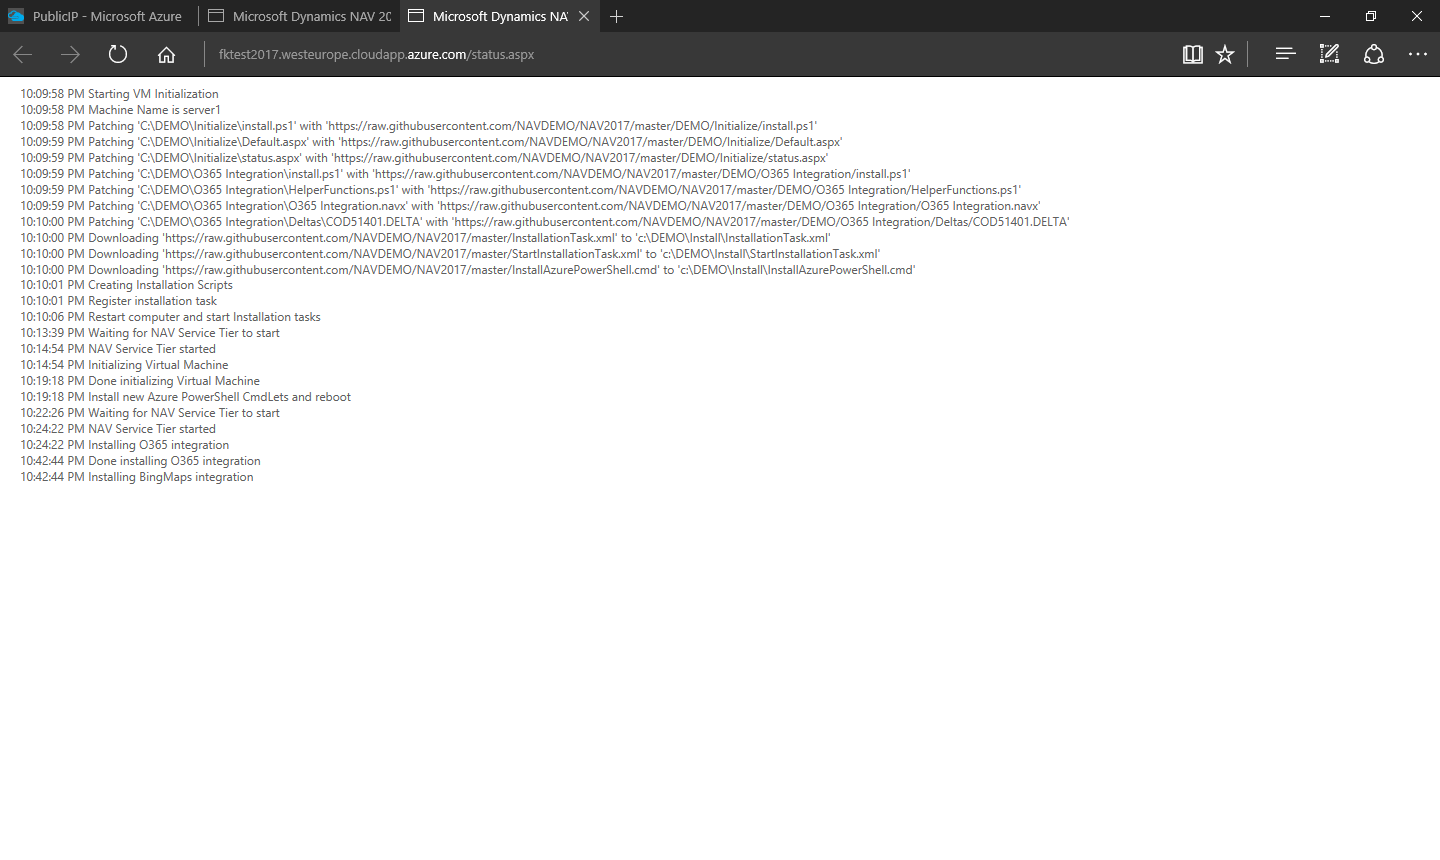
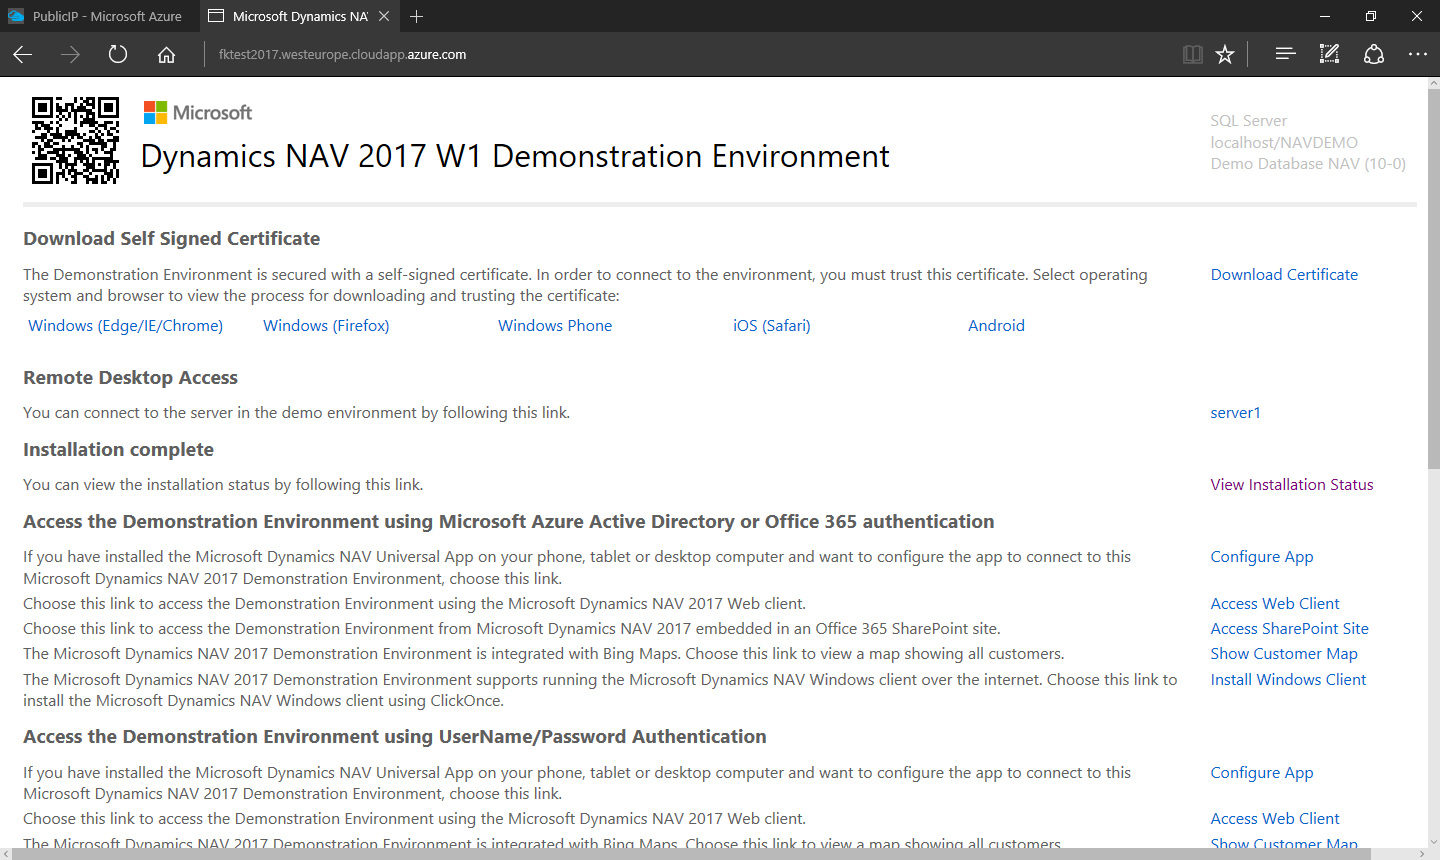
After around 10-20 minutes, the status should say Installation Complete:

and your Landing page should now be complete:
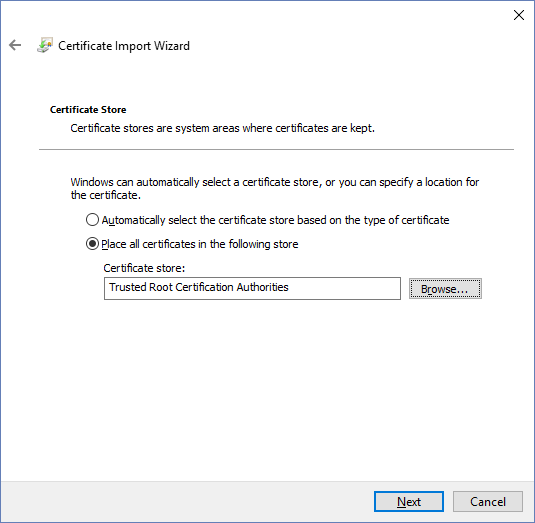
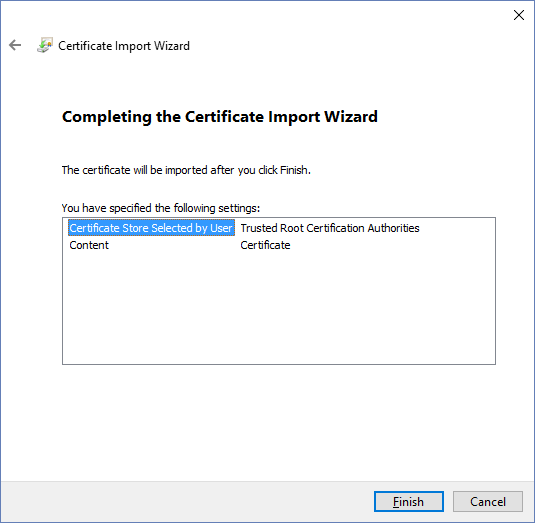
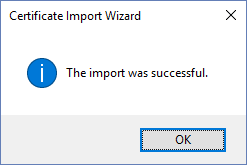
Install the Self Signed Certificate
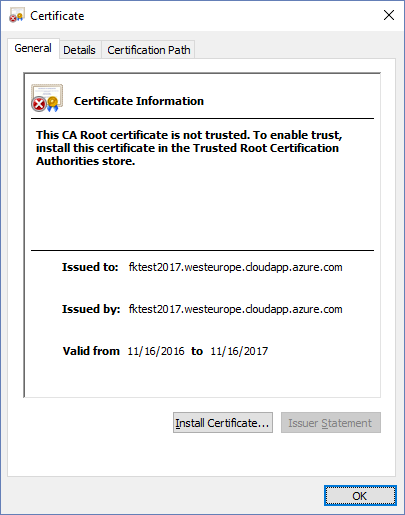
If you are using a self-signed certificate (if you followed the process here, you are), click the Download Certificate link and follow the process for installing the certificate in the trusted root certificate authorities:

Note, if you are going to connect to the Virtual Machine with your tablet or your phone, you would need to install the certificate on the device also. You can scan the QR code on the landing page on your device, to navigate to the landing page and download the certificate and the app for your device (link is at the bottom of the landing page).
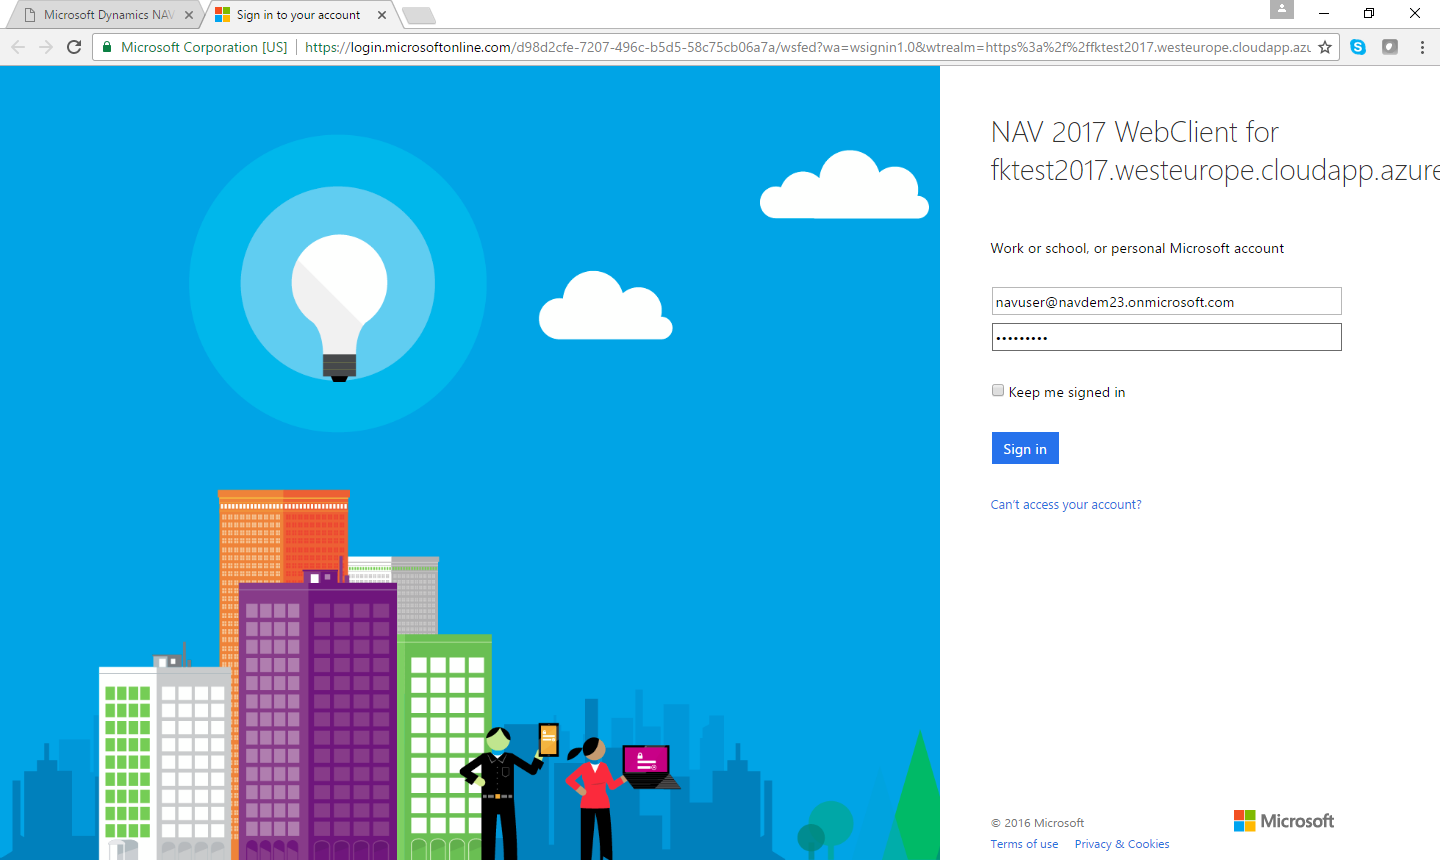
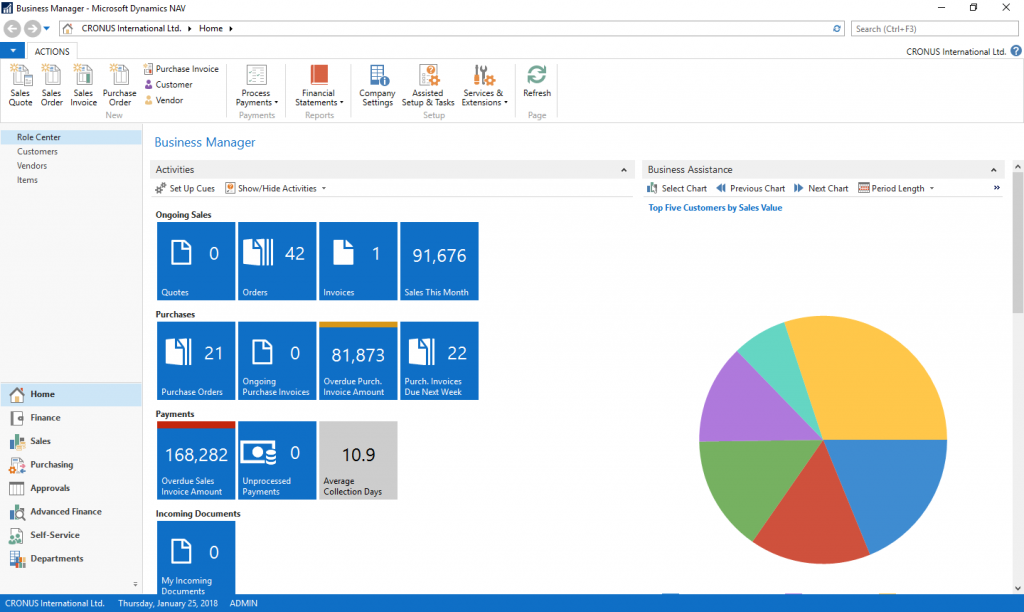
Access NAV 2017 using the Web Client
On the landing page, in the section with Accessing NAV 2017 using Office 365 authentication, you will find a link to Access Web Client:
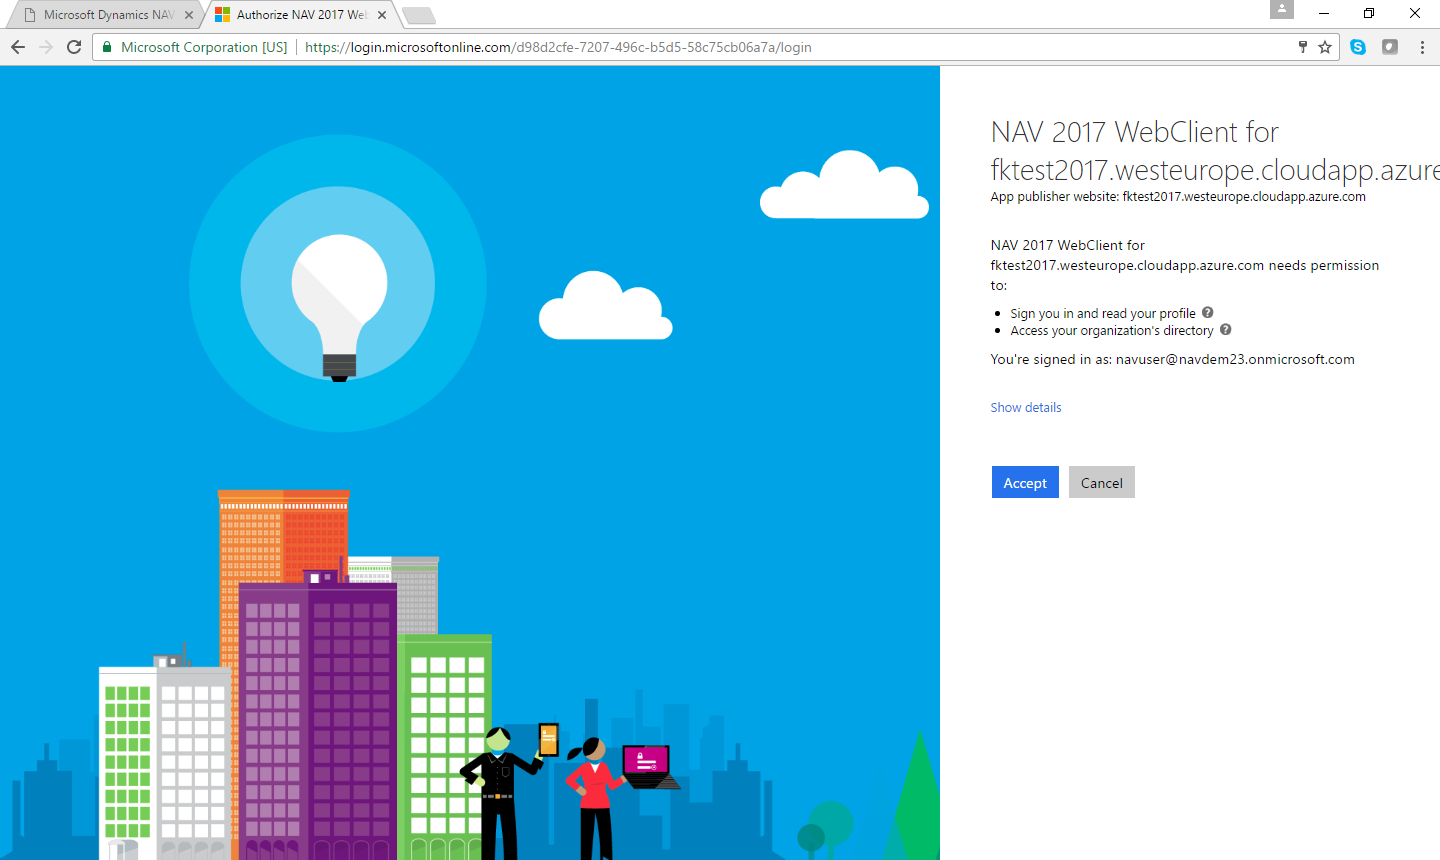
You will be redirected to the sign-in page. Enter your Office 365 credentials and press Sign in:
The first time you login, you will be asked to give permissions to sign you into the NAV Web Client with your credentials:
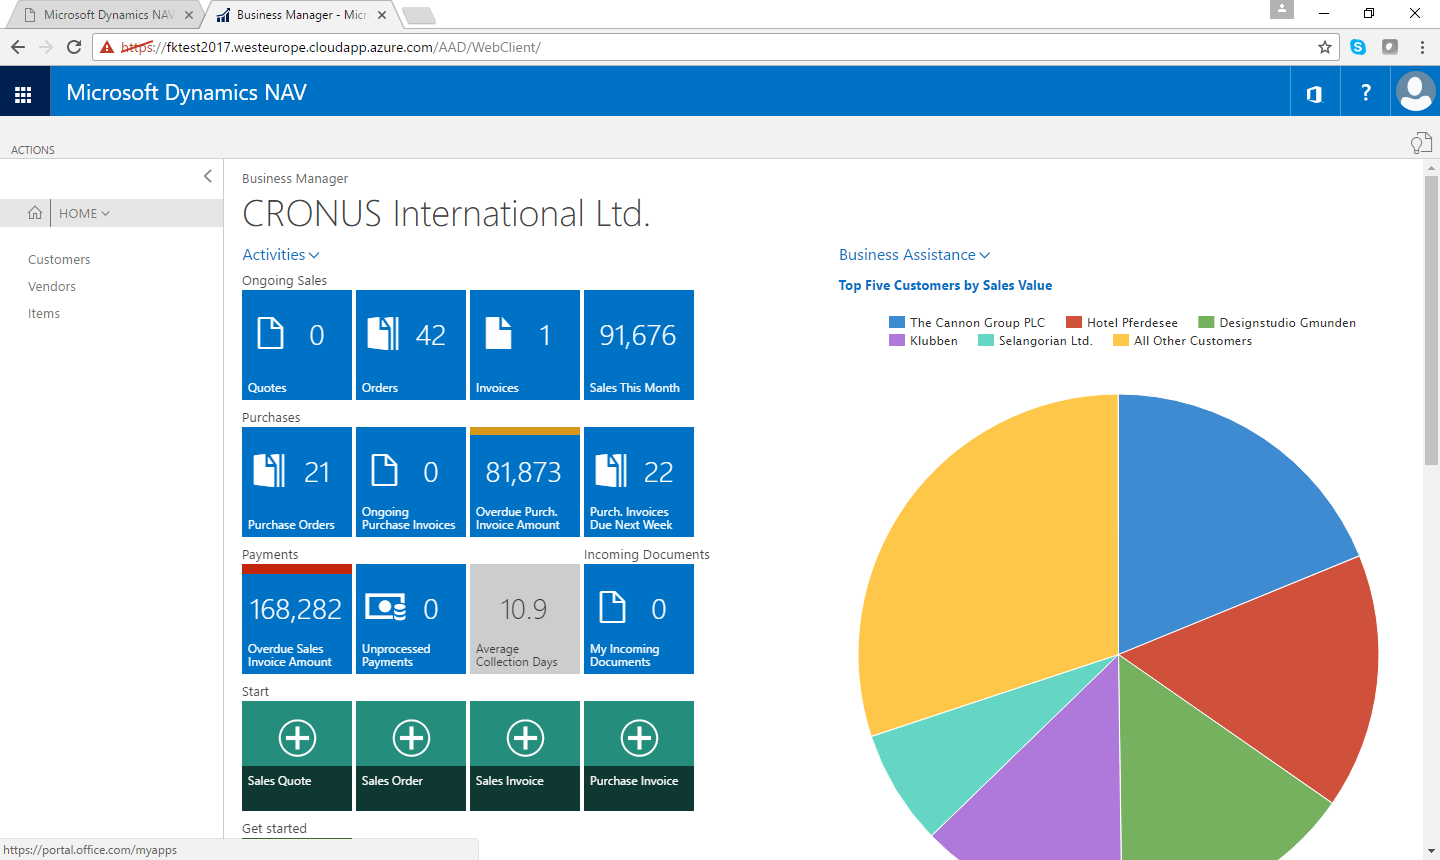
And after that you will open the Web Client:
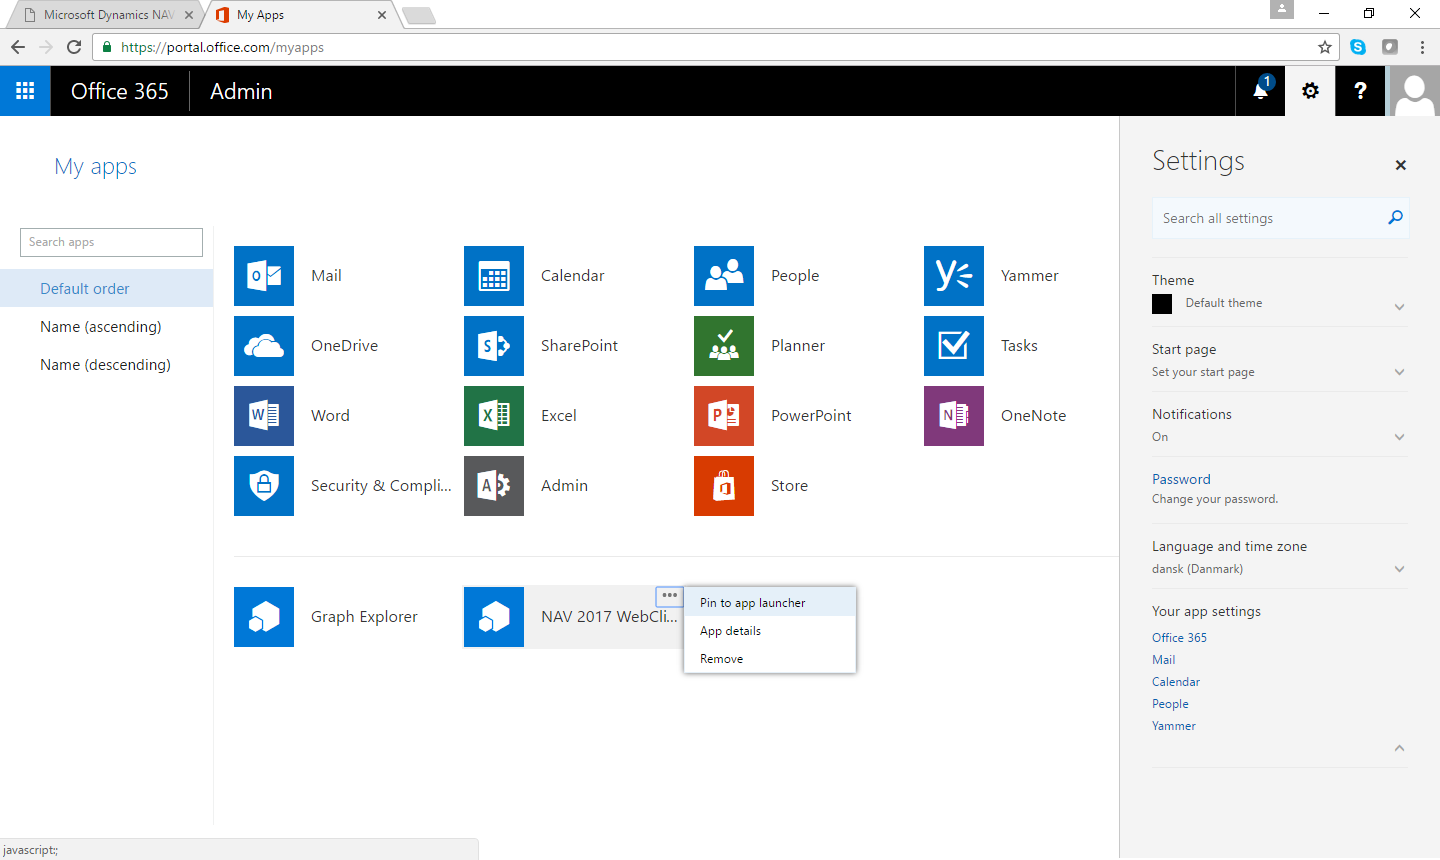
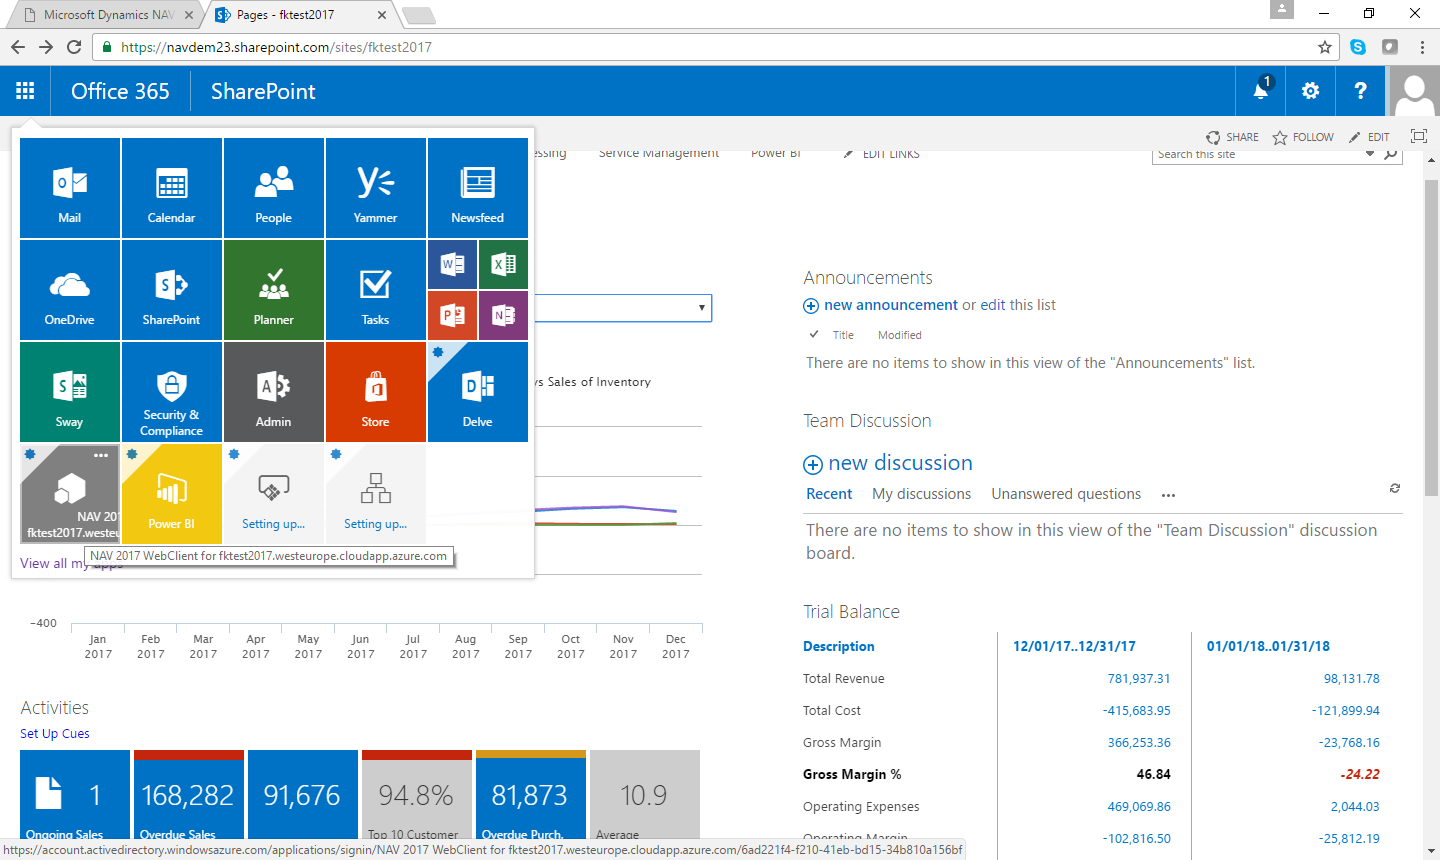
Add NAV 2017 to the Waffle Menu
If you want to have NAV 2017 in your Waffle Menu in Office 365, click the "Waffle" Menu in NAV 2017, which will navigate to your apps. Click the ... menu next to your NAV 2017 app and say Pin to App Launcher:
Create a PowerBI dashboard with data from NAV
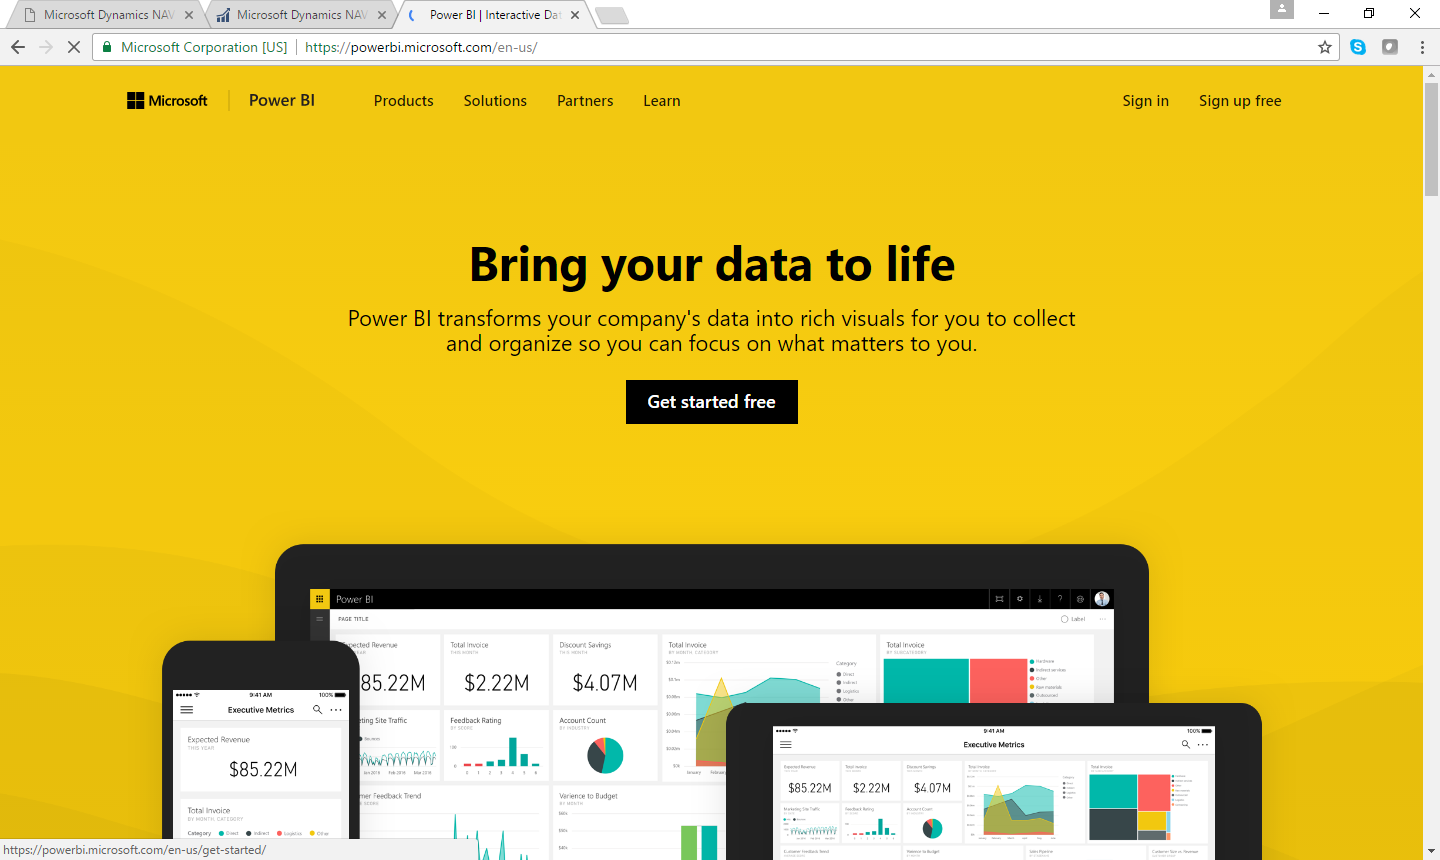
Navigate to https://powerbi.microsoft.com/en-us/ and sign in with your Office 365 username and password:
and press Start:

In PowerBI, under Content Pack Library, Services, click Get:
Search for the NAV Content pack and press GET:

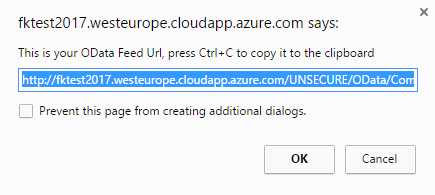
Now, for the PowerBI content pack, you will need the OData URL. Open your landing page and click the Get OData Feed Url: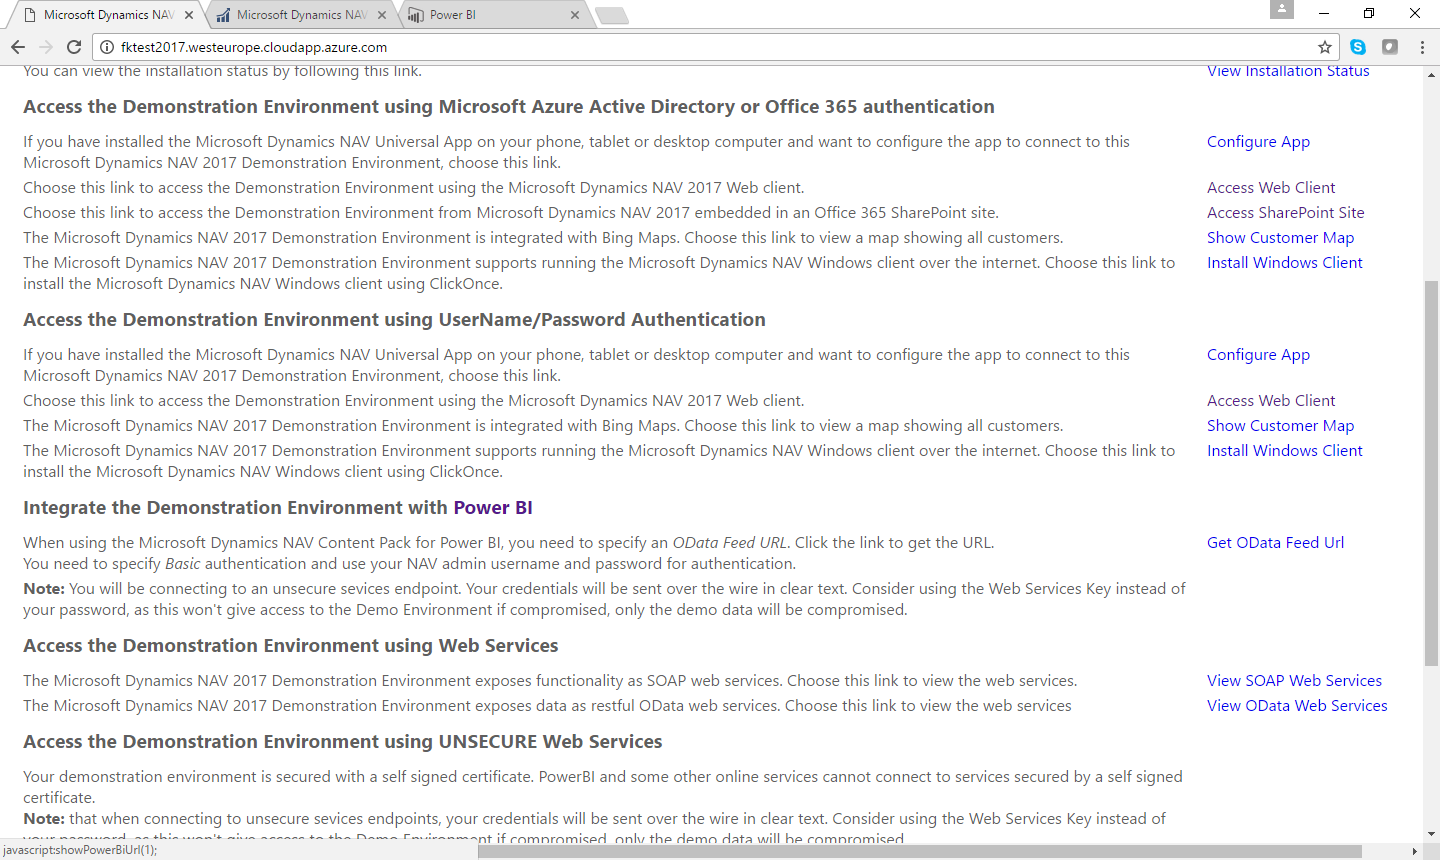
Copy the Feed Url from the dialog and close it:
and in the setup dialog of the PowerBI, you need to paste the URL. Select authentication method Basic and put in your username and password for your admin user. Note: this is NOT your Office 365 username and password, it is the username and password for your NAV user. You can also create a Web Services key in the users dialog in NAV and use that instead of the password.
NOTE: if you are using the UNSECURE endpoint, your username and password will be sent over the wire in clear text and you should never do that with your production system: 
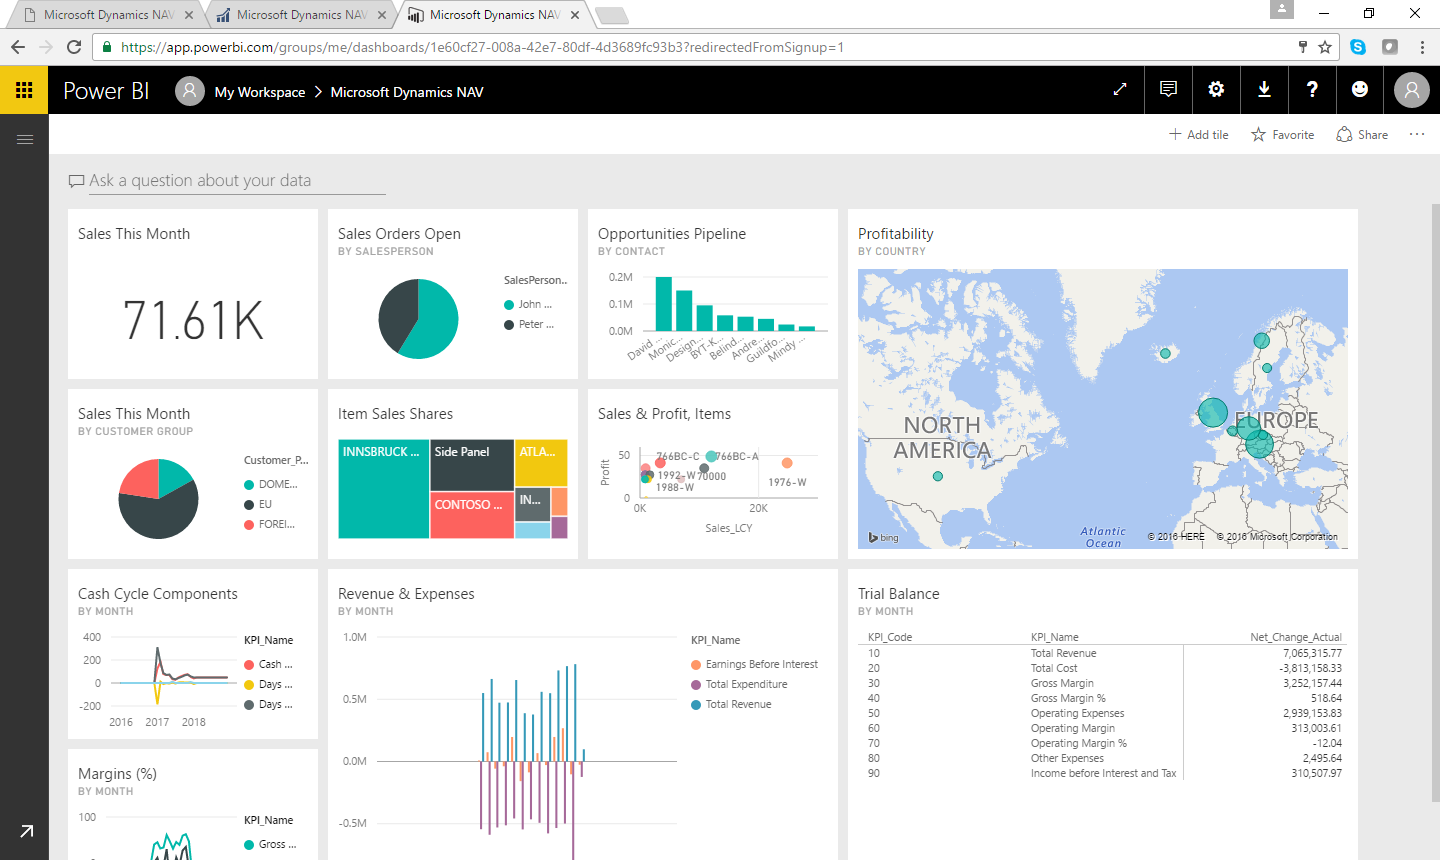
After a short while, you will have a PowerBI dashboard based on NAV 2017 Data:
Embedding PowerBI
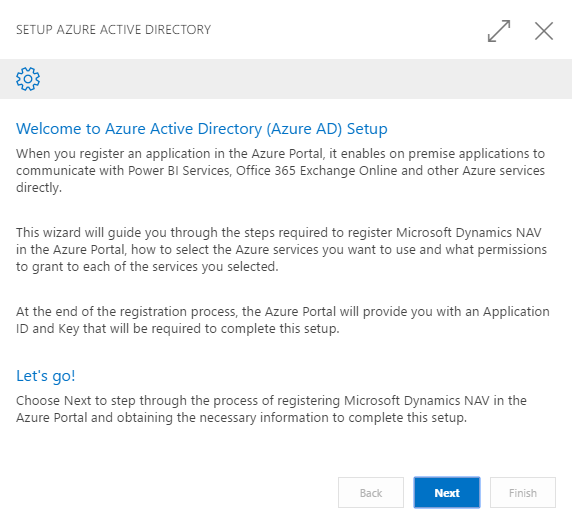
Now where you have PowerBI, you want to setup embedded PowerBI in NAV 2017. Start your Web Client like described in the section about starting the Web Client. In the Role Center, Click Actions and select Assisted Setup & Tasks.
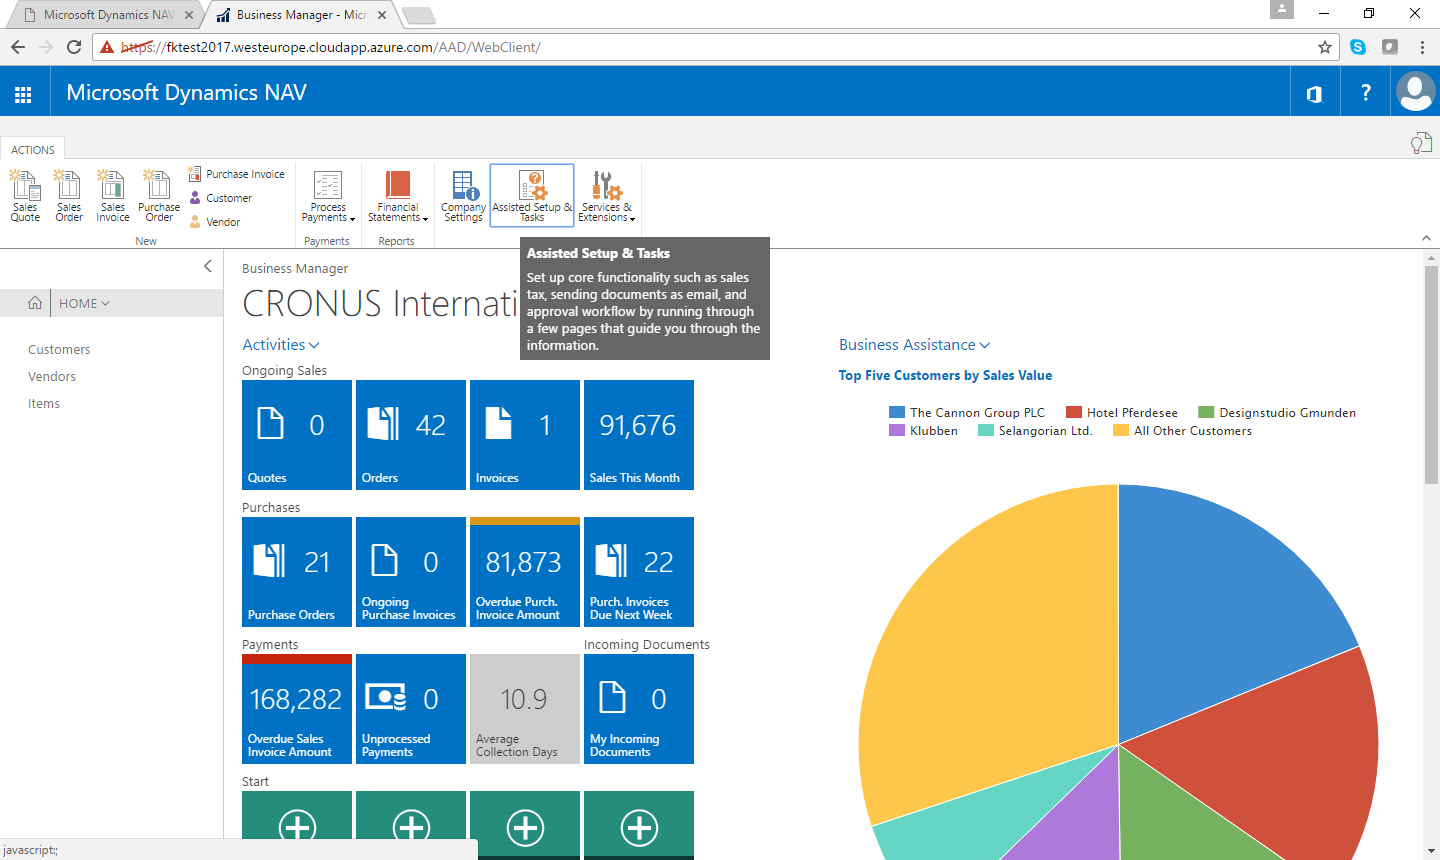
In the list of Assisted Setup, select Setup Azure Active Directory and go through the Wizard. All values should be pre-populated.


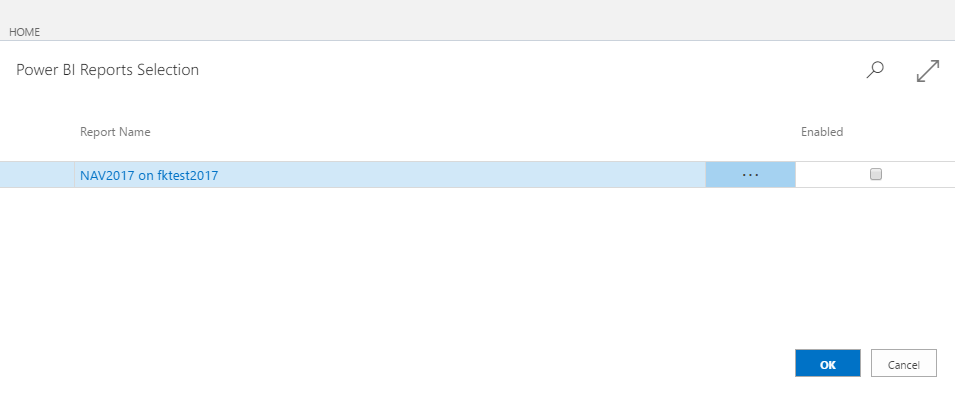
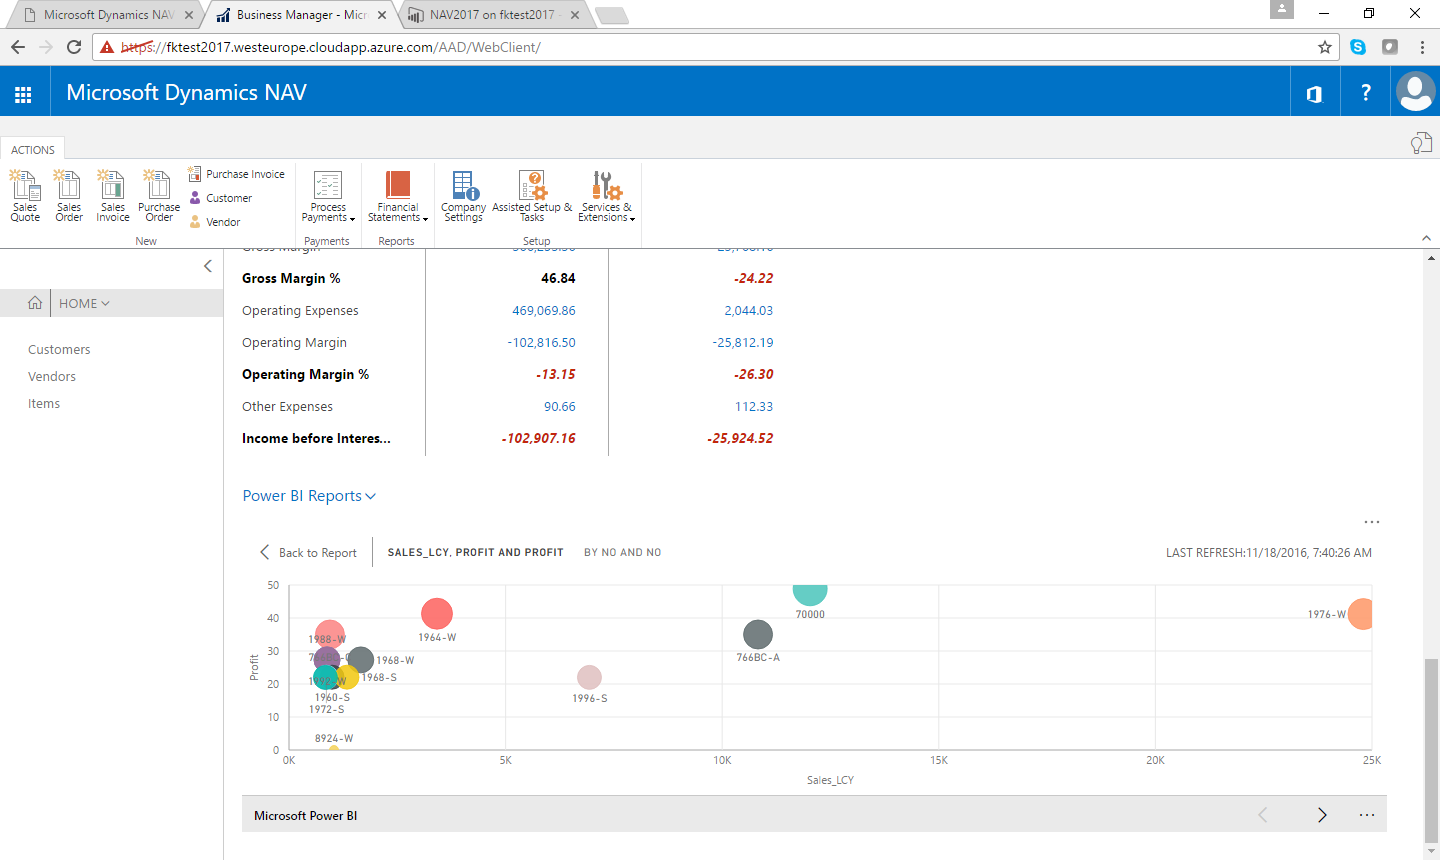
On the Role Center, locate the Power BI Reports at the bottom and click Get Started with Power BI.


Now, click the Power BI Reports selection and you will see a window with your Power BI Reports. The Reports are by default not enabled.
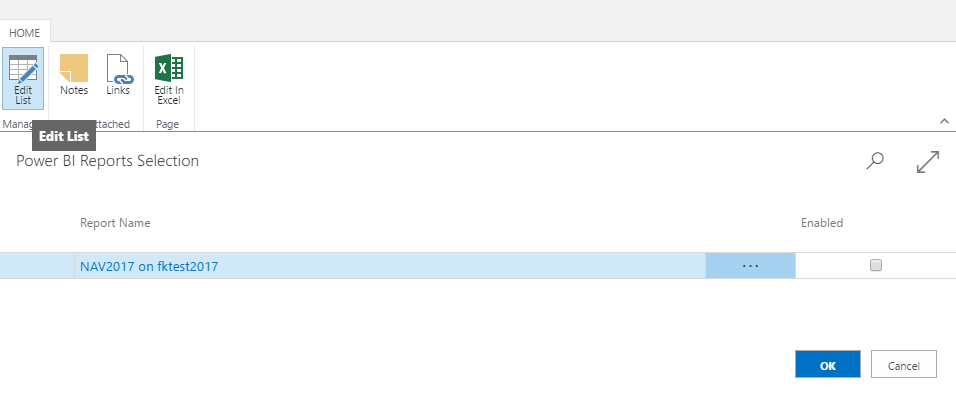
Click the Home menu, Select Edit List
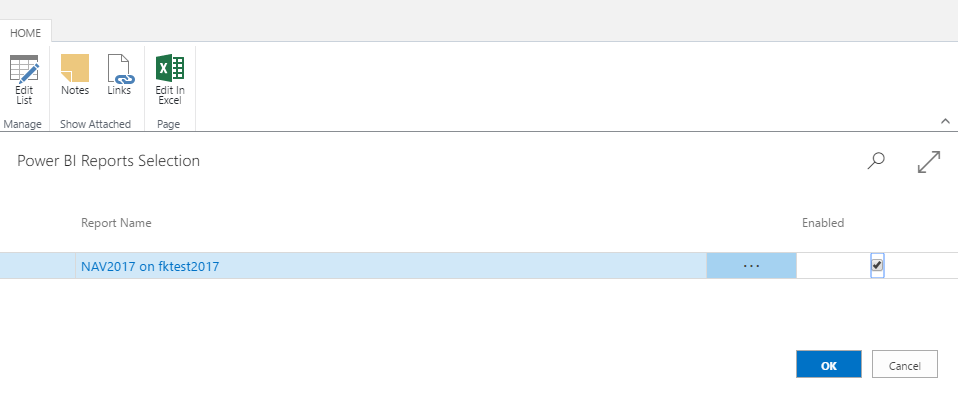
Enable the Report and press OK
And you will now have an embedded PowerBI report on your Role Center
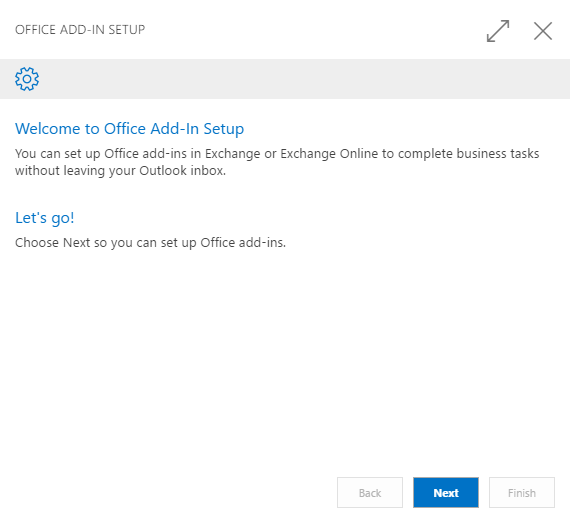
Configure the Outlook/Office Add-in
Start your Web Client like described in the section about starting the Web Client. In the Role Center, Click Actions and select Assisted Setup & Tasks.
Select Set up Outlook for Financials to start the setup wizard:

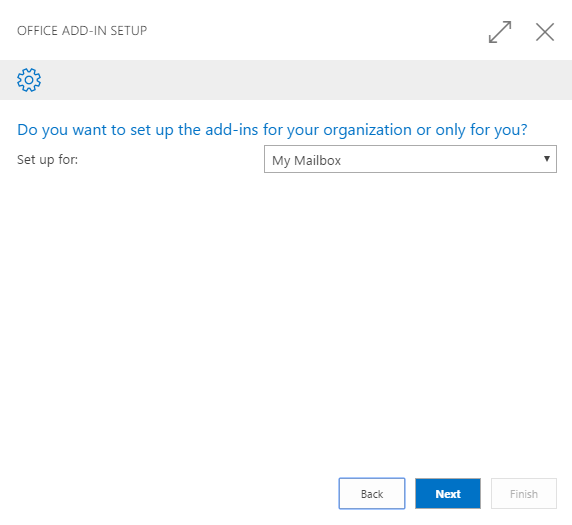
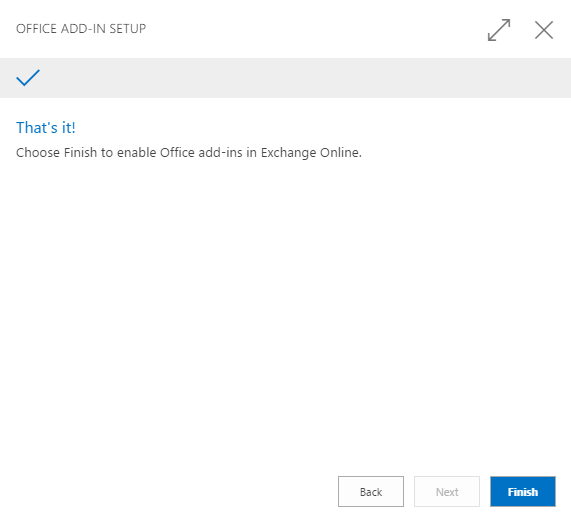
Go through the wizard, select your mail (or your organization) and type in your Office 365 username and password:

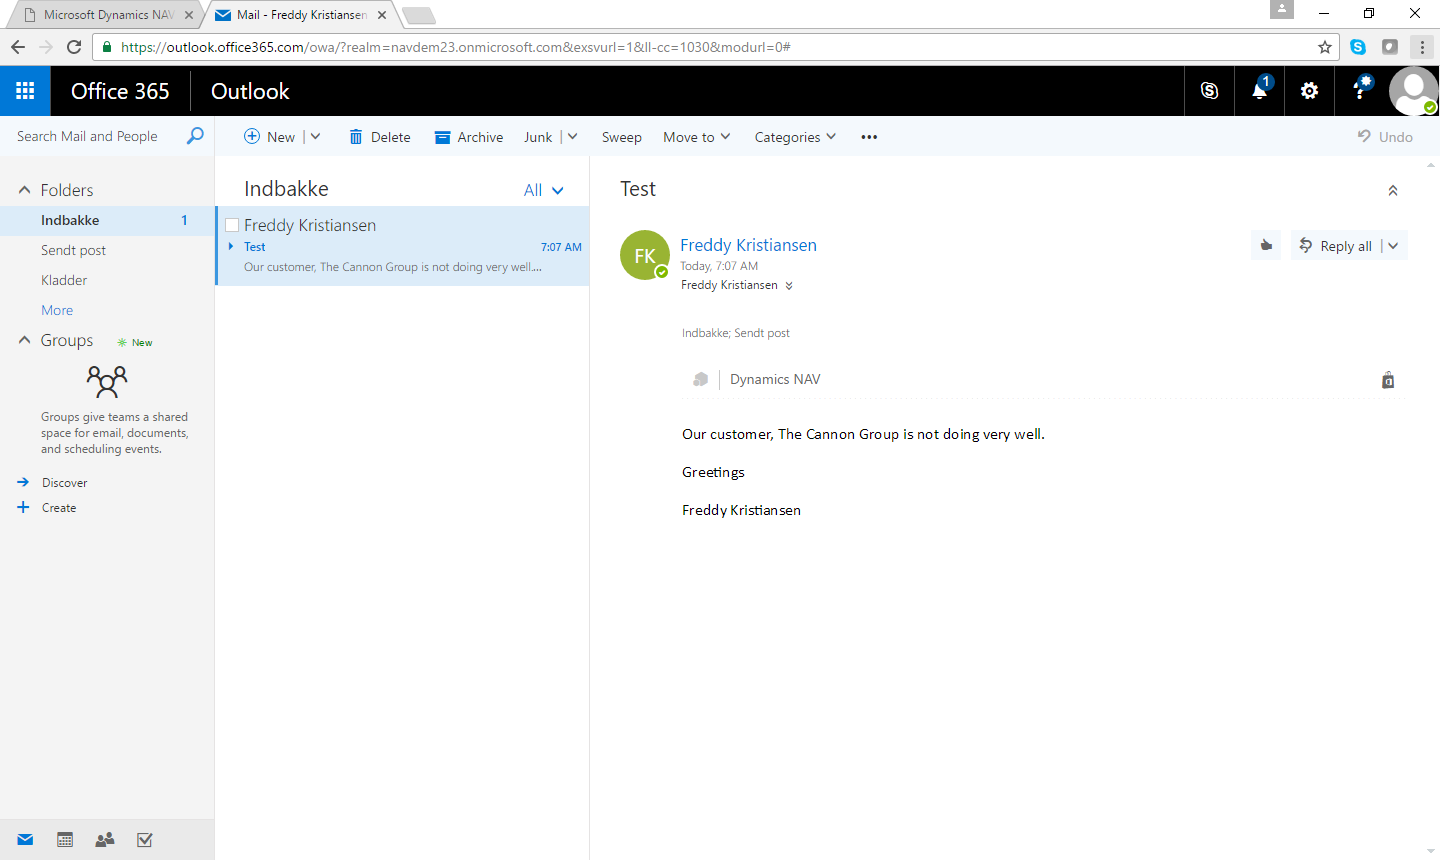
Now navigate to Outlook in Office 365 and send and email to yourself to test the NAV 2017 Add-in.
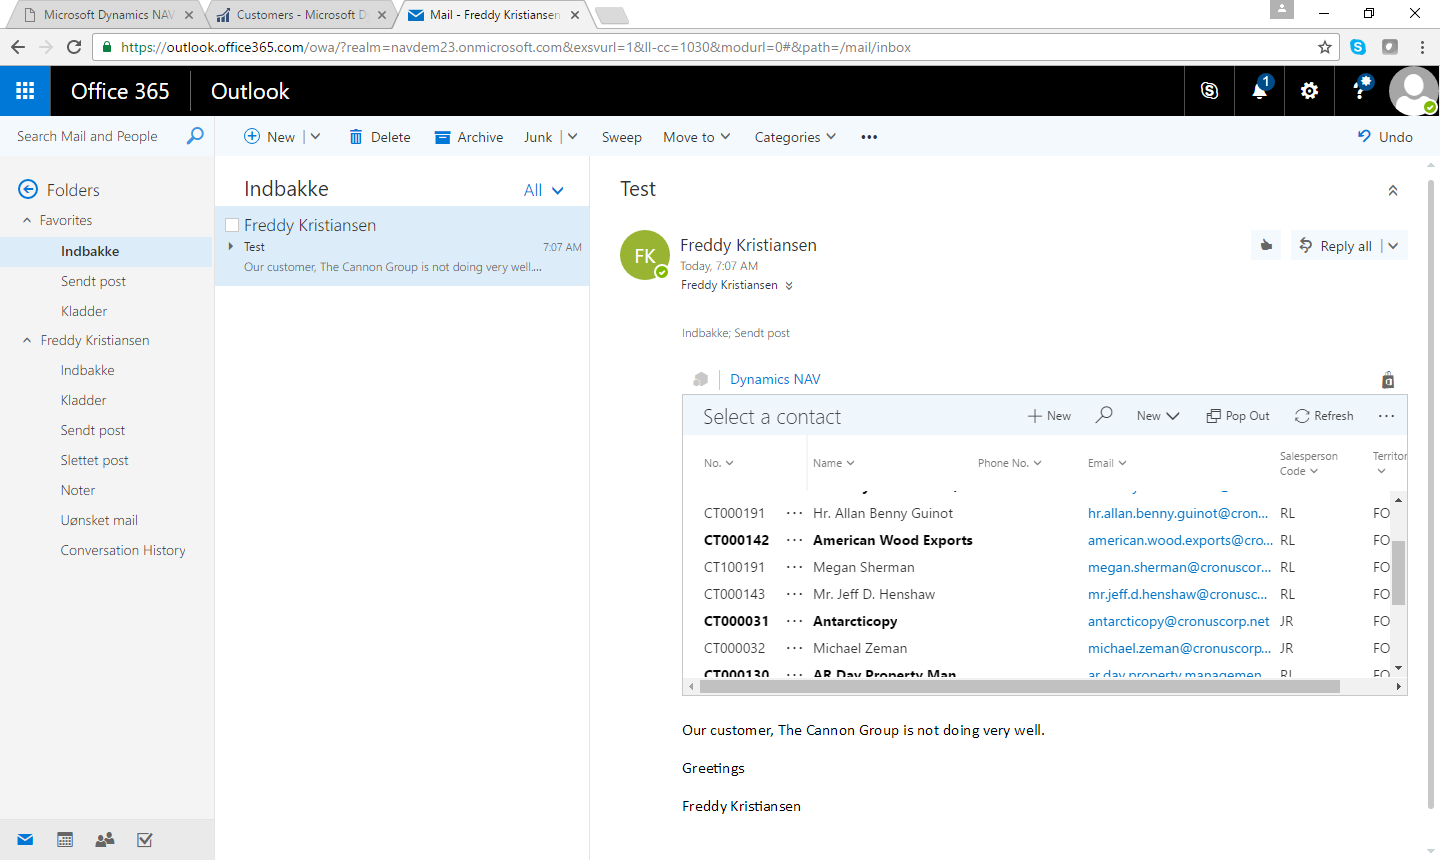
When you click Dynamics NAV the first time, it will ask you to login to NAV 2017 using your Office 365 username and password:
Setup Email
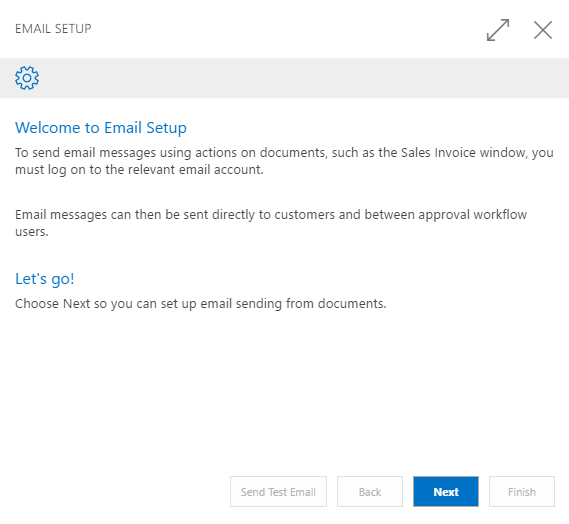
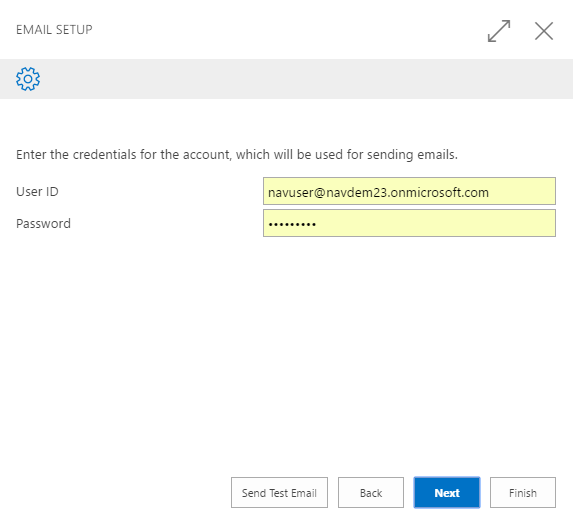
Setting up E-mail from NAV 2017 is really easy. Start your Web Client like described in the section about starting the Web Client. In the Role Center, Click Actions and select Assisted Setup & Tasks.
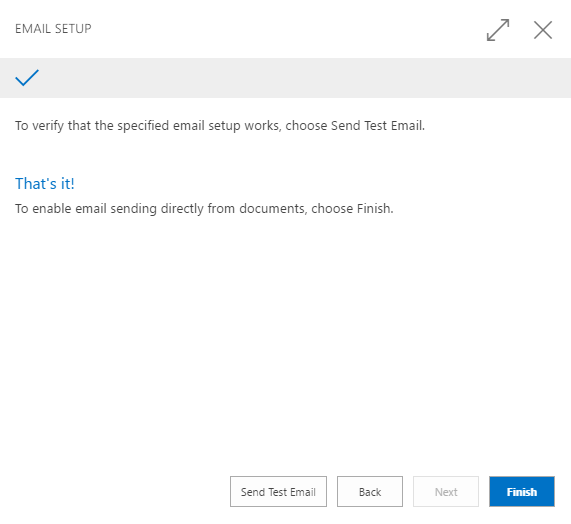
In the Assisted Setup list, Select Setup Email. This will guide you through a very easy 4-step wizard, which sets up the E-Mail connection. On Step 3, it is recommended that you click Send Test Mail to check your setup.

Setup Email Logging
Setting up E-mail Logging from NAV 2017 is really easy. Start your Web Client like described in the section about starting the Web Client. In the Role Center, Click Actions and select Assisted Setup & Tasks.
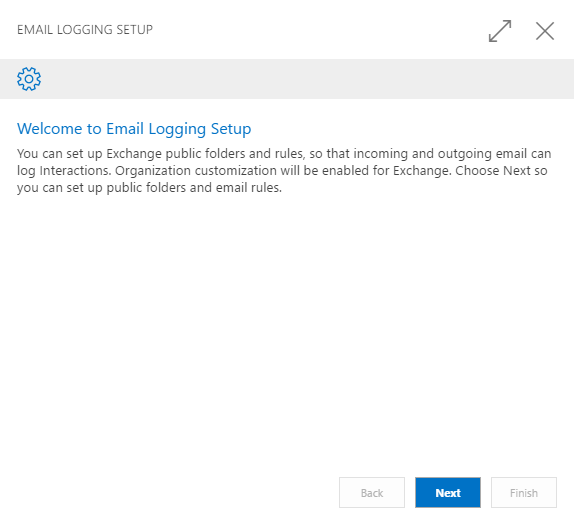
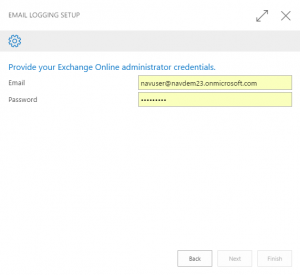
In the Assisted Setup list, Select Setup Email Logging. This will guide you through an easy 3 step wizard, which sets up Email logging.

Do you want to Edit In Excel
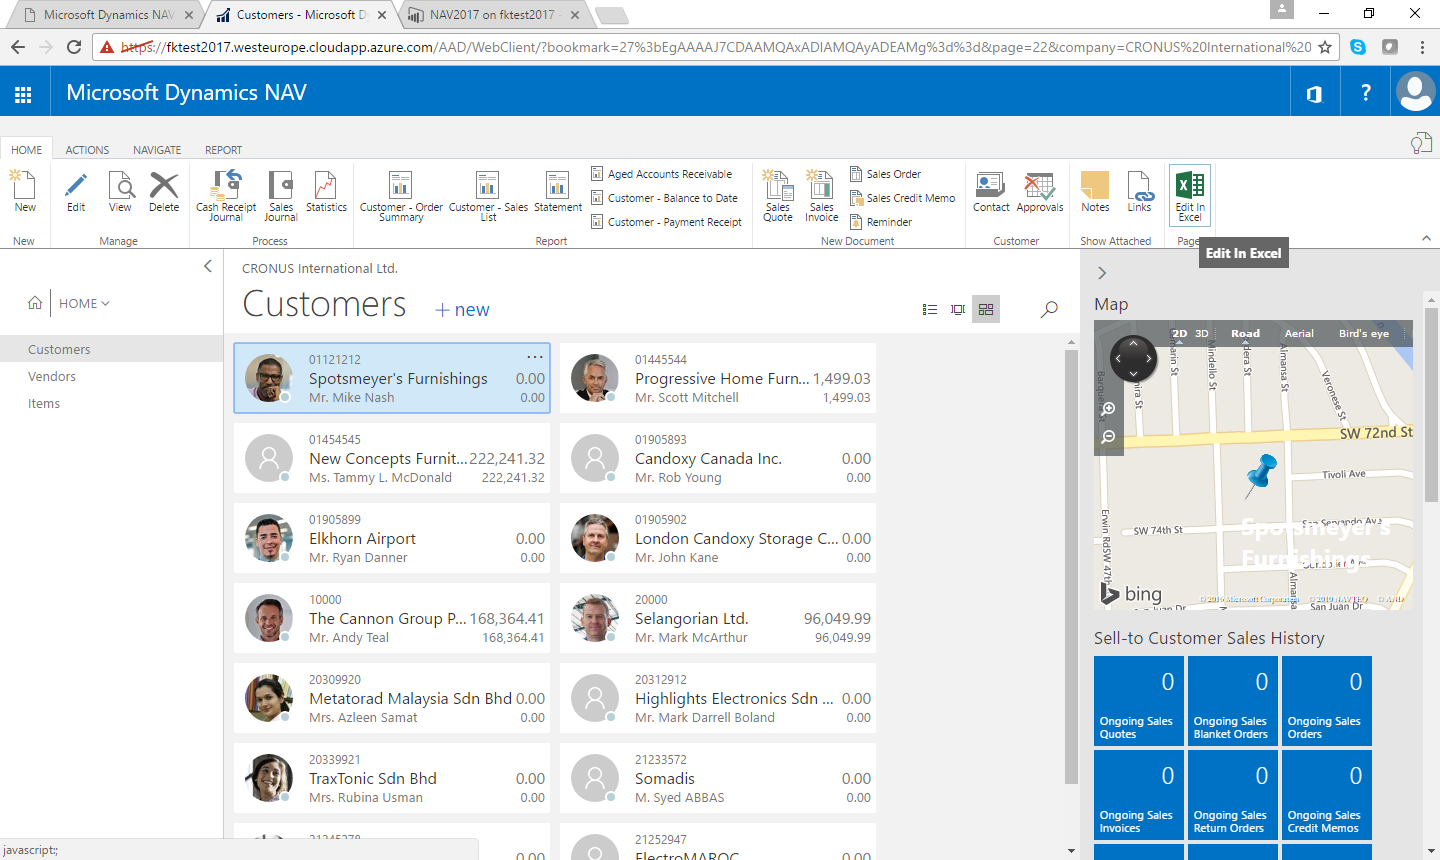
Good news: Everything has already been setup for you. Start your Web Client like described in the section about starting the Web Client. In the Navigation pane on the Role Center, click Customers and select Edit In Excel in the ribbon.
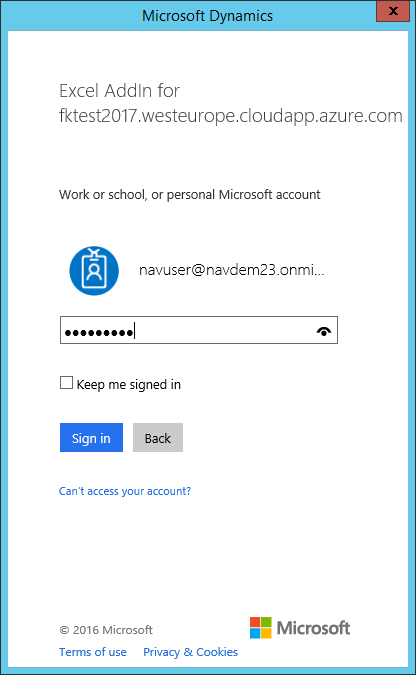
Now the devil is always in the detail. You might run into issues if Excel is installed with a different Office 365 account. I had to install Excel on a different machine, using the Office 365 credentials used to setup NAV 2017, which was pretty annoying. When Excel opens, you will have to enable editing:

and then sign in to the Excel Add-in:

Like with embedded PowerBI, you will have to sign in and give permissions to the Excel Add-in:

and then you can edit your customers in Excel:

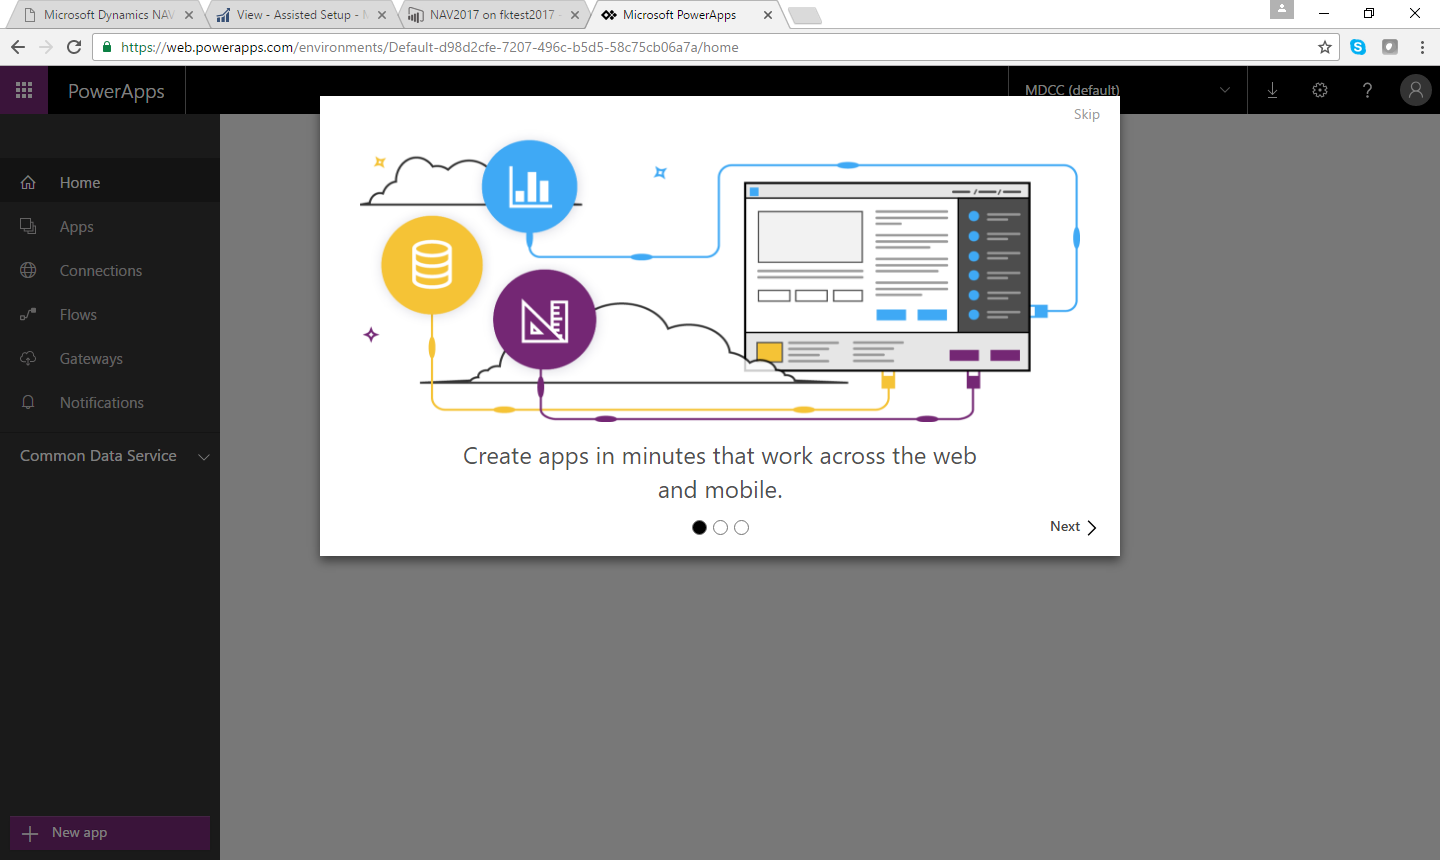
Create your PowerApps
So, you want to create PowerApps... - wait no more. Navigate to https://powerapps.microsoft.com/en-us/ and sign in with your Office 365 account:

and start your free trial:

Wait a few minutes...
And now you are ready. Start by adding a New Connection (top right hand corner):
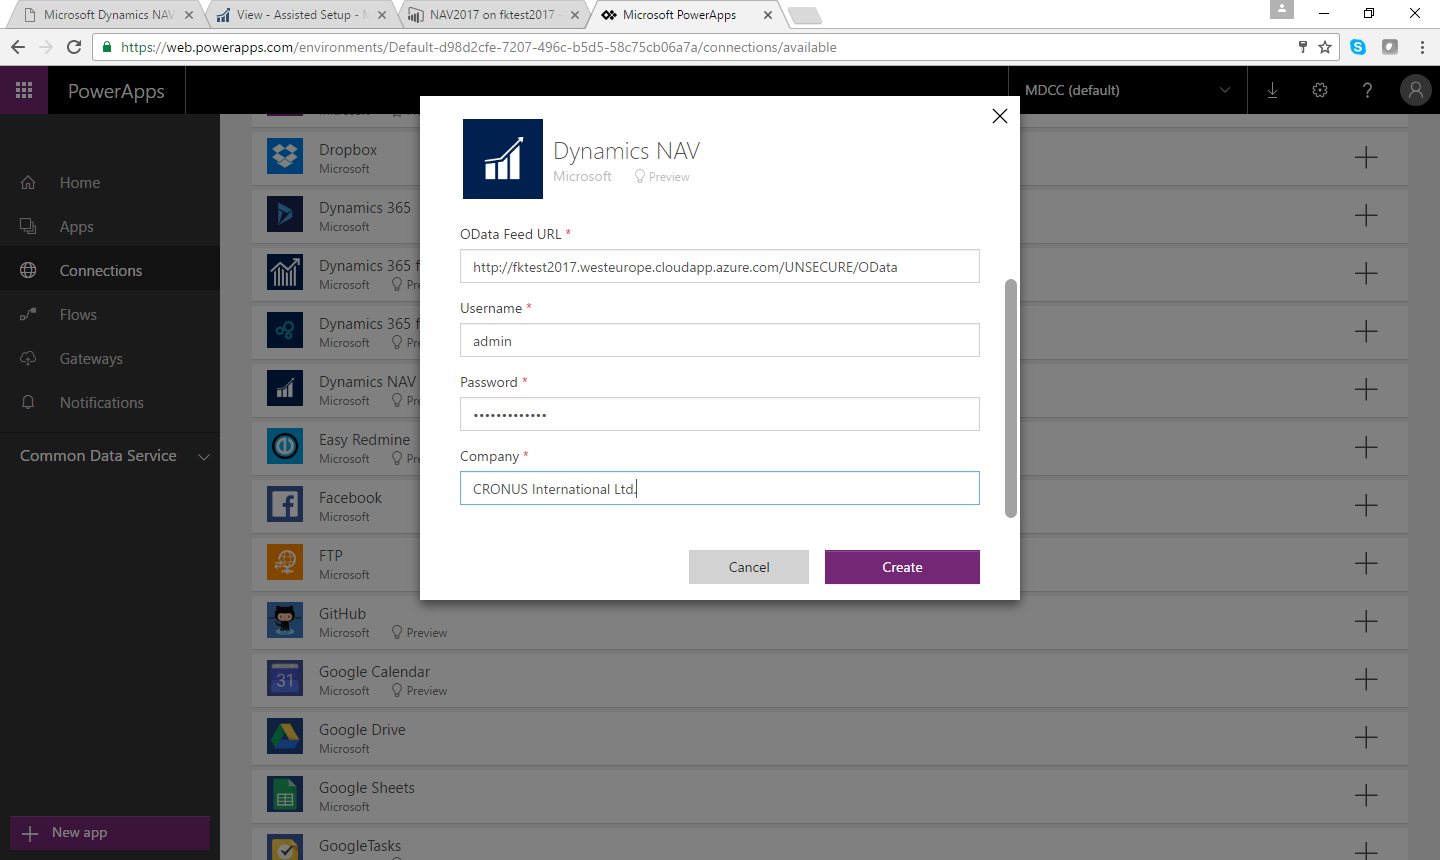
In the new connections dialog, add your UNSECURE OData endpoint. On the landing page you can right click the View UNSECURE OData Web Services and copy the link address to the clipboard.
As the Username and password you use your NAV admin username and the password (NOT your Office 365 credentials). Company name is the Company name from NAV, if you are using W1, the company name is CRONUS International Ltd.
Having created your Connection, it is time to create your first PowerApp. Press New app and select to use PowerApps Studio for web: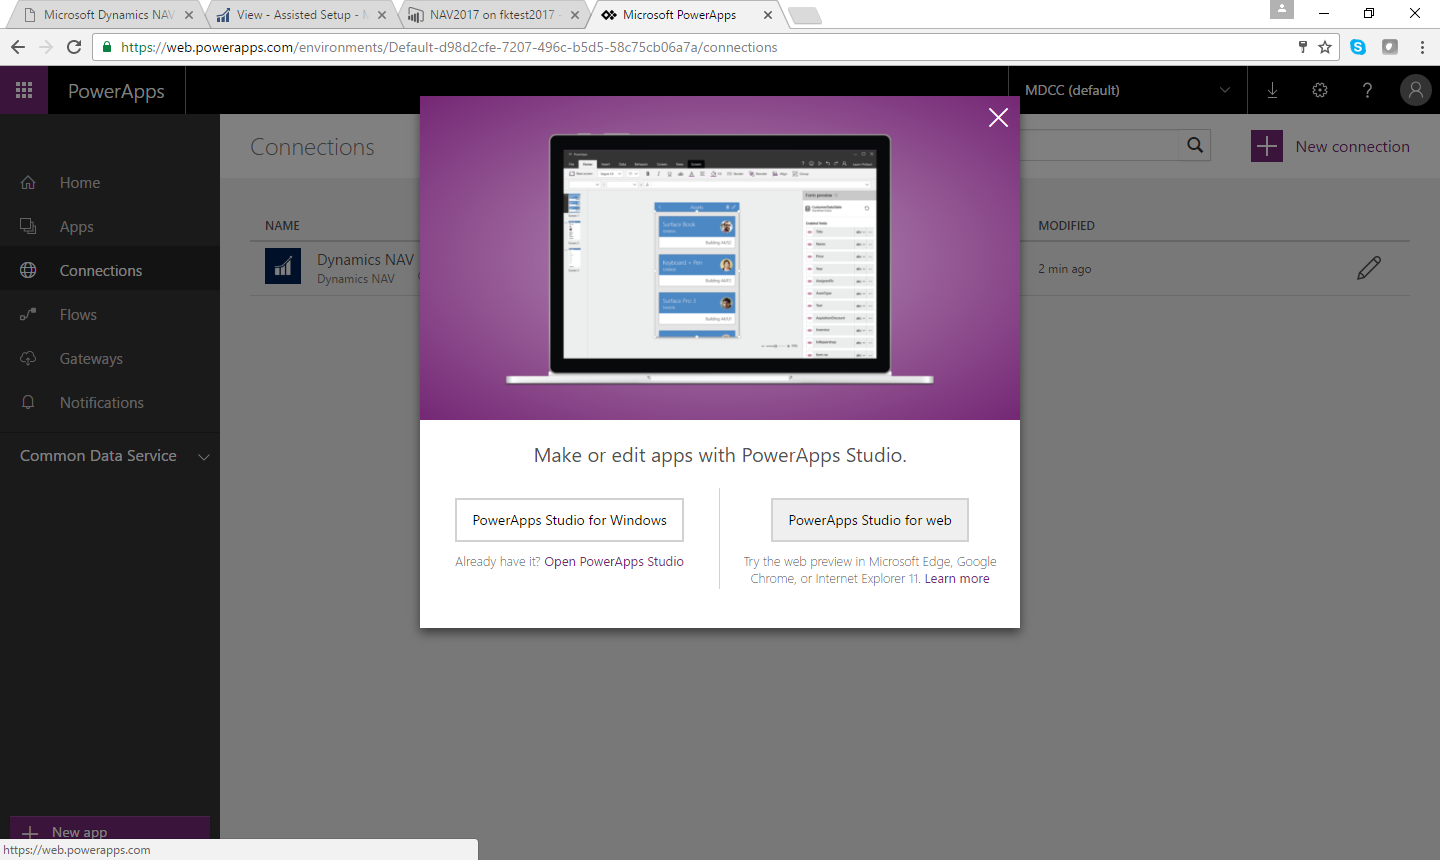
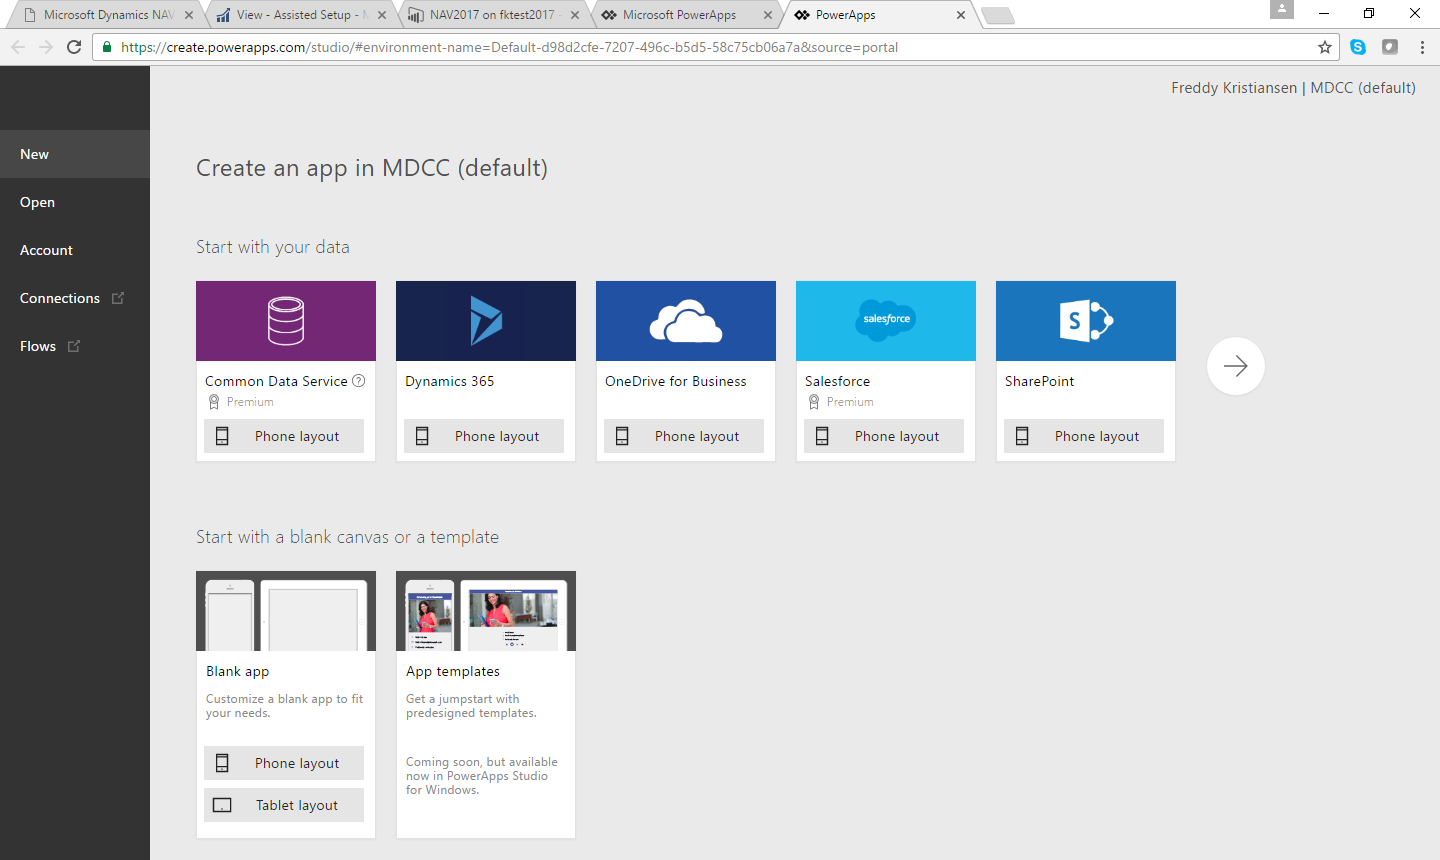
In the create an app window, press the white right arrow and locate your data/connection:
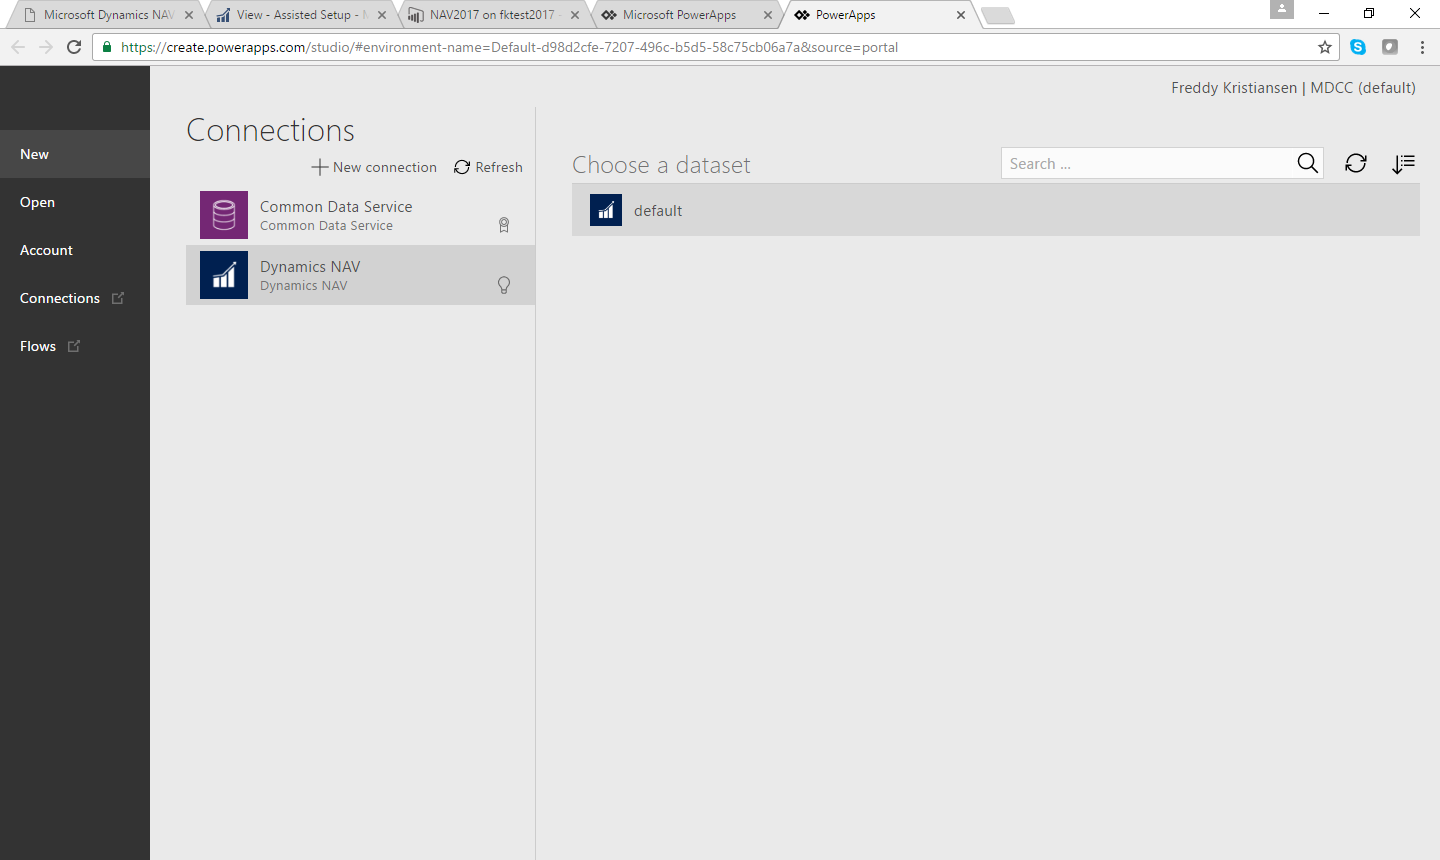
Select your connection and your dataset:
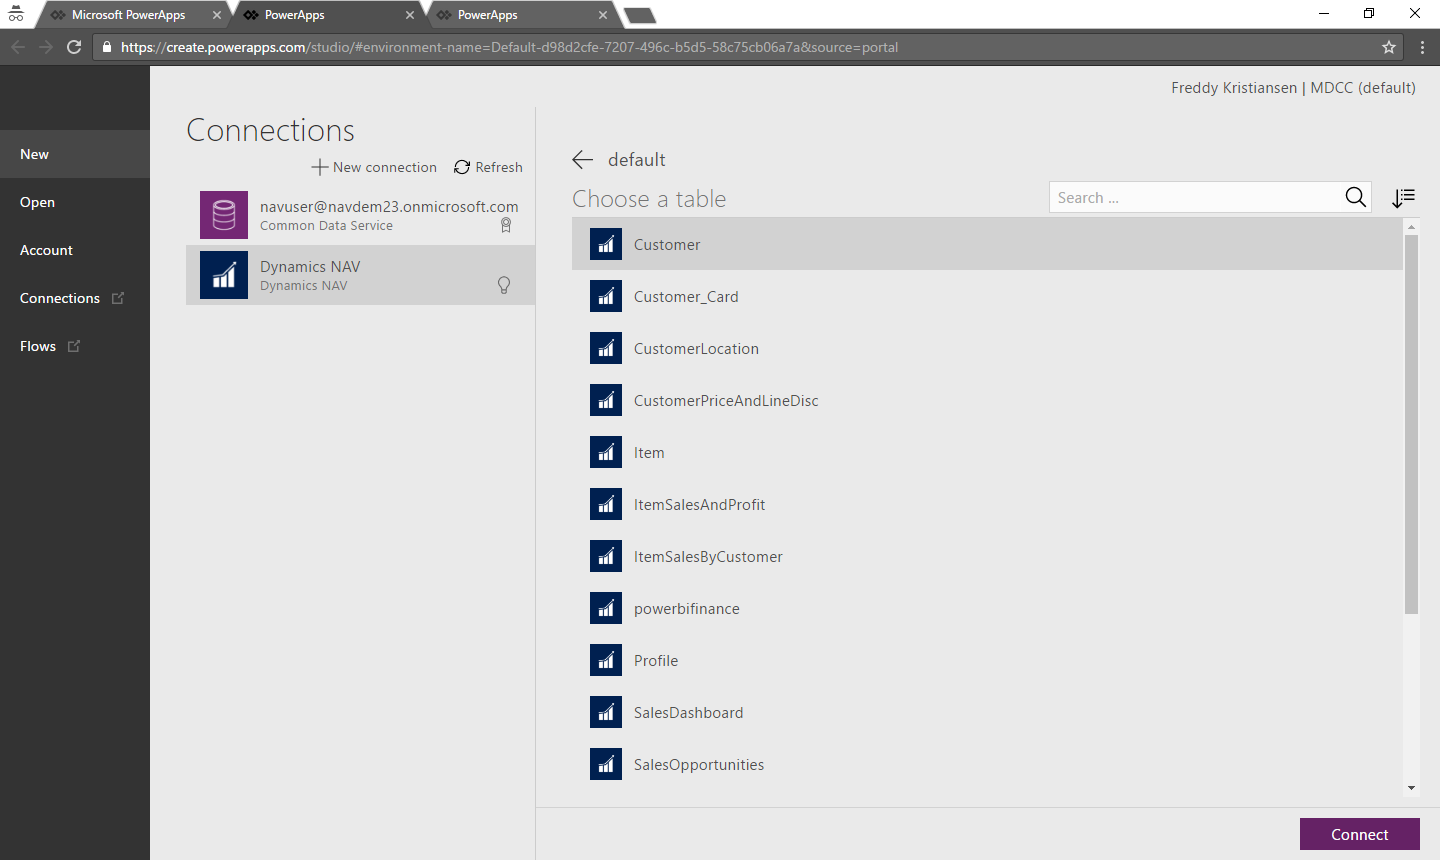
and select the Customer table:
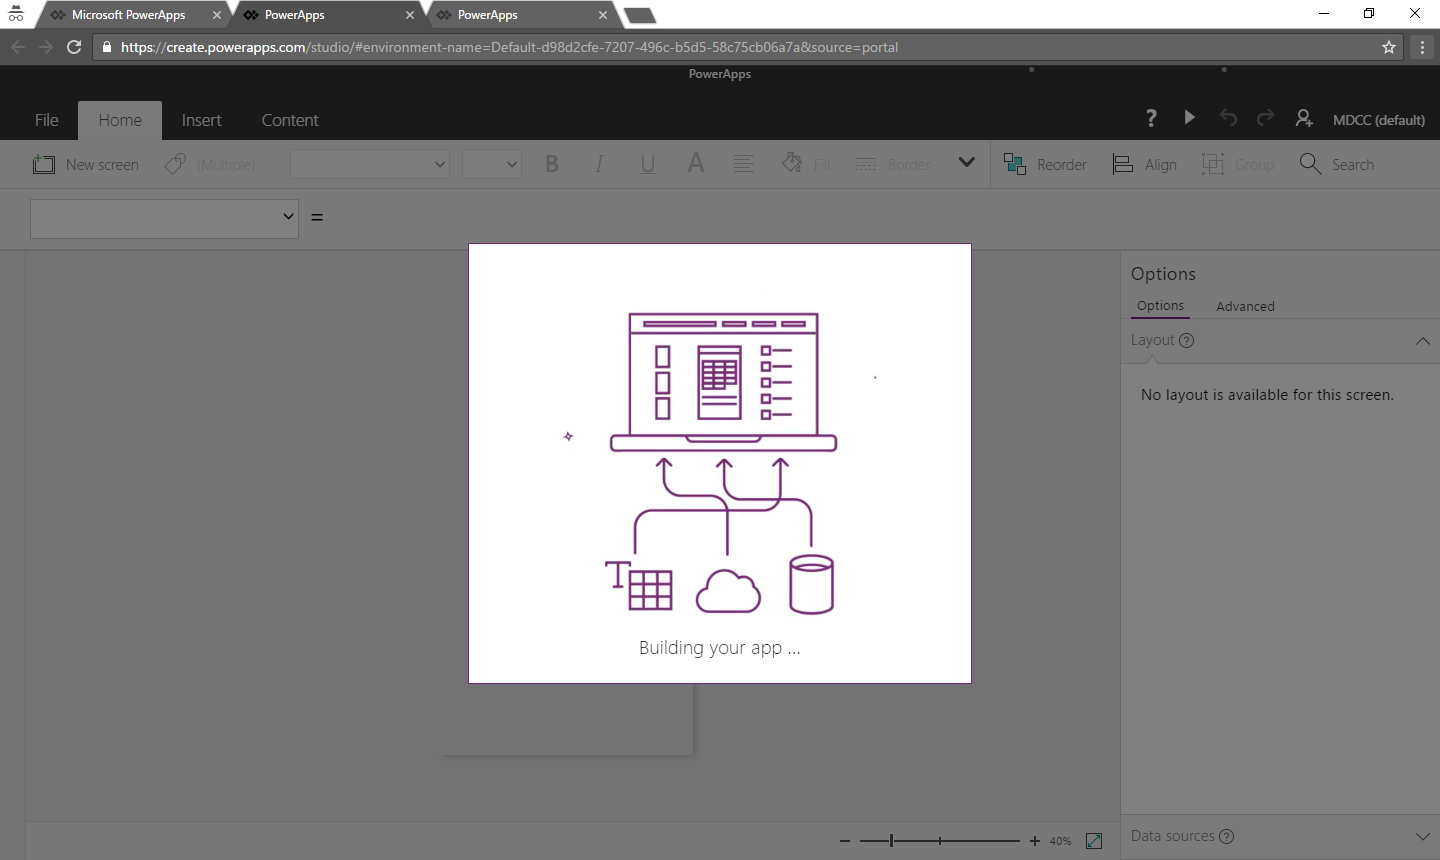
and wait...
Voila, your first PowerApp is ready. Press the Play button in the top right corner:
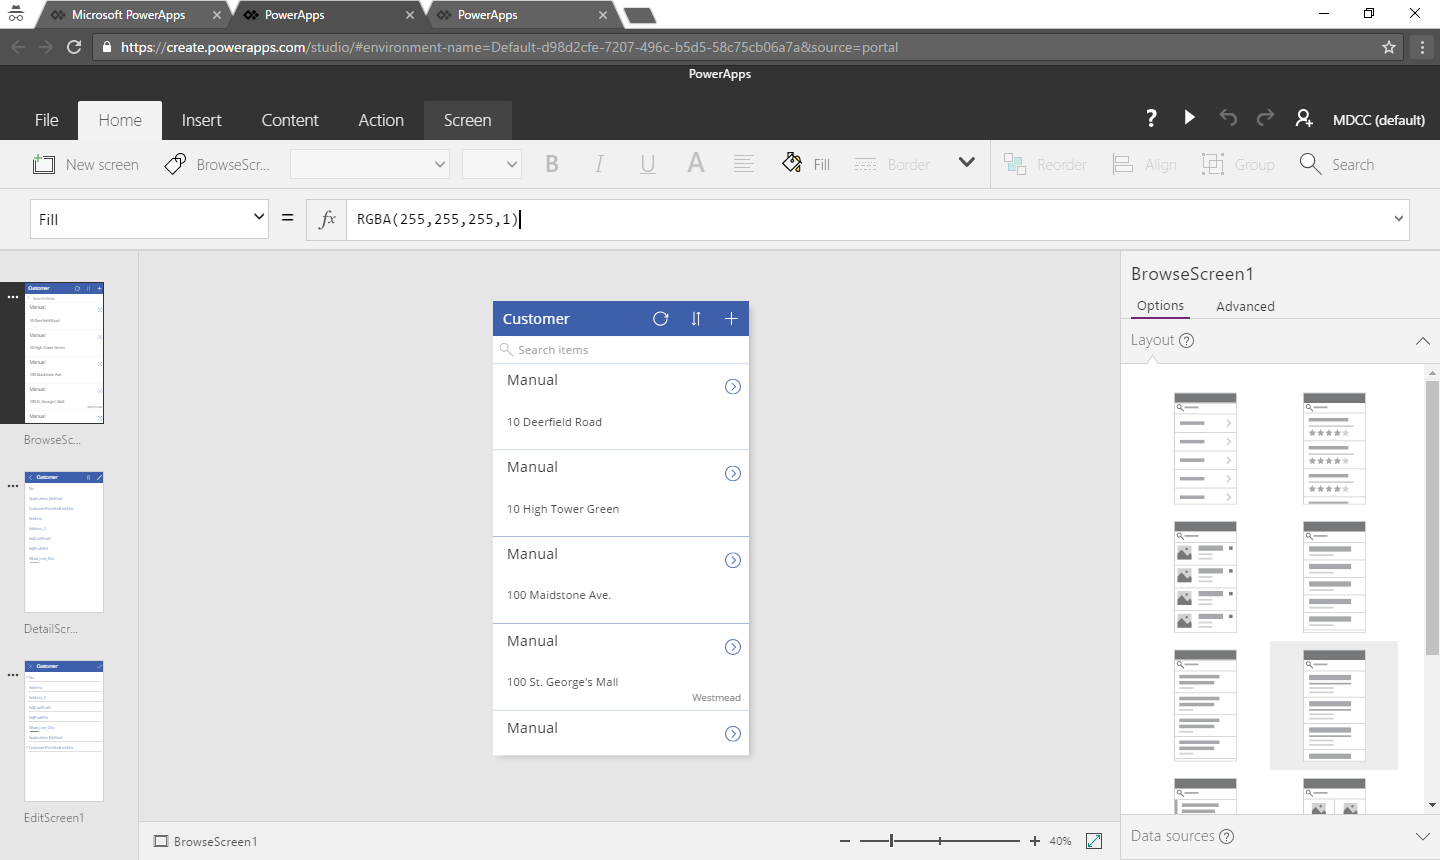
and... here you are - your first PowerApp:

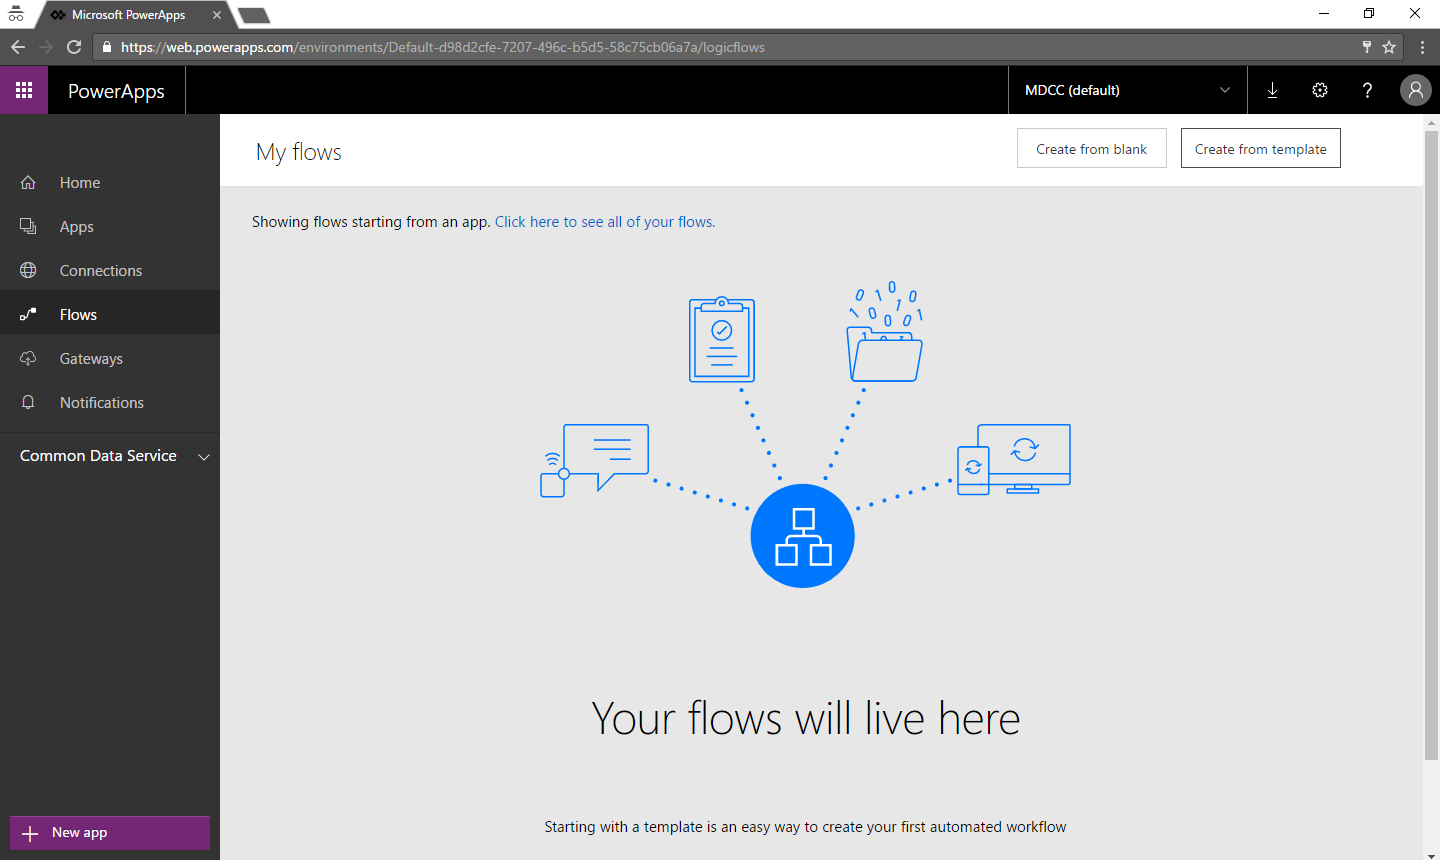
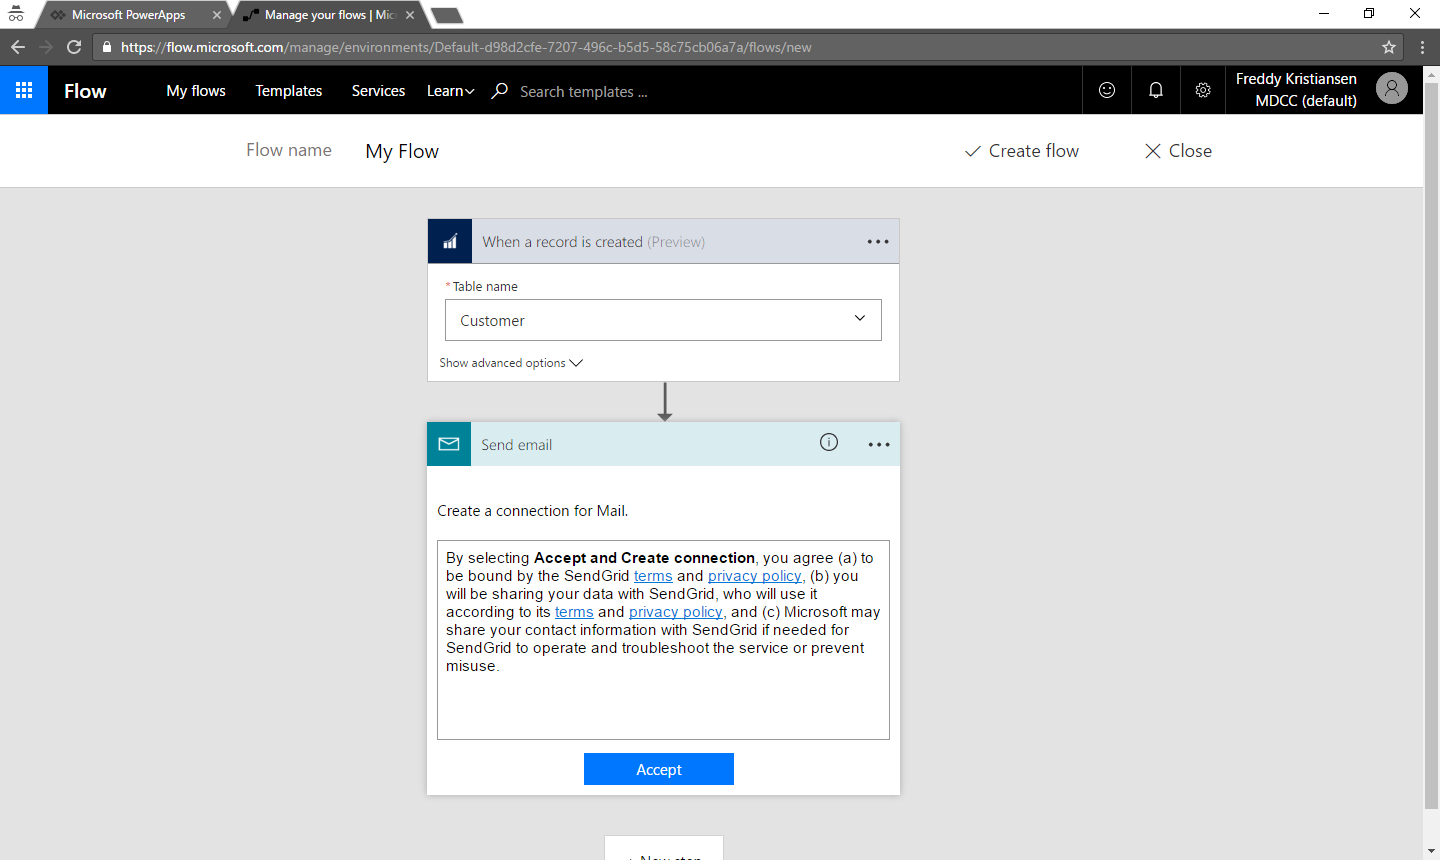
Create a Flow
Flows lives in the same area as PowerApps. In order to create a Flow, you need to have a Connection created and you can find information how to do this in the previous section about PowerApps. Click Flows:
Create a new Flow and select the Template: Dynamics NAV: When a record is created. 
Select the Customer table
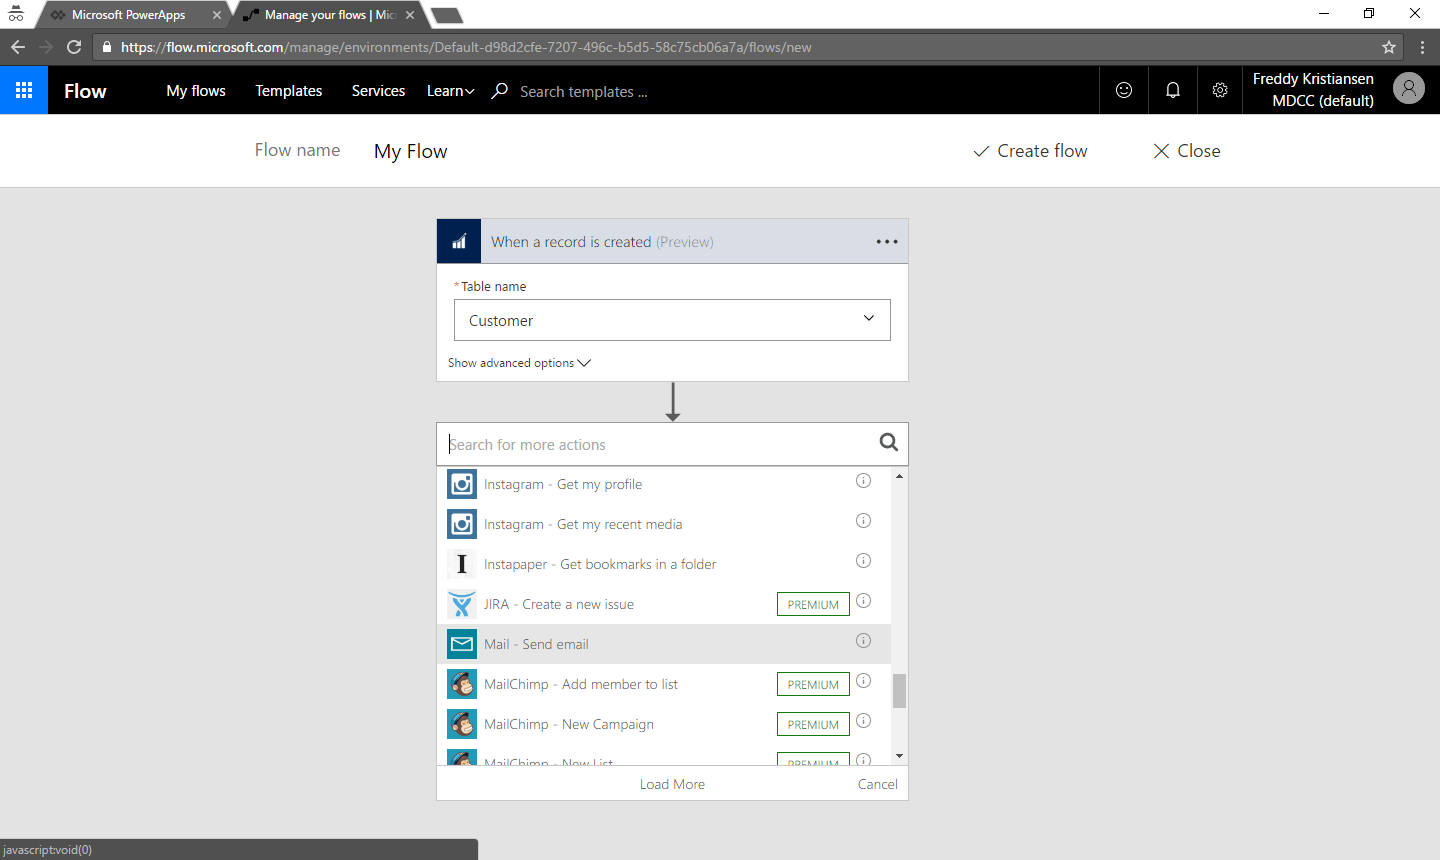
As the next step, select the send email step:
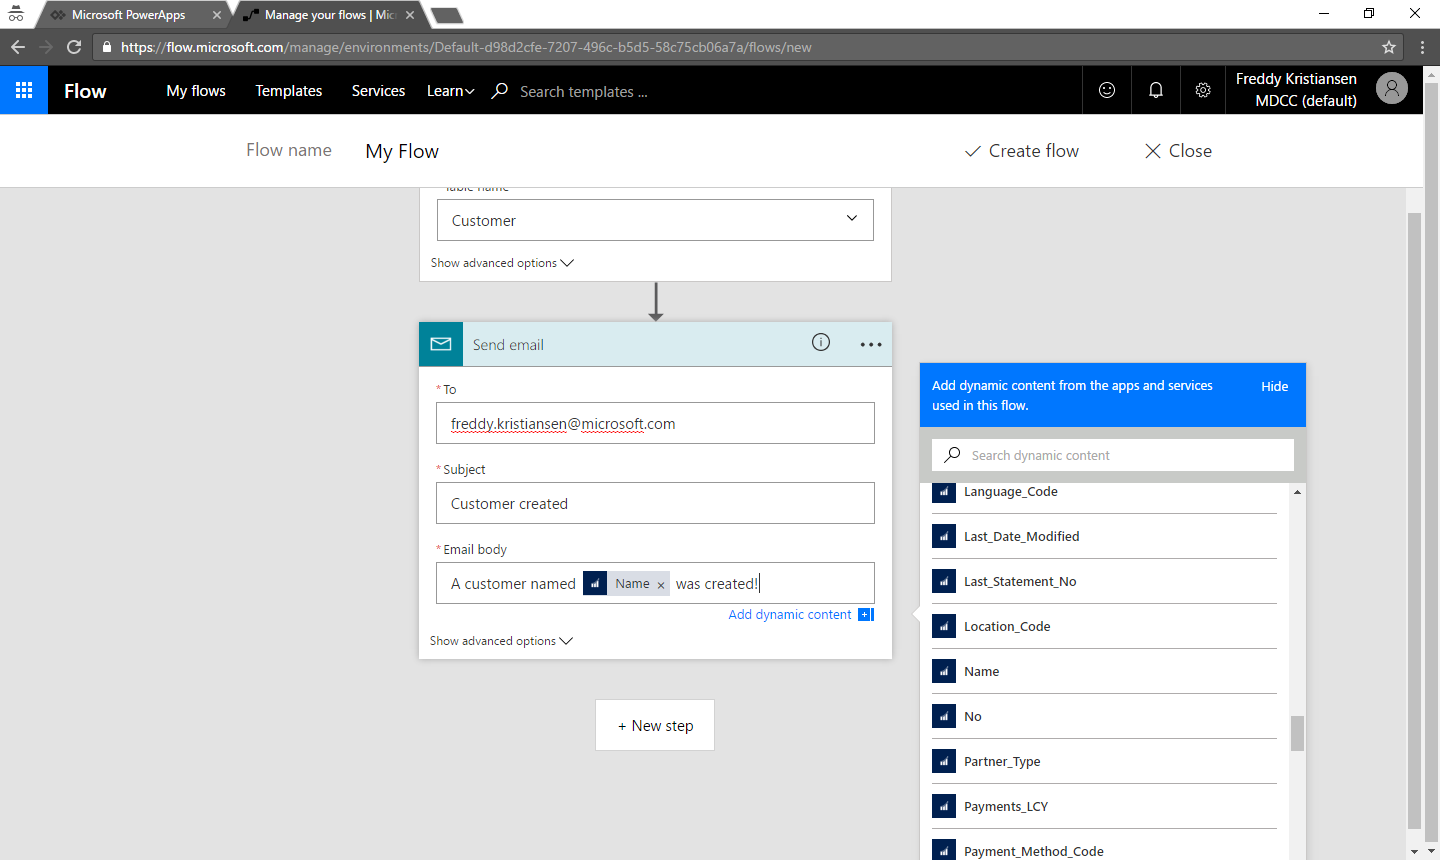
Specify the reciever of the email and a text. In the text you can embed fields from the connection:
Your new flow is running...

and after creating a customer in NAV 2017, I got this email:
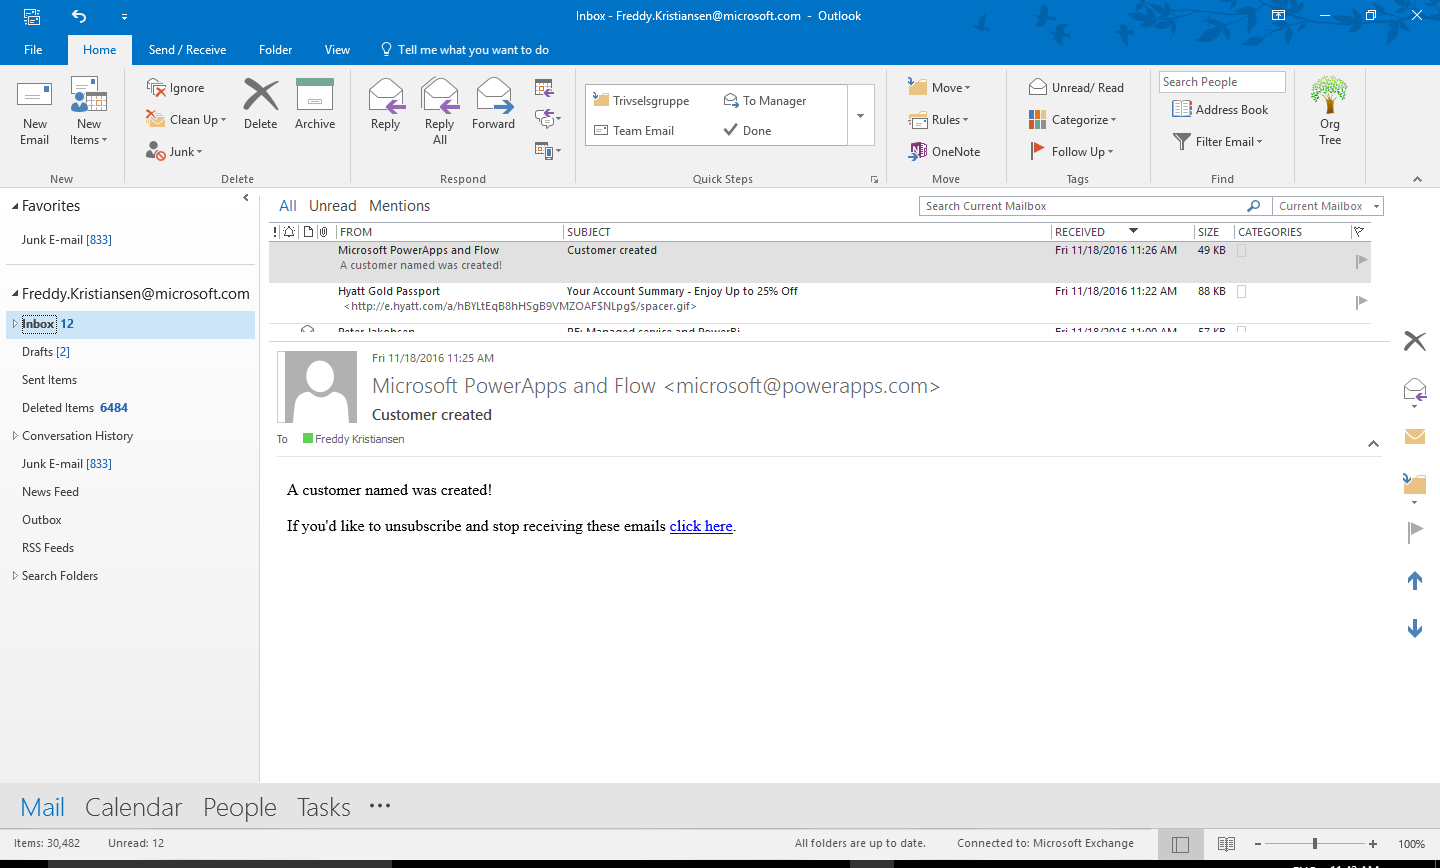
If this was a session with an audience, I would ask: Does anybody knows why the customer name is empty? and if the audience had been working with NAV for more than just a short time, they would all answer: Because the created trigger is invoked when the record is created, not when you have filled out the fields and pressed OK on the customer card. It might have been a better demo to hook on to the customer modified event in Flow.
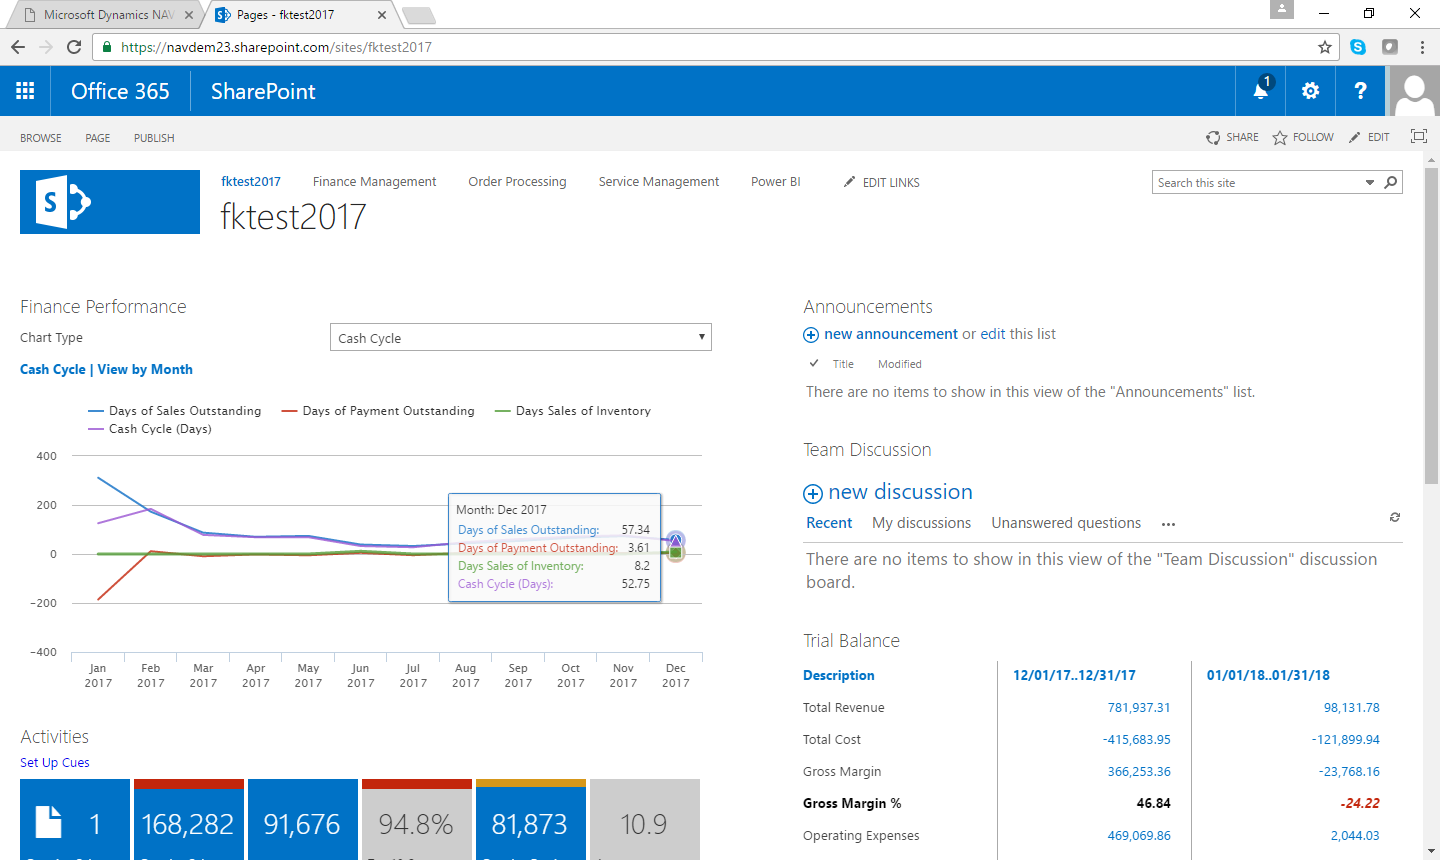
Access NAV 2017 via a SharePoint Portal
On the landing page, click the link called Access SharePoint Site.
and you will be taken to a SharePoint Portal that looks like this:
In the waffle menu, you will find links to your Apps (PowerApps and Flow are still being setup?)

And in the Web Client you will find a button in the top right corner, which also will take you to your SharePoint portal:
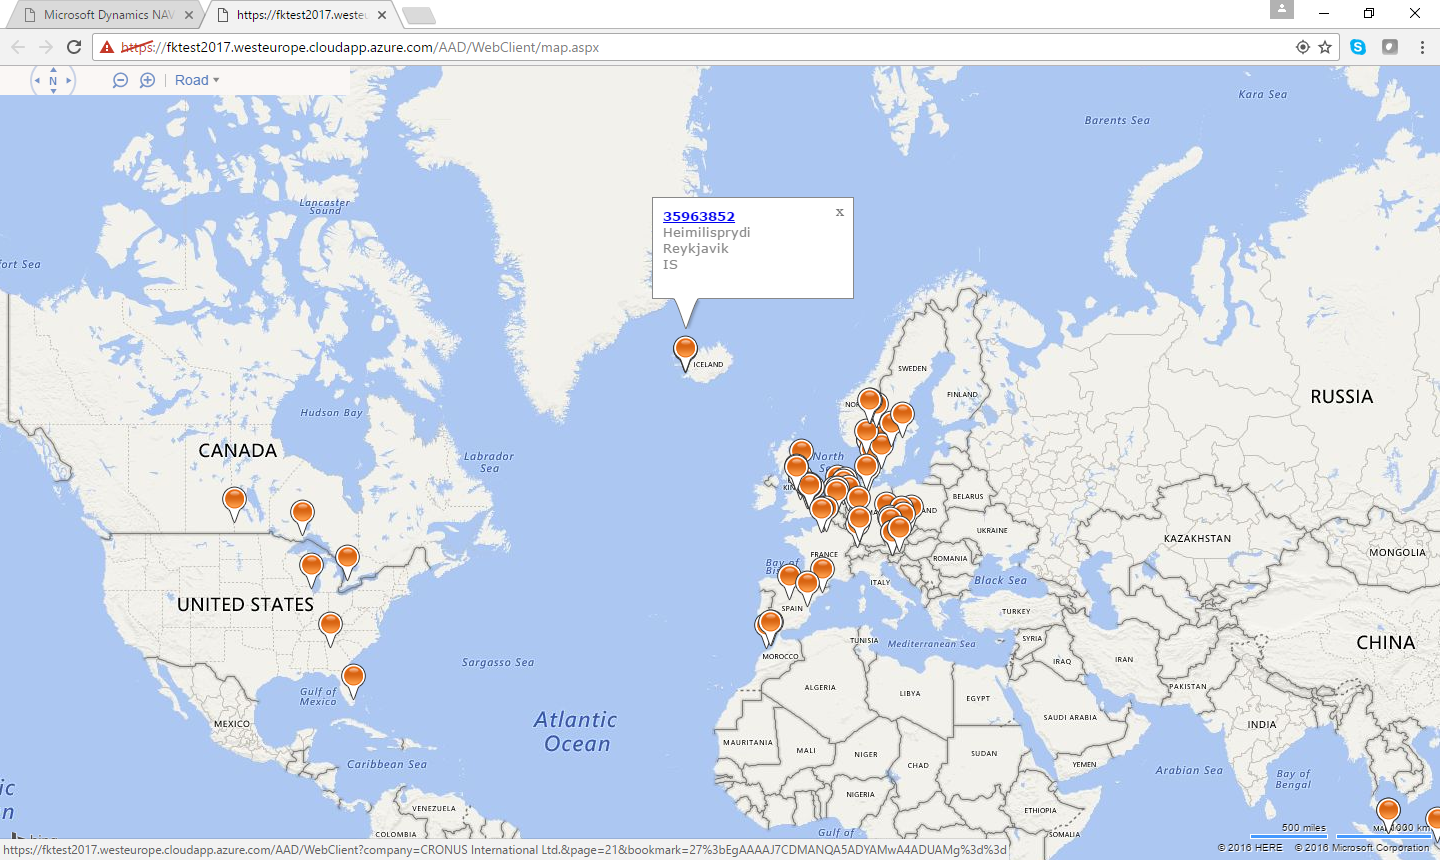
View a world map of your customers
On the landing page, click the link called Show Customer Map.
The browser might ask for permission to use your physical location and then show a customer map centered in your current location.
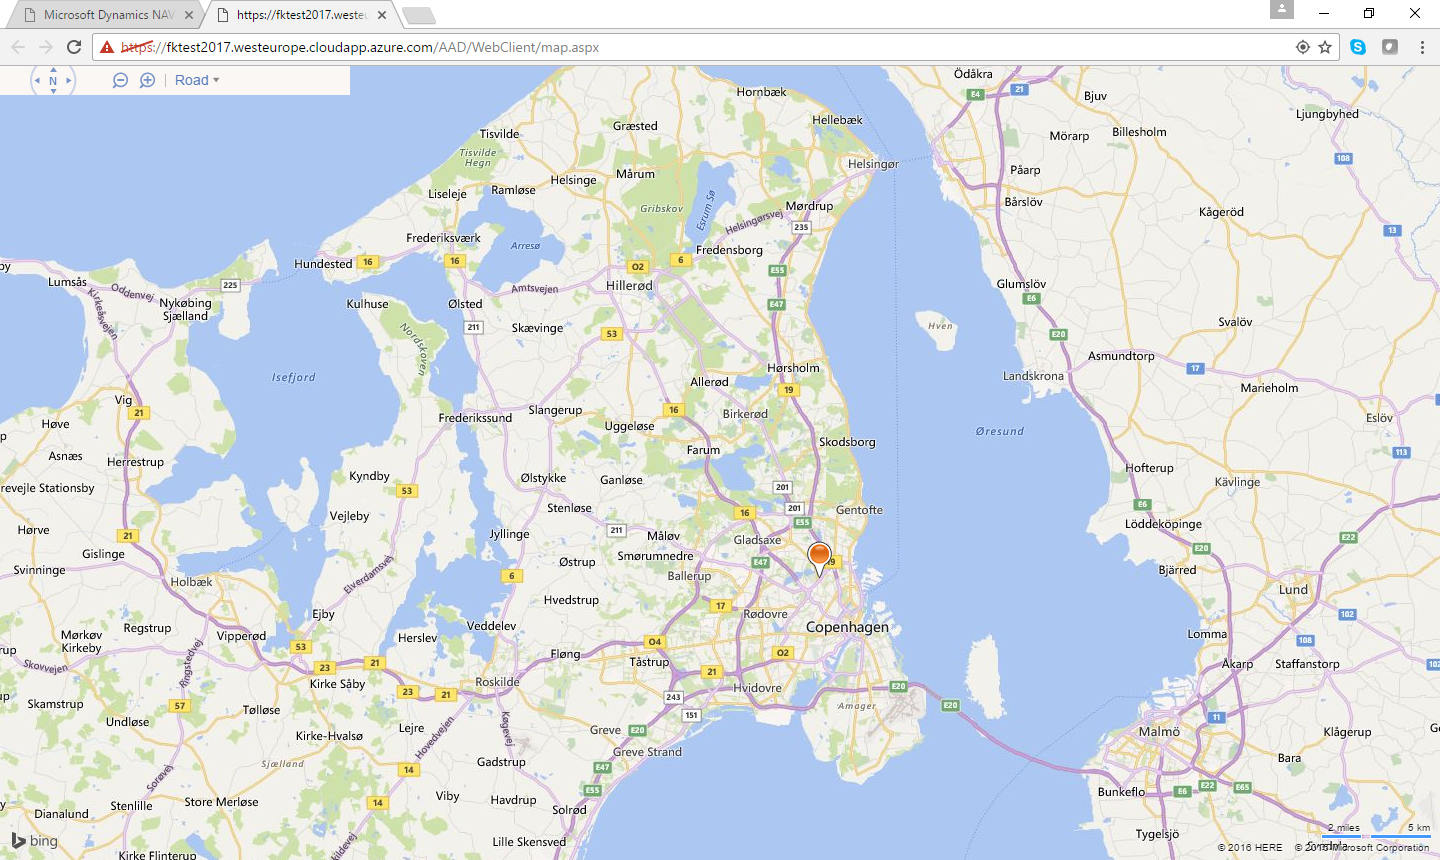
When you zoom out, you will see all customers and when you hover over a customer, you will get a link for navigating to the customer in the Web Client.
Connect your Phone or Tablet to NAV 2017
In the top left corner of your landing page, you will see a QR code, with the device you want to use, scan that barcode:

Your device will now navigate to your landing page. At the bottom of the landing page, you will find links to download the NAV 2017 app for your device:

Before you open your app and connect to your NAV 2017, you will need to install the self-signed certificate on your device as well. At the top of the landing page, you will find a description on how to do and a link to download the self-signed certificate.
Last, but not least, the easiest way to configure the app on your device to your instance of NAV 2017 is to click the Configure App link on the landing page. It should autoconfigure the app to the URL for NAV 2017.
Note: there are two configure App links. One with Office 365 authentication and one with username/password authentication.
Access NAV 2017 using the Windows Client
The Windows Client is available for ClickOnce deployment on the NAV 2017 environment. On the landing page, click the Install Windows Client link under Office 365 authentication (or under username/password authentication). The system will open a page, on which you need to accept the license terms and press install now.
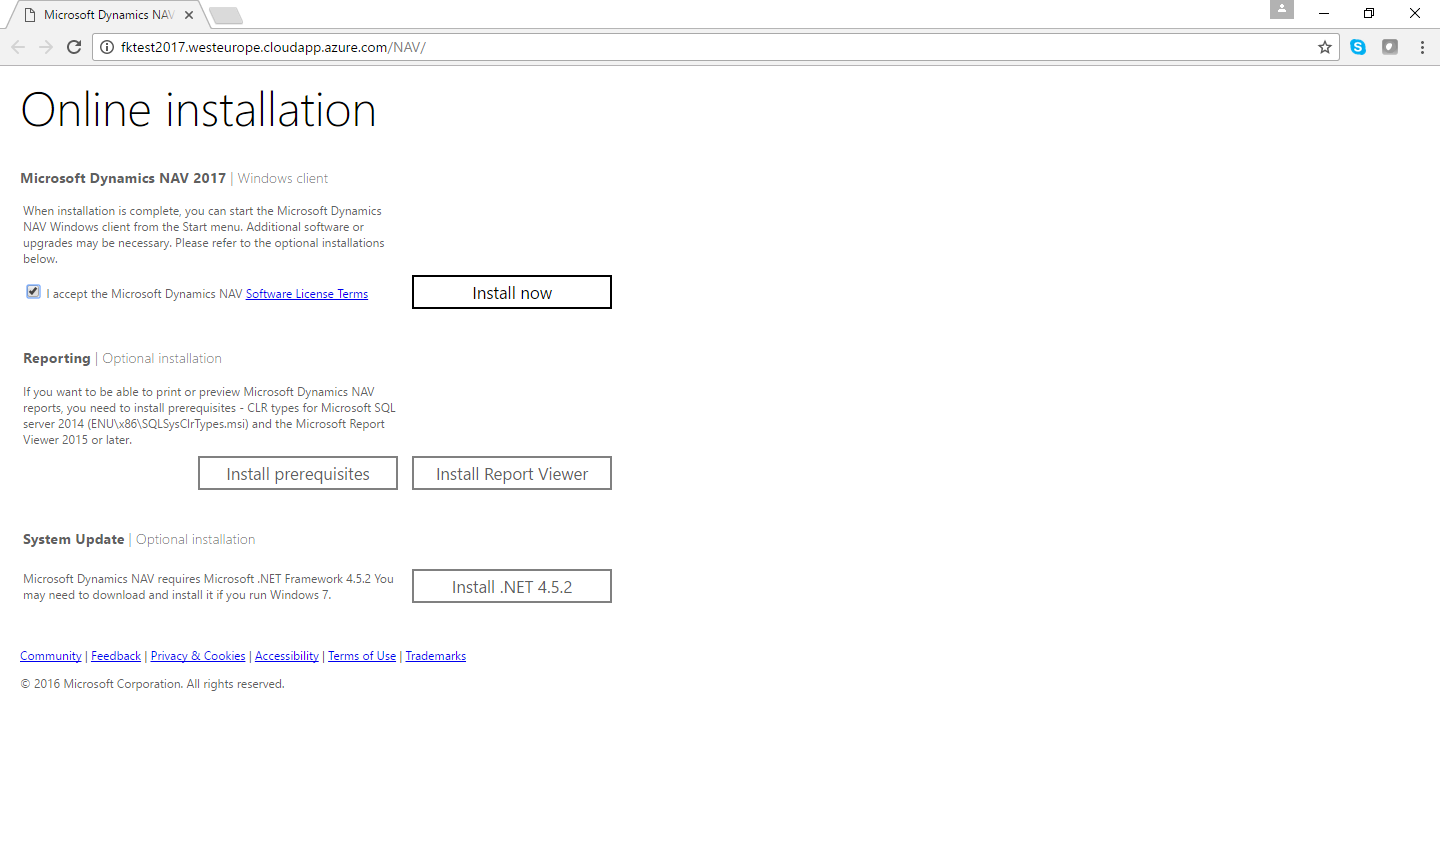
The Windows Client will now be installed on your PC using ClickOnce. Read more here.


When the installation is done, you will be asked to authentication and you will now be running the Windows Client locally against a NAV Service Tier on Azure.
Connect to your Virtual Machine
If you need to connect to your Virtual Machine, then you will find a link to a Remote Desktop connection to your Virtual Machine (server1) on the landing page. Click that and login with your Virtual Machine Administrator username and password.

[audio m4a="https://msdnshared.blob.core.windows.net/media/2016/11/ThatWasEasy.m4a" preload="metadata"][/audio]
BTW - if you ever succeeded in setting up all of this without the Gallery image, please write in the comments how much time it took, from start to finish... (or maybe how much time it took to get some of the way:-)) - we can multiply this with a lot of people - to see how much time people actually save by using the NAV 2017 image on Azure.
Enjoy
Freddy Kristiansen
Technical Evangelist