Updates to the Azure Gallery Image... - kind of...
Note: Updated on November 16th with info on the Excel Add-In
Note: Update on November 18th with info on PowerApps and Flow.
The Microsoft Dynamics NAV 2017 Image on Azure has been live for a few weeks and I have received a lot of feedback that it is very hard to setup the new things in NAV, like:
- Outlook Add-in
- Excel Add-in
- Embedded PowerBI
- Microsoft Flow
- PowerApps
- Azure services
- etc.
Indeed, you are right. It is very hard. especially when you are used to just running a script and have everything done for you, but if you think back, it is not that different from when you had to create Provider Hosted SharePoint Apps in Visual Studio, setup self signed certificates that didn't work with anything but Windows etc. etc.
I (nor Microsoft) ever promised that the scripts would include every new functionality exposed in NAV. I am trying to, but it is hard to ship something a few days after a product release and then have everything ready by then. It was my intention to fix these things in the upcoming Cummulative Updates, but based on the feedback and how many people have spent time trying to set something up, I have made an exception.
No new Image on Azure!
There is NOT going to be a new image on Azure before CU1 (which comes in December), I cannot do that. The Image follows the releases of NAV and that is how it needs to be, so if you are creating your demo environment manually using the classic portal or the new portal, you will have to wait until December to get help.
But...
If you use the https://aka.ms/navdemodeploy to deploy your Demo Environment, this script will automatically do the "extra" stuff needed, to make some of these things work, it will overwrite some of the DEMO scripts with a newer version during deployment and then run the scripts as normally.
So what has been fixed
Here's a list of the things, that the new navdemodeploy script fixes:
PublicWebBaseUrl
In customsettings.config, there is a setting called PublicWebBaseUrl, which is the Url pointing to the Web Client. In NAV 2016 (and 2017RM) this points to the Web Client which is using NAV User/Password authentication. It is now being changed to point to the Web Client using Azure Active Directory (Office 365) authentication when you run the O365 Integration Script.
This fix will make the Outlook Add-in work and is a foundation for some of the other things as well.
App Registration for PowerBI
When you want to setup embedded PowerBI, you will be met by this dialog.
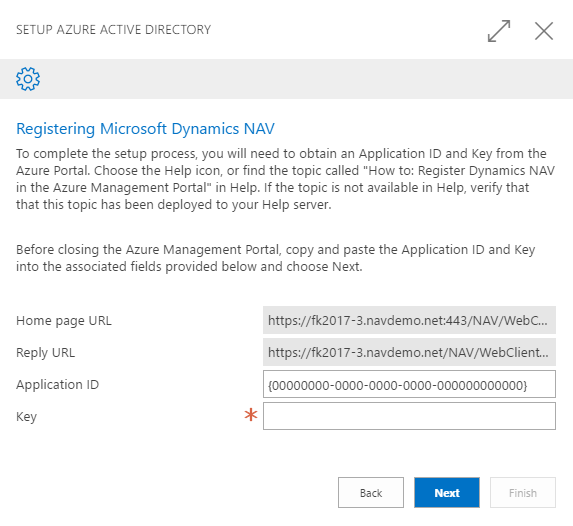
In the text, you will find a link to the Documentation, which looks like this
and if you follow that, you will almost be there.
You will however need to give some services access to your App also (step 8½).
- In the API Access section there is a Required Permissions, click that
- Add delegated permissions to view all reports to the Power BI Service
- Add delegated permissions to Sign In and read user profile to Windows Azure Active Directory
That should do it.
Note, that you need to do this logged into https://portal.azure.com as your Office 365 administrator, which probably isn't the owner of the subscription in which your NAV VM is running.
In the new O365 Integration script, the app registration happens automatically and you should not have to go through this wizard.
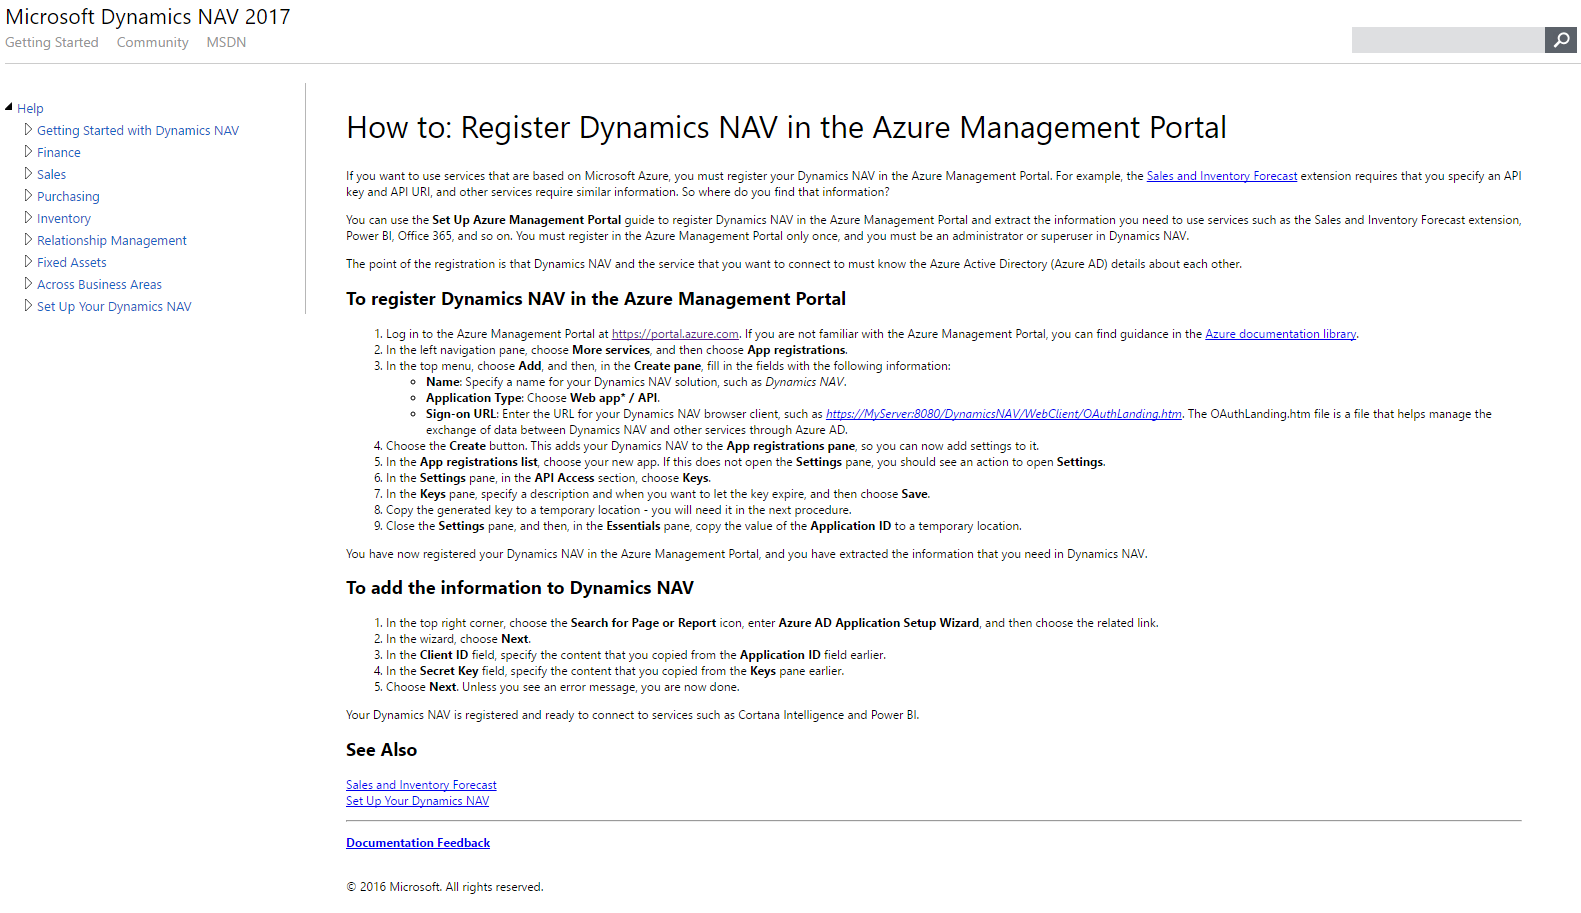
Excel add-in
Just as the PowerBI Service needs an application in the AAD, the Excel Add-in needs the same. The documentation describes how to do this, but there are a lot of things that can go wrong and it is just very hard to troubleshoot.
So... - I set out to add a small PowerShell snippet to my script to create the Excel Add-in App. Little should I know about the length of this journey... (sounds like years:-))
The Ad App for the Excel Add-in needs access to the Single SignOn app for the WebClient, but since the script earlier just used the Set-NavSingleSignOnWithOffice365 CmdLet and that actually doesn't create an App in the Ad, so I had to change that.
Next, I found that not all the things I wanted to do was directly supported by the PowerShell API, so I had to call the Aad Graph API to do some tweeks, not hard, but this made me run into a "feature" in Invoke-RestMethod, which caused me a lot of time. It turns out, that Invoke-RestMethod doesn't close the connection until later on (when there is time for it) and snice the tcp stack only can handle 2 connections to the same hostname, I was constantly getting timeout errors and of course I thought there was something wrong with my code.
To make a very long story short - the O365 Integration script (when you use https://aka.ms/navdemodeploy, will be included on the image for NAV 2017CU1) now creates these three apps in the Aad App registrations for you automatically: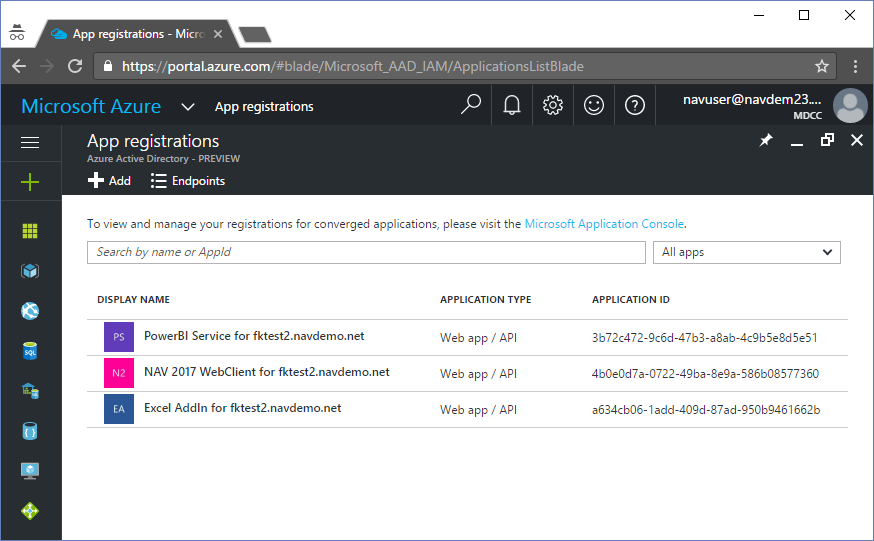
Which enables you to SignIn to NAV WebClient, use PowerBI and the Excel Add-in.
I will provide a blog post on the details some good day.
PowerApps and Flow
PowerApps and Flow are using the same mechanism to connect to NAV as the PowerBI content pack. This means, that if you are using a self-signed certificate you will need to use the UNSECURE OData endpoint, but then, the setup is pretty straightforward and just works.
Sync-NavTenant
A few people have reported that after running the O365 Integration, then NAV Parts wouldn't show. After starting a Management Shell and run Sync-NavTenant -ServerInstance NAV -Tenant default -force the problem disappeared. This problem is also fixed in the new scripts.
One Important Note
When deploying the new image, the new portal will say Succeeded, BEFORE it actually is done running all the demo scripts. The DEMO scripts will be launched after the machine is up running and will now include a number of reboots.
So please, give it ~10 minutes after the portal tells you that it is done.
Some more cool stuff that you get for free
Performance counters from NAV and from the machine are now available in the new portal:
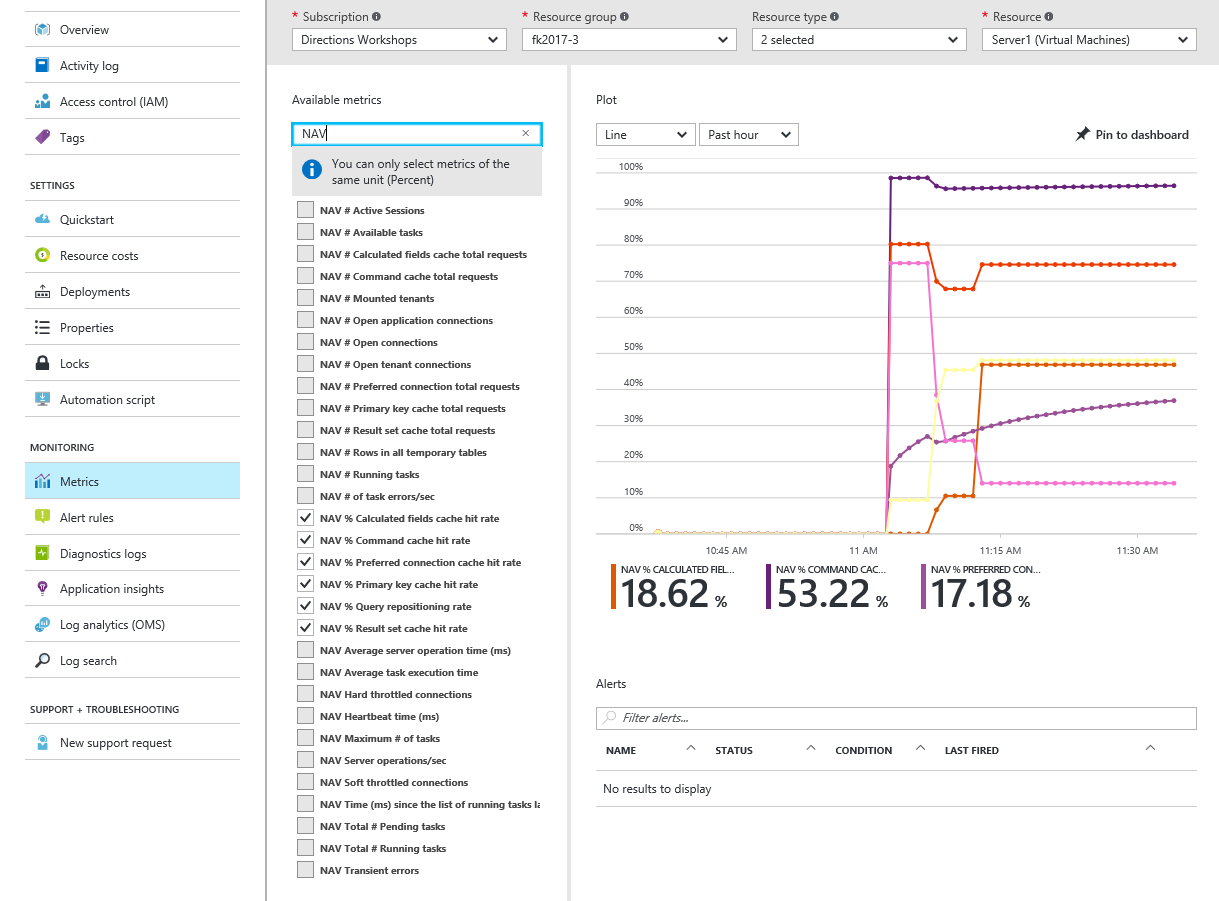
Meaning that you can monitor your VM right here from the portal.
Use trusted certificate
3 new parameters have been added to the template, which will allow you to use a trusted certificate instead of having the DEMO scripts create a self signed certificate. Certificate Pfx Url, Certificate Pfx Password and Public Machine Name:
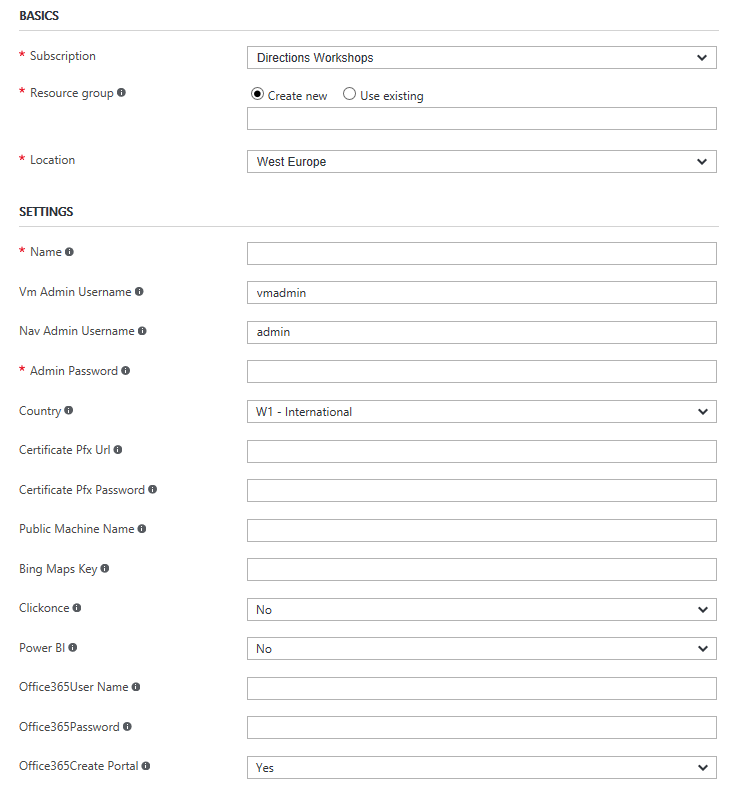
Note, that you have to create a CNAME record in the DNS to match the Public Machine Name yourself if you are using a trusted certificate.
Leave options empty if you don't use them.
Enjoy
Freddy Kristiansen
Technical Evangelist