Connecting to NAV Web Services from the Cloud–part 2 out of 5
If you haven’t already read part 1 you should do so here, before continuing to read this post.
In part 1 I showed how a service reference plus two lines of code:
var client = new Proxy1.ProxyClassClient("NetTcpRelayBinding_IProxyClass");
Console.WriteLine(client.GetCustomerName("10000"));
could extract data from my locally installed NAV from anywhere in the world.
Let’s start by explaining what this does.
The first line instantiates a WCF client class with a parameter pointing to a config section, which is used to describe bindings etc. for the communication.
A closer look at the config file reveals 3 endpoints defined by the service:
<client>
<endpoint
address="sb://navdemo.servicebus.windows.net/Proxy1/"
binding="netTcpRelayBinding"
bindingConfiguration="NetTcpRelayBinding_IProxyClass"
contract="Proxy1.IProxyClass"
name="NetTcpRelayBinding_IProxyClass" />
<endpoint
address="https://navdemo.servicebus.windows.net/https/Proxy1/"
binding="basicHttpBinding"
bindingConfiguration="BasicHttpRelayBinding_IProxyClass"
contract="Proxy1.IProxyClass"
name="BasicHttpRelayBinding_IProxyClass" />
<endpoint
address=https://freddyk-appfabr:7050/Proxy1
binding="basicHttpBinding"
bindingConfiguration="BasicHttpBinding_IProxyClass"
contract="Proxy1.IProxyClass"
name="BasicHttpBinding_IProxyClass" />
</client>
The endpoint we use in the sample above is the first one, using the binding called netTcpRelayBinding and the binding configuration NetTcpRelayBinding_IProxyClass, defined in the config file like:
<netTcpRelayBinding>
<binding
name="NetTcpRelayBinding_IProxyClass"
closeTimeout="00:01:00"
openTimeout="00:01:00"
receiveTimeout="00:10:00"
sendTimeout="00:01:00"
transferMode="Buffered"
connectionMode="Relayed"
listenBacklog="10"
maxBufferPoolSize="524288"
maxBufferSize="65536"
maxConnections="10"
maxReceivedMessageSize="65536">
<readerQuotas
maxDepth="32"
maxStringContentLength="8192"
maxArrayLength="16384"
maxBytesPerRead="4096"
maxNameTableCharCount="16384" />
<reliableSession
ordered="true"
inactivityTimeout="00:10:00"
enabled="false" />
<security
mode="Transport"
relayClientAuthenticationType="None">
<transport protectionLevel="EncryptAndSign" />
<message clientCredentialType="Windows" />
</security>
</binding>
</netTcpRelayBinding>
If we want to avoid using the config file for creating the client, we can also create the bindings manually. The code would look like:
var binding = new NetTcpRelayBinding(EndToEndSecurityMode.Transport, RelayClientAuthenticationType.None);
var endpoint = new EndpointAddress("sb://navdemo.servicebus.windows.net/Proxy1/");
var client = new Proxy1.ProxyClassClient(binding, endpoint);
Console.WriteLine(client.GetCustomerName("10000"));
In order to do this, you need to have the Windows Azure AppFabric SDK installed (can be found here), AND you need to set the Target Framework of the Project to .NET Framework 4 (NOT the .NET Framework 4 Client Profile, which is the default). After having done this, you can now add a reference and a using statement to Microsoft.Servicebus.
You can also use .Net Framework 3.5 if you like.
What are the two other endpoints?
As you might have noticed, the config file listed 3 endpoints.
The first endpoint uses the servicebus protocol (sb://) and connecting to this endpoint requires the NetTcpRelayBinding which again requires the Microsoft.ServiceBus.dll to be present.
The second endpoint uses the https protocol (https://) and a consumer can connect to this using the BasicHttpRelayBinding (from the Microsoft.ServiceBus.dll) or the standard BasicHttpBinding (which is part of System.ServiceModel.dll).
The last endpoint uses the http protocol (https://) and is a local endpoint on the machine hosting the service (used primarily for development purposes). If this endpoint should be reachable from outside Microsoft Corporate network, I would have to ask Corporate IT to setup firewall rules and open up a specific port for my machine – basically all of the things, that the Servicebus saves me from doing.
BasicHttpRelayBinding
Like NetTcpRelayBinding, this binding is also defined in the Microsoft.Servicebus.dll and if we were to write code using this binding to access our Proxy1 – it would look like this:
var binding = new BasicHttpRelayBinding(EndToEndBasicHttpSecurityMode.Transport, RelayClientAuthenticationType.None);
var endpoint = new EndpointAddress("https://navdemo.servicebus.windows.net/https/Proxy1/");
var client = new Proxy1.ProxyClassClient(binding, endpoint);
Console.WriteLine(client.GetCustomerName("10000"));
Again – this sample would require the Windows Azure AppFabric SDK to be installed on the machine connecting.
How to connect without the Windows Azure AppFabric SDK
As I stated in the first post, it is possible to connect to my Azure hosted NAV Web Services using standard binding and not require Windows Azure AppFabric SDK to be installed on the machine running the application.
You still need the SDK on the developer machine if you need to create a reference to the metadata endpoint in the cloud, but then again that could be done on another computer if necessary.
The “secret” is to connect using standard BasicHttpBinding – like this:
var binding = new BasicHttpBinding(BasicHttpSecurityMode.Transport);
var endpoint = new EndpointAddress("https://navdemo.servicebus.windows.net/https/Proxy1/");
var client = new Proxy1.ProxyClassClient(binding, endpoint);
Console.WriteLine(client.GetCustomerName("10000"));
Or, using the config file:
var client = new Proxy1.ProxyClassClient("BasicHttpRelayBinding_IProxyClass");
Console.WriteLine(client.GetCustomerName("10000"));
Note that the name refers to BasicHttpRelayBinding, but the section refers to BasicHttpBinding:
<bindings>
<basicHttpBinding>
<binding name="BasicHttpRelayBinding_IProxyClass" …
and the section determines what class gets instantiated – in this case a standard BasicHttpBinding which is available in System.ServiceModel of the .net framework.
Why would you ever use any of the Relay Bindings then?
One reason why you might want to use the Relay bindings is, that they support a first level of authentication (RelayClientAuthenticationType). As a publisher of services in the cloud, you can secure those with an authentication token, which users will need to provide before they ever are allowed through to your proxy hosting the service.
Note though that currently, a number of platforms doesn’t support the Relay bindings out of the box (Windows Phone 7 being one) and for this reason I don’t use that.
In fact the service I have provided for getting customer names is totally unsecure and everybody can connect to that one, provide a customer no and get back a customer name. I will discuss authentication more deeply in part 4 of this post series.
Furthermore the NetTcpRelayBinding supports a hybrid connectionmode, which allows the connection between server and client to start out relayed through the cloud and made directly between the two parties if possible. In my case, I know that my NAV Web Services proxy is not available for anybody on the outside, meaning that a direct connection is not possible so why fool ourself.
Connecting to Proxy1 from Microsoft Dynamics NAV 2009 R2
In order to connect to our Cloud hosted service from NAV we need to create a DLL containing the proxy classes (like what Visual Studio does when you say add service reference).
In NAV R2 we do not have anything called a service reference, but we do have .net interop and it actually comes pretty close.
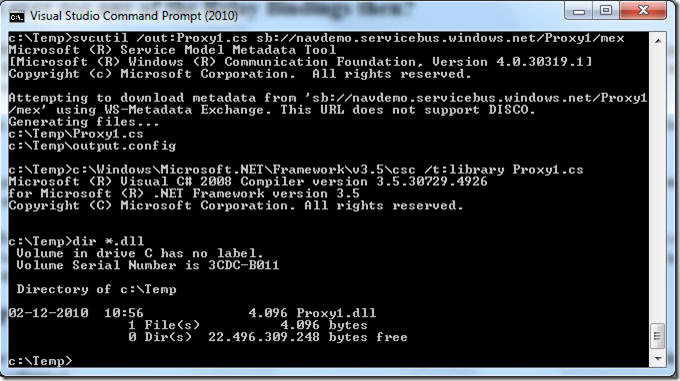
If you start a Visual Studio command prompt and type in the following commands:
svcutil /out:Proxy1.cs sb://navdemo.servicebus.windows.net/Proxy1/mex
c:\Windows\Microsoft.NET\Framework\v3.5\csc /t:library Proxy1.cs
then, if successful you should now have a Proxy1.dll.
The reason for using the .net 3.5 compiler is to get a .net 3.5 assembly, which is the version of .net used for the Service Tier and the RoleTailored Client. If you compile a .net 4.0 assembly, NAV will not be able to use it.
Copy this DLL to the Add-Ins folder of the Classic Client and the Service Tier..
- C:\Program Files\Microsoft Dynamics NAV\60\Classic\Add-Ins
- C:\Program Files\Microsoft Dynamics NAV\60\Service\Add-Ins
You also need to copy it to the RoleTailored Client\Add-Ins folder if you are planning to use Client side .net interop.
Create a codeunit and add the following variables:
Name DataType Assembly Class
proxy1client DotNet Proxy1 ProxyClassClient
securityMode DotNet System.ServiceModel System.ServiceModel.BasicHttpSecurityMode
binding DotNet System.ServiceModel System.ServiceModel.BasicHttpBinding
endpoint DotNet System.ServiceModel System.ServiceModel.EndpointAddress
all with default properties, meaning that they will run on the Service Tier. Then write the following code:
OnRun()
securityMode := 1;
binding := binding.BasicHttpBinding(securityMode);
endpoint := endpoint.EndpointAddress('https://navdemo.servicebus.windows.net/https/Proxy1/');
proxy1client := proxy1client.ProxyClassClient(binding, endpoint);
MESSAGE(proxy1client.GetCustomerName('20000'));
Now you of course cannot run this codeunit from the Classic Client, but you will have to add an action to some page, running this codeunit.
Note: When running the code from the RoleTailored Client, you might get an error (or at least I did) stating that it couldn’t resolve the name navdemo.servicebus.windows.net – I solved this by letting the NAV Service Tier and Web Service Listener run as a domain user instead of NETWORK SERVICE.
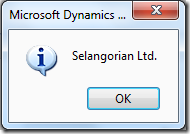
If everything works, you should get a message box like this:
So once you have created the Client, using the Client is just calling a function on the Client class.
I will do a more in-dept article about .net interop and Web Services at a later time.
Connecting to Proxy1 from a Windows Phone 7
Windows Phone 7 is .net and Silverlight – meaning that it is just as easy as writing a Console App – almost…
Especially since our Service is hosted on Azure we can just write exactly the same code for creating the Client object. Invoking the GetCustomerName is a little different – since Silverlight only supports async Web Services. So, you would have to setup a handler for the response and then invoke the method.
Another difference is, that the Windows Azure AppFabric SDK doesn’t exist for Windows Phone 7 (or rather, it doesn’t while I am writing this – maybe it will at some point in the future). This of course means that we will use our Https endpoint and BasicHttpBinding to connect with.
Start Visual Studio 2010 and create a new application of type Windows Phone Application under the Silverlight for Windows Phone templates.
Add a Service Reference to sb://navdemo.servicebus.windows.net/Proxy1/mex (note that you must have Windows Azure AppFabric SDK installed on the developer machine in order to resolve this URL). In your Windows Phone application, the config file will only contain the endpoints that are using a binding, which is actually compatible with Windows Phone, meaning that all NetTcpRelayBinding endpoints will be stripped away.
Add the following code to the MainPage.xaml.cs:
// Constructor
public MainPage()
{
InitializeComponent();
var client = new Proxy1.ProxyClassClient("BasicHttpRelayBinding_IProxyClass");
client.GetCustomerNameCompleted += new EventHandler<Proxy1.GetCustomerNameCompletedEventArgs>(client_GetCustomerNameCompleted);
client.GetCustomerNameAsync("30000");
}
void client_GetCustomerNameCompleted(object sender, Proxy1.GetCustomerNameCompletedEventArgs e)
{
this.PageTitle.Text = e.Result;
}
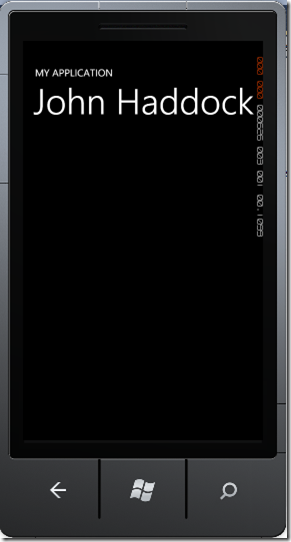
Running this in the Windows Phone Emulator gives the following:
Wow – it has never been easier to communicate with a locally installed NAV through Web Services from an application running on a Phone – anywhere in the world.
The next post will talk about how Proxy1 is created and what it takes to expose services on the Servicebus.
Enjoy
Freddy Kristiansen
PM Architect
Microsoft Dynamics NAV


