PageUp and PageDown in the Role Tailored Client
If you have been working with the Role Tailored Client you are probably aware, that it doesn't support PageUp and PageDown in Task Pages. The reason for removing this support was, that the new User Experience is centered around starting from the List, and this way you have a better overview and can find the records you are searching for right away easier and then open the Task Page.
This is all good, but users have told us, that they would like to use PageUp and PageDown in Task Pages anyway and the reason is that they want to do work on all the records they have selected in a List Place with e.g. Delayed Sales Orders. Why does the user have to close the Task Page, select the next record and reopen the Task Page.
Another scenario is users looking through recent sales orders, to find an order where the customer bought 20 bicycles (because the user remembers this).
So, no doubt that this is something we will be looking at supporting in the future - but NAV 2009 is released, and it does NOT support PageUp and PageDown.
In this post I will explain how to make a poor-man's PageUp and PageDown in a Page - the goal is to show how this is done, and if anybody run into a customer, with the need of having PageUp and PageDown in e.g. the Sales Order Page - then they can use this as inspiration.
It isn't a perfect solution, but it is better than nothing. To apply it on ALL pages would be a lot of work - but to apply it on a couple of pages (where the users request it the most) might be the difference between an unsatisfied user and a happy user.
In this sample, I will add the functionality to the Sales Order List Place, which is page 9305. In the List Place we will add an action called Edit All and in the Task Page for the Sales Order (which is 42) we will add two actions: Next Record and Previous Record.
The Edit All action
First, open the Page Designer for Page 9305. Move the selected line to the line after the last object - and select View -> Actions.
In the list of actions - create a new action called Edit All.
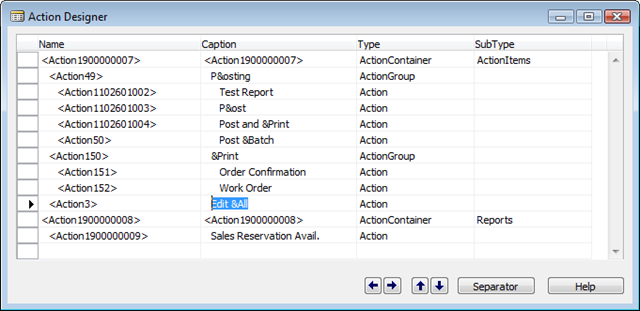
In the properties of action we change two values:
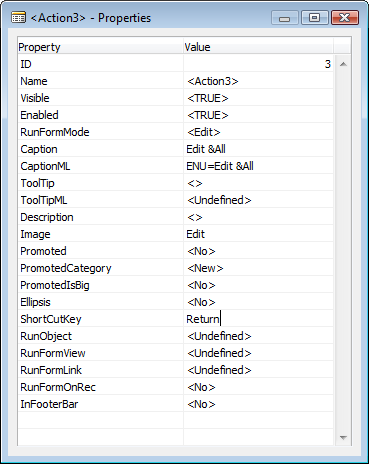
We set the Image, so that the action has the same image as Edit, and we set the ShortCutKey to Return.
Setting the ShortCutKey to Return means that whenever you press ENTER in the list - this action is called instead of the built-in Edit. DoubleClick does the same as ENTER, so my action also gets called when double clicking a row. Ctrl+Shift+E still calls the Built-in Edit action, like when you select that action in the Menu - the only trick here is ENTER and double click - no magic.
Close the properties and hit F9 to modify the code for the actions. Unfortunately F9 doesn't position you in the action you are modifying, so you will have to find the right action, add the following variables
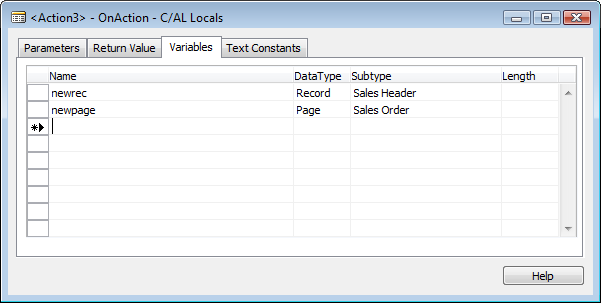
and the following code
<Action5> - OnAction()
newrec.SETPOSITION(GETPOSITION());
newpage.SETRECORD(newrec);
//newpage.SetViewFromList(GETVIEW(true));
newpage.RUN();
Note, that the SetViewFromList method call is out commented - we haven't created this function yet on the Sales Order page, so this function more or less does exactly the same as the normal Edit function - open the Sales Order page with the currently selected record.
But we want more...
The Card needs to know the View
In order to support Page Up and Page Down, our Task Page needs to know the Filter and sorting from the List. Both these things are in the value we get from GETVIEW, so we will create a function on the Sales Order page to receive this from our list.
Design the Sales Order page (42) and hit F9 - create a new Global Variable called View (Text[250]) and set the Include In Dataset in the properties
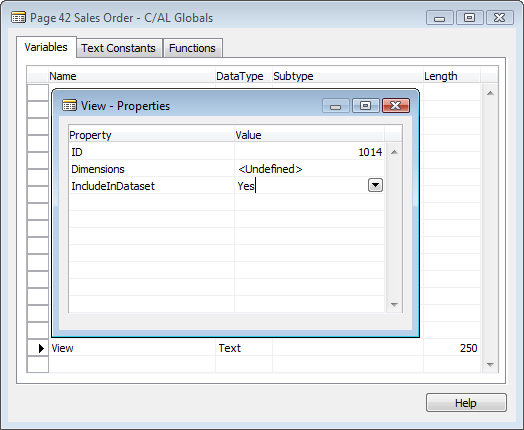
Reason for the include in dataset is that it now can be used in the property expressions on actions (we don't want to have the Next and Previous actions enabled if you cannot do next or previous).
Also create a function called SetViewFromList like this
SetViewFromList(ViewFromList : Text[250])
View := ViewFromList;
We could also insert the following lines to our OnOpenPage (as the first lines)
IF View <> '' THEN BEGIN
CurrPage.CAPTION := View;
END;
Having done this, and saved (with compile) the Sales Order page, we can go back to the Edit All action and remove the comment from the line
newpage.SetViewFromList(GETVIEW(true));
Save and run.
Open your sales order list place, create a filter on Location Code = YELLOW and double click on an order and you will get an order with a different caption
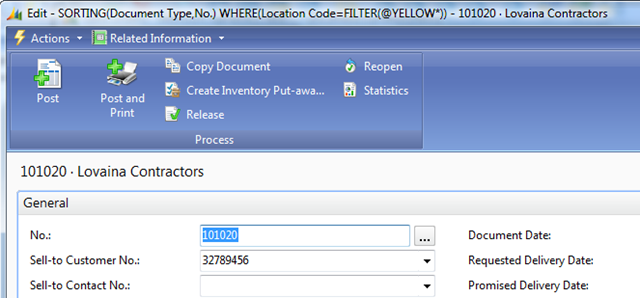
A little nerdy - but I didn't want to create a function for making the filter human readable in this post.
So far so good...
The Next and Previous Actions
So now, our Task Page knows about the filter, which was applied on the list. We of course haven't done anything with it yet - but the remaining should be pretty straightforward for people who knows C/AL
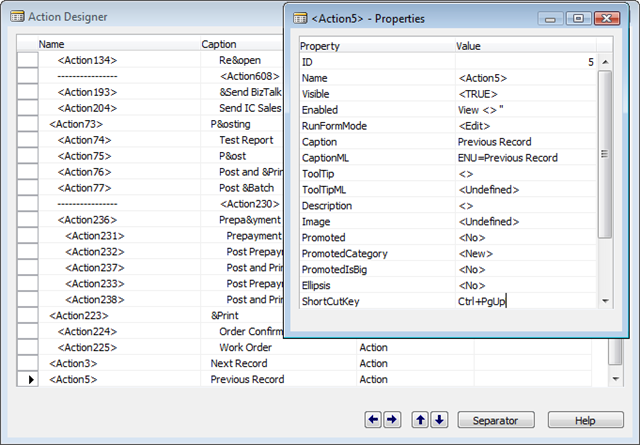
Create two actions (at the very end of the list - make sure to get the indent right)
Set the shortcut key of Next Record to Ctrl+PgDn and the shortcut key of Previous Record to Ctrl+PgUp. For some reason I cannot use PgUp and PgDn, the Client crashes when I try to do this with an invalid Shortcut key value - I guess we could have handled this situation a little nicer:-).
Both actions should also have an enabled expression called View <> ''
Before adding in the code for these actions we create another global function called NextPrev. In this function we add two local variables
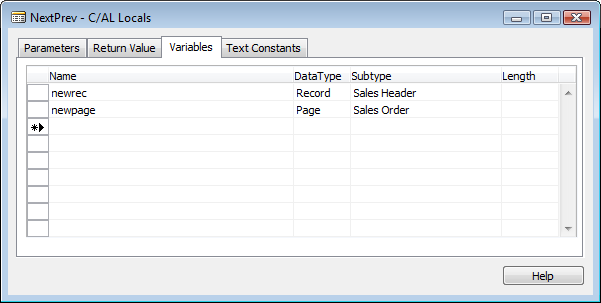
and the following code
NextPrev(Ascending : Boolean)
newrec.SETVIEW(View);
newrec.SETPOSITION(Rec.GETPOSITION());
newrec.ASCENDING(Ascending);
newrec.NEXT(1);
IF Rec.GETPOSITION() = newrec.GETPOSITION() THEN EXIT;
CurrPage.CLOSE();
newpage.SetViewFromList(View);
newpage.SETRECORD(newrec);
newpage.RUN();
Basically what we do is to locate the next record (ascending or descending) that matches the filter - and if this record is different from the current record - it closes the current page and opens a new page with the next or previous record (it is not possible to change the current record on a page).
It also transfers the View to the next page, so that Next and Previous still works.
The code for the actions should be straight forward
<Action3> - OnAction()
NextPrev(TRUE);
<Action5> - OnAction()
NextPrev(FALSE);
Save, Compile and run the Role Tailored Client.
Yes - it does some flickering when the page closes and reopens - but it works.
Note that if you move the window and use next and previous, then the next window will open on the currently saved position (the CLOSE doesn't complete and save the new location as the preferred location until after the new page opens) so the window will jump back and forth - I haven't found any way to avoid that.
Enjoy
Freddy Kristiansen PM Architect
Microsoft Dynamics NAV