How to Move the BizTalk ESB Databases
Databases sometimes need to be moved to different SQL Servers for a variety of reason: faster performance, scale out among different SQL Instances/Servers, disaster recovery, etc.
The procedure below describes how to move BizTalk ESB databases to another SQL location (Server or instance). Note: The same basic procedure can also be used to move the BizTalk ESB databases from a local SQL Server to a remote SQL Server or to a SQL Server cluster.
ESB Toolkit Configuration Files
On every computer where ESB Toolkit is configured, navigate to C:\Program Files (x86)\Microsoft BizTalk ESB Toolkit 2.0, and make a backup of the file esb.config before any modification.
Open the esb.config file for editing.
Under ConnectionString node, change the Data Source attribute to point to the new Database cluster:
<connectionStrings><add name="ItineraryDb" connectionString="Data Source=NEWDBSERVER;Initial Catalog=EsbItineraryDb;Integrated Security=True"providerName="System.Data.SqlClient" />...</connectionStrings>
Save the edited file.
On every computer running BizTalk Server, navigate to C:\Program Files (x86)\Microsoft BizTalk ESB Toolkit 2.0\Bin, and make a backup of the file “ESBConfigurationTool.exe.Config” before any modification.
Open the ESBConfigurationTool.exe.Config file for editing.
Change below keys to point to the new SQL Cluster:
<add key="ItineraryServerInstance" value="NEWDBSERVER" />
<add key="ServerInstance" value="NEWDBSERVER" />
Save the edited file.
ESB Portal Configuration Files
- On every computer where ESB Portal is configured, navigate to C:\inetpub\wwwroot\esb.portal make a backup of the file Web.config before any modification
- Open the Web.config file for editing.
- Under connectionStrings node, change the Data Source attribute to point to the new Database cluster<connectionStrings>...<add name="AdminDatabaseServer" connectionString="Network Library=dbmssocn;Data Source=NEWDBSERVER;Integrated Security=True;Initial Catalog=ESBAdmin;" providerName="System.Data.SqlClient"/>...</connectionStrings>
- Save the edited file.
- Repeat Step 1-4 for the file C:\inetpub\wwwroot\esb.portalONO\Web.config
UDDI Services Registry Information
On every computer where UDDI service is configured, modify below Registry Key to point to the new SQL Cluster
-
- HKEY_LOCAL_MACHINE\SOFTWARE\Microsoft\UDDI\Database\ReaderConnectionString
- HKEY_LOCAL_MACHINE\SOFTWARE\Microsoft\UDDI\Database\WriterConnectionString
- HKEY_LOCAL_MACHINE\SOFTWARE\Microsoft\UDDI\Setup\WebServer\databaseName
Custom Configurations files
On every computer where Custom application is installed (BizTalk Servers), modify existing connection Strings in configuration files to point to new SQL Server:
- Make a backup of * .config before any modification
- Edit each configuration file and modify “Data Source” attribute to point to the new SQL Cluster. Note: The easy way to accomplish this is replacing all occurrences of ‘OLDDBServer’ by ‘NEWDBSERVER’ .
- Save the edited file
Folders containing configuration files with connection strings pointing to old SQL Cluster:
- C:\program files (x86)\Microsoft BizTalk Server\
- C:\Program Files (x86)\Microsoft BizTalk Server\Tracking
- C:\Program Files (x86)\Microsoft BizTalk Server\BAMPortal\BAMManagementService
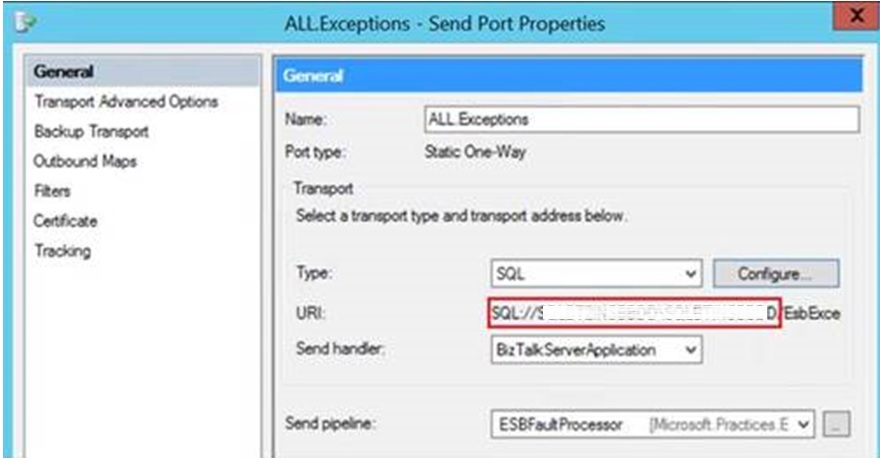
ESB Send Ports
Modify “ALL.Exceptions” Send Port (under “Microsoft.Practices.ESB” BizTalk Application) to point to the new SQL Cluster “NEWDBSERVER”