How to install VNC in Azure Oracle Linux VM
1 Introduction
In the Azure VM gallery are available a list of Linux distributions, including Oracle Linux. One of effective way to access remotely the Linux VM desktop is through VNC (Virtual Network Computing). VNC is used to display an X windows session running on another computer. Unlike a remote X connection, the xserver is running on the remote computer, not on your local workstation. Your workstation (Linux or Windows ) is only displaying a copy of the display that is running on the remote machine. In this note are reported the configuration steps required to connect to the Oracle Linux VM through VNC (Virtual Network Computing). The present note shows up two configurations:
- direct connection to the VNC Server
- tunneling VNC connections over SSH.
2 Create an Oracle Linux IaaS VM
Login in Azure Management portal and create an IaaS VM through the VM gallery
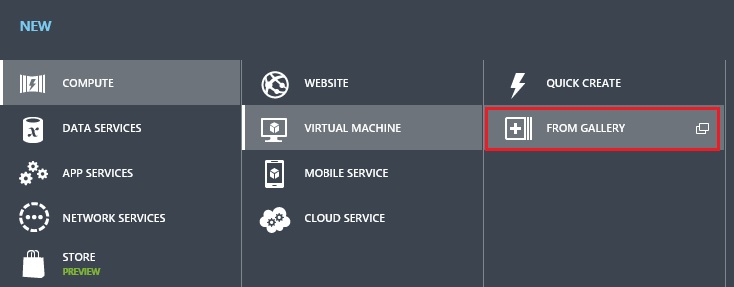
Figure 1: Create a new IaaS VM from the image gallery
Select the Oracle Linux image available in the VM gallery.
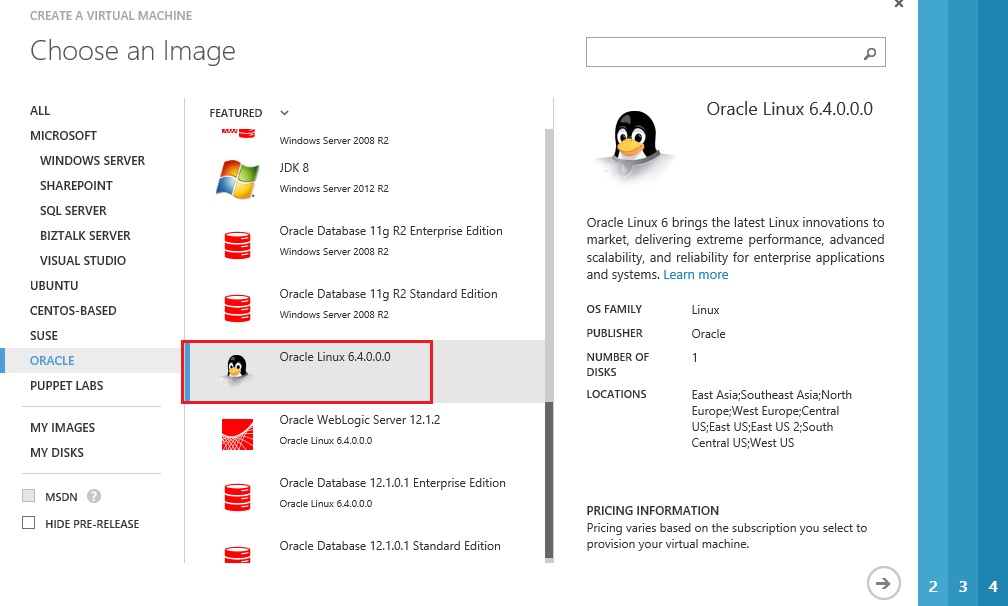
Figure 2: Oracle Linux 6.4.0.0.0 available in Azure image gallery
Define the name of VM, size and administrator credentials (username and password) to access to the Oracle Linux VM.
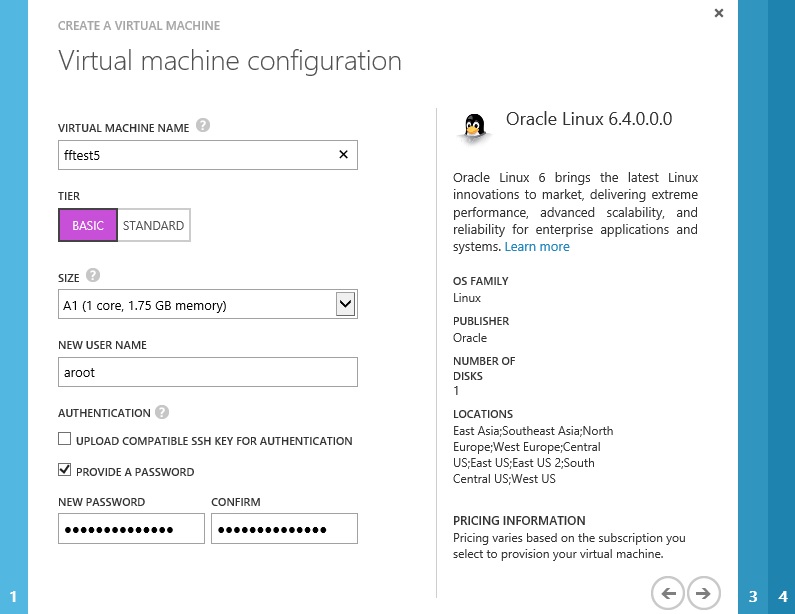
Figure 3: define IaaS size and administrator credentials
Select the affinity group and storage account to store the .VHD file of the Linux VM
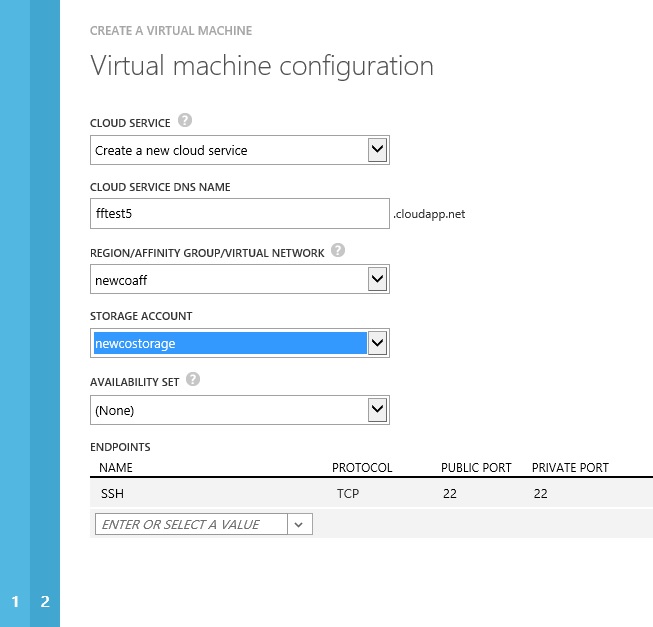
Figure 4: specify an Affinity Group and Azure Storage account
Install the VM agent in the Linux VM.
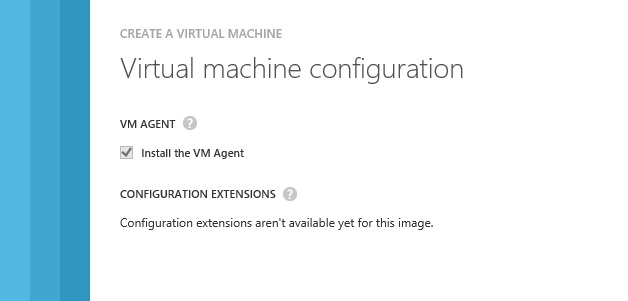
Figure 5: keep the default option to install the VM Agent
3 Install the desktop package in Oracle Linux
When the Oracle Linux VM is up and running connect to the VM through SSH session.

Figure 6: Oracle Linux VM up and running
To login in the system use the same credential specified in the creation of VM.
It is easy to work with group of packages; there are some useful commands:
| sudo yum grouplist |
it lists the installed and available groups for your system in two separate lists.
| sudo yum groupinfo <groupname> |
It provides you detailed information for each group including: description, mandatory, default and optional packages.
When you create an Azure Oracle Linux IaaS VM, by default you do not have GUI and desktop environment.
To install X Window and fonts run the command:
| sudo yum -y groupinstall "Desktop Platform" "X Window System" "Fonts" |
….. Running rpm_check_debug Running Transaction Test Transaction Test Succeeded Running Transaction Warning: RPMDB altered outside of yum. ** Found 4 pre-existing rpmdb problem(s), 'yum check' output follows: glibc-headers-2.12-1.107.el6_4.4.x86_64 has missing requires of kernel-headers glibc-headers-2.12-1.107.el6_4.4.x86_64 has missing requires of kernel-headers >= ('0', '2.2.1', None) oracle-rdbms-server-11gR2-preinstall-1.0-7.el6.x86_64 has missing requires of kernel-uek oracle-rdbms-server-12cR1-preinstall-1.0-8.el6.x86_64 has missing requires of kernel-uek ……. |
You can ignore the reference to the new Linux kernel uek (unbreakable enterprise kernel)
If you install GNOME desktop, using the command:
| sudo yum -y groupinstall "Desktop" |
you get the message:
…. --> Finished Dependency Resolution Error: WALinuxAgent conflicts with 1:NetworkManager-0.8.1-66.el6.x86_64 You could try using --skip-broken to work around the problem ** Found 4 pre-existing rpmdb problem(s), 'yum check' output follows: glibc-headers-2.12-1.107.el6_4.4.x86_64 has missing requires of kernel-headers glibc-headers-2.12-1.107.el6_4.4.x86_64 has missing requires of kernel-headers >= ('0', '2.2.1', None) oracle-rdbms-server-11gR2-preinstall-1.0-7.el6.x86_64 has missing requires of kernel-uek oracle-rdbms-server-12cR1-preinstall-1.0-8.el6.x86_64 has missing requires of kernel-uek |
Installation procedure aborts because it tries to install NetworkManager package as part of this install, but the already installed WALinuxAgent is conflicting with NetworkManager package.
To skip the dependent packages and proceed GNOME Desktop installation use --skip-broken as
| sudo yum -y --skip-broken groupinstall "Desktop" |
You can also install the following optional GUI packages.
sudo yum -y groupinstall "Graphical Administration Tools" sudo yum -y groupinstall "Internet Browser" sudo yum -y groupinstall "General Purpose Desktop" |
It is useful to add other packages to our Oracle Linux VM:
- xterm is the standard terminal emulator for the X Window System. A user can have many different invocations of xterm running at once on the same display
- twm is a window manager for the X Window System. It provides titlebars, shaped windows, several forms of icon management, user-defined macro functions, click-to-type and pointer-driven keyboard focus, and user-specified key and pointer button bindings.
- xsetroot program allows you to tailor the appearance of the background ("root") window on a workstation display running X.
| sudo yum -y install xterm twm xsetroot |
You can install optional xorg fonts packages through the command:
| sudo yum install xorg-x11-fonts-base xorg-x11-fonts-misc xorg-x11-font-utils xorg-x11-fonts-Type1 |
4 Install the VNC server in Oracle Linux VM
In this paragraph, you have the procedure to install the VNC server in Oracle Linux VM.
For setting up the VNC server, we perform the following steps:
- Install the VNC server package
- Create the VNC users accounts
- Edit the VNC server configuration
- Set your users' VNC passwords
- Confirm that the VNC server can start and stops cleanly
- Starting VNC server service automatically at boot
- Customize xstartup scripts
- Test each VNC user through direct connection to the VNC Server
4.1 Installing the required VNC server package
Login as administrator in Oracle Linux VM and install the VNC Server.
Our VM runs with Oracle Linux 6, the server is tigervnc-server (and not vnc-server).
| sudo yum install tigervnc-server |
4.2 Create the VNC users accounts.
By default the Oracle Linux VM install an oracle user in the system.
sudo cat /etc/passwd …… oracle:x:54321:54321::/home/oracle:/bin/bash aroot:x:54322:54323::/home/aroot:/bin/bash …… |
To reset the password of Oracle user:
sudopasswd oracle Changing password for user oracle. New password: Retype new password: passwd: all authentication tokens updated successfully. |
4.3 Edit the VNC server configuration
Edit the " /etc/sysconfig/vncservers" file to configure the required displays.
| sudo vi /etc/sysconfig/vncservers |
Add to the file /etc/sysconfig/vncservers the following entries to enable VNC for display number “ .1” and “ .2”
VNCSERVERS="1:aroot 2:oracle" VNCSERVERARGS[1]="-geometry 1024x768 -nolisten tcp" VNCSERVERARGS[2]="-geometry 800x600 -nolisten tcp" |
Notice multiple "display:user" pairs are defined on a single line, but the arguments for each display are defined separately.
With these entries we define that a VNC server instance should be started as user “atoor” on display 1 and the user “oracle” on display 2 and we also set some options for this server such as resolution and color depth. Each VNC server instance listens on port 5900 plus the display number on which the server runs. In our case,
- aroot’s vnc server would listen on port 5901
- oracle’s vnc server would listen on port 5902
4.4 Set your users' VNC passwords
Set the VNC password for any users defined in the " /etc/sysconfig/vncservers" file.
Switch user into the account for each user, and as noted below, run: vncpasswd
We are prompted for a password. This is the password that we will use when we connect to userid’s vnc server instance.
[aroot@fftest5 ~]$ vncpasswd Password: Verify: [aroot@fftest5 ~]$ su - oracle Password: [oracle@fftest5 ~]$ vncpasswd Password: Verify: [oracle@ffora1 ~]$ |
This will create the ~/.vnc directory for that userid:
[aroot@fftest5 ~]$ ls -al /home/aroot/.vnc/
total 12
drwxrwxr-x. 2 aroot aroot 4096 Oct 16 08:54 .
drwx------. 3 aroot aroot 4096 Oct 16 08:54 ..
-rw-------. 1 aroot aroot 8 Oct 16 08:54 passwd
4.5 Confirm that the VNC server can start and stop cleanly
| sudo /sbin/service vncserver start |
[aroot@fftest5 ~]$ sudo /sbin/service vncserver start
[sudo] password for aroot:
Starting VNC server: 1:aroot xauth: creating new authority file /home/aroot/.Xauthority
New 'fftest5:1 (aroot)' desktop is fftest5:1
Creating default startup script /home/aroot/.vnc/xstartup
Starting applications specified in /home/aroot/.vnc/xstartup
Log file is /home/aroot/.vnc/fftest5:1.log
2:oracle
New 'fftest5:2 (oracle)' desktop is fftest5:2
Creating default startup script /home/oracle/.vnc/xstartup
Starting applications specified in /home/oracle/.vnc/xstartup
Log file is /home/oracle/.vnc/fftest5:2.log
[ OK ]
| sudo /sbin/service vncserver stop |
Shutting down VNC server: 1:aroot 2:oracle [ OK ]
Start again the vncserver:
| sudo /sbin/service vncserver start |
4.6 Starting VNC server service automatically at boot
To enable the vncserver service to be automatically started at boot:
| sudo /sbin/chkconfig vncserver on |
Checking correct automatic boot:
[aroot@fftest5 ~]$ sudo chkconfig vncserver --list
vncserver 0:off 1:off 2:on 3:on 4:on 5:on 6:off
4.7 Customize xstartup scripts
After the VNC service is started, some new files are created in /home/aroot/.vnc/ directory. These include aroot’s vnc server log file, pid file and an X startup script. As user “aroot” we edit the script in order to customize some settings. The default /home/aroot/.vnc/xstartup script contains some commands that are executed when the VNC server is started.
#!/bin/sh [ -r /etc/sysconfig/i18n ] && . /etc/sysconfig/i18n export LANG export SYSFONT vncconfig -iconic & unset SESSION_MANAGER unset DBUS_SESSION_BUS_ADDRESS OS=`uname -s` if [ $OS = 'Linux' ]; then case "$WINDOWMANAGER" in *gnome*) if [ -e /etc/SuSE-release ]; then PATH=$PATH:/opt/gnome/bin export PATH fi ;; esac fi if [ -x /etc/X11/xinit/xinitrc ]; then exec /etc/X11/xinit/xinitrc fi if [ -f /etc/X11/xinit/xinitrc ]; then exec sh /etc/X11/xinit/xinitrc fi [ -r $HOME/.Xresources ] && xrdb $HOME/.Xresources xsetroot -solid grey xterm -geometry 80x24+10+10 -ls -title "$VNCDESKTOP Desktop" & twm & |
- xsetroot in this case sets the background color.
- vncconfig is a supplementary program that can be used to control the VNC server. Apart from this, when run without arguments it acts as a helper application and its main purpose is to provide support for clipboard transfers between the client (vncviewer) and the vnc server.
- xterm starts an xterm terminal.
- twm starts the X server’s default window manager. We probably want to change that to a more user-friendly window manager.
The presence of the " & " symbol after each command, so that it goes to the background and the xstartup script continues on.
4.8 Test each VNC user through direct connection to the VNC server
You should now be able to use a VNC viewer to connect to system using the display numbers and passwords defined. In our case, we have two VNC users: aroot and oracle.
To allow direct VNC connection we need to open the related TCP ports on Oracle Linux VM.
Open the Azure Management portal, select the Oracle Linux VM and select ENDPOINTS to control traffic incoming on public VIP (Virtual IP Address).
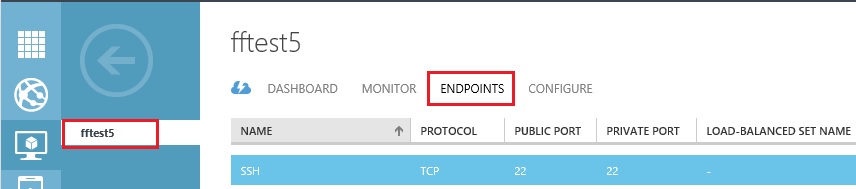 Figure 7: ENDPOINTS to control incoming network traffic in IaaS VM
Add a new ENDPOINT
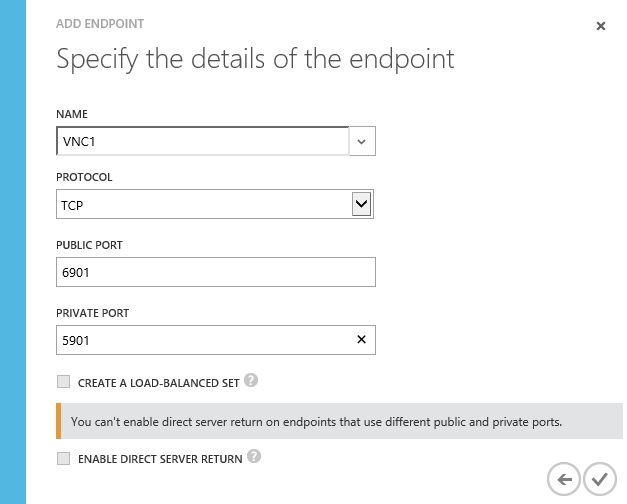
Figure 8: first step to add a new public ENDPOINT
We can example map a public TCP port like 6901 in the port 5901:
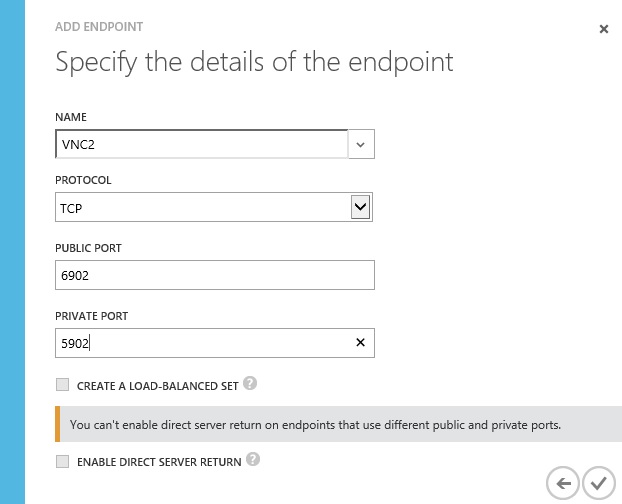
Figure 9: public port 6901 is mapped into private TCP port 5901
We need to add a second ENDPOINT to the Oracle Linux VM to allow to the user oracle to connect to the private TCP port 5902.
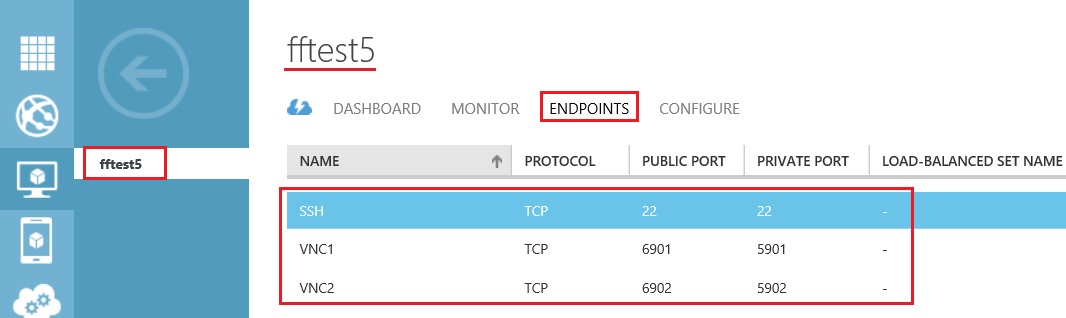
Figure 10: add a second ENDPOINT to connect to the VM through oracle user
After adding the two public Azure ENDPOINTS we have:
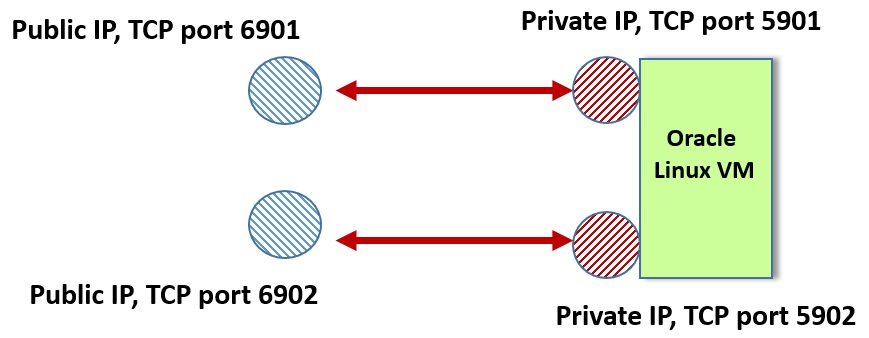
Figure 11: endpoints mapping on Oracle Linux VM
4.9 Install VNC client on your local host
Once your VNC server is configured, you can connect to it from any VNC client. On your local linux host (my local CentOS client run in hyper-V in Windows 8), install the VNC client using the following command.
| sudo yum install tigervnc |
We are now ready from our local linux VM to open a VNC connection to the Oracle Linux VM running in Azure. To manage the remote Oracle Linux VM through the user too we use the command:
| vncviewer fftest5.cloudapp.net:6901:1 |
A GUI ask for the VNC password assigned to the user toor.
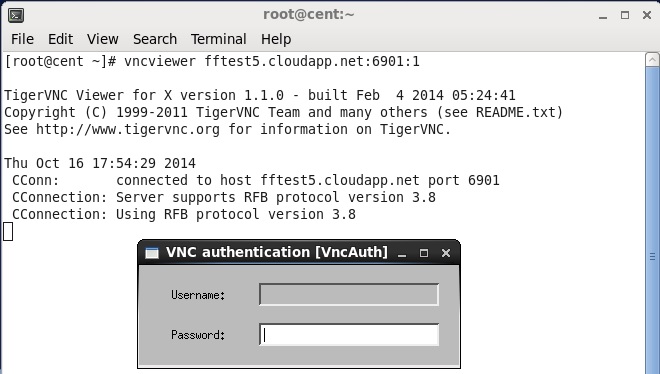
Figure 12: vnc client ask for toor password to connect to remote Oracle Linux VM
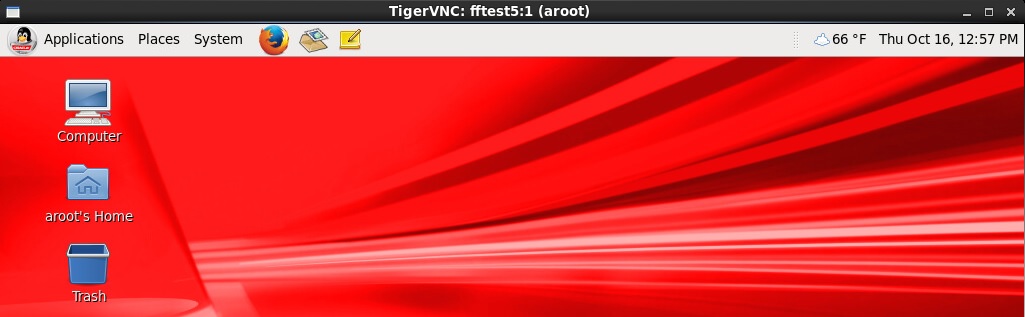
Figure 13: successful connection to the Oracle Linux VM through the VNC client
We can establish a second VNC connection to the Oracle Linux VM through oracle user:
| vncviewer fftest5.cloudapp.net:6902:2 |
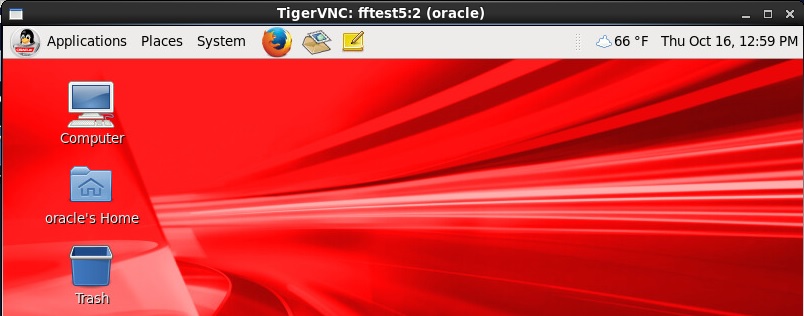
Figure 14: remote connection via VNC client as oracle user
5 Tunneling VNC connections over SSH
The VNC protocol is not a secure communication protocol. Presence of a vnc password provides security to access to the server, but the whole VNC session is transmitted in the clear, without encryption. A way to secure our connection to the VNC server is to connect through an encrypted SSH tunnel. This way the whole session get encrypted.
5.1 Open the incoming SSH port in the Oracle Linux VM
In the last paragraph, we have used a direct connection from VNC client to VNC server using the TCP ports above 5900. First of all we do not need any more of public ENDPOINTs on Oracle Linux VM, and we can remove it. The only Endpoint we need is the TCP port 22, to accept incoming SSH traffic.
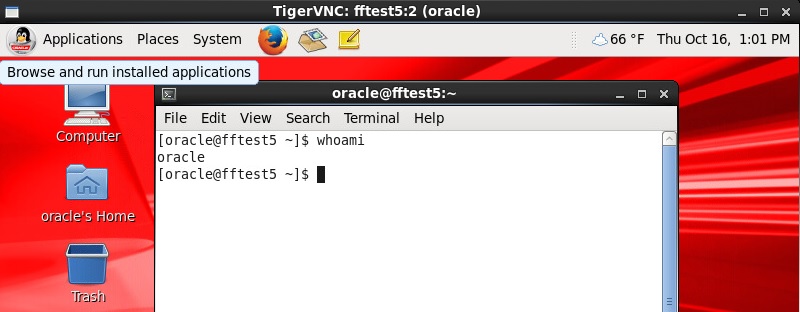
Figure 15: the only endpoint required to tunnel VNC on SSL is the TCP port 22
We want to configure a local port forwarding for a VNC session
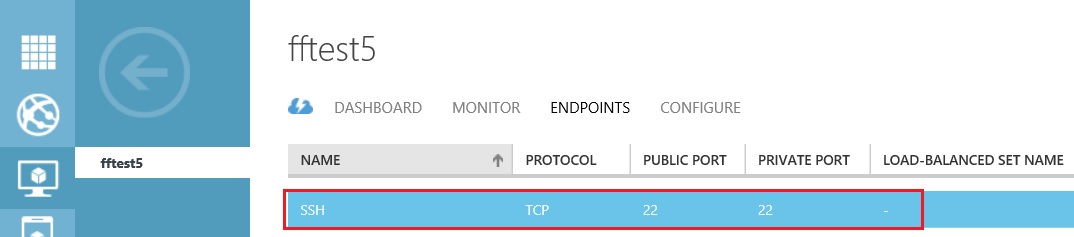
Figure 16: local port forwarding for a VNC session
The syntax for local port forwarding as used in the example:
ssh username@RemoteServerHost -L localport:LocalHost:RemotePort
The operating systems on client and on the server are irrelevant. What matters is that local client has a SSH client and VNC viewer, and the remote machine (Azure Oracle Linux VM) has a SSH server and VNC server.
5.2 Change the VNC server configuration
Edit the file /etc/sysconfig/vncservers and modify the entry:
VNCSERVERS="1:toor 2:oracle"
VNCSERVERARGS[1]="-geometry 1024x768 –depth 24 -nolisten tcp -localhost"
VNCSERVERARGS[2]="-geometry 800x600 –depth 16 -nolisten tcp -localhost"
where:
" -localhost" option prevents remote VNC clients connecting except when doing so through a secure tunnel
“ -depth 16” option to specify the color depth in the VNC session
To get the new configuration Restart the VNC service:
| sudo service vncserver restart |
Shutting down VNC server: 1:aroot 2:oracle [ OK ]
Starting VNC server: 1:aroot
New 'fftest5:1 (aroot)' desktop is fftest5:1
Starting applications specified in /home/aroot/.vnc/xstartup
Log file is /home/aroot/.vnc/fftest5:1.log
2:oracle
New 'fftest5:2 (oracle)' desktop is fftest5:2
Starting applications specified in /home/oracle/.vnc/xstartup
Log file is /home/oracle/.vnc/fftest5:2.log
[ OK ]
5.3 Open an SSL connection with port forwarding
The syntax for local port forwarding as used in the example:
ssh RemoteUsername@RemoteServerHost -L localport:LocalHost:RemotePort
We want to create an encrypted tunnel, and connect to our VNC server through it, but we also want the tunnel to be ”automatically closed”, as soon as we shut down vncviewer:
ssh toor@fftest5.cloudapp.net –f –L 6901:localhost:5901 -v sleep 10 |
where:
- toor@ffora1.cloudapp.net = SSH host to connect to
- -f forks the SSH session to the background, while sleep is being executed on the remote machine. This ssh option is needed because we want to execute the following command (vncviewer) in the same local machine’s terminal.
- -L = Option to enable local port forwarding
- 6901 = Port on the client PC
- localhost = Host server to connect to (the remote PC, same as 127.0.0.1)
- 5901 = Port on the remote host (forwarded from the client PC)
- The sleep command is of major importance in the above line as it keeps the encrypted tunnel open for 10 seconds. If no application uses it during this period of time, then it is closed. Contrariwise, if an application uses it during the 10 sec period, then the tunnel remains open until this application is shutdown. This way the tunnel is automatically closed at the time we close vncviewer’s window, without leaving any SSH processes running on our workstation.
To connect to the VNC server, open a new Xterm session and enter the following command:
| vncviewer localhost:6901:1 |
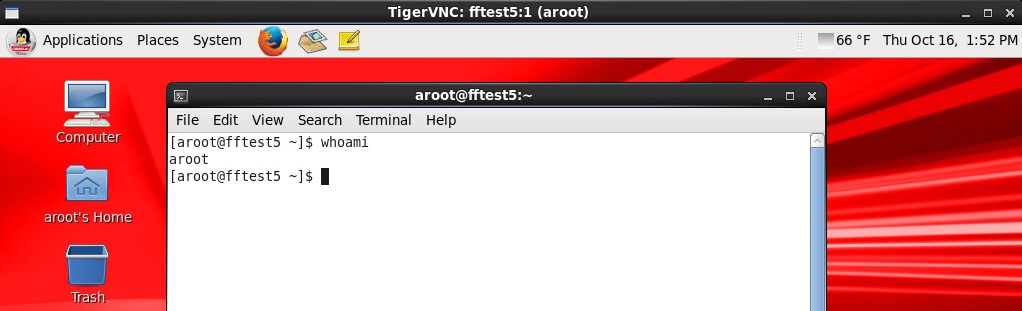
Figure 17: connection to the VNC Server
Instead to open two Xterm sessions to connect to VNC server, you can run all in unique command:
| ssh toor@fftest5.cloudapp.net –f –L 6901:localhost:5901 sleep 10; vncviewer localhost:6901:1 |
A second SSH tunnel can be opened from local Linux host to the Oracle Linux IaaS VM, using the remote port 5902:
ssh toor@fftest5.cloudapp.net –f –L 6902:localhost:5902 -v sleep 10 |
On the local linux host to remote VNC server, run the command in a new XTERM session:
| vncviewer localhost:6902:2 |
In VNC authentication, specify the oracle’s user credential.
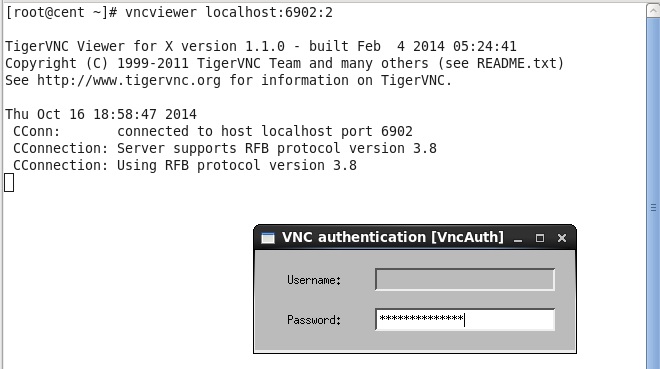
Figure 18: vnc client ask for oracle’s user credential
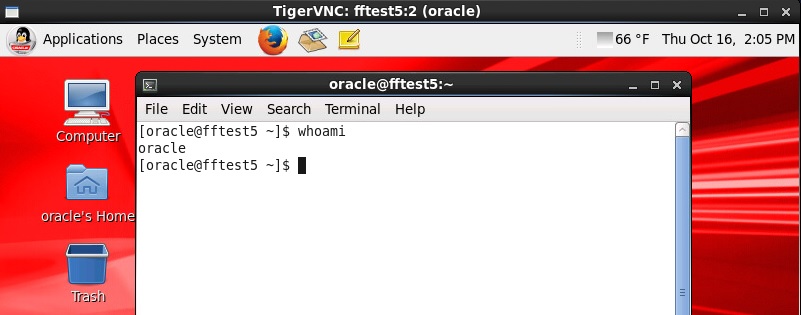
Figure 19: connection to remote Oracle Linux VM through oracle’s user credential
You can connect to the VNC server with "oracle" user credential using a unique command (in single Xterm session):
| ssh oracle@fftest5.cloudapp.net –f –L 6902:localhost:5902 sleep 10; vncviewer localhost:6902:2 |
6 Reference
- HowTo VNC: https://wiki.centos.org/HowTos/VNC-Server
- Configuring VNC Server on Linux: https://www.oracle-base.com/articles/linux/configuring-vnc-server-on-linux.php
7 Glossary
IaaS |
Infrastructure as a Service |
SSH |
Secure Shell |
VM |
Virtual Machine |
VNC |
Virtual Network Computing |
yum |
Yellowdog Updater, Modified (linux command) |