Clip Path Editing and Animating in Blend 2!
Due to popular demand we have added the clip path editing/animating feature to Blend 2. Clip path editing works for both WPF and Silverlight 1.0 projects. You can download the December Preview to test out the new features! In this post, I will go through some of the interesting things you can do with this feature!
What is a Clipping Path?
A clipping path is a path or shape that is applied to another object, hiding the portions of the masked object that fall outside of the clipping path. For example, the following image shows you a separate individual image and text object on the left, but thanks to clipping paths, on the right you have just the image object with everything outside of the Seattle text hidden:

Using a Path Object to Apply a Clipping Path
Let's take a quick look at how to use clipping paths in Blend:
- With the selection tool select the path or shape that you want to turn into a clipping path, hold CTRL, and then select the object that you want to clip. (Make sure that the clipping path object is in front of (in Z order) the object that you intend to clip.)
- On the Object menu, point to Path, and click Make Clipping Path. You can also right click on the two selected objects and select Make Clipping Path under the Path options.
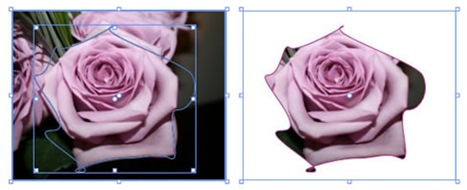
The left image below shows the path overlaid on our image, and on the right, you see the image visible through the region created by our path:
Editing a Clipping Path
You just saw how to apply a clipping path, so let's next look at how you would edit a clipping path. In Blend 2 you now have all path editing capabilities used to edit regular paths applicable to editing clipping paths as well.
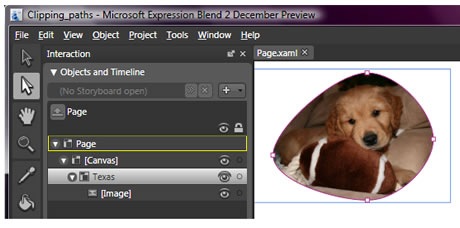
- Select the object with the clipping path applied. In this case you select the Image object.
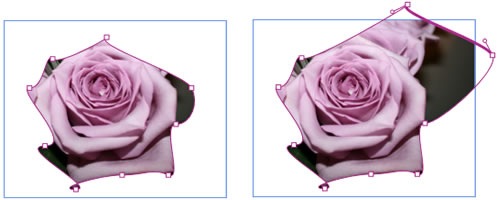
- Select the direct selection tool. Note that the clipping path is displayed as the purple outline. The clipping path consists of points and segments just like a regular path.
- Click and drag a segment on the clipping path to edit as you would a path object. You will be able to edit the clipping path by using the same artboard gestures and keyboard shortcuts associated with path editing.
The following image shows you how manipulating the path preserves the overall masking efffect that we expect:
Releasing a Clipping Path
You saw how to create a clipping path, and you also saw how to edit a clipping path. Let's look at how to actually release a clipping path. It's pretty straightforward:
- Select the object that is being clipped.
- On the Object menu, point to Path, and then click Release Clipping Path.
Note: In Blend 1 you only had the option of removing the clipping path, and that would remove the original clipping object from the artboard. This behavior has been improved in Blend 2 by allowing you to release the clipping path without removing the clipping object!
Animating a Clipping Path
In Blend 2, along with being able to edit clipping paths you can also use the full animation capabilities used to animate regular paths to animate clipping paths as well. You can also take advantage of the structure changes supported by vertex animation.
Let's look at that in greater detail:
- Select the object with the clipping path applied. In this case you select the Image object.
- Add a storyboard in the Objects and Timeline panel.
- Select the direct selection tool. Note that you can single click any point or segment to select or you can double click the clipping path to select all of the points and segments to move them all at once.
- You can then use the vertex animation features to create interactive animations with the clipping path.
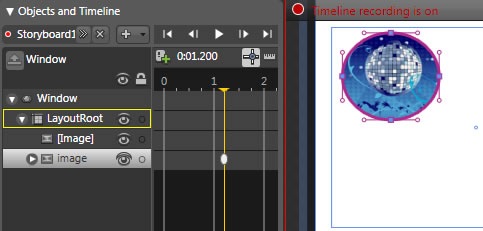
As seen in the following image, you can apply vertex animations to clipping paths. This can be used to easily create interactivity such as the “spotlight effect”:
Interop with Design
You currently have the ability to import files into Blend created with Expression Design with clipping paths or copy/pasting objects with clipping paths applied from Design->Blend.
In Blend 2 we also support editing/animating of these clipping paths. Below is an example of me creating a clipping path in Expression Design:
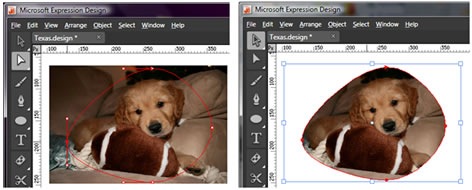
To import an object with a clipping path from Expression Design to Blend 2 you can simply copy the element from Design and paste it into a Blend project. Below is an example of an image object from Design pasted into a Blend 2 Silverlight 1.0 project.
Conclusion
As you can see you can create a variety of visual and interactive effects by creating, editing, and animating clipping paths in Blend 2. Give the features a try and let us know if you have any feedback!
Happy Blending!
Janete Perez