Migration from IIS 6 to IIS 7.x – 8.x
I have completed numerous migrations for customers and the majority of the time is spent troubleshooting the migrated web applications on the new IIS platform. The migration process with Web Deploy is very quick and the testing and mitigation of the migrated applications will consume the bulk of the time spent on the project. The steps outlined in these blog posts will help guide the migration process https://technet.microsoft.com/en-us/library/ff633422(v=WS.10).aspx or https://www.iis.net/learn/publish/using-web-deploy/migrate-a-web-site-from-iis-60-to-iis-7-or-above
Detailed planning is the key to reducing issues encountered during the migration process. Please follow the steps outlined in this blog post to prepare for the migration: https://blogs.msdn.com/b/ericparvin/archive/2014/04/30/preparing-for-the-iis-migration.aspx
Unfortunately, cataloging the applications and creating test plans does not always fall into the job description of a server admin and may seem burdensome. However, the key take-away from the planning process is being able to effectively declare the web application is successfully migrated and there must be a clear definition of success. Success can either be defined as having the application compile on the new server and for the login screen or first page appear in the browser for each application. Or, working through the test plan to ensure each page functions correctly . This must be decided before the migration occurs otherwise there will never be a clear definition of success and the project will continue and not have a clear end.
The following steps in the migration process are what has helped make migrations successful with my customers and go beyond the steps outlined in the blog posts mentioned in the first paragraph. The steps are broken out by the type of migration being performed with an entire server level migration first, moving to a web site, and the last option is moving just the application.
The key difference between using these Web Deploy commands on an IIS 7.x or IIS 8.x server is the is the syntax used on the –source switch. Web Deploy requires the use of webServer60 or metakey=lm/w3svc/1 to properly identify the site on IIS 6.0 servers.
Sever Level Migration:
This method can be accomplished with either a Web Deploy package migration using the Inetmgr GUI, or the Web Deploy command line to copy the files and settings to the new server.
The -source switch for migrating an entire server is webServer.
Example Syntax:
msdeploy.exe -verb:sync -source:webServer60,computername=10.0.0.11 -dest:webServer,computername=10.0.0.12
Housekeeping:
· Source server = Server sending the web files
· Target server = Server receiving the files (new server)
· For these examples, the Source server IP is 10.0.0.11 and the Target server is 10.0.0.12.
Backup on Target Server:
Make a backup of the IIS configuration settings on the target server using IIS backup and the web deploy tool to back up the web.config files:
%windir%\system32\inetsrv\appcmd add backup “PreWebDeploy”
AND
msdeploy -verb:sync -source:webServer -dest:package=c:\IISMigration \PreWebDeploy.zip
Note:
The Appcmd utility backs up the IIS settings for the target IIS Server and the Web Deploy utility backs up the IIS settings AND the web files. An extra layer of security and a quick restore option.
Command Line Package Creation Method:
From the command prompt, enter the following commands to create a differencing file and mechanism to review errors and warnings before generating the package file:
msdeploy.exe -verb:sync -source:webServer60,computername=10.0.0.11 -dest:webServer,computername=10.0.0.12 -enableLink:AppPoolExtension –verbose -whatif > c:\IISMigration\ServerDiff.txt
Note: The command switch -source:webServer is the equivalent to the IIS server level. This means, include everything on this IIS server in the package.
Inspect the output in the text file by searching on Error and Warning and resolve the issues before generating the package. Again, the pipe command to the file is optional and output from the WhatIf command can be viewed within the command window. This is what a successful test migration would look like.

Generate the Package to Transfer:
From the command prompt, enter the following commands to create a Web Deploy package:
msdeploy -verb:sync -source:webserver60 -dest:package=c:\IISMigration\SourceServer.zip
Copy the package to the target server and import using the following command to test before the import:
msdeploy -verb:sync -source:c:\IISMigration\SourceServer.zip -dest:webServer -enableLink:AppPoolExtension –verbose -whatif > c:\IISMigration\ SourceImportWhatIf.txt
Inspect the output in the text file by searching on Error and Warning and resolve the issues before generating the package.
Final command to complete the migration by omitting the –whatif command:
msdeploy -verb:sync -source:c:\IISMigration\SourceServer.zip -dest:webServer -enableLink:AppPoolExtension –verbose > c:\IISMigration\
Command Line Method without Packages:
This method generates a server to server transfer of IIS settings and files and the fastest method.
From the command prompt, enter the following commands to create a differencing file to review errors and warnings before generating the package file:
msdeploy.exe -verb:sync -source:webServer60,computername=10.0.0.11 -dest:webServer,computername=10.0.0.12 -whatif > c:\IISMigration \ServerDiff.txt
Note: The –whatif command can pipe to the command window instead of the file by omitting the pipe command.
Inspect the output in the text file by searching on Error and Warning and resolve the issues before generating the package:
msdeploy.exe -verb:sync -source:webServer,computername=10.0.0.11 -dest:webServer,computername=10.0.0.12 > c:\IISMigration \SourceToTargerServerMigration.txt
Inetmgr Package Creation Method:
The easiest method is generate a package from the source server through the Inetmgr GUI and copy the package to the target server and import the package. The wizard allows for multiple different options and is easy to follow.
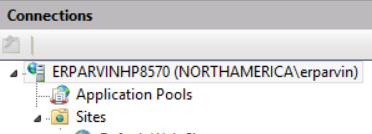
On the source IIS server, open Inetmgr and select the server level node in the connections pane.

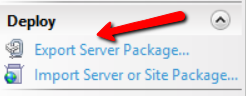
In the Actions pane, select the Deploy section has the Export Server Package option to start the wizard.

Save the package on the source server and transfer to the target IIS server and repeat the process except select the Import Server or Site Package option to start the wizard.
Alternative Methods for Sync Export/Export:
Push-
From the IIS 6 server, issue the following command (Push):
msdeploy -verb:sync -source:metakey=lm/w3svc/1 -dest:metakey=lm/w3svc/1 ,computername=10.0.0.5 -whatif > c:\iismigration\pushmigration.log

Check the log for any errors and proceed with the actual command:
msdeploy -verb:sync -source:metakey=lm/w3svc/1 -dest:metakey=lm/w3svc/1 ,computername=10.0.0.5
Pull-
From the IIS 7.x server run the following command:
msdeploy -verb:sync -source:metakey=lm/w3svc/1 ,computername=10.0.0.5 -dest:metakey=lm/w3svc/1 -whatif >c:\iismigration\pullmigration.log

Back Out Plan:
appcmd list backup
appcmd restore backup "PreMigration"
Web Site Level Migration:
This scenario will migrate all of the web server's bindings, certificates, and other high level web site information during the migration effort. This is for a single web site and all of the related applications under the web site.
The -source switch for migrating an entire server is metakey.
Note: This scenario can only be accomplished with the Web Deploy command line.
Example:
msdeploy -verb:sync -source:metakey=lm/w3svc/1 -dest:appHostConfig="Hello",computerName=10.0.0.12
Contoso.com= Web Site
Housekeeping:
Source server = Server sending the web files
Target server = Server receiving the files (new server)
For these examples, the Source server IP is 10.0.0.11 and the Target server is 10.0.0.12.
Backup on Target Server:
Make a backup of the IIS configuration settings on the target server using IIS backup and the web deploy tool to back up the web.config files:
%windir%\system32\inetsrv\appcmd add backup “PreContosoV2_Deploy”
AND
msdeploy -verb:sync -source:appHostConfig="Contoso.com" -dest:package=c:\_WebDeploy\PreContosoUpdate.zip
Migration Options:
There are two options presented to migrate the web site. The first option generates a Web Deploy package in the .zip format and this package is copied to the destination server. The second option performs the migration directly from the command prompt and is the fastest method. With both methods, please verify the results from the migration is the expected result by using the –whatif command to ensure a successfully migration.
Verify before Execution:
From the command prompt, enter the following commands to create a differencing file and mechanism to review errors and warnings before generating the package file:
msdeploy.exe -verb:sync -source:metakey=lm/w3svc/1,computername=10.0.0.11 -dest:appHostConfig="Contoso.com",computername=10.0.0.12 –verbose -whatif > c:\IISMigration\ServerDiff.txt
Note: The command switch -source:metakey is the equivalent to the IIS web site level. This means, include everything in the web site when creating the package.
Note: To find the site's number to use as a parameter:
Open the metabase.xml file (c:\Windows\system32\inetsrv\Metabase.xml
Search for the site name in the file
The <IIsWebVirtualDir Location> tag will show the number of the site.
Inspect the output in the text file by searching on Error and Warning and resolve the issues before generating the package. Again, the pipe command to the file is optional and output from the -WhatIf command can be viewed within the command window.
Note: If the website on the Target does not exist, the output from the -whatif statement will show all adds and no deletes.
Package Transfer Method:
From the command prompt, enter the following commands to create a Web Deploy package:
msdeploy -verb:sync -source: metakey=lm/w3svc/1 -dest:package=c:\IISMigration\SourceServerContosoSite.zip
Copy the package to the target server and import using the following command to test before the import:
msdeploy -verb:sync -source:c:\IISMigration\SourceServerContosoSite.zip -dest:appHostConfig="Contoso.com" –verbose -whatif > c:\IISMigration\SourceImportWhatIf.txt
Inspect the output in the text file by searching on Error and Warning and resolve the issues before generating the package.
Open the command prompt on the target server, run the following command to complete the migration:
msdeploy -verb:sync -source:c:\IISMigration\SourceServerContosoSite.zip -dest:appHostConfig="Contoso.com"
Command Line Method without Packages:
This method generates a server to server transfer of entire website settings and files.
From the command prompt, enter the following commands to create a differencing file and mechanism to review errors and warnings before generating the package file:
msdeploy.exe -verb:sync -source:metakey=lm/w3svc/1,computername=10.0.0.11 -dest:appHostConfig="Contoso.com",computername=10.0.0.12 -whatif > c:\IISMigration\WebSiteDiff.txt
Inspect the output in the text file by searching on Error and Warning and resolve the issues before generating the package. The output file is the history of the migration and can be archived.
msdeploy.exe -verb:sync -source:metakey=lm/w3svc/1,computername=10.0.0.11 -dest:appHostConfig="Contoso.com",computername=10.0.0.12 > c:\IISMigration\SourceToTargerWebSiteMigration.txt
Application Level Migration:
This method is used to migrate a web application hosted under a web site to a new server.
Here is the link to the TechNet content about the iisApp provider- https://technet.microsoft.com/en-us/library/dd569054(v=WS.10).aspx
Note: This scenario can only be accomplished with the Web Deploy command line OR the Internet Manager GUI.
Example Syntax:
The -source switch in Web Deploy for migrating an application is metakey and it migrates the directory content to a folder and marks the folder as an application.
Example:
msdeploy -verb:sync -source:metakey=lm/w3svc/1/PayCalculator -dest:iisApp="Contoso.com/PayCalculator",computername=10.0.0.12
- Web Site = Contoso.com
- PayCalculator = Web Application
Migration Options:
There are two options presented to migrate the application. The first option generates a Web Deploy package in the .zip format and this package is copied to the destination server. The second option performs the migration directly from the command prompt and is the fastest method. With both methods, please verify the results from the migration is the expected result by using the –whatif command to ensure a successfully migration.
Verify before Execution:
From the command prompt, enter the following commands to create a differencing file and mechanism to review errors and warnings before generating the package file:
msdeploy -verb:sync -source:metakey=lm/w3svc/1/PayCalculator -dest:iisApp="Contoso.com/PayCalculator",computername=10.0.0.12 -whatif > c:\IISMigration\PayCalculatorDiff.txt
Inspect the output in the text file by searching on Error and Warning and resolve the issues before generating the package. Again, the pipe command to the file is optional and output from the WhatIf command can be viewed within the command window.
Note: If the application on the Target does not exist, the output from the -whatif statement will show all adds and no deletes.
Package Transfer Method:
Create Application Package on Source Server:
There are two methods to create the package presented below and at end of the day, produce the same result. It all depends on the level of comfort using the GUI over the command line.
Inetmgr GUI:
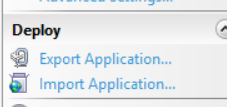
Open Inetmgr and select the web site and application to migrate. Select the Export Application utility on the GUI and follow the steps within the wizard.

Command Line:
msdeploy -verb:sync -source:metakey=lm/w3svc/1/PayCalculator" -dest:package=c:\IISMigration\PayCalculator.zip
Copy the Web Deploy package to the new server.
Import Site on Remote Server:
InetMgr GUI:
Open Inetmgr and select the web site and application to migrate. Select the Import Application utility on the GUI and follow the steps within the wizard.
Command Line:
msdeploy -verb:sync -source:c:\IISMigration\PayCalculator.zip -dest:iisApp="Contoso.com/PayCalculator" > c:\IISMigration\PayCalculatorDeployment.txt
Command Line Method without Packages:
This method generates a server to server transfer of the web application and omits the use of packages. It will synchronize the differences between the source and the target server at the application level.
msdeploy -verb:sync -source:metakey=lm/w3svc/1/PayCalculator -dest:iisApp="Contoso.com/PayCalculator",computername=10.0.0.12 > c:\IISMigration\PayCalculatorDeployment.txt
To include the application pool settings, use the -enablelink:AppPoolExtension switch in the statement as such:
msdeploy -verb:sync -source:metakey=lm/w3svc/1/PayCalculator -dest:iisApp="Contoso.com/PayCalculator" –enableList:AppPoolExtension,computername=10.0.0.12 > c:\IISMigration\PayCalculatorDeployment.txt