Web Application Migration with Web Deploy
This method is used to migrate a web application hosted under a web site in the following scenarios:
- Deploying a new application to IIS
- Migrating a web application to a new IIS server
- Promoting an entire web application between environments, such as a promotion from QA to Production utilizing a code promotion strategy.
- Synchronizing changes between servers.
Here is the link to the TechNet content about the iisApp provider- https://technet.microsoft.com/en-us/library/dd569054(v=WS.10).aspx
Note: This scenario can only be accomplished with the Web Deploy command line OR the Internet Manager GUI.
Example Syntax:
The -source switch in Web Deploy for migrating an application is iisApp and it synchronizes directory content to a folder and marks the folder as an application.
Example:
msdeploy -verb:sync -source:iisApp="Contoso.com/PayCalculator" -dest:iisApp="Contoso.com/PayCalculator",computername=10.0.0.12
- Web Site = Contoso.com
- PayCalculator = Web Application
Migration Options:
There are two options presented to migrate the application. The first option generates a Web Deploy package in the .zip format and this package is copied to the destination server. The second option performs the migration directly from the command prompt and is the fastest method. With both methods, please verify the results from the migration is the expected result by using the –whatif command to ensure a successfully migration.
Verify before Execution:
From the command prompt, enter the following commands to create a differencing file and mechanism to review errors and warnings before generating the package file:
msdeploy -verb:sync -source:iisApp="Contoso.com/PayCalculator" -dest:iisApp="Contoso.com/PayCalculator",computername=10.0.0.12 -whatif > c:\_WebDeploy\PayCalculatorDiff.txt
Inspect the output in the text file by searching on Error and Warning and resolve the issues before generating the package. Again, the pipe command to the file is optional and output from the WhatIf command can be viewed within the command window.
Note: If the application on the Target does not exist, the output from the -whatif statement will show all adds and no deletes.
Package Transfer Method:
Create Application Package on Source Server:
There are two methods to create the package presented below and at end of the day, produce the same result. It all depends on the level of comfort using the GUI over the command line.
Inetmgr GUI:
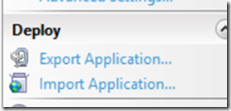
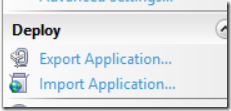
Open Inetmgr and select the web site and application to migrate. Select the Export Application utility on the GUI and follow the steps within the wizard.
Command Line:
msdeploy -verb:sync -source:iisApp="Contoso.com/PayCalculator" -dest:package=c:\_WebDeploy\PayCalculator.zip
Copy the Web Deploy package to the new server.
Import Site on Remote Server:
InetMgr GUI:
Open Inetmgr and select the web site and application to migrate. Select the Import Application utility on the GUI and follow the steps within the wizard.
Command Line:
msdeploy -verb:sync -source:c:\_WebDeploy\PayCalculator.zip -dest:iisApp="Contoso.com/PayCalculator" > c:\_webdeploy\PayCalculatorDeployment.txt
Command Line Method without Packages:
This method generates a server to server transfer of the web application and omits the use of packages. It will synchronize the differences between the source and the target server at the application level.
msdeploy -verb:sync -source:iisApp="Contoso.com/PayCalculator" -dest:iisApp="Contoso.com/PayCalculator",computername=10.0.0.12 > c:\_WebDeploy\PayCalculatorDeployment.txt

