SharePoint 2010 Provisioning A New Farm with PowerShell
<Update 2010.02.23 Re-ordered provisioning steps to fit with supported test cases>
NEW! Looking for a simplified process for working with SharePoint and PowerShell?
Check out: SPModule.
<Update 2009.11.20 Initialize-SPResourceSecurity and Install-SPApplicationContent>
This post will take you down the process of configuring your SharePoint farm while introducing the new administrative functionality shipping in the PowerShell provider.
During the SharePoint Installation, make sure you choose “Server Farm” and then “Complete” install. This will allow you to create a SharePoint farm rather than a standalone server.
After the install completes, the setup program will ask you if you want to run the SharePoint Technologies Configuration Wizard (default is checked). Uncheck the box to NOT run the wizard.
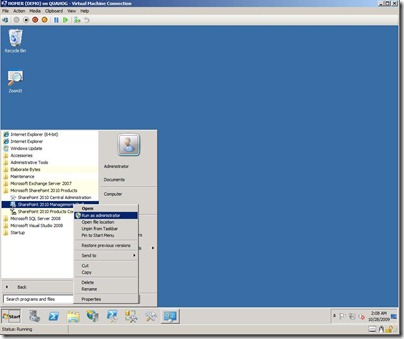
Under the Start Menu, browse to Microsoft SharePoint 2010 Products. Right-click on SharePoint 2010 Management Shell and choose Run as administrator
Notice: Since we have not created a farm yet, the shell will load with an error that the local farm is not accessible. This is expected.
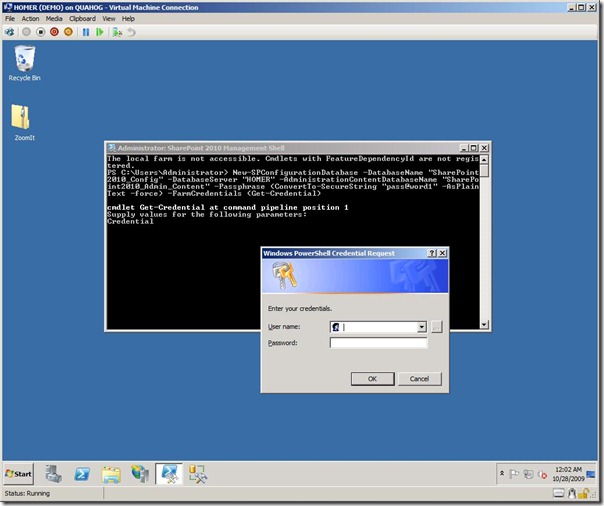
First… , run the following command to create a new configuration database and central admin content database.
Note: One of the main reason we are using this method, versus the UI is because we can specify the central admin content database name. In the UI, you cannot specify the name and it is created with a GUID. <— DBA’s hate this
New-SPConfigurationDatabase –DatabaseName “SharePoint2010_Config” –DatabaseServer “<db server>” –AdministrationContentDatabaseName “SharePoint2010_Admin_Content” –Passphrase (ConvertTo-SecureString “pass@word1” –AsPlaintext –Force) –FarmCredentials (Get-Credential)
Notice: rather than hard coding the credential for the farm account, I am having PowerShell prompt me for it. You can also do this with the passphrase by accessing the “Password” property of the of the credential object: (Get-Credential).Password
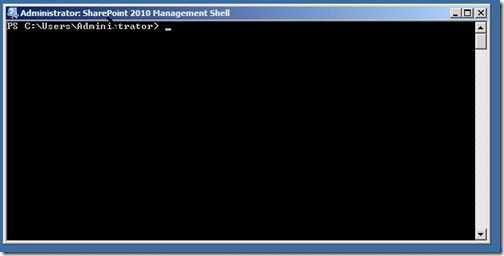
After the process runs, you can test that the server has been added to a farm, by reloading the PowerShell window. Close and repeat the “Run as administrator” step above. It should load with no warning message.
Next, we need to install the help files
Install-SPHelpCollection -All
After that command completes, we need to secure the files and registry entries on the server otherwise we we will receive a whole bunch of weird security errors.
Initialize-SPResourceSecurity
Next, we need to install and and then provision the services onto the farm.
Install-SPService #(for server farm installations)
Install-SPService -Provision #(for standalone servers only)
Next, we need to install the features on the server.
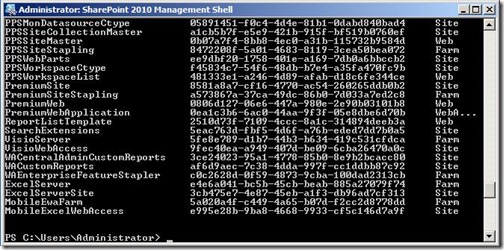
Install-SPFeature –AllExistingFeatures
Next, we need to provision the central admin web application on our desired port. This will also link up the web application with the admin content database we created in the previous step.
New-SPCentralAdministration -Port 1234 -WindowsAuthProvider "NTLM"
Next, we need to install all of the application content
Install-SPApplicationContent
Lastly, one of the last steps that I perform here is to Disable the Loopback Check on stand alone demo servers. This setting usually kicks out a 401 error when you try to navigate to sites that resolve to a loopback address e.g. 127.0.0.1
To disable the loopback check, run this command from PowerShell:
New-ItemProperty HKLM:\System\CurrentControlSet\Control\Lsa -Name "DisableLoopbackCheck" -value "1" -PropertyType dword
DONE! Now, you can open up Internet Explorer to the central admin site/port you specified and you’re on your way!
Or, since you’re now a PowerShell pro, run this command :
“start iexplore https://server:1234”


