Setting Up A Delayed Sending Rule For Email In Microsoft Outlook

Author: Ed Katibah, Microsoft SQLCAT
Reviewer: Abdallah Fateen, Microsoft
Introduction
A few weeks ago, a couple of us were in the hallway discussing email and the topic of recalling sent email came up. After some discussion, a colleague, Chris Kurt suggested another approach – implementing a delay in outgoing email, a.k.a. a delayed sending rule? That sounded like it could be a great general purpose approach and subsequently became the basis for this blog post since I liked it so much.
As a means of introducing this rule, how many times have you pressed the Send button on an email only to realize in the following moments that you wished to add (or delete) something on the email – maybe you left somebody off of the To… line who needed to be on it. Or worse, you had second thoughts about sending the email at all. Wouldn’t it be nice if the email were delayed for a few minutes before it was actually sent, allowing you time to be able to modify it (or delete it)? The following tutorial steps you through how to set up such a rule in Microsoft Outlook, in this case Outlook 2010 (Version 14). The post reviewer, Abdallah, reports that the instructions presented in this post work with Outlook 2013, also.
Quick Start
If you have done this before and/or want just the basic
steps to get started, here is a quick start guide:
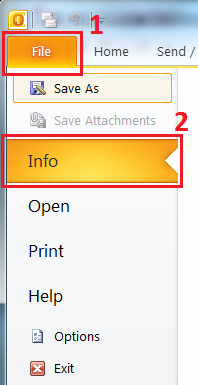
A. In Outlook, select “File”, “Info”
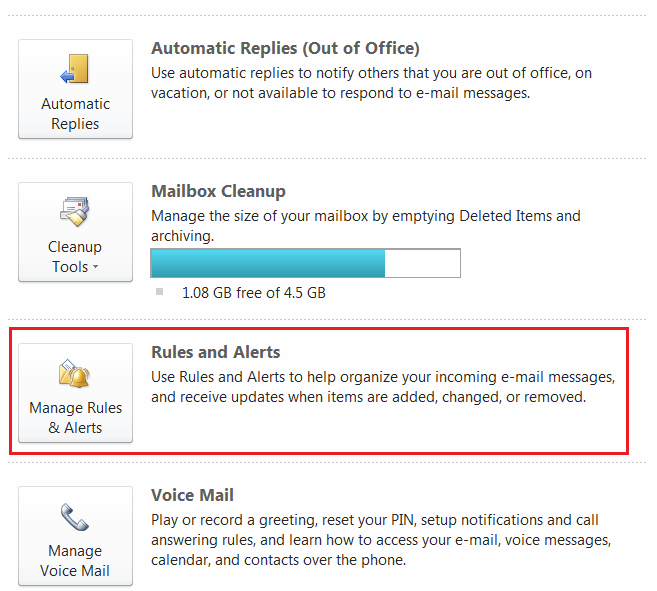
B. On the “Account Information” screen, select “Manage Rules and Alerts”
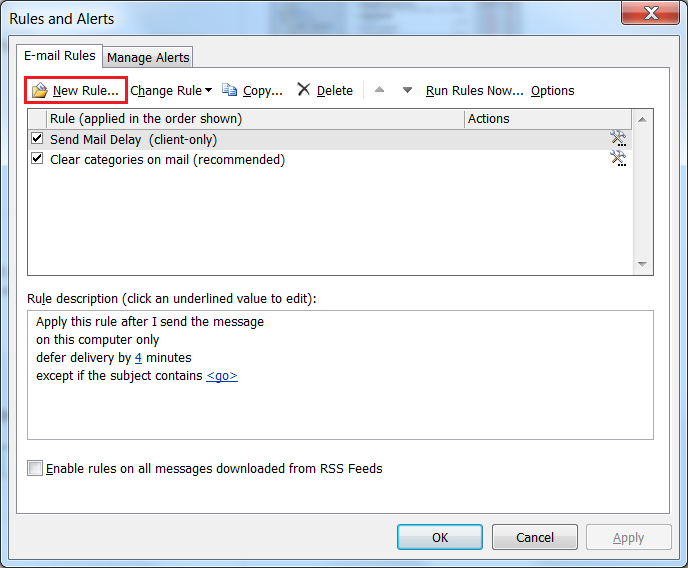
C. On the “Rules and Alerts” screen, select “New Rule”
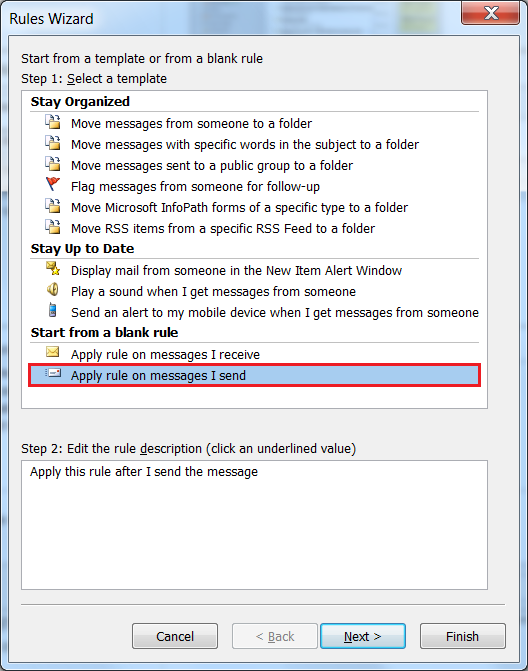
D. On the "Rules Wizard" screen, go the "Start from blank rule" section and select "Apply rule on messages I send"
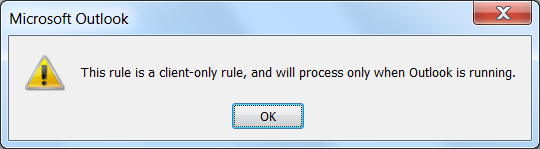
E. On the next "Rules Wizard" screen, go to "Step 1: Select condition(s) " and check "on this computer only"
F. On the next "Rules Wizard" screen, go to the "Step 1: Select actions(s) "
section and...
- check "defer delivery by a number of minutes"
- select "a number of" minutes hyperlink... under Step 2 on the screen
- enter the number of minutes to delay sending in the popup menu
G. On the next "Rules Wizard" screen, go to the "Step 1: Select exceptions(s) " section and...
- check "except if the subject contains specific words"
- select the "specific words" hyperlink in Step 2... ”
- enter the specific word(s) string in the "Search Text" menu
H. Enter the specific word or phrases string in the "Search Text" menu on which to apply the delay exception
I. This step is a recap of the last wizard screen, confirming the choices that you just made
J. On the next "Rules Wizard" screen, you can name, finalize and review the new rule in 3 easy steps…
K. Accept the final notification screen and you are done.
Steps
Here are steps I employed to set up a rule to delay sending mail by 4 minutes. I also added several key words, which when added (typically appended) to the subject line, instruct Outlook to bypass the delayed mail send rule and send immediately.
Step A: In Outlook, select “File”, “Info”
Step B: On the “Account Information” screen, select “Manage Rules and Alerts”
Step C: On the “Rules and Alerts” screen, select “New Rule”
Step D: On the "Rules Wizard" screen, go the "Start from blank rule" section and select "Apply rule on messages I send"
Step E: On the next "Rules Wizard" screen, go to "Step 1: Select condition(s) " and check "on this computer only"

Step F: On the next "Rules Wizard" screen, go to the "Step 1: Select actions(s) " section and...
- check "defer delivery by a number of minutes"
- select "a number of" minutes hyperlink... under Step 2 on the screen
- enter the number of minutes to delay sending in the popup menu
Note : 1 minute is the default. I set my delay for 4 minutes as a personal preference. Set your delay to however many minutes you would like. You can always go back and modify the delay (or remove it altogether).

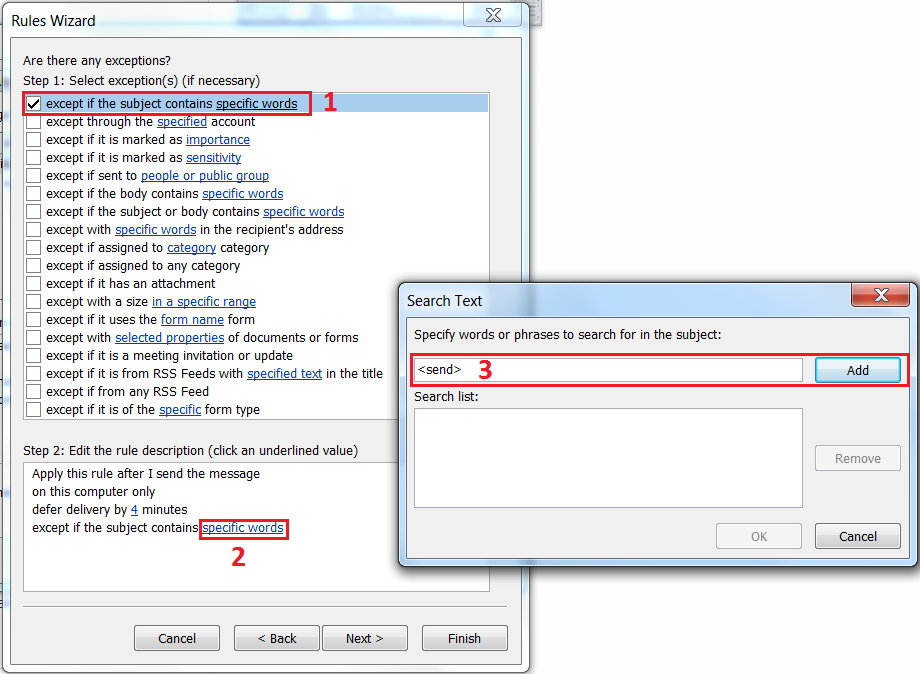
Step G: On the next "Rules Wizard" screen, go to the "Step 1: Select exceptions(s) " section and...
- check "except if the subject contains specific words"
- select the "specific words" hyperlink in Step 2... ”
- enter the specific word(s) string in the "Search Text" menu
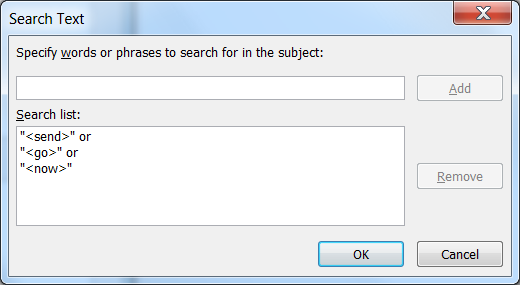
Note : In this example, I used the keyword "<send>". In the following examples, I added a couple of additional key words, used to bypass the sending delay.
Step H. Enter the specific word or phrases string in the "Search Text" menu on which to apply the delay exception
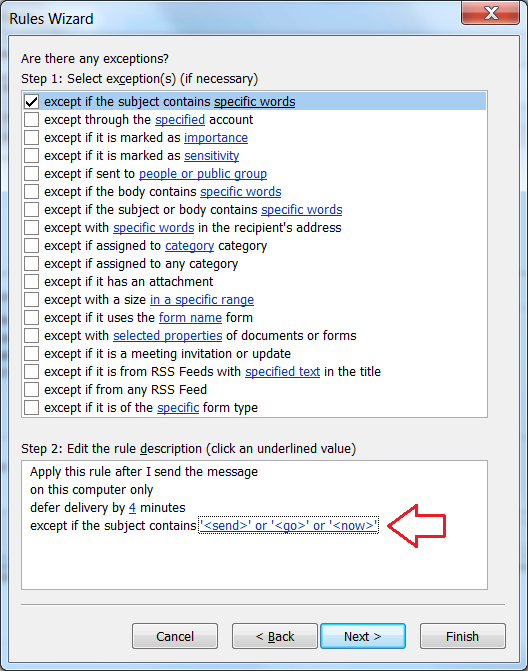
Step I: This step is a recap of the last wizard screen, confirming the choices that you just made.
Step J: On the next "Rules Wizard" screen, you can name, finalize and review the new rule in 3 easy steps…

Step K. Accept the final notification screen and you are done.