Configuring and Customizing the Content Query Web Part
Hi everyone, George Perantatos here. Last time I posted on this blog, I discussed how Smart Client Authoring can be used to convert documents into web pages. This time I want to switch gears a bit and talk about how you can aggregate content from various places in your web site and present it all in one place.
So, let's imagine that you've built out a web site using Office SharePoint Server 2007. Your web pages, documents, and images are stored in SharePoint libraries. Content types define the schemas of discrete items, and sub-sites are used for organization and navigation. Now, the question is: how do I aggregate interesting slices of this information on places like my web site's home page?
Well, we have a great web part for doing just that right out of the box, and it's called the Content Query Web Part. This web part allows you to show items from your site based on a query, or set of rules, that you define. You can control what part of the site the web part looks for content, what types of items it returns, and it lets you filter, sort, and group those results. And, it lets you control how the items are rendered, so you can make these aggregations match the look and feel of the rest of your web site, both in what content is shown as well as how it's styled.
The best way to show what the web part is capable of is to walk through an example. Let's say that you've defined a type of page in your site called a "Product Page". A Product Page has a set of common fields, like Title, Description, and Body, but it also has some additional metadata that tells you what product line the page is for. Now, let's say that you want your home page to feature a list of the latest 5 product pages from your entire site that are about the Widget product line. Furthermore, you want to show this list of product pages by displaying the Title of the page as well as a portion of the Body content, with a little "more..." link that takes people to the full article. Something like:
Widget 2007The Widget 2007 Beta 2 has recently gone to market. This innovative... (more)
Widget Community launches!
Our first community driven application portal has just launched. You can...(more)
OK, let's get to work!
Step 1: add a Content Query Web Part to the home page
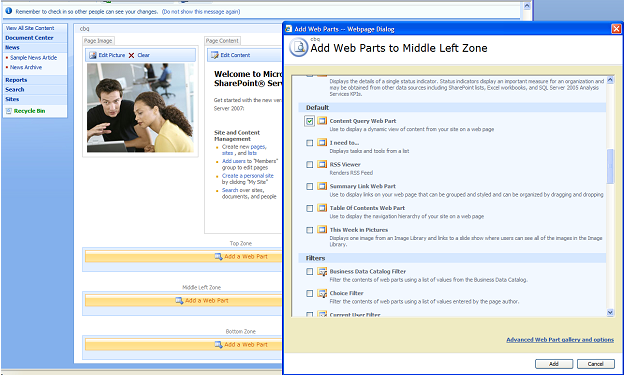
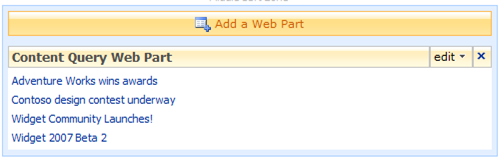
This part is pretty basic. I go to the home page of our site, click on Site Actions, and click Edit Page. The page is checked out to me, and is placed in edit mode. In one of the web part zones, I click "Add Web Part", scroll down to the Content Query Web Part, select it, and add it.
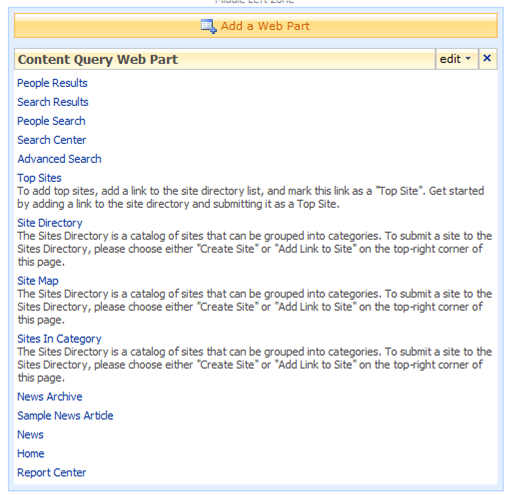
Now, I have a Content Query Web Part on my checked-out version of the home page. It's running a default query that shows me all of the web pages in my site collection.
Step 2: configure Content Query to rollup product pages
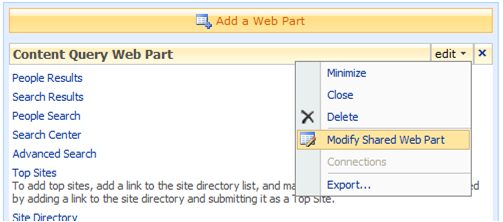
Well, that's an OK query as a placeholder to show me that the web part is working correctly, but the results are not exactly what I want to show. So, I have to edit the web part and configure it to show product pages. First, I click on the web part menu and select Modify Shared Web Part.
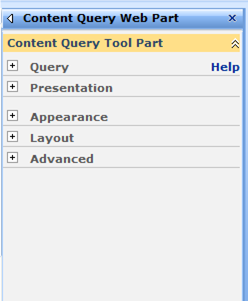
The toolpane opens and I see sections of properties. The Query section lets me configure what content the web part will show, and the Presentation lets me configure how the content is displayed.
Let's expand the Query section and configure this part:
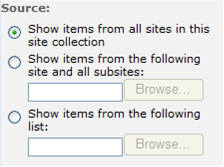
- For Source, I don't know (or care) where the product pages live, so I'll leave that set to the entire site collection.
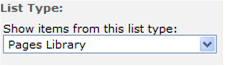
- For List Type, I know these are Web pages, which reside in a pages library, so I'll leave this set to Pages Library.
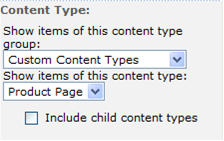
- For Content Type, I know these are pages of a particular content type: Product Page. So, I'll pick the content type group that I created Product Page in, and then set the drop-down to Product Page.
Now, if I click Apply on my web part, I see just product pages appearing!
OK, but my tasks is to show the latest 5 product pages that are about the Widget product line. Let's look further down the toolpane UI and see what we can do.
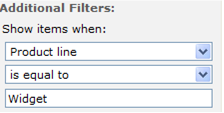
- If I expose the Additional Filters drop-downs, I see the properties that are defined for the Product Page content type. Great; so if I select Product line, is equal to, and type in Widget, I should only get back those pages whose metadata says they're for the Widget product line.
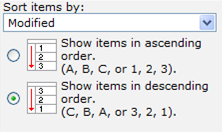
- Down on the Sorting drop-down, I see that we're sorting by created date (most recent first). I care about when people update product pages, so I'll set this to Modified.
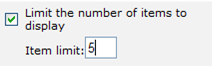
- Finally, I like to have an item limit here so the web part doesn't show too much information (it's the home page after all). I'll set the item limit to 5.
Now, if I click Apply on my web part, I see not only just product pages, but the latest 5 product pages about the Widget product line!
OK, we're getting close. But...hmm, the styles don't look quite right. I see a title, but I don't see the body text and the "more...". How do we fix that?
Step 3: customize Content Query to ask for additional product page fields
Anytime you want the Content Query web part to show specific fields from the items that you're aggregating, you have to do two things:
- You have to tell the web part to ask for those fields
- You have to render those fields in the styles that the web part uses to show the items
Let's tackle the first one. So, I want to have the web part show the Body field from the product pages, so I have to configure the web part to ask for it.
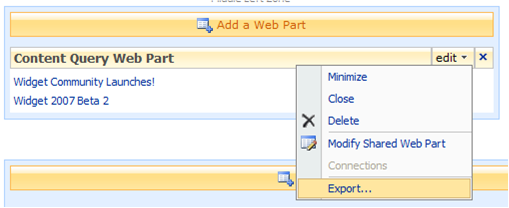
First, I export the web part that we've added. From the web part menu, I select Export..., and pull down the .webpart file. This is just a text file that shows all of the properties of the web part and their values.
We look for the property called "CommonViewFields". This property makes the web part request additional fields, on top of the "base" ones it asks for out of the box. We can edit this property and specify one additional field to ask for, namely the Body field.
<property name="CommonViewFields" type="string">Body_x0020_content, RichHTML</property>
There's a few ways you can configure this property but the most common one is "Internal name of field", followed by a comma, followed by the type of the field. If you want more than one, add a semicolon between each pair. (Don't worry, we have an SDK article coming soon that gets into all the details of using this and other properties.)
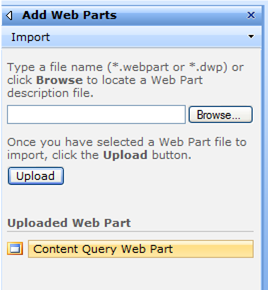
Now, all we have to do is save this .webpart file and import it back on the site. By selecting Import from the toolpane, and browsing to the .webpart file, you can upload this new .webpart and then add it to your page.
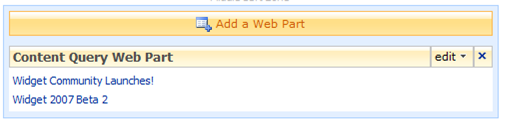
As soon as we add our web part, we see...
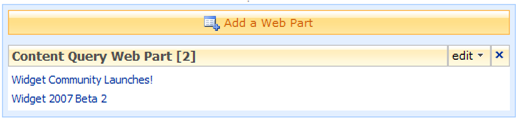
Wow, that looks exactly the same! Right, so the web part now has the Body field content, but it's not rendering the content. How do I make the web part do that?
Step 4: customize XSLT to render additional fields
The Content Query web part utilizes XSLT to render its contents. This means that I can edit the way the web part renders content and configure exactly what is shown and how it's shown.
If I edit the web part and look at the toolpane, I'll see a couple of drop-downs that relate to Styles. These correspond to the Header and ItemStyle XSLT files that are located in the site collection's Style Library, which is in the root site.
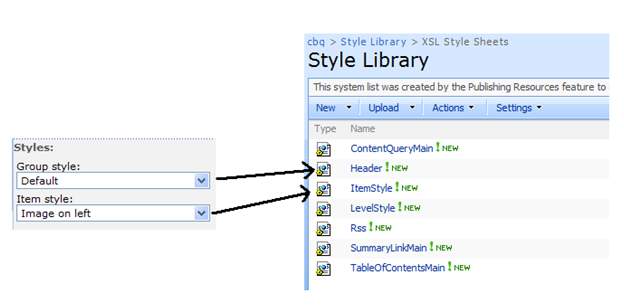
I see that the web part is currently configured to use the "Image on left" style. If we open the ItemStyle file, we'll see several xsl templates. Each corresponds to an item style in the drop-down above. The Image on left style looks like this:
     <xsl:template name="Default" match="*" mode="itemstyle">
        <xsl:variable name="SafeLinkUrl">
            <xsl:call-template name="OuterTemplate.GetSafeLink">
                <xsl:with-param name="UrlColumnName" select="'LinkUrl'"/>
            </xsl:call-template>
        </xsl:variable>


        <xsl:variable name="SafeImageUrl">
            <xsl:call-template name="OuterTemplate.GetSafeStaticUrl">
                <xsl:with-param name="UrlColumnName" select="'ImageUrl'"/>
            </xsl:call-template>
        </xsl:variable>


        <xsl:variable name="DisplayTitle">
            <xsl:call-template name="OuterTemplate.GetTitle">
                <xsl:with-param name="Title" select="@Title"/>
                <xsl:with-param name="UrlColumnName" select="'LinkUrl'"/>
            </xsl:call-template>
        </xsl:variable>


        <xsl:variable name="LinkTarget">
            <xsl:if test="@OpenInNewWindow = 'True'" >_blank</xsl:if>
        </xsl:variable>
        <div id="linkitem" class="item">
            <xsl:if test="string-length($SafeImageUrl) != 0">
                <div class="image-area-left">
                    <a href="{$SafeLinkUrl}" mce_href="{$SafeLinkUrl}" target="{$LinkTarget}">
                        <img class="image" src="{$SafeImageUrl}" mce_src="{$SafeImageUrl}" alt="{@ImageUrlAltText}" />
                    </a>
                </div>
            </xsl:if>


            <div class="link-item">
                   <xsl:call-template name="OuterTemplate.CallPresenceStatusIconTemplate"/>
                <a href="{$SafeLinkUrl}" mce_href="{$SafeLinkUrl}" target="{$LinkTarget}" title="{@LinkToolTip}">
                    <xsl:value-of select="$DisplayTitle"/>
                </a>
                <div class="description">
                    <xsl:value-of select="@Description" />
                </div>
            </div>
        </div>
    </xsl:template>
The style breaks down into two sections:
- The first section (the part that begins with an "xsl:variable") processes the data, and ensures that it is properly formatted. Some of these functions called here ensure the styles can be shared between the Summary Links and the Content Query web parts. Other functions are there to ensure that the information passed to the XSLT doesn't contain improper markup that could render out as unescaped HTML.
- The second section (the part that begins with a "div id") renders HTML and includes the data.
We see that this style renders an image, a title, and a description. For the scenario above, all I have to do is change that description line:
                 <div class="description">
                    <xsl:value-of select="@Description" />
                </div>
and make it show the Body content field:
                 <div class="description">
                    <xsl:value-of select="@Body_x005F_x0020_content" />
                </div>
If I save the XSLT and reload the page with my web part, I see:

Great, I'm finally done!
Tips and tricks
- Often you may want to see how the cross-list query data is getting thrown to the XSLT, so you can devise the right statements to display the data. Here's a quick way to render the names of the fields that are getting passed to you. For a given item style that the web part is using, add the following markup:
                 <xsl:for-each select="@*">
                       P:<xsl:value-of select="name()" />
                </xsl:for-each>
- A quick sidenote on web part property editing: while exporting the web part as I did above is certainly valid, it only applies to one instance of a web part on one page. You have two other options:
-
- You can configure a Content Query web part as above, and have it be available in the web part gallery, for authors to add to their pages.
- You can edit a web part on a web part page or page layout in SharePoint Designer, and configure it as above. If you edit a web part in a web part zone in a page layout, then all new pages that use this layout will get your customized web part.
Pay attention to details when editing XSLTs. Missing closed tags matter, as do letter casings when referring to field names. I speak from experience here.
I hope this walkthrough helps people configure and use the Content Query Web Part. I'd be interested to hear and see examples of how people are using the web part, as well as field questions. So, post your comments!
--George Perantatos, Program Manager