CRM 4.0 Accelerators for CRM Online: Event Management
The Event Management accelerator gives organizations the ability to manage the planning, execution, tracking and reporting requirements for event campaigns. Designed for CRM 4.0 On-Premise, the installation includes customizations, workflows, plug-ins, reports, code and controls.
Although this is an On-Premise accelerator, there are some parts that can be applied to CRM Online, in particular the customizations and workflows. This provides an Event Management template or skin for organizations who need more robust tracking of event campaigns. The following article describes how to install the customizations and provides an example of Event Management in CRM Online.
Step 1: Import the customizations
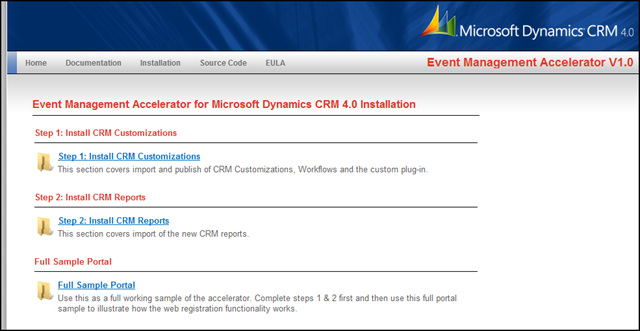
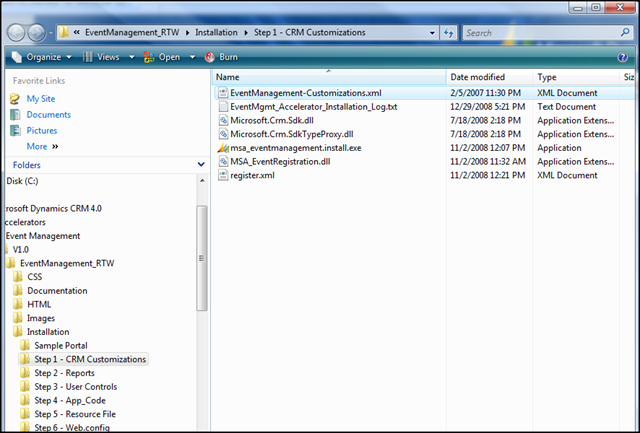
Go to CodePlex and download the installation files: www.codeplex.com/crmaccelerators/Release/ProjectReleases.aspx?ReleaseId=19077. First, read the documentation. Then click on the Installation link, Step 1: Install CRM Customizations, and save EventManagement-Customizations.xml file locally.
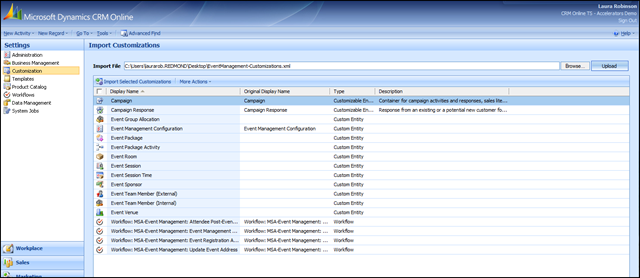
Backup all of your existing customizations as a precautionary measure. Upload the customization file. If you have Internet Marketing for CRM Online enabled, refer to the instructions below before proceeding. With the exception of Internet Marketing users, import all customizations. (Settings -> Customization -> Import Customizations -> upload file).
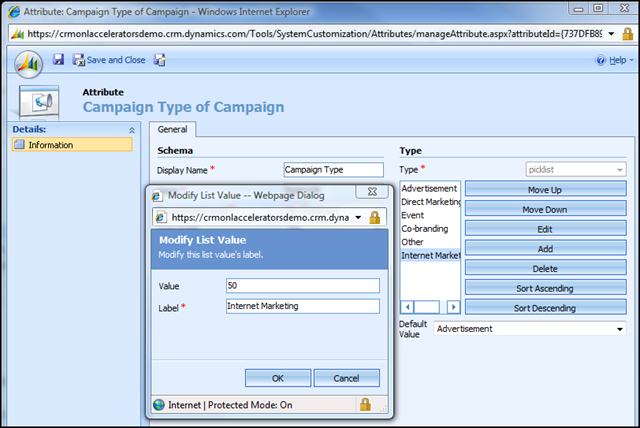
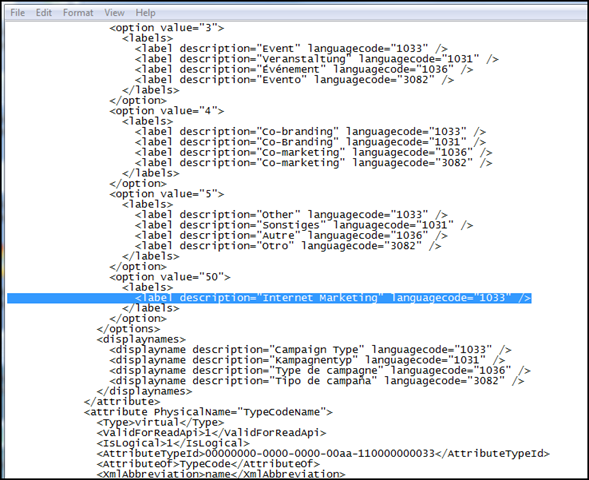
Internet Marketing Users: If you already have Internet Marketing enabled for CRM Online, importing the Campaign customization included with Event Management will disable Internet Marketing. When Internet Marketing is activated, a new value is added to the Campaign Type picklist with a value = 50. Importing the Campaign customization within the Event Management .xml file will revert Campaign Type to its original values and you cannot add Internet Marketing, value = 50, back to the picklist values through the UI (new system picklist values start at 200,000).
However, you can modify the event management .xml customization file so that Campaign Type includes Internet Marketing, if you are comfortable doing so. Proceed with caution and backup your customizations before making changes.
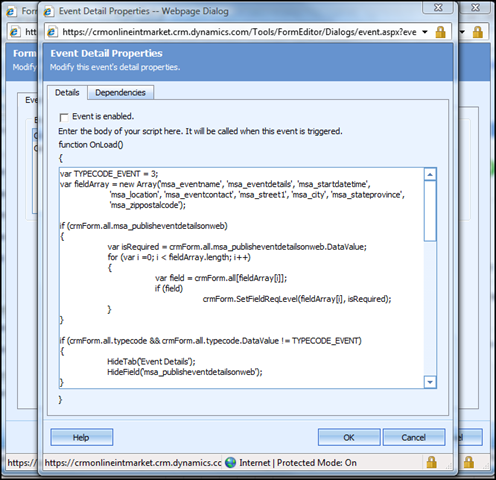
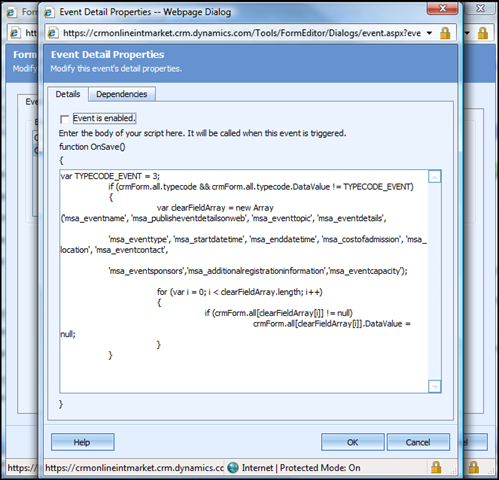
Furthermore, for Internet Marketing folks: if you wish to track both Internet Marketing campaigns as well as event management, you may choose to disable the script running on the OnLoad and OnSave events within the Campaign entity for event management. These OnLoad and OnSave customizations will disable the Event Management tab on the form when you aren't tracking an event campaign type. (Settings -> Customization -> Campaign -> Forms & Views -> Form -> Form Properties)
After you have reviewed the changes (and are comfortable with them), publish all customizations. Enable the custom entities for other users in your org.
Step 2: Review and publish the event management workflows
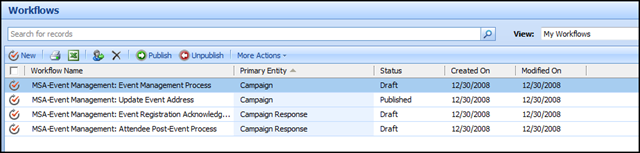
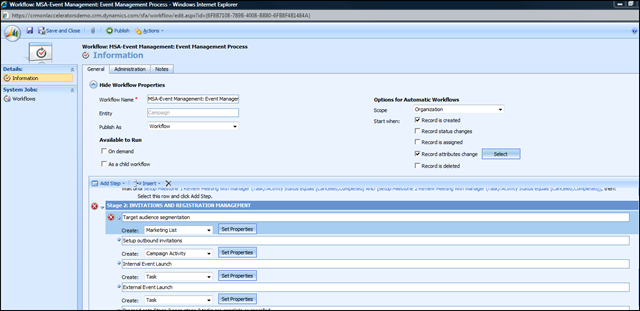
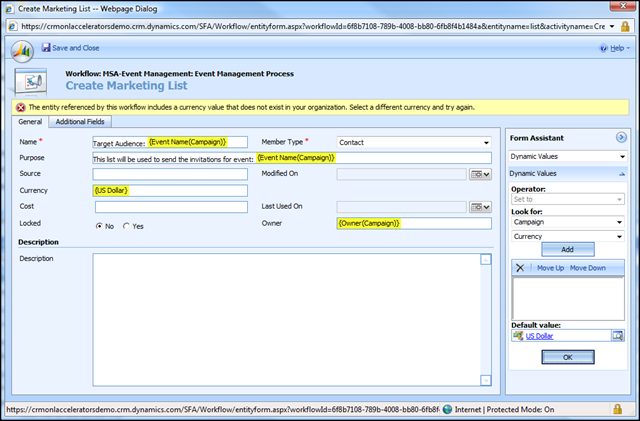
- MSA-Event Management: Event Management Process - this workflow adds a process to the event campaign with various tasks laid out. You will need to correct the following step and add a new default currency so there are not errors:
- MSA-Event Management: Update Event Address - this workflow updates the event address information once you select the primary venue.
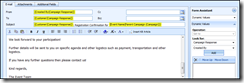
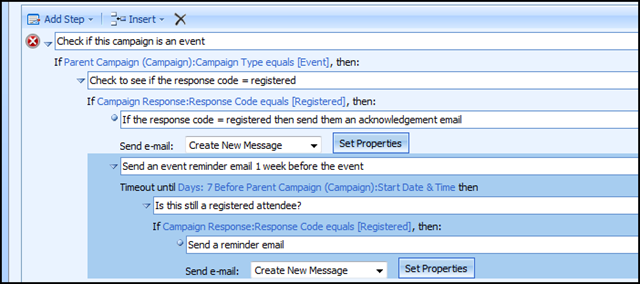
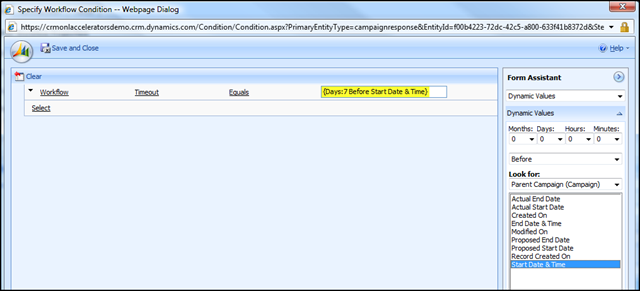
- MSA-Event Management: Event Registration Acknowledgement - another process workflow to manage registrant responses. Upon import this workflow has many errors. To fix the errors, open the email messages and change the From value. You may also have to reset the Timeout step if this still gives an error.
- MSA-Event Management: Attendee Post-Event Process - this workflow sends a follow-up email to event attendees. Like in the above workflow, you need to change the From value to fix the errors.
NOTE: If you are running Internet Marketing AND the Event Management customizations you will have to change the triggers of most of these workflows since they are run on Campaign Type: Event.
Step 3: Create your Event Campaign
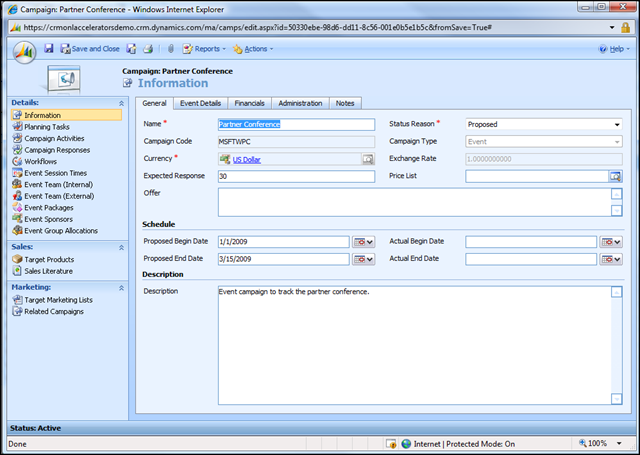
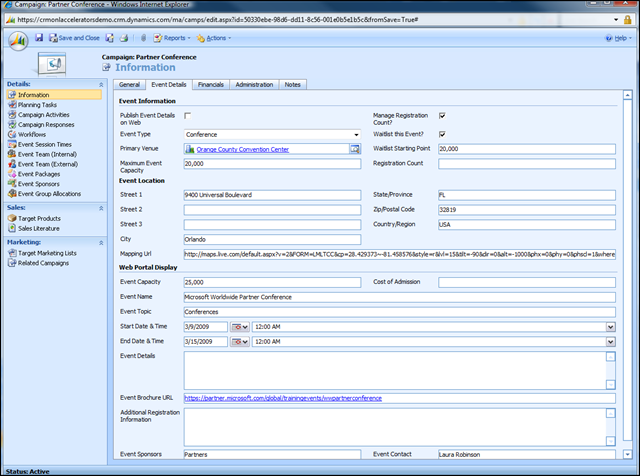
Start a new campaign and set to Type: Event (or Type: Internet Marketing if you want to enable IM per the instructions above) . This will enable the event planning, including tracking the event venue, rooms, sessions, times, sponsors, teams, activities and packages. Here's an example:
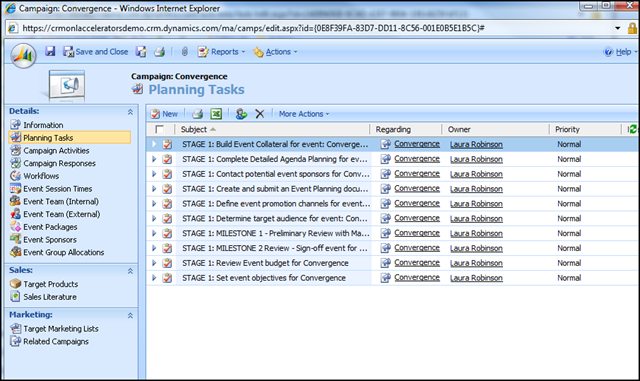
Review and complete the planning tasks generated by the event campaign workflow process:
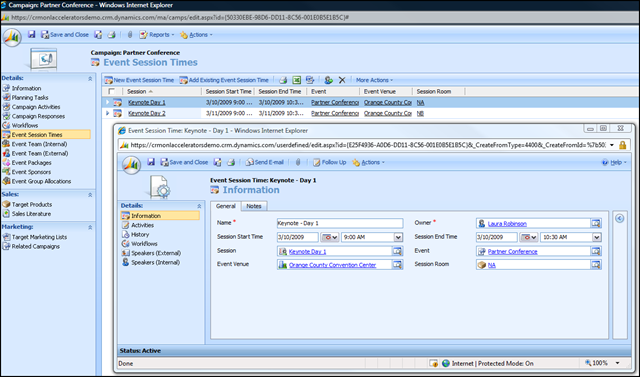
Add session rooms and session times to format your agenda:
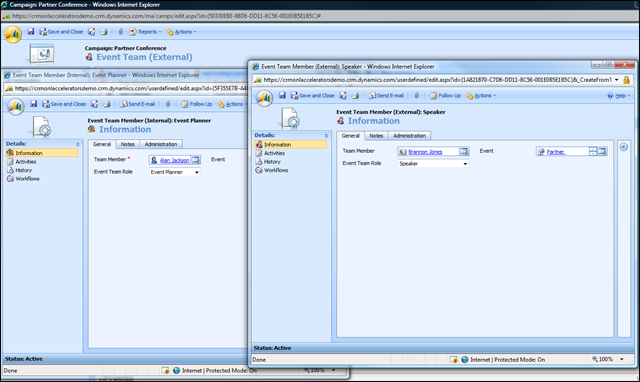
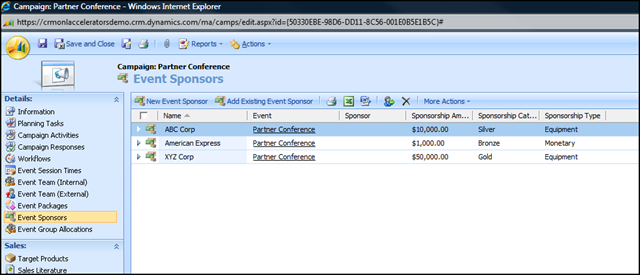
Add existing users and outside contacts as your internal and external teams, respectively, and sponsors:
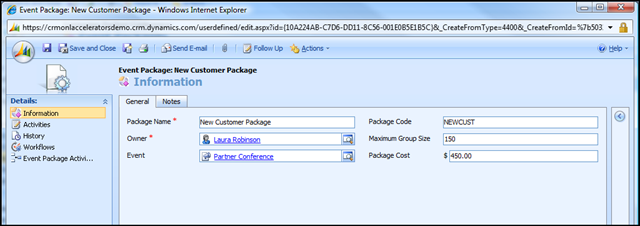
Track event packages and activities available to attendees:

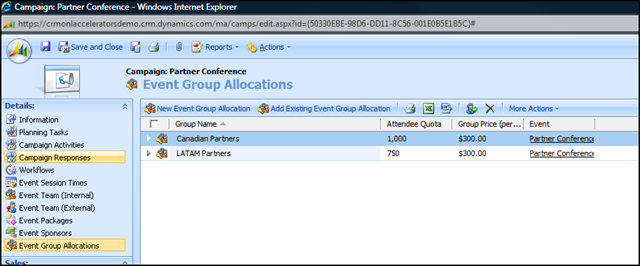
Track attendee group allocations:
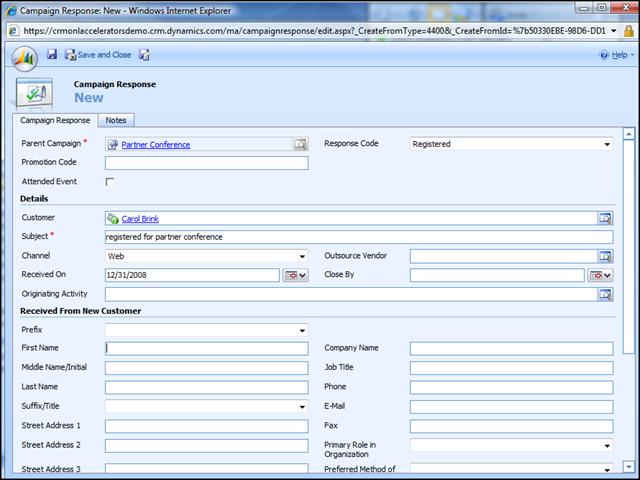
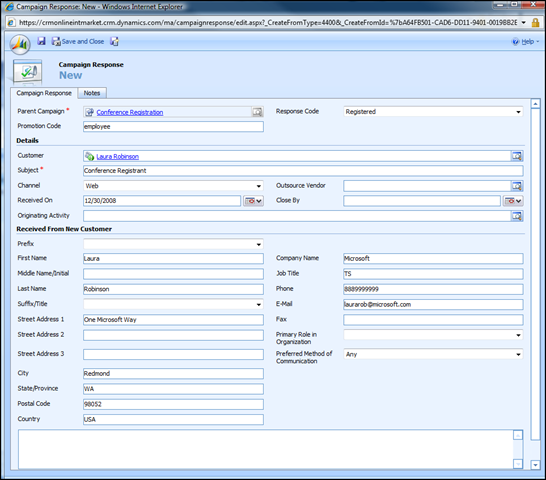
Track registration by creating a campaign response for each registrant. The customizations with Event Management modify the campaign response form to include contact information on the form, presumably for the web registration piece that is not currently available for CRM Online. You may wish to remove these fields if you are not using them, or write a workflow to populate the fields, since the campaign response links to a lead or contact anyway.
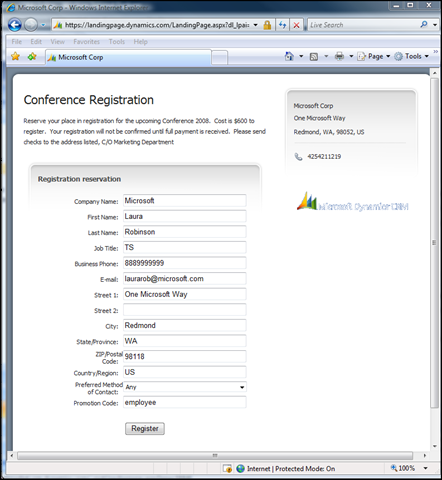
Internet Marketing users: you can use a web form and landing page to track registration, to a degree (monetary exchange not possible). Create a campaign with Campaign Type: Internet Marketing. Sample web form with Internet Marketing:
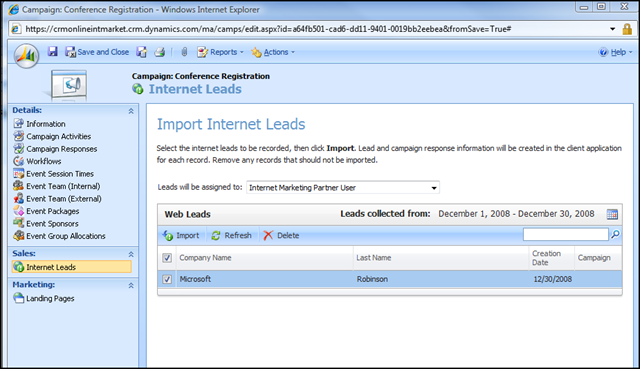
Import the registrants as new Leads, and track the Campaign responses once registration is complete.

Again, you may prefer to remove the custom fields in the Campaign response if you use this approach.
Finally, on CodePlex there is mention of a video demonstration to be released soon that shows the complete end-to-end cycle of event management for CRM 4.0 On-Premise. Once the video is released we can see what else is possible with CRM Online event management.
Good luck!