Adding Activities to the Contact form in an iFrame
I came across the details on how to do this when reading a blog posting from Matt Wittemann a couple years back. I still use it and thought you might be interested. Another capability to demonstrate the flexibility of the configuration options of Microsoft Dynamics CRM Online.
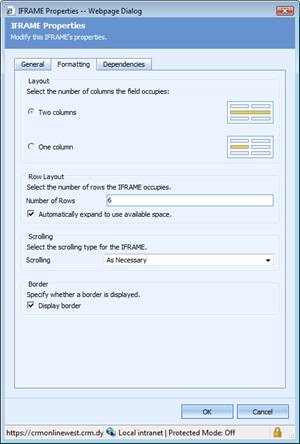
1. Create an iFrame on the Contact form with the following properties.
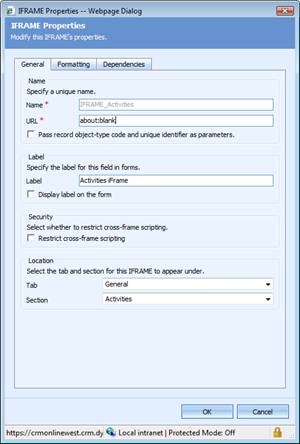
2. Note the iFrame Name. The color coding will come in handy later. In this example I use IFRAME_Activities.
3. Install the Internet Explorer Developer Toolbar
4. Open a CRM contact record, copy the URL
5. Open a new IE window and enable the IE Developer toolbar
6. Paste the contact URL to load the Contact record with the IE dev toolbar enabled. Click on the toolbar icon for “Select Element by Click”
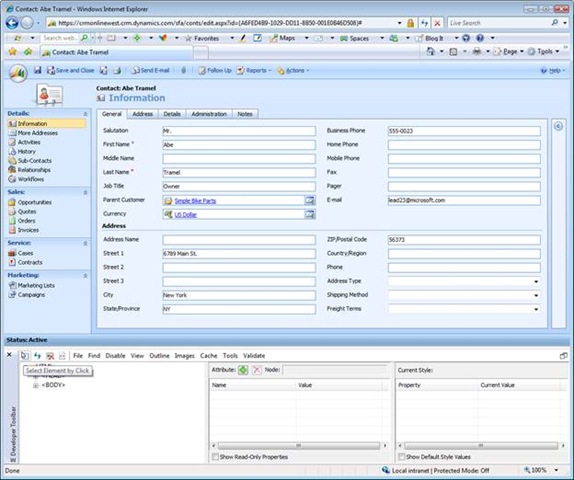
7. Find the Activities id by clicking on Activities from the left nav bar. Ensure to select the whole Activities area, not just the logo or the text. See outlined in blue in the screenshot below. Note the id: NavActivities from the middle window of the toolbar.
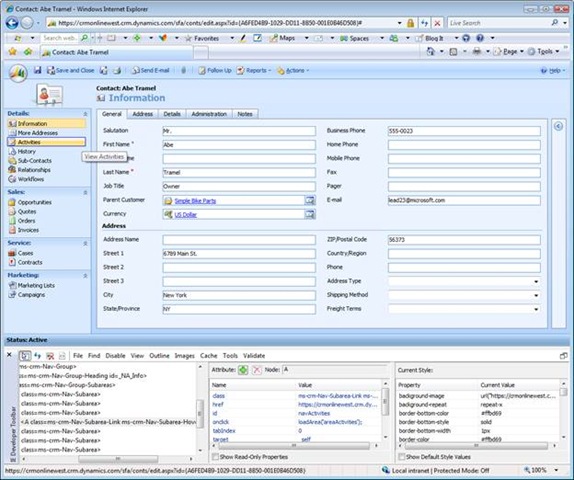
8. Click on the toolbar icon for “Select Element by Click” to disable it and click on Activities in the left nav bar to open the Contacts’ Activities list view in CRM. Enable the “Select Element by Click” functionality and click to the left of Filter On: Next 30 Days to select the windows highlighted in blue below.
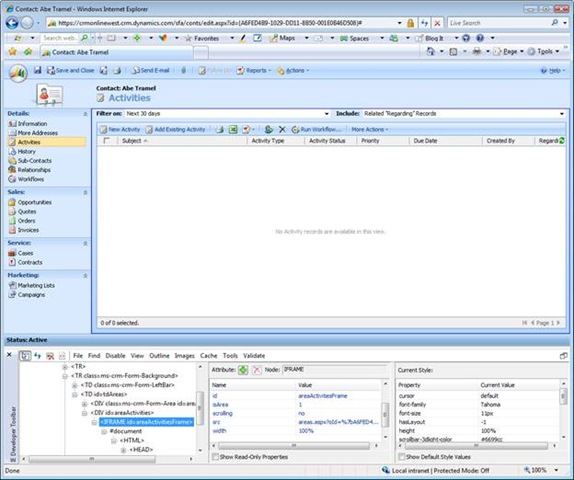
9. Note the src value (areas.aspx?oId=…) from the middle window of the toolbar. In particular the part of the string after the CRM GUID starting at “&oType=2&security=…..”
10. Include the nav values and src value in the following script. The script is complete with values highlighted.
**********************************************************************************
//Render Activities in iFrame
if (crmForm.FormType != 1)
{
var navActivities;
navActivities = document.all.navActivities;
if (navActivities != null)
{
navActivities.style.display = "none";
document.all.IFRAME_Activities.src="areas.aspx?oId=" + crmForm.ObjectId +
"&oType=2&security=852023&tabSet=areaActivities";
}
else
{
alert("navActivities Not Found");
}
}
**********************************************************************************
11. Open the contact form to edit
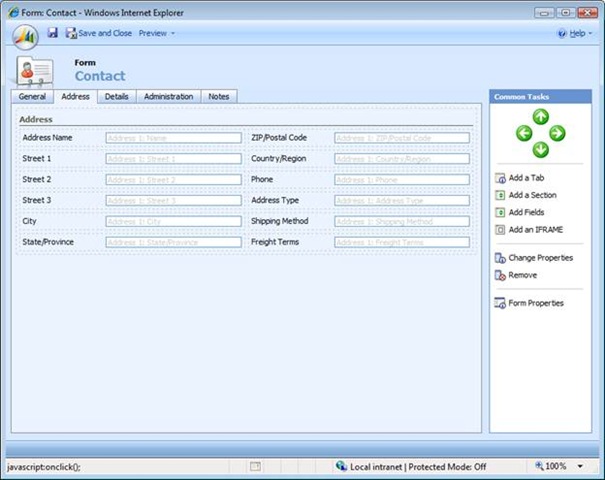
12. Create a new tab called Address and move the current Address section to that tab
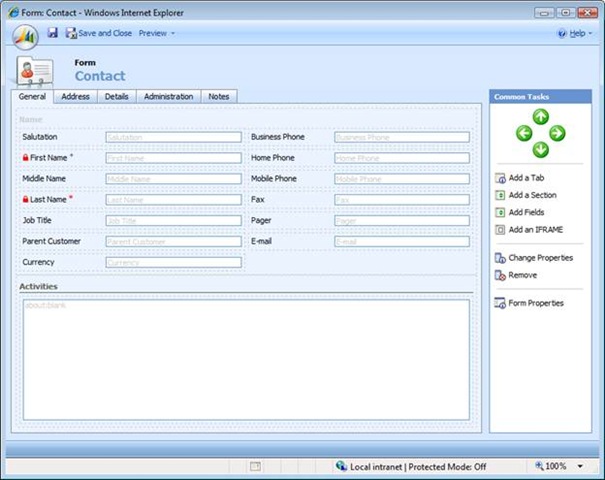
13. Create a new section on the General tab called Activities and show the divider. Add the IFRAME_Activities to the Activities section.
14. Add the previously edited jscript to the Contact form OnLoad event and Enable.

15. Publish your contact entity customizations.
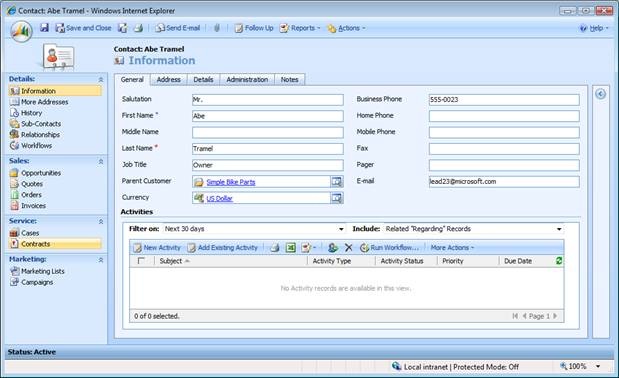
16. Result will be the Contact form with Activities rendering in an iFrame on the form rather than appearing in the left nav bar.
Enjoy,
- Eric Boocock