Integrating e-mail address from Dynamics CRM to the Internet Addresses in Dynamics GP 2010
At a recent conference, we were asked "Can the Connector integrate e-mail address from Dynamics CRM to the Internet Addresses in Dynamics GP 2010?" We are happy to say the answer is "Yes". Use the following high-level steps to connect these two pieces of data (each of these steps is outlined in greater detail below):
1. Determine which internet address field surfaced by Dynamics GP 2010 Web Services represents the e-mail address in Dynamics GP 2010
2. Customize Dynamics CRM to add an E-mail address field to the customer address entity
3. Update the Customer to Account map NOTE: If your integration uses the Customer to Contact map, you will need to adjust accordingly
4. Update the Account to Customer map NOTE: If you integration uses the Contact to Customer map, you will need to adjust accordingly
Which Address to Map
In Dynamics GP 2010, log into the company you are integrating and open the "Internet User Defined Setup" window: Tools>>Setup>>Company>>Company>>Internet User Defined
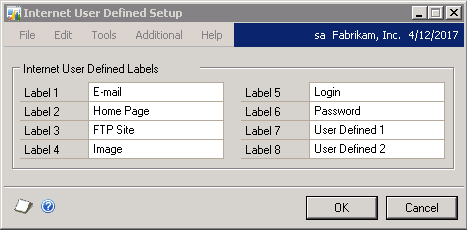
Because Dynamics GP 2010 allows the field labels to be changed, Dynamics GP web services expose the data generically as Internet Field 1...2...3 etc. I will be mapping the E-mail address using Internet Field 1 which is the default label in Dynamics GP. If the labels in your company are different or if you want to map a different field, you will need to make changes accordingly.
Customize Dynamics CRM
Add E-mail Field to the customeraddress entity in Dynamics CRM
Dynamics CRM has the E-mail field as part of the account header; Dynamics GP 2010 has the E-mail as part of the customer address. In order to integrate all E-mail addresses from Dynamics GP 2010 to Dynamics CRM, you will need to add an E-mail field to the customer address entity.
- 1. In Dynamics CRM, go to: Settings>>Customizations>>Customize the System
- 2. In the Default Solution customization window, go to : Entities>>Address>>Fields
- 3. Click the "New" button
- 4. For display name, enter E-mail
- 5. Set the Maximum Length field to 200
- a. 200 is the GP 2010 Max length for internet address field
- 6. Click the "Save and Close" button
- 7. Go to: Entities>>Address>>Forms
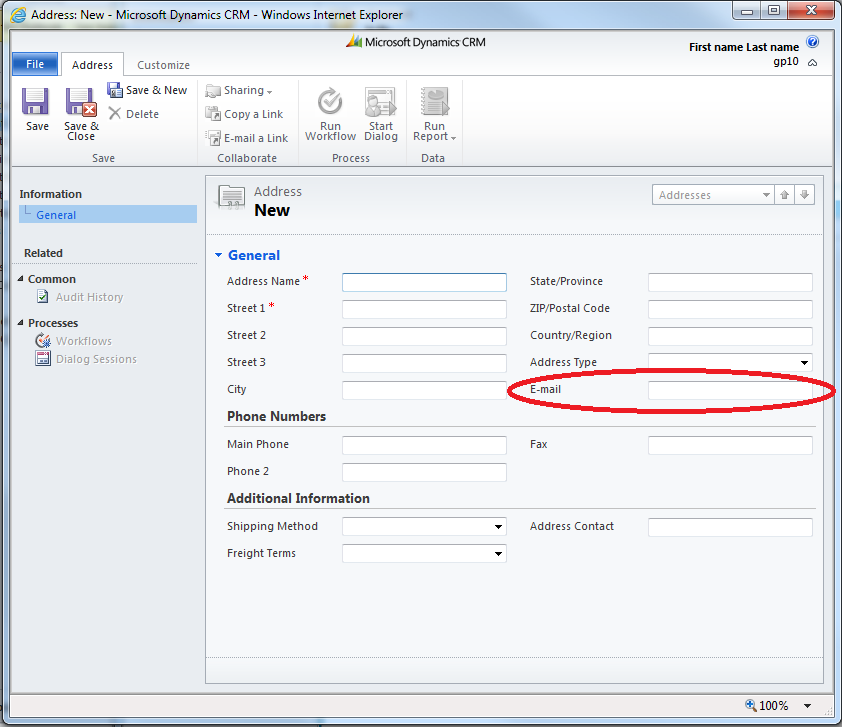
- 8. Add the E-mail address field to the Address Form
- 9. Click Save and Close.
The Address form will look something like this:
Customize Dynamics CRM's Account form to align with the Dynamics GP 2010 Customer form
This step is not required but since Dynamics GP treats the E-mail as part of the address, it may make sense to display it this way in Dynamics CRM for consistency.
- 10. In Dynamics CRM, go to Entities>>Account>>Forms
- 11. Select the Main form
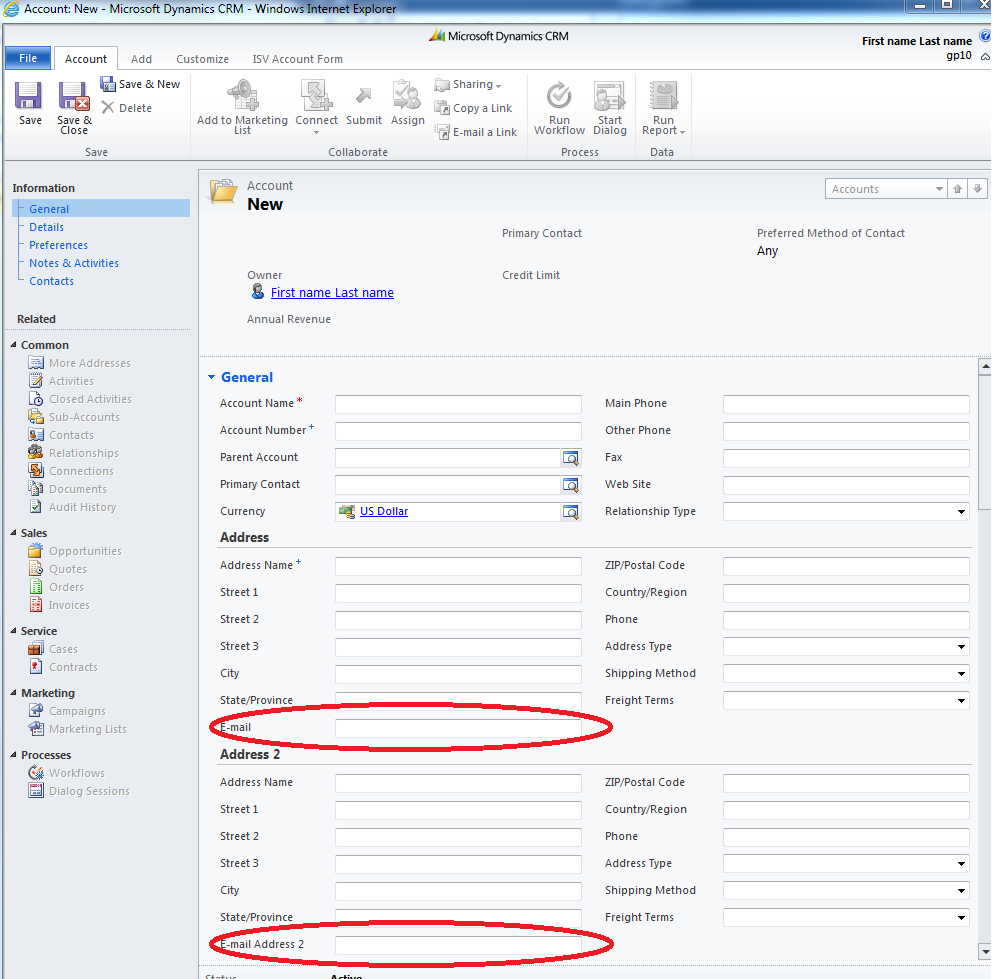
- 12. Move the E-mail field from the Account Information section to the Address Section
- 13. Add E-mail Address 2 field to the Address2 section
- a. I have already customized the account form to display the address 2 fields on the header.
- 14. Click "Save and Close".
- 15. Back on the customization window, click the "Publish All Customizations" button.
Your account form will look something like this:
Update Dynamics CRM Object Configurations
Make sure that you have published the customization made above before continuing.
After Customizing Dynamics CRM to add a new field to the customeraddress entity, you will need to run the Dynamics CRM Adapter Configuration Utility to expose the new field in the mapping UI.
- 1. Open the Connector client
- 2. Click the Adapter Settings toolbar button
- 3. Select the Microsoft Dynamics CRM Adapter
- 4. Click the Configure Microsoft Dynamics CRM link
- 5. Click Next
- 6. Enter the administrator account information
- 7. Click Get Organizations
- 8. Select the CRM organization modified above
- 9. Click next
- 10. Verify the Account Entity is selected in the tree view
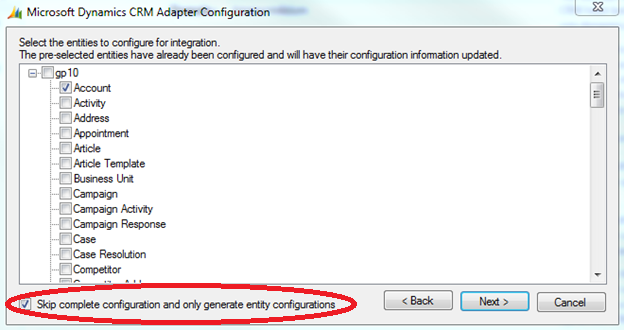
11. Important: Make sure the "Skip complete configuration and only generate entity configuration" check box is checked
12. Click next
13. Click Configure
14. After configuration is complete click Finish
15. Close and reopen the Client
Update the Customer to Account Map
Before making any changes to the maps, it is a good idea to deactivate the map first.
After making these map changes, you must re-integrate all the customers from Dynamics GP 2010 to Dynamics CRM to ensure the E-mail addresses are integrated to Dynamics CRM. Failure to do so can result in E-mail Addresses being deleted from Dynamics GP 2010 because they do not yet exist in Dynamics CRM.
- 1. Go to Account>>E-mail field

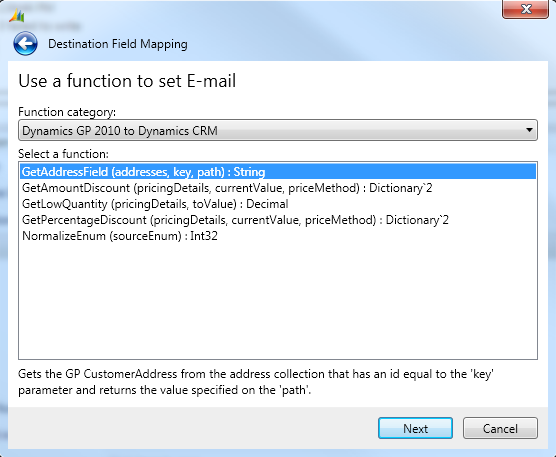
- 2. Set the Function category to "Dynamics GP 2010 to Dynamics CRM function"
- 3. Select the function "GetAddressField"
- 4. In the Addresses field, select source field : All Addresses
- 5. In the Key field, select source field : Primary Address ID\ID
- 6. In the Path field, enter the constant: "InternetAddresses\InternetField1"
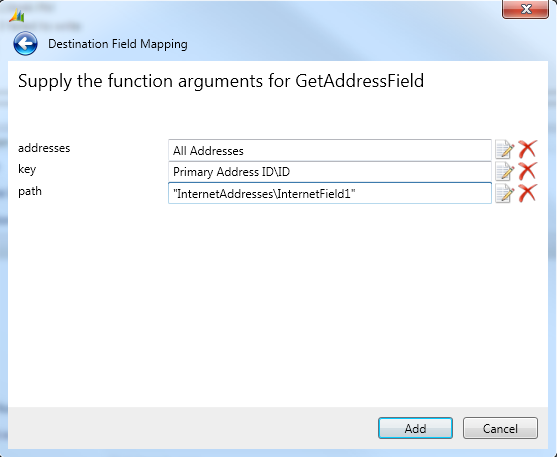
- 7. Click Add
E-mail Address 2
For E-mail Address 2, we only want to set this field if the "Primary Address\ID" and the "Ship to Address\ID" are different. This is similar to how the rest of Address 2 is mapped out-of-the-box.
- 8. Go To Account>>E-mail Address 2 field
- 9. Set the Function category to "Dynamics GP 2010 to Dynamics CRM"
- 10. Select the function "GetAddressField" (same as E-mail)
- 11. In the Addresses field, select source field : All Addresses

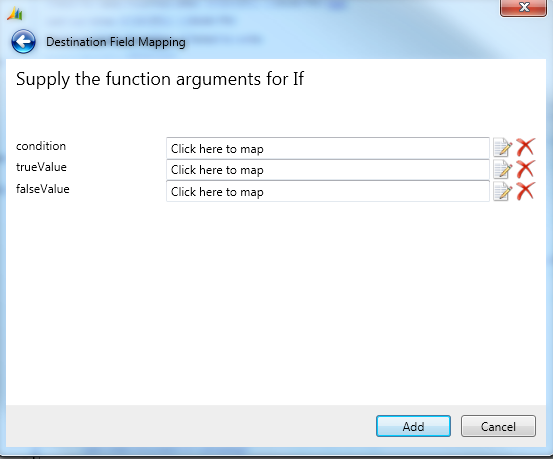
- 12. In the Key field, select the "If" function found under the Logical function category
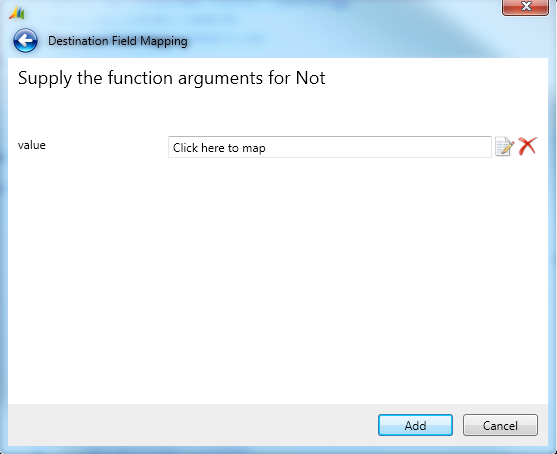
- 13. In the Condition field, select the "Not" function found under the Logical function category
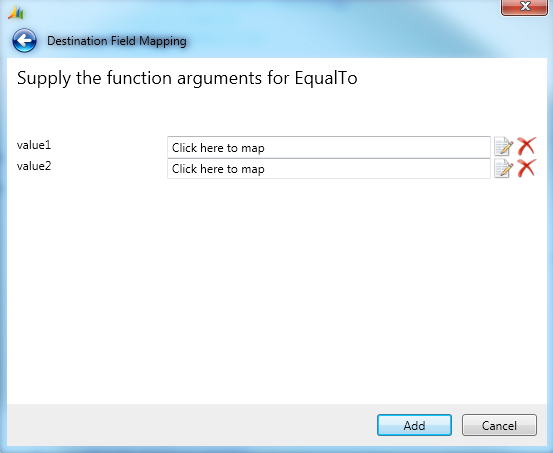
- 14. In the Value field, select the "EqualTo" function found under the Logical Function category
- 15. In the Value1 field, select source field: Primary Address ID\ID
- 16. In the Value2 field, select source field: Ship To Address ID\ID
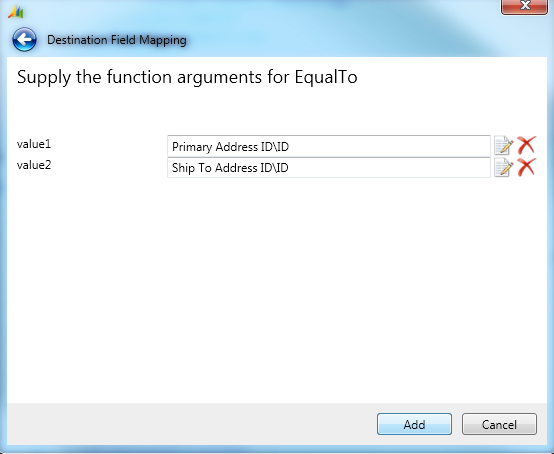
- 17. Click the add button

- 18. Click the add button
- 19. For the trueValue field enter constant: "SECONDARY"
- 20. For the falseValue field select source field: Ship To Address ID\ID
- 21. Click the add button
- 22. In the Path field, enter constant: "InternetAddresses\InternetField1"
- 23. Click the add button
- 24. Go to Account>>All Addresses>>Customer Address>>E-mail field
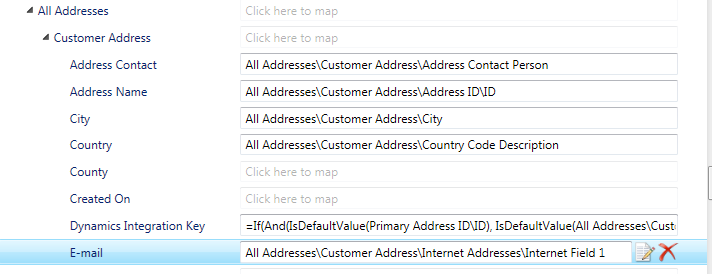
- 25. In the E-mail field, select source field:
All Addresses\Customer Address\Internet Addresses\Internet Field 1
a. This is the Internet Field in GP that is labeled as E-mail, which was discovered in the Which Address to Map section above.
26. Click the save button in the client to save your changes to the Customer to Account map
Update Account to Customer map
Before making any changes to the maps, it is a good idea to deactivate the map first.
Caution before enabling the following map changes you will want to first re-integrate all the customers from Dynamics GP 2010 to Dynamics CRM. Failure to do so can result in E-mail addresses being deleted from Dynamics GP 2010 because they do not yet exist in Dynamics CRM.
In this map, you will only need add a mapping to one field, however we want to validate for address1 and address2 that we use the E-mail addresses from the Dynamics CRM Account header. All the rest of the E-mail addresses will come from the all addresses collection.
- 1. Go to Customer>>All Addresses>>Customer Address>>Internet Addresses>>Internet Field 1

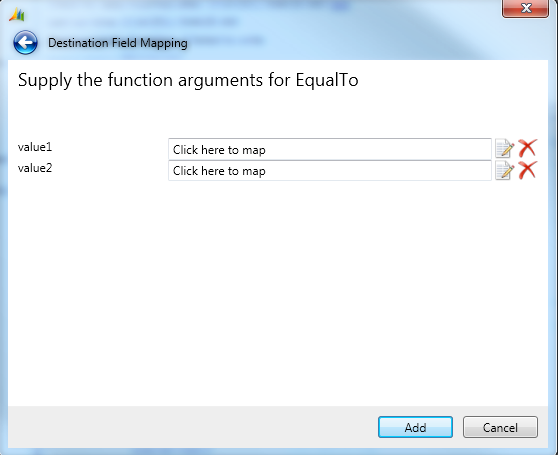
- 2. In the Internet Field 1 field select the "If" function found under the logical function category

- 3. In the Condition field, select the "EqualTo" function under the Logical function category
- 4. In the Value1 field, select source field: All Addresses\Customer Address\Address Key\ID
- 5. In the Value2 field, select source field: Address 1 Key\ID
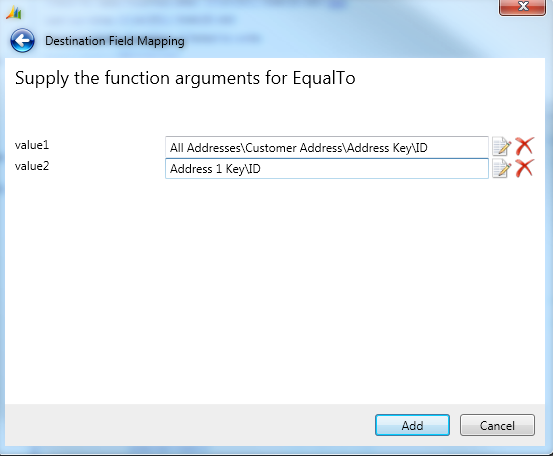
- 6. Click the add button
- 7. In the trueValue field select source field: E-mail

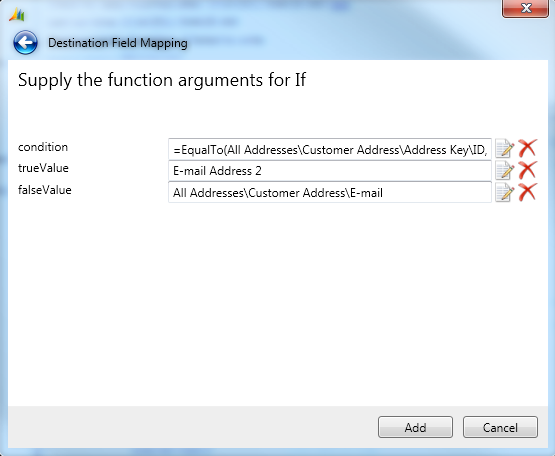
- 8. In the falseValue field select the "if" function under the logical function category
- 9. In the Condition field select the "EqualTo" function under the Logical function category
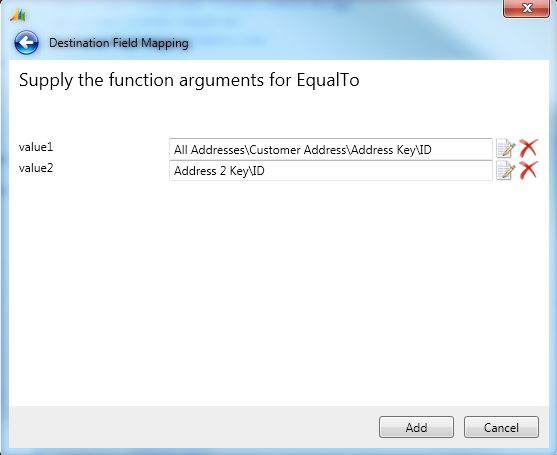
- 10. In the value1 field select source field: All Addresses\Customer Address\Address Key\ID
- 11. In the value2 field select source field: Address 2 Key\ID
- 12. Click the add button
- 13. In the trueValue field select source field: E-Mail Address 2
- 14. In the falseValue field select source field: All Addresses\Customer Address\E-mail
- 15. Click the add button.