
How to direct work for a specific zone to a person who works in the zone using the new Warehouse Management module in Dynamics AX 2012 R3.
Posted on behalf of Karina Normann Jakobsen.
Many warehouse are divided into zones, for example, cold storage zones or freezer zones, and warehouse workers typically work in one zone at a time. This blog describes how to set up Warehouse management in Microsoft Dynamics AX2012 R3 to assign work orders to zones and direct work to a worker in a specific zone.
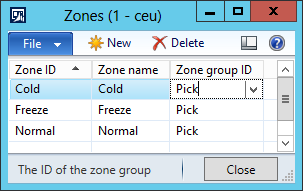
1 – Set up zones
The first step is to set up some zones. To open the Zones form, use the following path:
- Warehouse management > Setup > Warehouse setup > Zones
For the sake of this example, I’ll set up three zones: Cold, Freeze, and Normal.
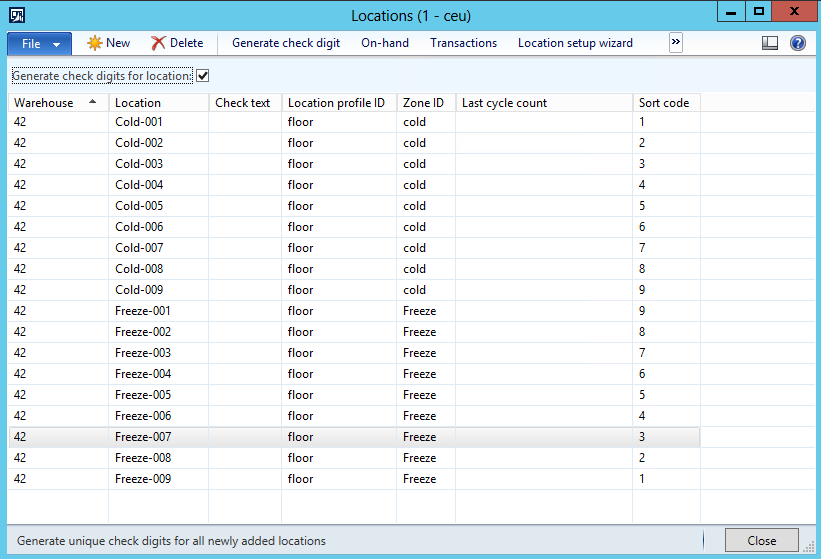
2 – Set up locations, and assign the zones
The next step is to assign the zones to locations. To open the Locations form, use the following path:
- Warehouse management > Setup > Warehouse setup > Locations
I’ve created locations for cold and freeze zones (Cold-001 through Cold-009, and Freeze-001 through Freeze-009) in warehouse 42. Then I assigned the appropriate zones to them.
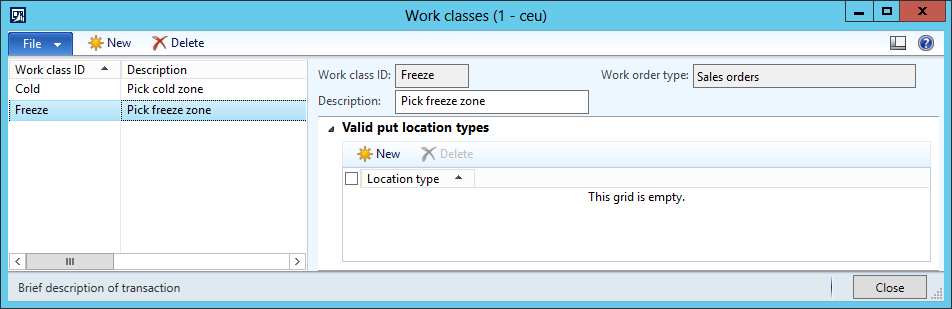
3 – Set up work classes
The next step is to create a work class for each zone. We will assign the work class to the work template that we’ll create in the next step. To open the Work classes form, use the following path:
- Warehouse management > Setup > Work > Work classes
4 – Set up work templates
Now we need to set up a work template for each zone. The work template will generate the work for the zones. To open the Work templates form, use the following path:
- Warehouse management > Setup > Work > Work templates.
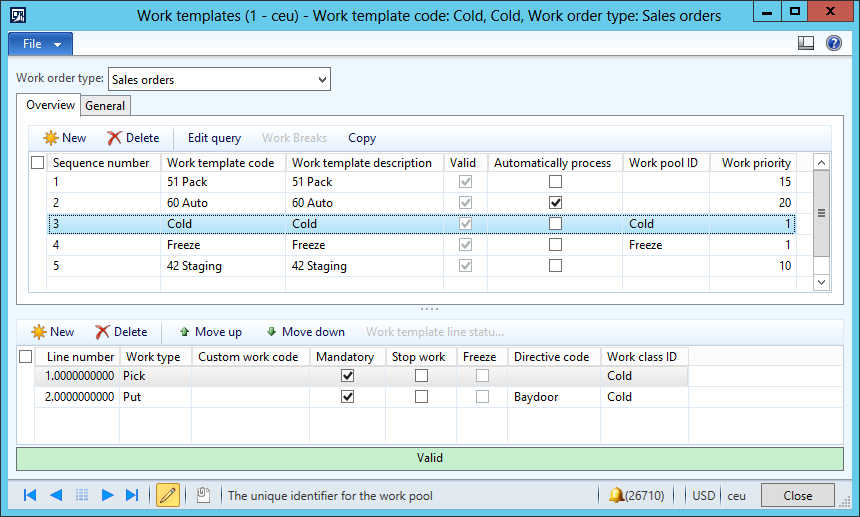
When you set up the work templates, there are a few tricks that you need to pay attention to.
- Specify the appropriate work class ID on the work lines.
- Add the zone ID to the query.

Note that the Zone ID is a field in the temporary work transaction table, and can be used to define ranges in the queries.
5 – Set up a mobile device menu item
Now we need to set up the mobile device menu item that the worker will use on his or her mobile device to perform the work. To open the Mobile device menu items form, use the following path:
- Warehouse management > Setup > Mobile device > Mobile device menu items
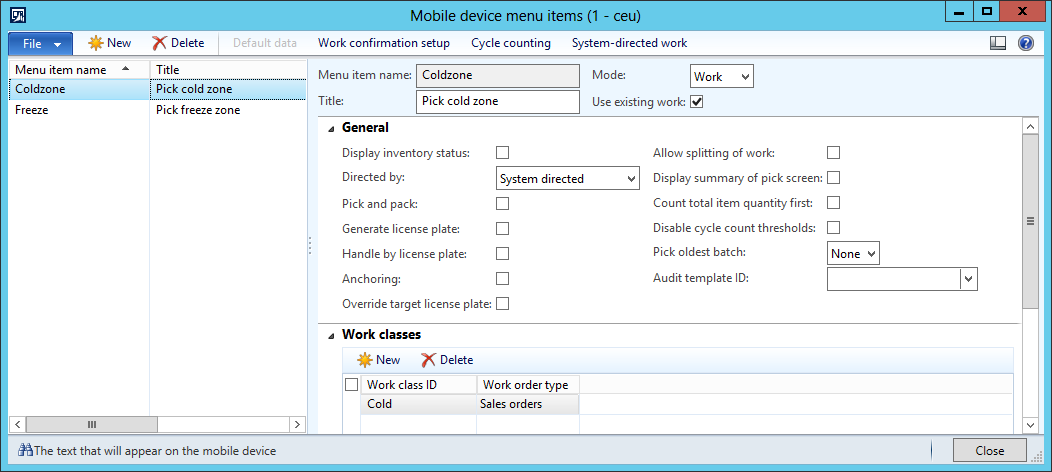
Create two mobile device menu items, one for each zone. For each menu item, make sure the following options are selected:
- In the Directed by field, select System directed.
- The work class must match the zone.
After the menu item is set up, we’ll add it to the mobile device menu to make it available on the mobile device.
Example
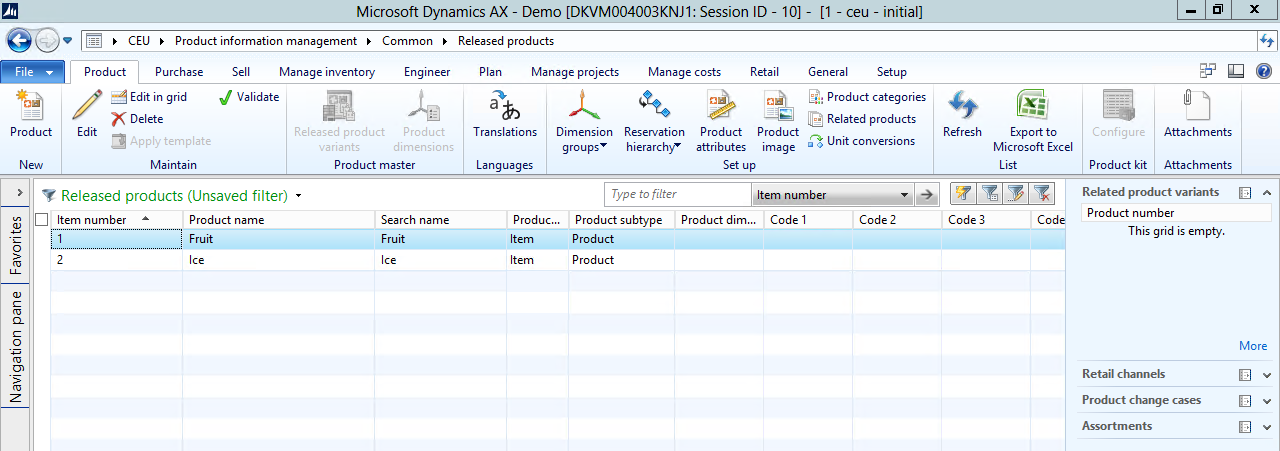
Karina’s company sells ice and fruit. Ice is stored in the freeze zone, and fruit in the cold zone.
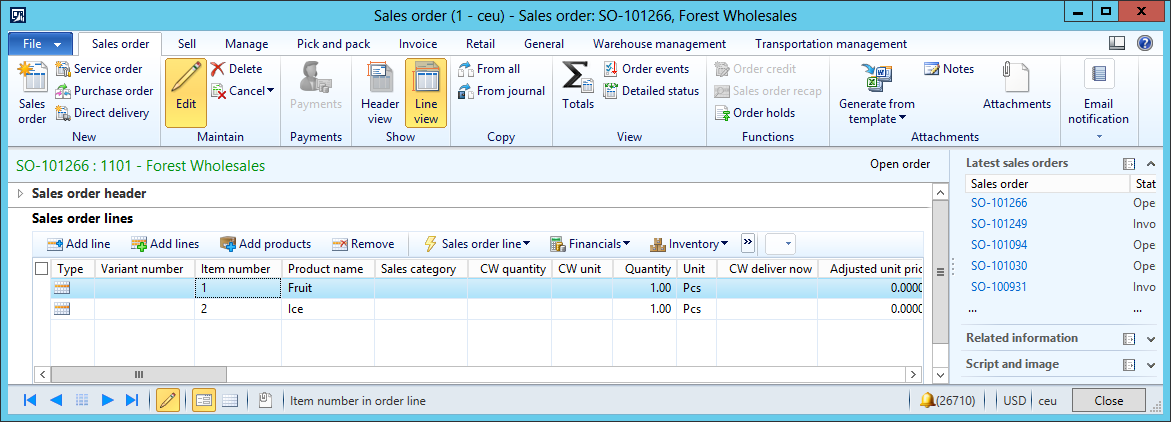
We have created a sales order for fruit and ice.
Work is created when the sales order is released to warehouse. With the setup we have just made, the result is two work orders.
One work order is created for the cold zone.
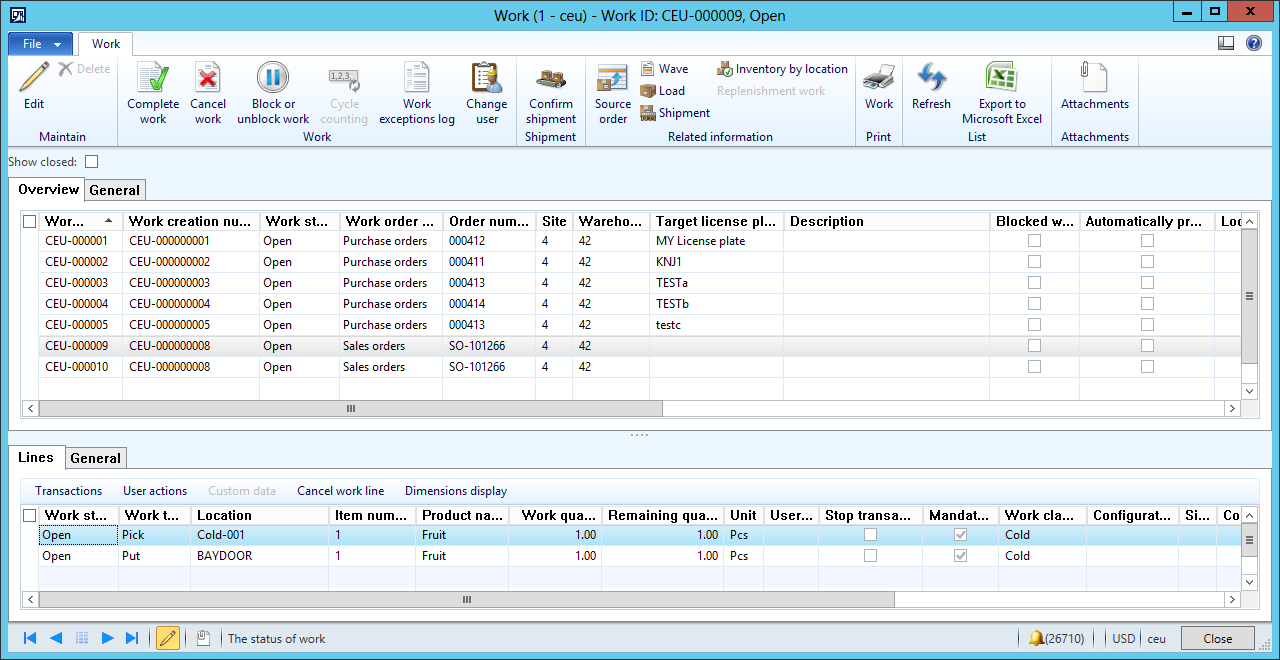
Another is created for the freeze zone.

When I log on to the mobile device, the following menu items are available to me.
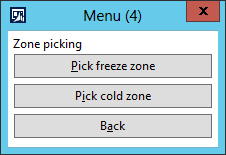
If I select the Pick freeze zone menu item, the following screen is displayed.
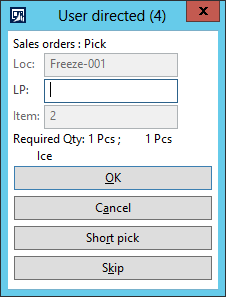
The work with work class Freeze has been directed to me.
If I select Pick cold zone in the menu, the following screen is displayed.
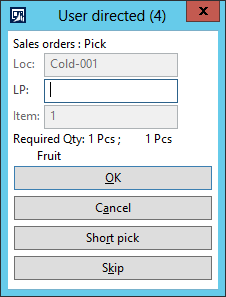
The work with work class cold has been directed to me.
Frequently asked question
If the same item is stored in multiple zones in a warehouse, is it possible to load balance the work between the zones.
Answer: No, unfortunately not.