New way to Add Columns in Dynamics 365 for Finance and Operations, Business Edition
With the December Update (Update 12) of Dynamics 365 for Finance and Operations, Business Edition there is a change to the way you add columns. You must be showing your page as a list to add columns.
Old Way of Adding Columns:
1. Click on Column Header and choose Add Columns.
2. In the list of columns mark the columns that you would like to include in your list of columns.
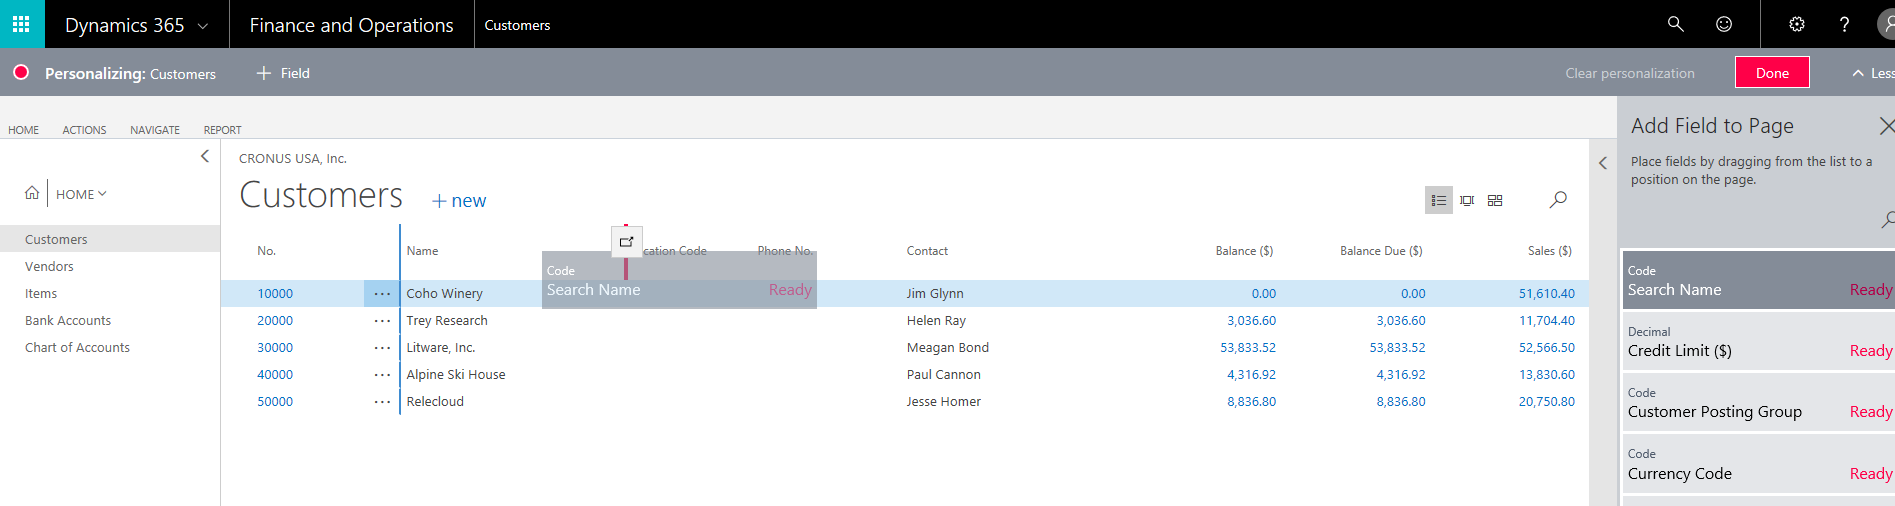
New way of Adding Columns:
1. Open the page which you would like to add columns to.
2. Click the Gears button in the upper right corner and select Personalize.
3. There will be a gray bar at the top of the page that says Personalizing, click More.
4. Click +Field
5. You should now see a list of fields that can be added to the page on the right.
6. Drag the column from the right list of fields and then drop the column in the list of columns.
Additional Information:
- To remove/hide a column in the list of columns, click the red arrow in the column header and choose Hide. This will move the column back into the list of fields available to add to the page.
- Clicking 'Clear personalization' will reset the columns to their original state on the current page, only. Other pages will keep their Personalization.
- Personalization is user specific.