Release Management: How to deploy web application as part of a Release - walkthrough
There are 3 main steps required to deploy web application as part of a Release:
- Defining a Release Path
- Defining a Component
- Configuring a Release Template
1.Defining a Release Path with multiple deployment stages for deploying Web Application as part of a Release
- Navigate to Configure Paths | Release Paths and double-click on the "New".
- Change the name of release path to be "Release Path Web Deploy Demo One Stage" and add 4 deployment stages: DEV, QA, TEST and PROD.
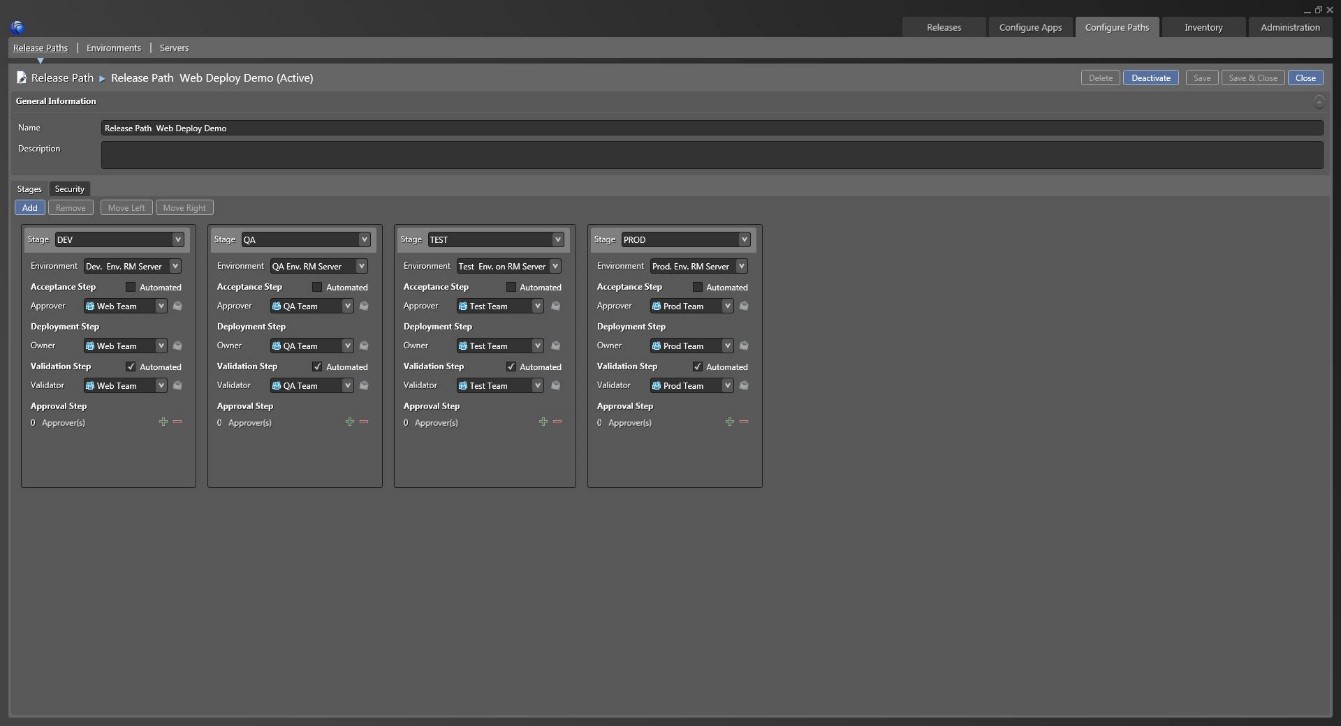
Please note that the available stage types can be defined under Administration -> Manage Pick Lists -> Stage Type
On each stage, specify:
- Environment
- Acceptance Step: Approver
- Deployment Step: Owner
- Validation Step: Validator
Save & Close the newly created Release Path.
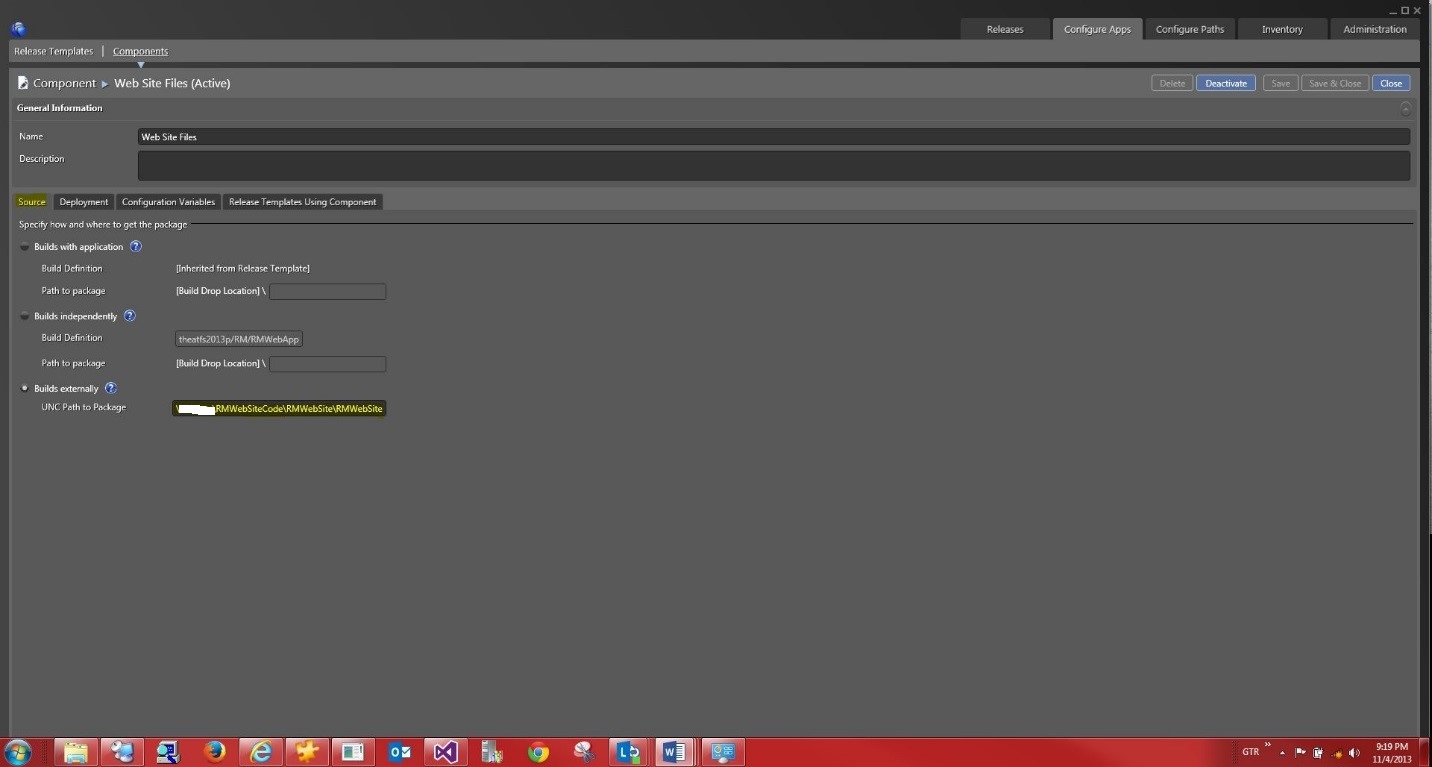
2. Defining a component for deploying Web Application as part of a Release
- Navigate to Configure Apps | Components and double-click on the "New".
- Change the name of the component to be "Web Site Files".
- Under the Source Tab - Select Builds Externally -> UNC Path to Package.
NOTE: We are going to be using for all four-deployment states the same source files.
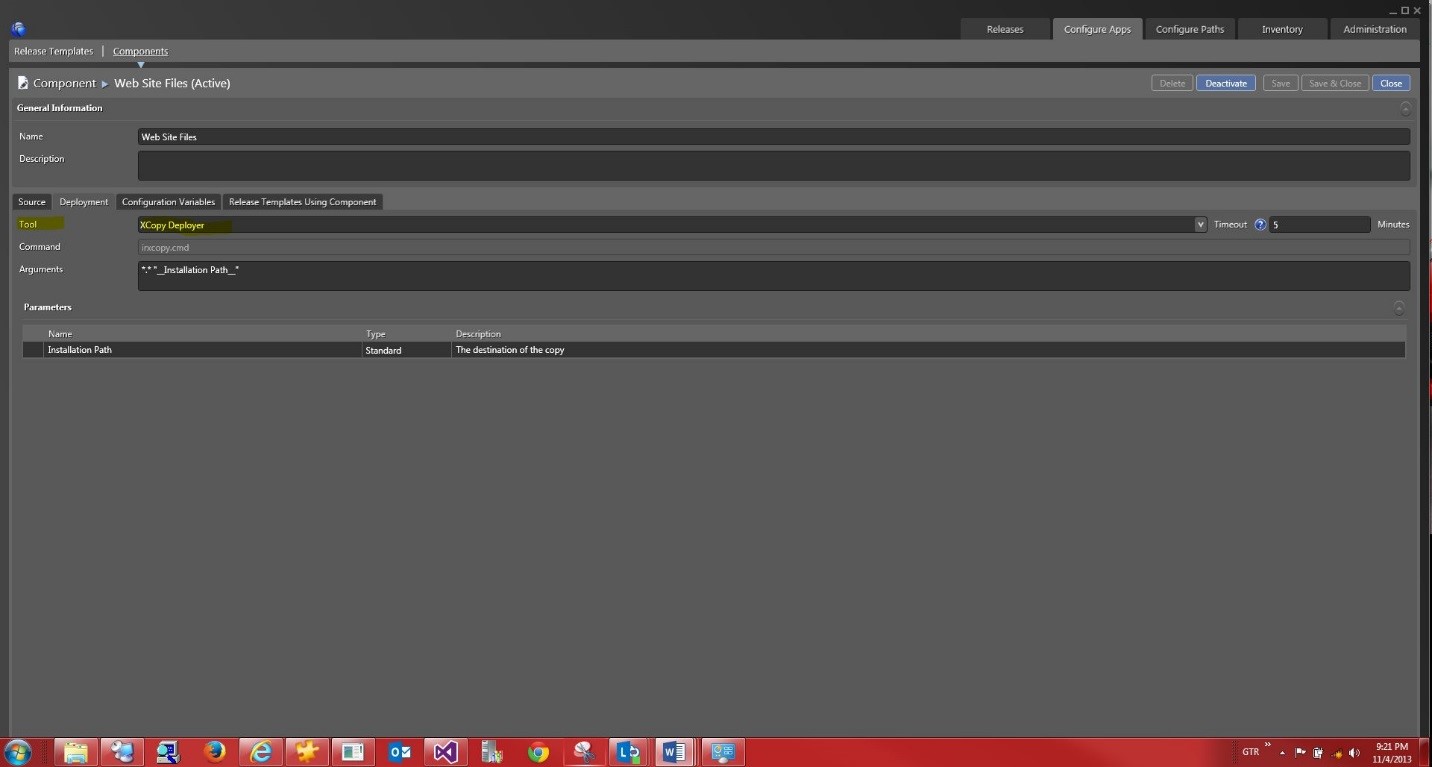
Under the Deployment Tab - Select XCopy Deployer Tool.
Save & Close the newly created Component.
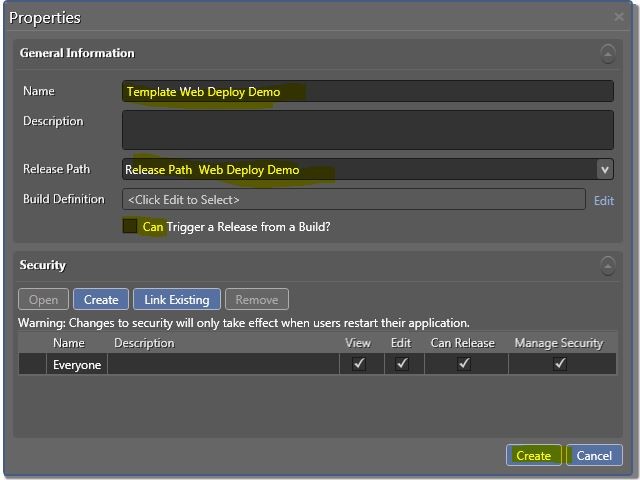
3. Configuring a Release Template for deploying a Web Application as part of a Release.
- Navigate to Configure Apps | Release Templates and then double-click on the "New" button.
The new template "Properties” dialog pops up.
Change the name of the new template to "Template Web Deploy Demo”
Change the Release Path to: "Release Path Web Deploy Demo".
Unselect "Can Trigger a Release from a Build?”
Click "Create" Button.
The release template designer has a toolbox with control flow building blocks, servers, custom components, and a bunch of other actions and tools to help with deployment.
Rick click on the "Components" and select "Add". The available components dialog box pops up.
Select the "Web Site Files" and click on "Link".
For the purposes of this demo, the deployment sequence is relatively simple to help illustrate the concept.
Drag and drop inside the "Deployment Sequence" the following:
- From the Servers Node:
- ServerName (the deployment server name)
- From the Component node
- "Web Site Files" component
- From IIS actions:
- Create Application pool
- Create Web site
You should see the following Deployment Sequence:
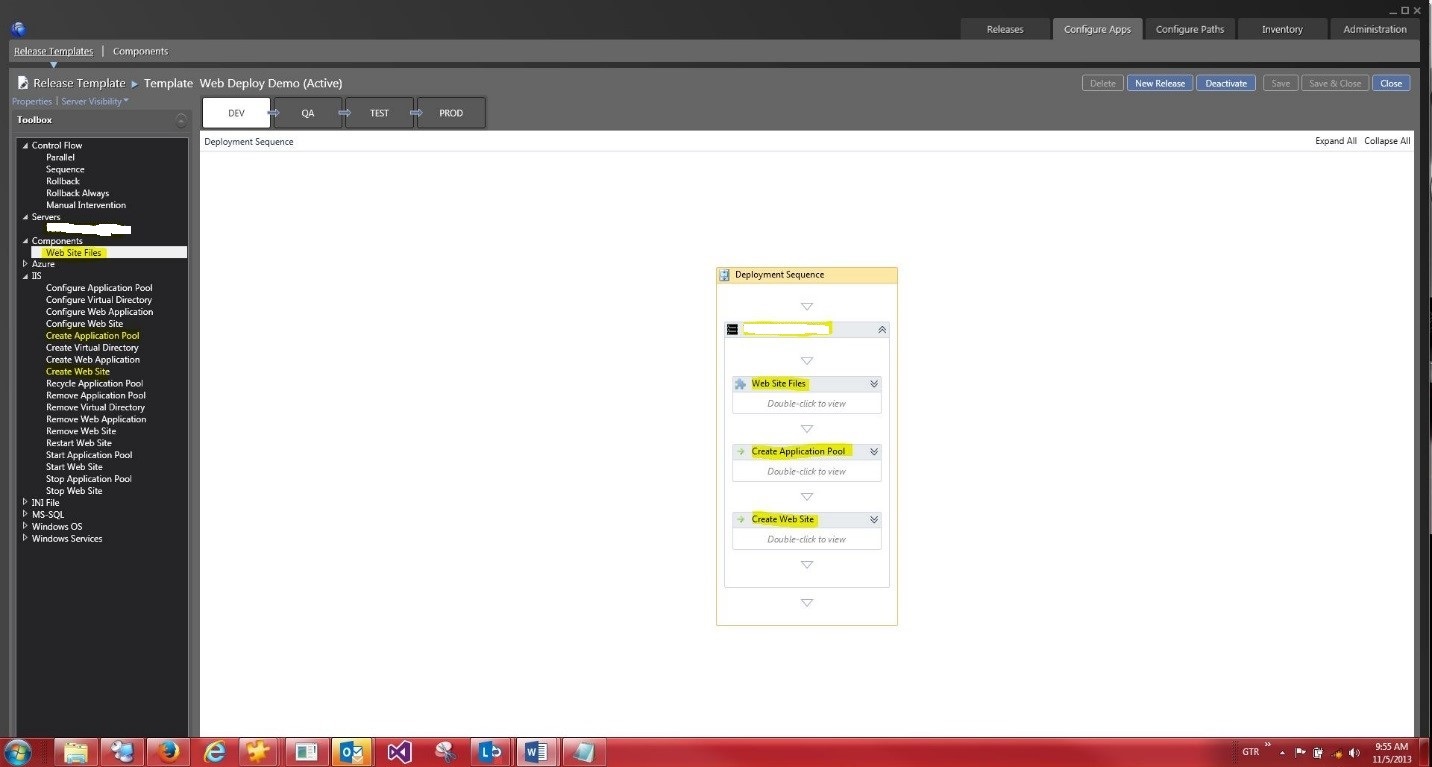
Select the Collapse All button so that we can dig into the example deployment sequence starting at a higher level of detail.
The collapsed view shows just the ServerName (the deployment server name), which means that all deployment tasks will occur on this server. If you look at the Toolbox, you will notice that there is a Servers node. This toolbox node shows all servers available to the environment configured for the currently selected stage.
Expand the ServerName(the deployment server name), node. In summary of the details to follow, the general deployment sequence:
- Web Site Files - copying the web site files from a network share to the deployment server
- Create Application Pool - creating the application pool on the deployment server
- Create Web site - creating the web site the deployment server
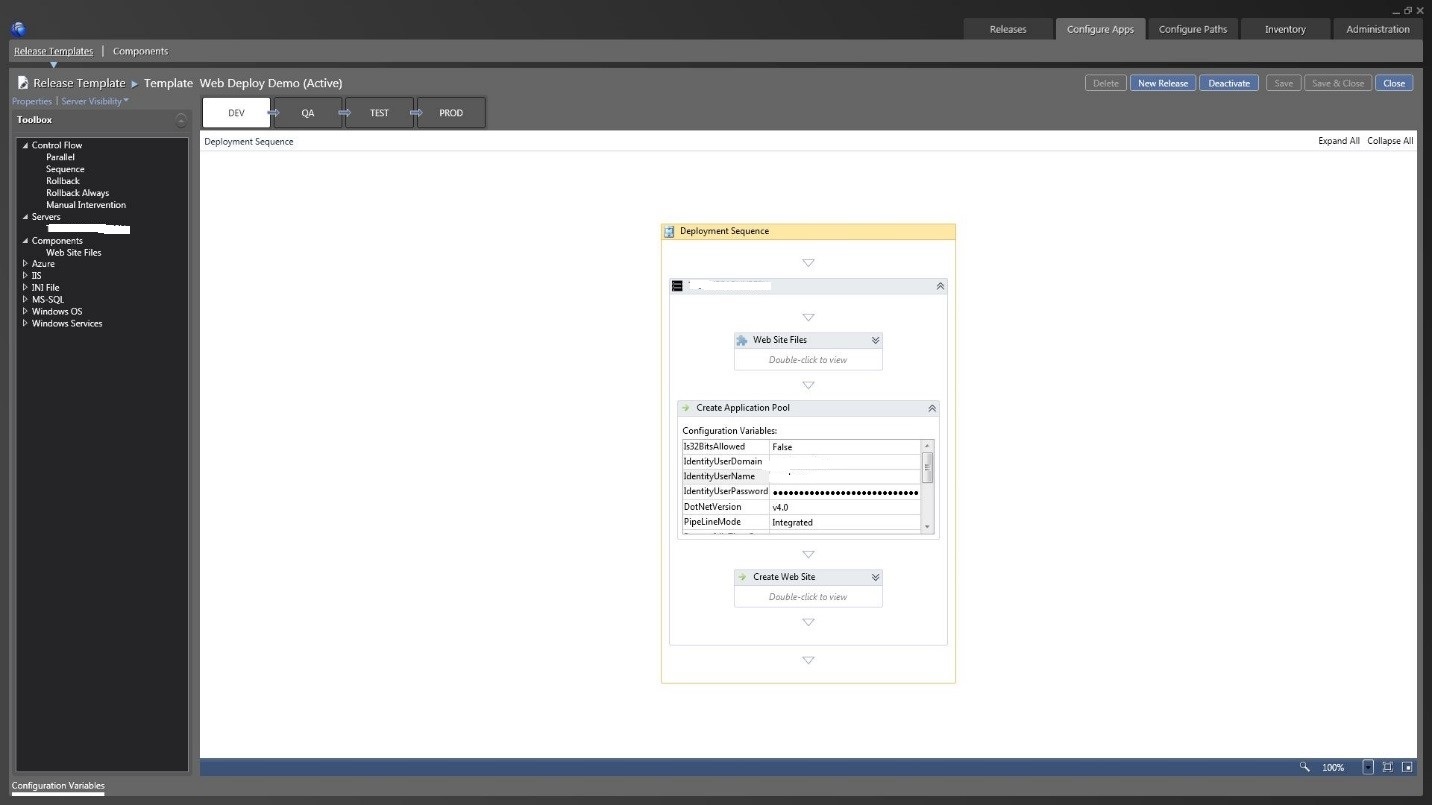
Expand the "Web Site Files" Node.
For the purpose of this demo, we will use the same web site files to create all four-deployment stages of the web site.
You can create this action by dragging and dropping the "Web Site Files" component.

Expand the Create Application Pool node. This creates the specified site application pool.
Expand the Create Web Site node. This creates the specified site in IIS.
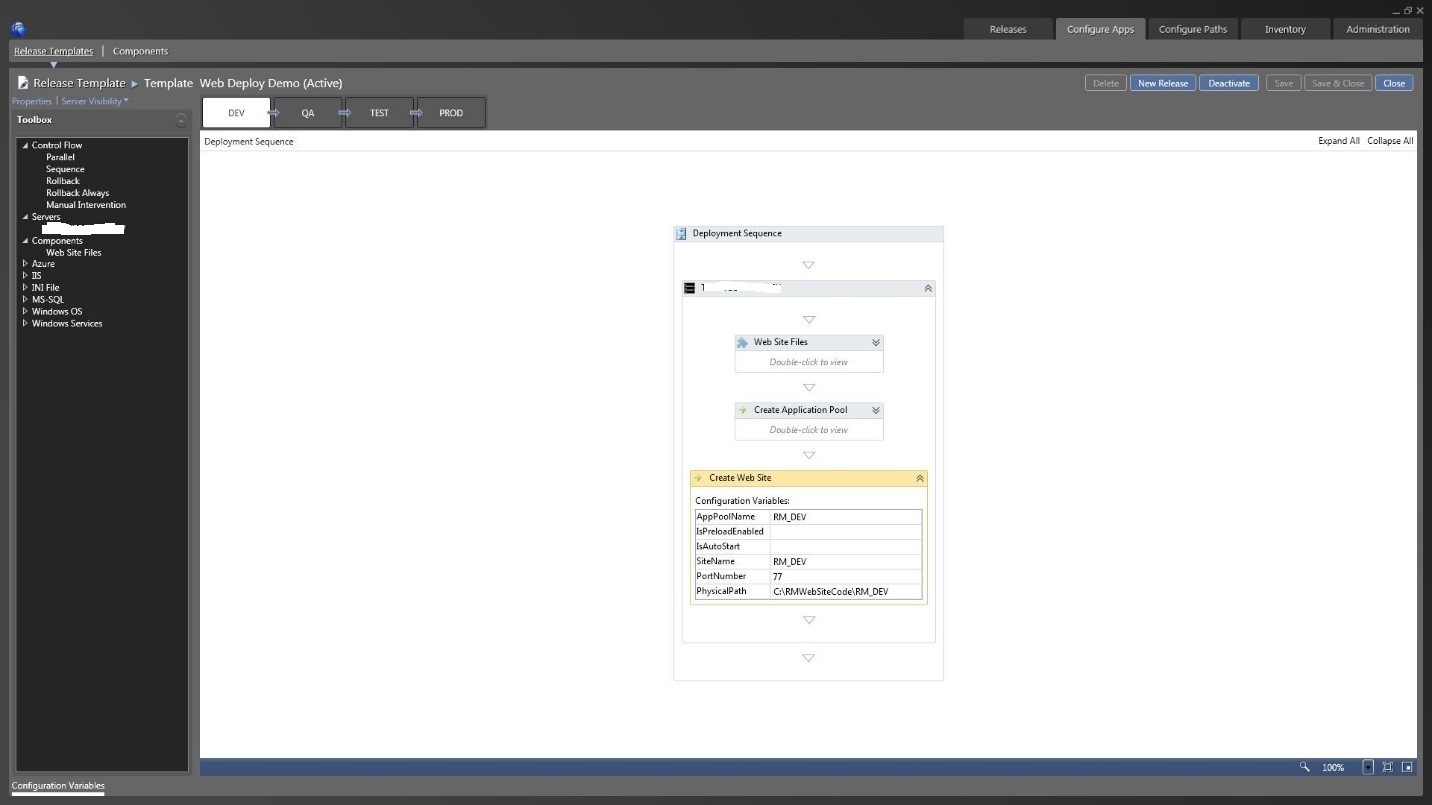
All stages of this demonstration release template have an identical structure, although with different parameters.
Note: In case that all stages have a similar structure, you can copy and paste elements from one stage to another. You can even copy the entire deployment sequence from one stage to another. In case that some servers are not available on the target stage, you will be prompted to replace those servers with available ones.
Save & Close the newly created Release Template.