Release Management: How to trigger Release from Team Build - walkthrough
There are 3 main steps required to trigger Release from Team Build:
• Defining a Release Path
• Defining a Component
• Configuring a Release Template
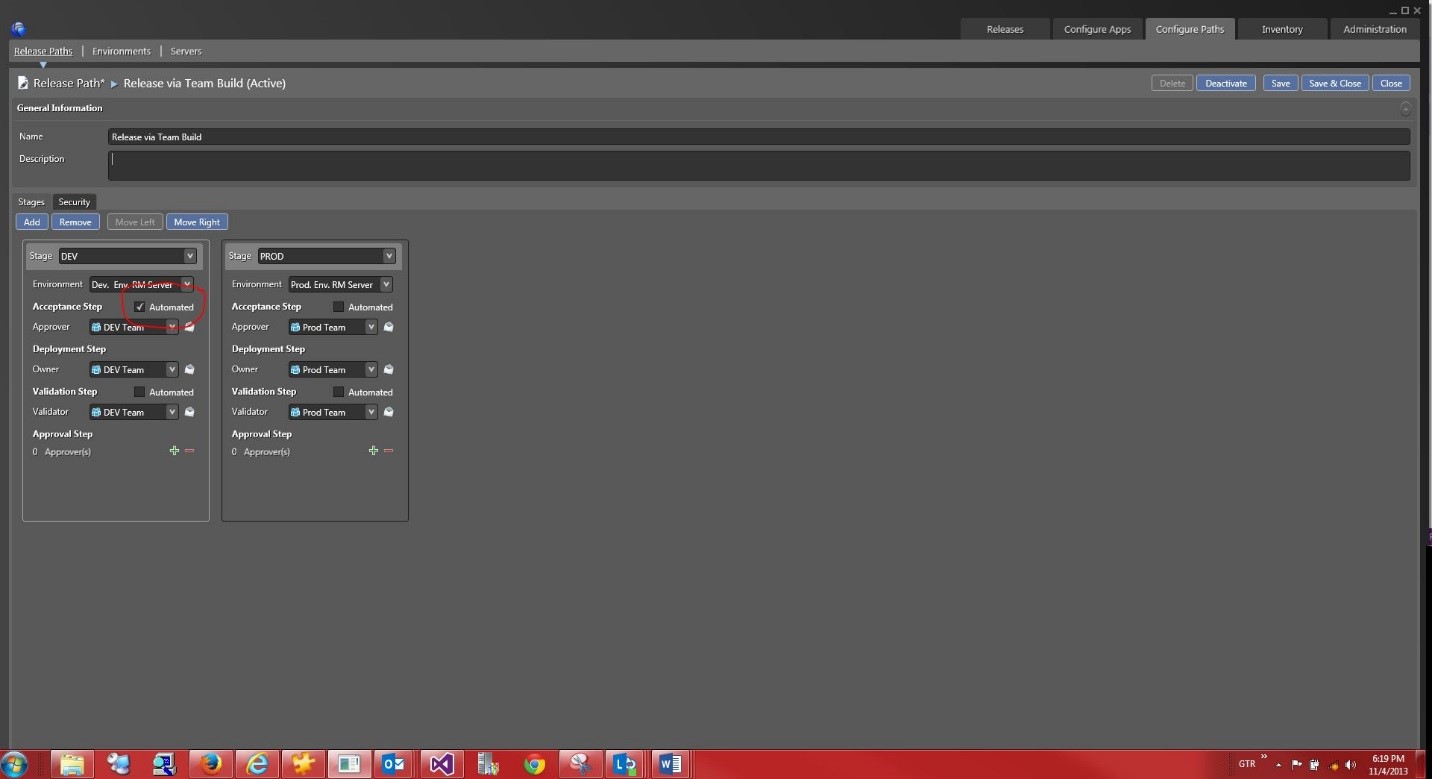
1. Defining a Release Path for triggering a Release from Team Build
- Navigate to Configure Paths | Release Paths and double-click on the "New".
- Change the name of release path to be "Release via Team Build" and add two deployment stages: DEV and PROD.
NOTE: The selected Release path must have the first stage's "Acceptance Step" set as Automated for the release template to support triggering a Release from a Team Build.
On each stage, specify:
• Environment
• Acceptance Step: Approver
• Deployment Step: Owner
• Validation Step: Validator
Save & Close the newly created Release Path.
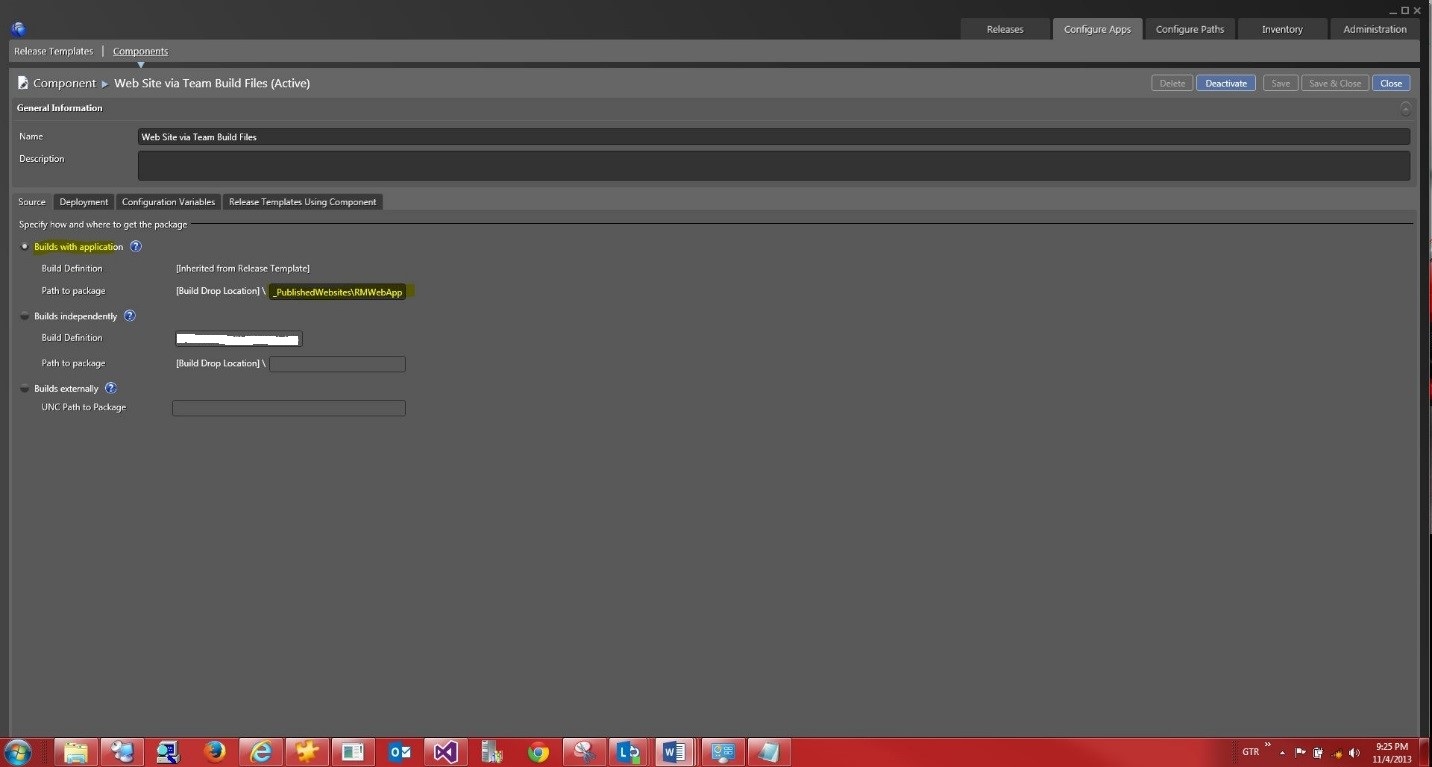
2. Defining a Component for triggering a Release from Team Build
- Navigate to Configure Apps | Components and double-click on the "New".
- Change the name of the component to be "Web Site via Team Build Files”.
- Under the Source Tab - Select "Builds with application”.
- Under the Deployment Tab - Select XCopy Deployer Tool.
- Save & Close the newly created Component.
3. Configuring a Release Template for triggering a Release from Team Build
- Navigate to Configure Apps | Release Templates and then double-click on the "New" button.
The new template "Properties" Dialog pops up.
- Change the name of the new template to "Release Template Web App via Team Build".
- Change the Release Path to: "Release via Team Build".
- Select "Can Trigger a Release from a Build?".
- Select the Build Definition you want to use to trigger the Release.
- Click "Create" Button.

NOTE: You cannot select Build definition that is being used in different release template.
The release template designer has a toolbox with control flow building blocks, servers, custom components, and a bunch of other actions and tools to help with deployment.
Rick click on the "Components" and select "Add". The available components dialog box pops up. Select the "Web Site via Team Build Files" and click on "Link".
The first stage is selected. For simplicity, we are going to use the same Deployment Sequence like the one in this blog.
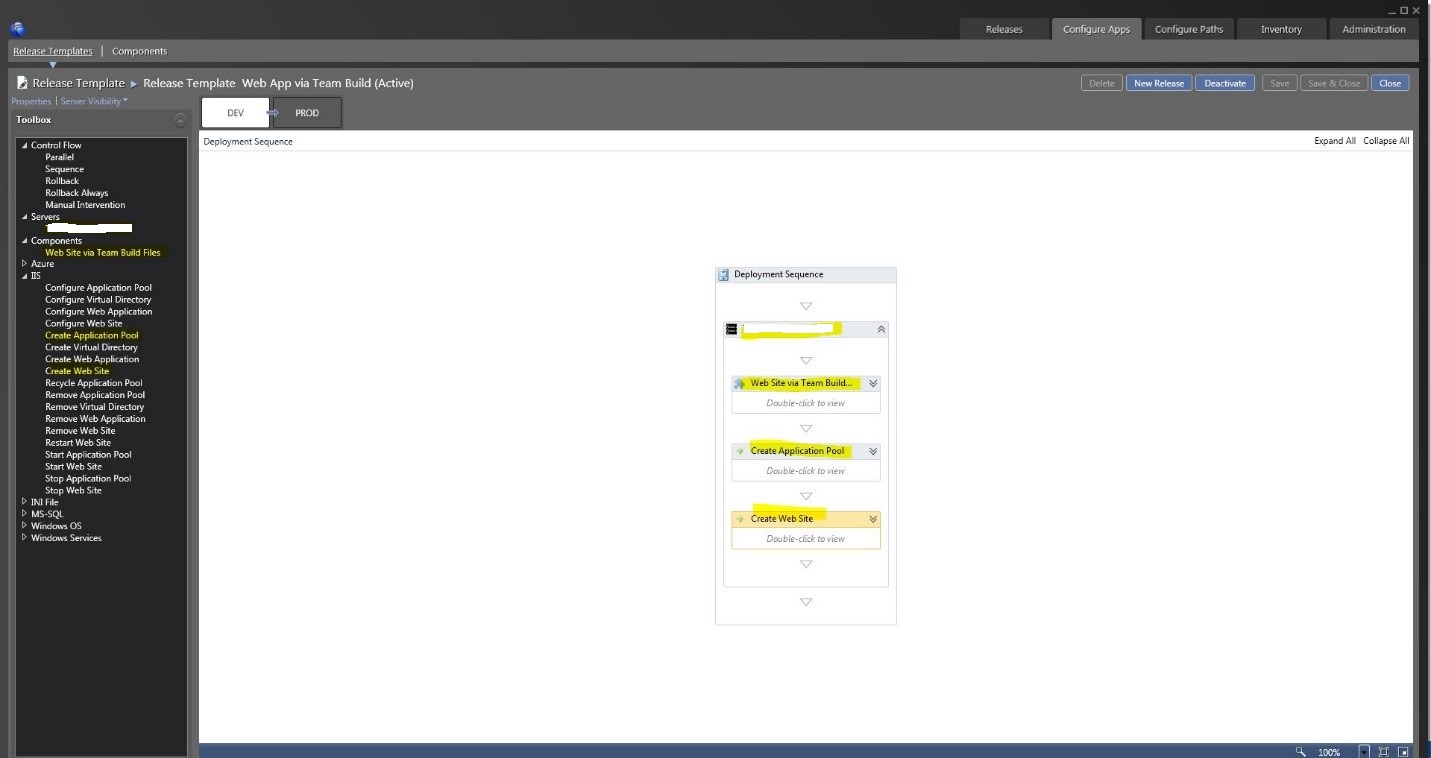
Save & Close the newly created Release Template.