Working with SharePoint Workflow inside Outlook add-in – Part 1
This is the first part of a 2 part series where I will show you how we can work with a SharePoint Approval workflow within the familiar environment of Outlook. You find second part here.
If you have been following Build 2015, you would know that Office apps and SharePoint apps have been renamed to Office add-ins and SharePoint add-ins respectively. You should also watch this excellent session available on Channel 9 in which the future of SharePoint and Office is discussed at length - Office Development Matters, and Here's Why...
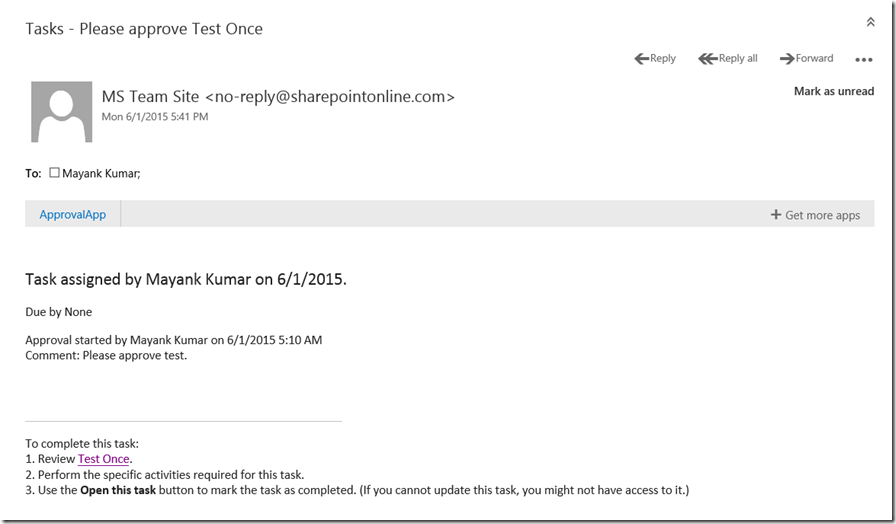
If you have worked with SharePoint Approval workflow, you would know that once a new item is added you can have a functionality where a mail is triggered to the approver for his approval. A typical approval mail looks something like this:
The user is then expected to click on the link which opens the browser where he logs-in and approves/rejects the request. What if we can provide the user a better experience within the Outlook app itself! Here we are going to create an Outlook add-in which will read the email, extract the link and provide a UI for approval to the user. In this first part, we will see how our app will identify the email and read the contents of the mail.
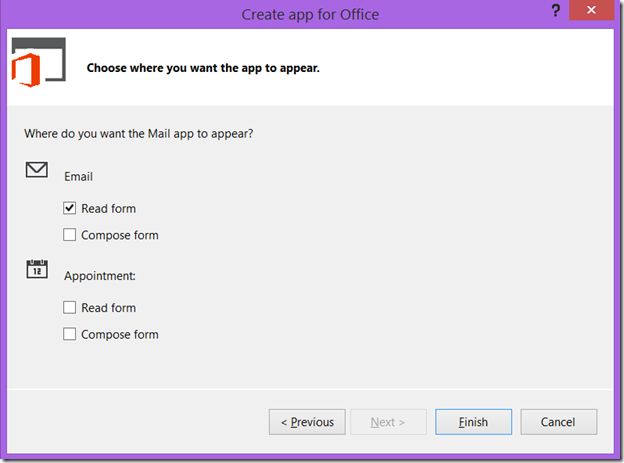
We will begin with creating a task pane app for Outlook. We will call it ApprovalApp which will run in Read mode of an Outlook email.
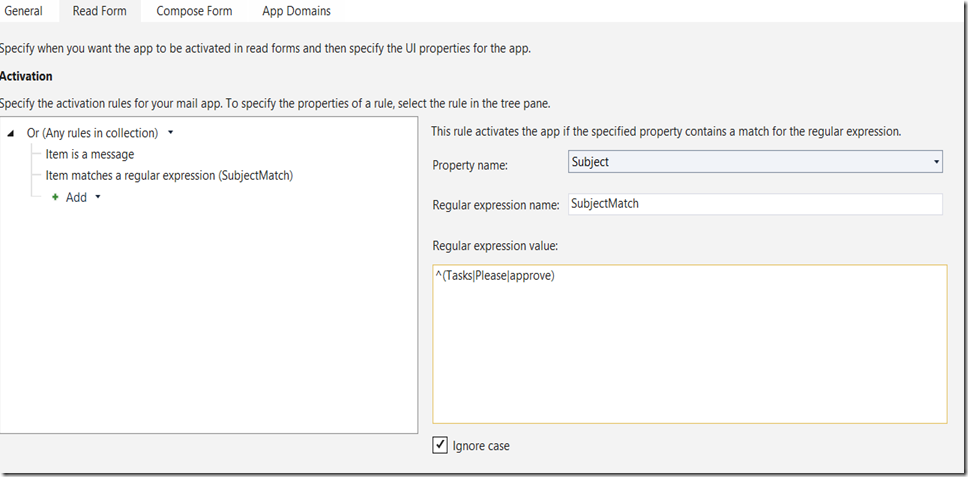
We will start with defining something called Activation Rule which defines when an add-in will detect the proper mail and show its UI. Here we are going with a very simple Regex applied on the subject of the mail.
Next we will define a Web API which will host our service which will help in getting the mail content as well as working with the SharePoint workflow once the List item URL is extracted from the email body. To avoid cross-domain issue, we will keep both the Web API as well as Outlook add-in website within the same project.
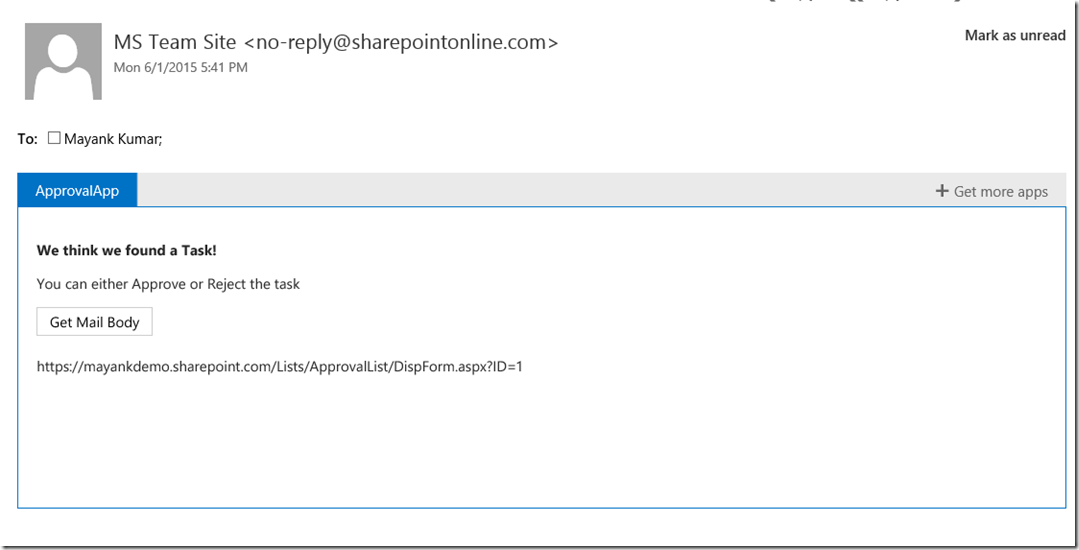
The UI of our app looks something like this:
On click of "Get Mail Body" button, our app will call the Web API which will in turn authenticate with the EWS and return the mail item body. The code for making the Web API request is pretty simple.
 function makeServiceRequest() {
    $.ajax({
        url: "/api/Approval",
        type: "POST",
        data: JSON.stringify(serviceRequest),
        contentType: "application/json",
        complete: responseComplete
    });
};
Now the main problem here is that in the current version of Office.js, you cannot access the mail body in Read Mode. To workaround this we have to use Exchange Web Services (EWS).
To authenticate with EWS, you do not have access to the user’s password. Instead Office.js provides a token via method getCallbackTokenAsync which can be used to authenticate with EWS. This is not very clearly documented anywhere and the following code will help you if you ever want to do the same thing.
 function getMailBody() {
    Office.context.mailbox.getCallbackTokenAsync(authorizationTokenCallback);
};

function authorizationTokenCallback(asyncResult, userContext) {
    if (asyncResult.status == "succeeded") {
        serviceRequest.AuthToken = asyncResult.value;
        makeServiceRequest();
    }
    else {
        $('#taskUrl').text("Could not get callback token: " + asyncResult.error.message);
    }
}
This token can then be used in EWS Managed API to authenticate with Exchange and load the item body. The code taken in the authentication token passed by our app and uses OAuthCredentials to authenticate with Exchange. In the following code, we are also extracting the URLs from the email body via Regex.
Note: There are other simpler ways to extract URLs from email. The aim of this post is to show how we can access the entire email in Read mode.
 public ApprovalApi.Models.ServiceResponse Post(ServiceRequest request)
        {
            ExchangeService service = new ExchangeService(ExchangeVersion.Exchange2013);
            service.Credentials = new OAuthCredentials(request.AuthToken);
            service.Url = new Uri(request.EwsURL);
            Item item = Item.Bind(service, request.ItemId);
            if (item.Body != null)
            {
                Regex linkParser = new Regex(@"\b(?:https?://|www\.)\S+\b", RegexOptions.Compiled | RegexOptions.IgnoreCase);
                Match match = linkParser.Matches(item.Body.Text)[1];
                ApprovalApi.Models.ServiceResponse response = new Models.ServiceResponse();
                response.isError = false;
                response.url = match.Value;
                return response;
            }

            return null;
        }
Now that we have the entire email body and also the item URL, in the next part we will look at how we can use this information to bring SharePoint functionality within Outlook.
Stay tuned!
P.S. – You can find the source code attached with this post below.


