Take an on-premise virtual machine to the cloud
- av Einar Ingebrigtsen
Since its introduction in 2008, Azure has learnt quite a few new tricks. Azure started off being a Platform as a Service offering where everything was managed and you only had a place to stick your solution and it would be hosted fine. Brilliant for a lot of cases but at times you need more raw power and control over the environment yourself. Infrastructure as a Service is an offering that was introduced a couple of years ago in Azure and basically enables you to get to this raw power and control. With the default offerings you will not be able to get to a physical box of your own, but to a virtual machine level. This should in most cases cover what you need. In Azure you do get an opportunity to control how much power should be allocated to your virtual machine from the physical hardware underneath and as with everything Azure; you pay as you go for the power you need.
A lot of you might already have virtual machines running inside your own on-premise solutions and you’re looking to move these across. This post will focus on how you can take an on-premise virtual machine hosted on top of Hyper-V and move it to Azure. If you happen to have some physical hardware that you’d like to move over, you can simply convert the physical installation into a virtual machine and then follow this post afterwards (More information here). Also, you might be hosting your virtual machines on other infrastructure like VMWare and want to convert it, Microsoft has a tool for converting it that can be found here.
Prerequisites
Before you get started doing anything, make sure you have an Azure Subscription and a supported .vhd file representing the virtual machine you want to move. The VHDX format is not supported in Microsoft Azure. Converting it is very simple, open up a powershell on the machine with Hyper-V that holds the virtual machine and use the Convert-VHD command:
Also worth mentioning, the VHD file needs to be Fixed size, not Dynamic nor Differencing. If you need to convert yours, you can add the –VHDType Fixed option to the command line.
Preparing
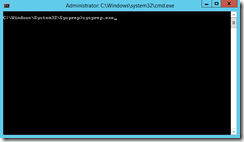
Before we can take the image to the cloud we need to generalize it using the sysprep command. Open up a command line and navigate to %WinDir%\System32\Sysprep and then run sysprep.exe.
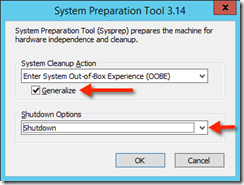
In the popup you need to check the “Generalize” checkbox and then make sure the shutdown options is set to “Shutdown”.
Preparing Azure
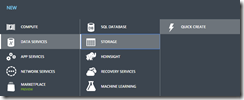
While the virtual machine is preparing and shutting down we can move our attention to what we need to do in Azure. The first thing we need, if you haven’t already got it, is a Storage account. Click the  button at the bottom of the screen and select DataServices -> Storage -> Quick Create.
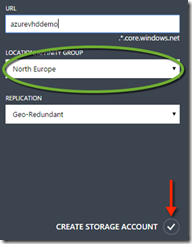
This should slide out a form to the right to fill in with the data you want. Firstly the URL, this is an Azure wide unique URL and the UI will constantly validate whether or not it is available. Secondly is location or affinity group. If you already have an affinity group you can reuse it here or simply chose the location in which you want the account to be. Then click the “CREATE STORAGE ACCOUNT” button at the bottom.
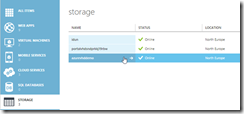
This probably takes a minute or so to provision. When its done it should sit under the Storage tab in the navigation menu to the left and have its status as online. Click it when its online.
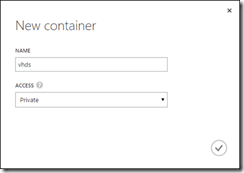
We need a container to put our VHD file. Navigate to “Containers” on the top navigation bar and click the “CREATE A CONTAINER” button.
You should now get a dialog to a name of the container. Name it and click the button.
Note: By default the access is set to private – which is most likely right for your VHDs. It just means that it won’t be publically available for read access.
This should create a container that should appear in your storage account within a few seconds. We are now ready for uploading.
Uploading
There are a few ways we can upload the VHD to Azure. You could use PowerShell, visual studio, set up an FTP bridge on a second virtual machine and a few more. I want to do this using a tool that I started using quite early in my first Azure days and have stuck with me ever since.
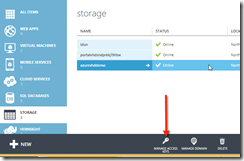
The tool that I’m using is called Azure Storage Explorer and is great for anything related to the storage side of Azure. It can be downloaded from here. Once its installed we’re going to need to connect it to Azure and our storage account. In order for us to do this, we are going to need the access key. Navigate to Storage in the left navigation menu. Select the storage account, don’t navigate to it. Then click the “MANAGE ACCESS KEYS” at the bottom.
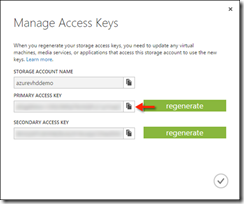
From the popup you can now access your primary and secondary access keys. This is also the place you can regenerate the key if you happen to get a security violation. The key can be copied into your clipboard by clicking the  button.
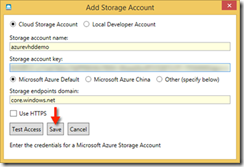
Open up the Azure Storage Explorer that you installed. Click the  at the top of the explorer. Put in the storage account name and access key copied from Azure into the dialog and then click Save.
You should now be seeing the content of your storage account and the container we created. Click the container and then click the  button.
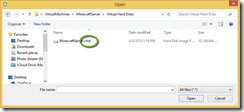
Navigate to your VHD file and select it and then click Open.
Your file will now start uploading. How long this will take is totally dependent on the size of your file, your bandwidth and datacenter location distance from you. Unfortunately there is no progress, so you’ll just have to wait till the status changes from  to nothing J.
If you are wondering if it’s at all working, you can check the Task Manager in Windows. It can give you an indication of network traffic, as long as you’re not doing a lot of other network related things.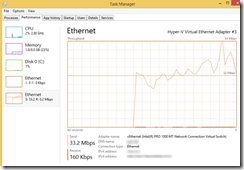
Setting up the virtual machine in Azure
Now that we’ve uploaded the virtual hard drive image, we can finish the setup in Azure and get our virtual machine ready.
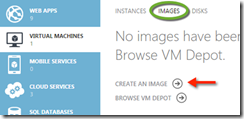
First thing we are going to have to do is to make the image available as a disk image making it available as a an image we can use for creating the actual virtual machine and its configuration. Go to the “VIRTUAL MACHINES” tab in the navigation menu and select “IMAGES” from the top. Then click “CREATE AN IMAGE”.
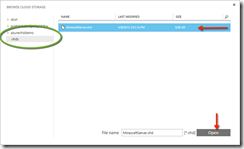
In the popup, navigate to the image, select it and click “Open”.
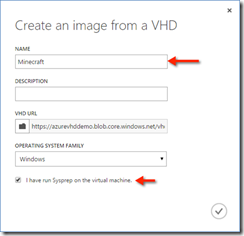
Give the image a name and make sure to check the checkbox saying that we’ve run Sysprep at the bottom of the popup. Then click  .
.
Shortly after you should se your image in the image list and be available.
Now we can go create the actual virtual machine based on the disk image. Click the  button at the bottom of the portal and select Compute -> Virtual Machine -> From Gallary.
Click “MY IMAGES” in the navigation menu to the left and then select your image in the list.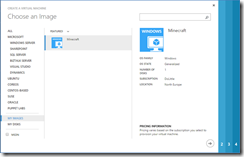
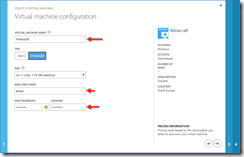
Click  in the wizard. Give the virtual machine a name and configure the settings as you please. You can change the size of the virtual machine, but be aware of the cost associated with it. Enter the username and the password for a user that will be granted administrator access.
Click ![clip_image048[1] clip_image048[1]](https://msdntnarchive.blob.core.windows.net/media/MSDNBlogsFS/prod.evol.blogs.msdn.com/CommunityServer.Blogs.Components.WeblogFiles/00/00/01/36/37/metablogapi/8103.clip_image0481_thumb_794DD80E.png) in the wizard. Give the machine a unique DNS name.
in the wizard. Give the machine a unique DNS name.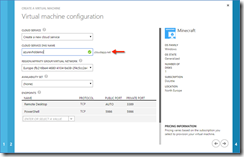
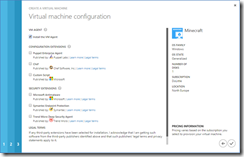
Click ![clip_image048[2] clip_image048[2]](https://msdntnarchive.blob.core.windows.net/media/MSDNBlogsFS/prod.evol.blogs.msdn.com/CommunityServer.Blogs.Components.WeblogFiles/00/00/01/36/37/metablogapi/2541.clip_image0482_thumb_4F03C195.png) in the wizard. You can preinstall extensions if you need it, in this setup I’ve chosen only to install the VM agent – which is checked by default. This agent will allow it to be integrated with Azure and its tools. When you’re done click
in the wizard. You can preinstall extensions if you need it, in this setup I’ve chosen only to install the VM agent – which is checked by default. This agent will allow it to be integrated with Azure and its tools. When you’re done click ![clip_image038[1] clip_image038[1]](https://msdntnarchive.blob.core.windows.net/media/MSDNBlogsFS/prod.evol.blogs.msdn.com/CommunityServer.Blogs.Components.WeblogFiles/00/00/01/36/37/metablogapi/6204.clip_image0381_thumb_02CBB7E7.png) .
.
Azure will now provision your virtual machine.
After a while it will be ready and it will say:
Selecting the virtual machine you should see the toolbar at the bottom change and give you a few options for controlling the virtual machine. The first button says “CONNECT”, this will download a remote desktop file that you can use to connect directly to it. Obviously, you can also just go into your remote desktop tool and enter the DNS address we registered it with and make note of the port that we had in the virtual machine setup wizard on page 3 and set this up manually.
With the remote desktop access, you can test that everything is running and continue administering your server.
Opening ports
During step number 3 in the wizard we could expose any known endpoints that we wanted exposed. But you can also do this after the virtual machine is up and running.
After navigating to the virtual machine you can select the “ENDPOINTS” tab at the top. Here we’ll find the endpoints that are exposed and we can add more by clicking the  button at the bottom in the toolbar.
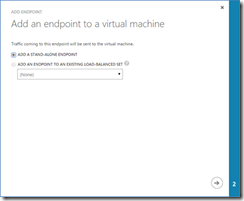
The first step in the wizard lets you chose between a stand-alone or a load balanced one. We’re not going to go into how to load balance things, but that is an option you have for scaling your services. Go with the stand-alone and click ![clip_image048[3] clip_image048[3]](https://msdntnarchive.blob.core.windows.net/media/MSDNBlogsFS/prod.evol.blogs.msdn.com/CommunityServer.Blogs.Components.WeblogFiles/00/00/01/36/37/metablogapi/3124.clip_image0483_thumb_01B37C70.png) .
.
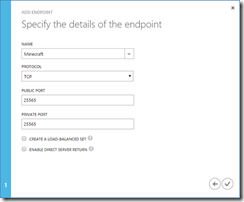
Enter the name of the endpoint and configure its protocol, public port and private port. We’re not doing anything load balanced. The last option is very useful if you’re setting up a SQL server and using the SQL AlwaysOn capability. That is not something for this post.´either. Click ![clip_image038[2] clip_image038[2]](https://msdntnarchive.blob.core.windows.net/media/MSDNBlogsFS/prod.evol.blogs.msdn.com/CommunityServer.Blogs.Components.WeblogFiles/00/00/01/36/37/metablogapi/4118.clip_image0382_thumb_6E28AD7F.png) .
.
In the status you should see  and at the top
  .
.
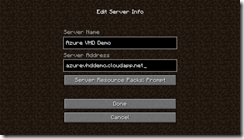
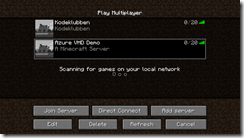
Once it is done your service is ready to be used. Since this was a Minecraft server – which all enterprises should have, you simply open Minecraft and configure it:
Then you can just start it:
And get killed by a Zombie.
Conclusion
Working with Azure has dramatically changed since its introduction and even since the virtual machine option was introduced as well. My first virtual machine that I moved into Azure was a heap of manual steps and took quite a while to get right. Today, it will take you the time it takes to upload the image and then a couple of minutes of configuration and you’re done. Obviously, if you’re starting from scratch and can use some of the pre installed templates that sits in Azure you’ll be up and running with a clean virtual machine in a couple of minutes.
Do YOU want to move your on-premise virtual machine to Azure? Or do you want to take a look at the services provided in Azure? Or do you just want to play around and take a look at the possibilities in the cloud? You can try for free for 30 days – get your free Trial now! 


