Setup and test of the Dynamics 365 Finance and Operations, Enterprise Edition Warehouse Management Document routing functionality
Document routing has been a sore point with me for a while. I could certainly talk to it, but I hadn’t set it up. Here is a guide for getting Document routing in the (WHS) Warehouse management module up and running on 365 FOEE – I am assuming the core setup is the same in AX 2012 R3 but I haven’t tested it yet.
So initially we wish to have a ZPL printer on the local machine, and to save a little lets do that by setting up a freeware ZPL emulator. One such can be found here:
https://chrome.google.com/webstore/detail/zpl-printer/phoidlklenidapnijkabnfdgmadlcmjo 
It can be a little tricky to get it up and running so here is a quick guide courtesy of akb at experts-exchange:
You need to run the app and leave it open on your screen.
Then go into Devices & Printers in Control Panel. Add a printer. Select Add a Local Printer.
Create a new port - Standard TCP/IP.
Use IP 127.0.0.1
Let Windows detect the port and it will eventually return an error.
Select Device Type -> Custom.
Press settings and make sure you have IP Address 127.0.0.1, Protocol RAW and port 9100.
Click OK and Next.
Wait for it to fail to detect driver model.
Select Generic and Generic/Text Only.
Next a few times then Name your printer.
Open Notepad and copy the following lines to Notepad:
^XA
^CF0,36,42
^FO30,40 ^A0,44,50 ^FDTEST^FS
^FO30,100 ^FDBag Number:^FS
^XZ
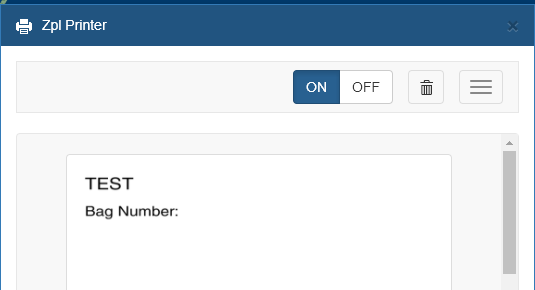
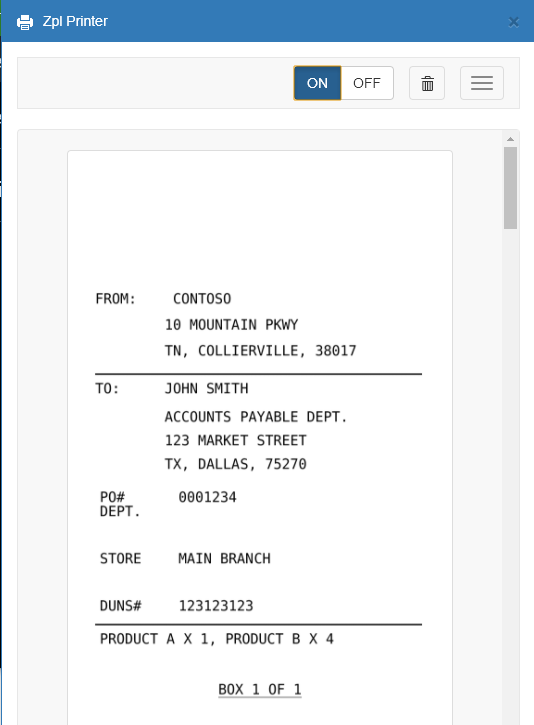
Now print the Notepad to the new printer you created and you should see a label appear in the ZPL Printer App.
If you have gotten this far then this should appear in your ZPL printer:
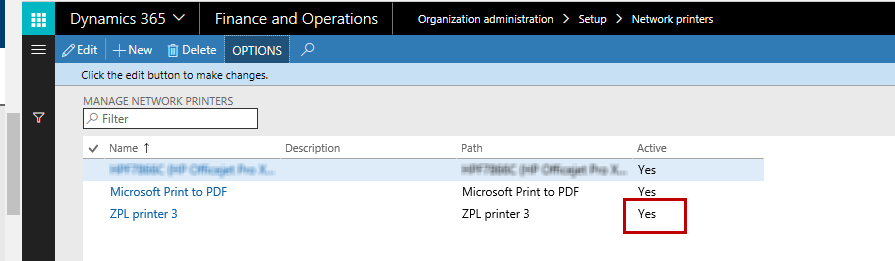
Secondly we need to add the printer to D365FOEE, there are several guides to this, the end result should be that it is added and ACTIVE!:
Now to the normal document routing setup. The layout first create one taking a bit of samle zpl text from somewhere or use the above example. Here I have a layout that I have grapped from <labelary.com/viewer.html> 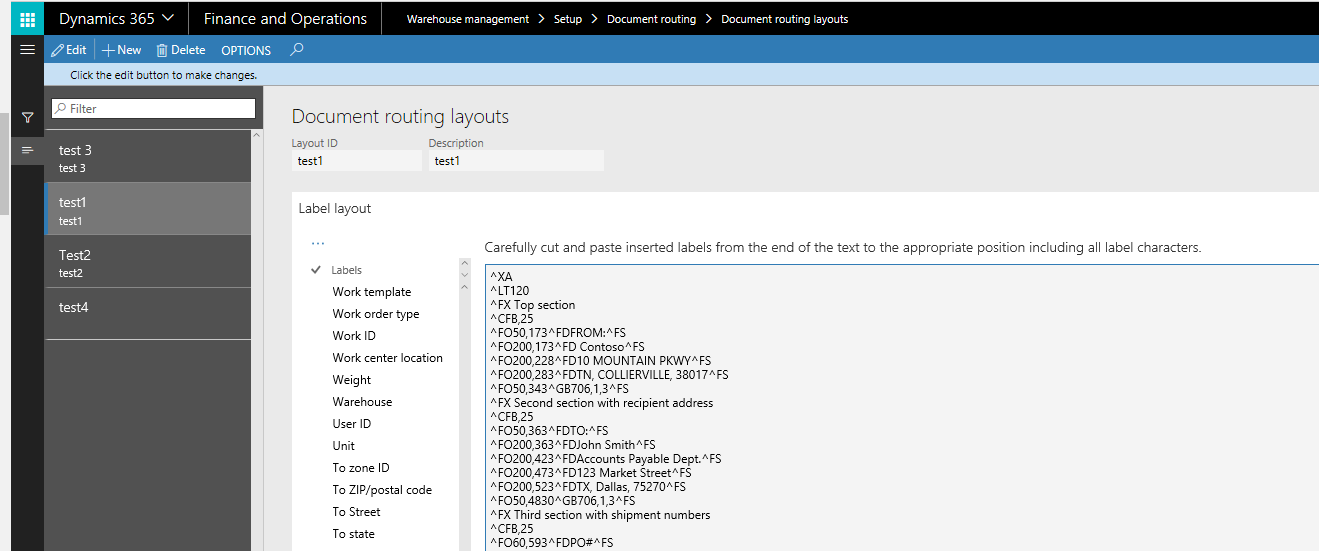
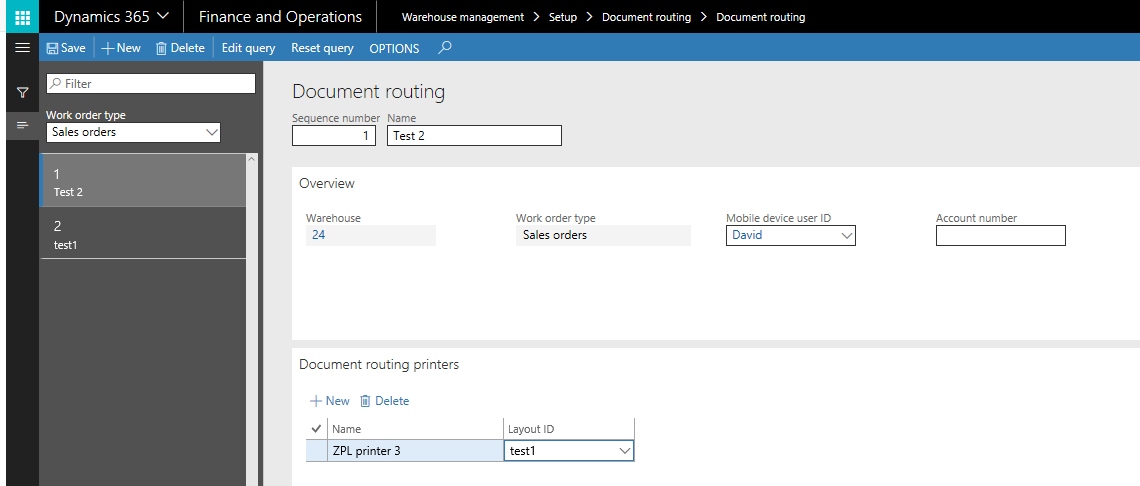
And secondly a document Routing setup. I use a Document against my sales order works and in this case when the Mobile device user is David:
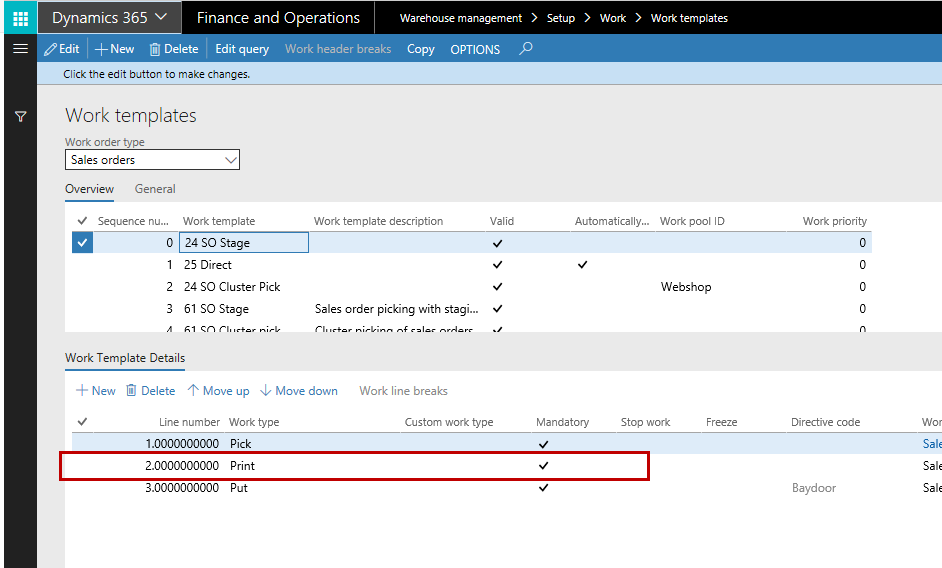
My Sales order work template contains a print step:
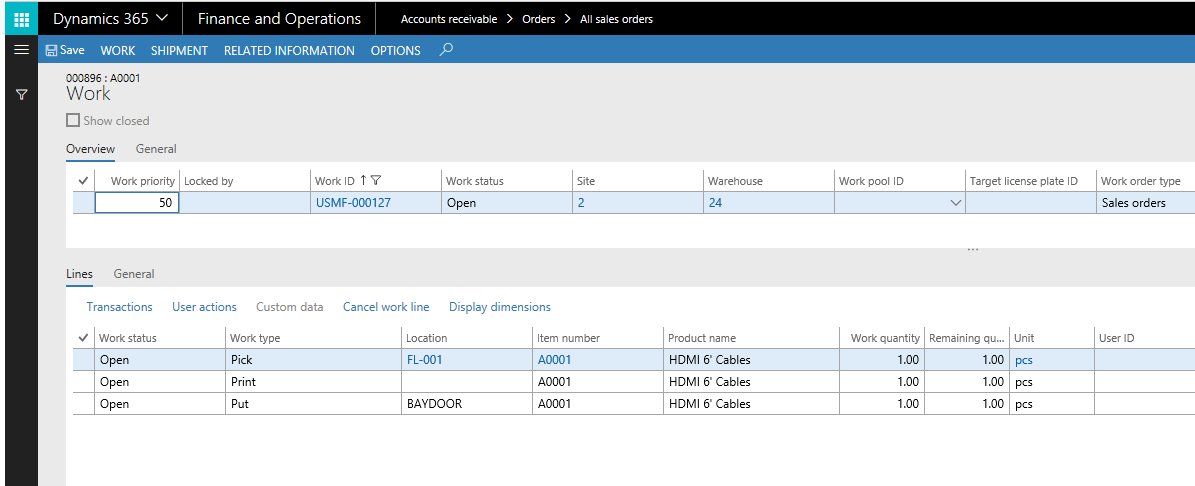
Now to a sales order and a sales work. Completely standard. Here I am selling one of my favourite items A0001 from warehouse 24:

Off to the warehouse with a release to warehouse and a work has been created with a Print step after the pick line(s):
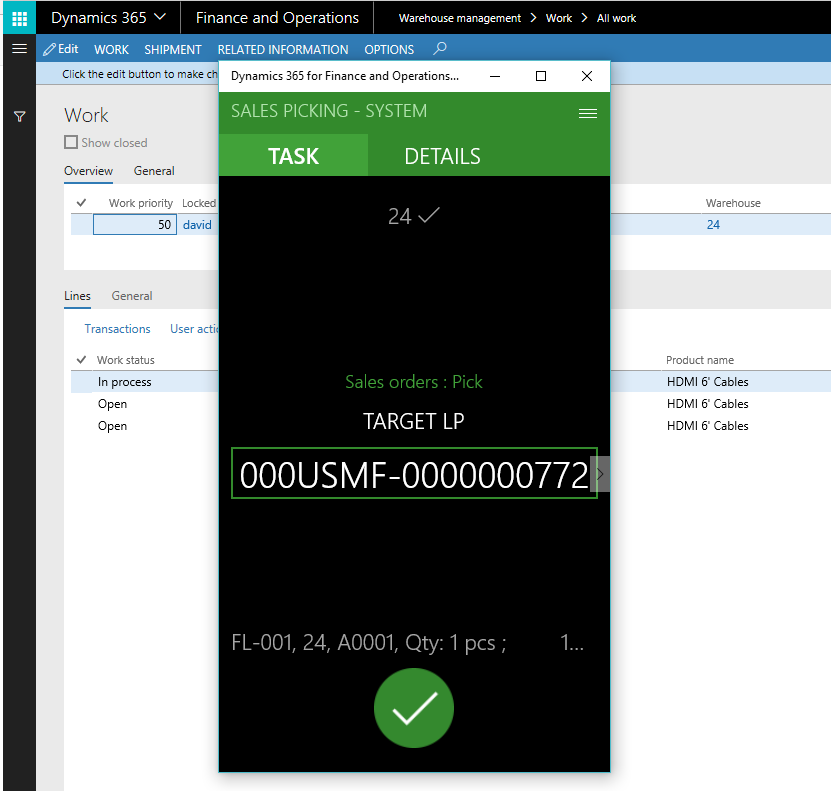
To pick it using your favourite mobile device (or the windows app):
And hooray, on your ZPL printer you should now get the formatted label:
This was an example of static text, It would be a little more beneficial with data actually coming from D365FOEE. To do that Microsoft have included a (fixed unfortunately - but see the comments below for extending these fields) number of warehouse related field to add to your document routing layout.
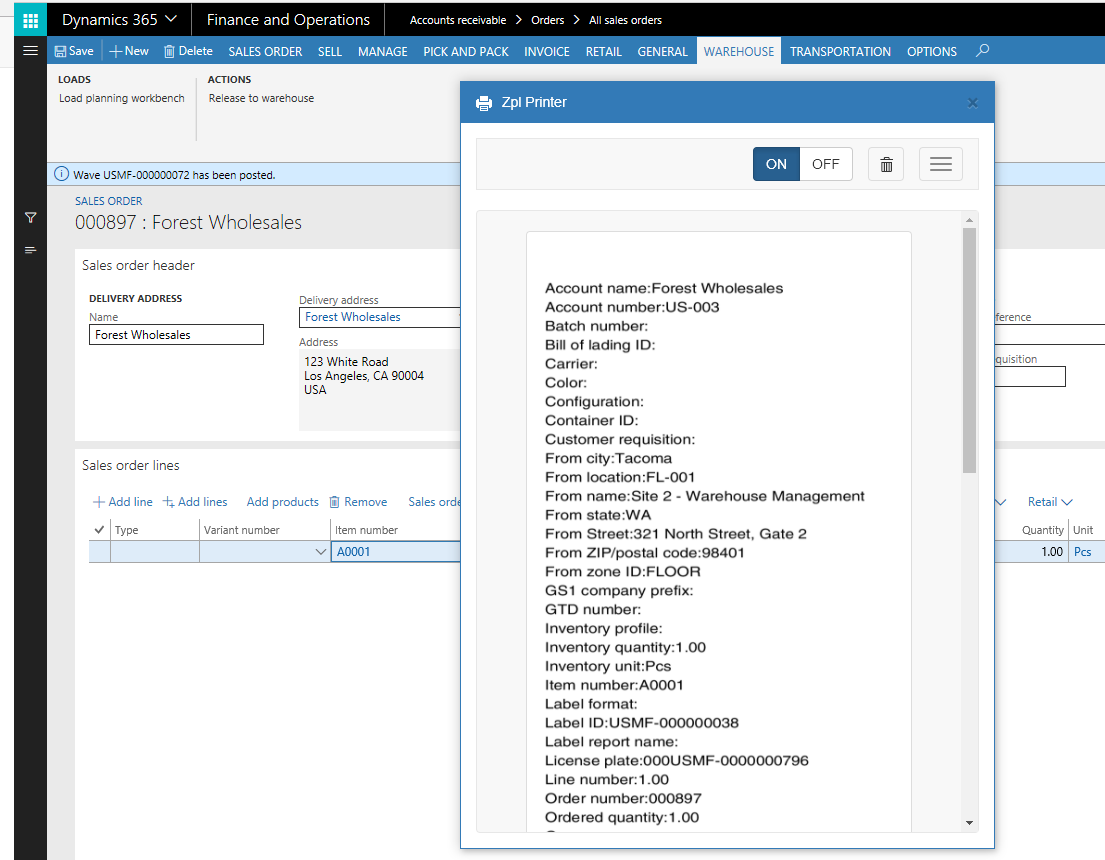
Below is a test template I have created that includes all the codes available:

And here is the ZPL text:
^XA
^CF0,36,42
^FO30,100 ^FDAccount name:$AccountName$^FS
^FO30,140 ^FDAccount number:$AccountNum$^FS
^FO30,180 ^FDBatch number:$InventBatchId$^FS
^FO30,220 ^FDBill of lading ID:$BillOfLadingId$^FS
^FO30,260 ^FDCarrier:$CarrierCode$^FS
^FO30,300 ^FDColor:$InventColorId$^FS
^FO30,340 ^FDConfiguration:$ConfigId$^FS
^FO30,380 ^FDContainer ID:$ContainerId$^FS
^FO30,420 ^FDCustomer requisition:$CustPurchaseOrder$^FS
^FO30,460 ^FDFrom city:$AddressCityFrom$^FS
^FO30,500 ^FDFrom location:$WMSLocationIdFrom$^FS
^FO30,540 ^FDFrom name:$FromName$^FS
^FO30,580 ^FDFrom state:$AddressStateIdFrom$^FS
^FO30,620 ^FDFrom Street:$AddressStreetFrom$^FS
^FO30,660 ^FDFrom ZIP/postal code:$AddressZipCodeIdFrom$^FS
^FO30,700 ^FDFrom zone ID:$ZoneIdFrom$^FS
^FO30,740 ^FDGS1 company prefix:$UCCCompanyPrefix$^FS
^FO30,780 ^FDGTD number:$InventGtdId_RU$^FS
^FO30,820 ^FDInventory profile:$InventProfileId_RU$^FS
^FO30,860 ^FDInventory quantity:$InventQty$^FS
^FO30,900 ^FDInventory unit:$InventUnitId$^FS
^FO30,940 ^FDItem number:$ItemId$^FS
^FO30,980 ^FDLabel format:$LabelFormat$^FS
^FO30,1020 ^FDLabel ID:$LabelId$^FS
^FO30,1060 ^FDLabel report name:$LabelReportName$^FS
^FO30,1100 ^FDLicense plate:$LicensePlateId$^FS
^FO30,1140 ^FDLine number:$LineNum$^FS
^FO30,1180 ^FDOrder number:$OrderNum$^FS
^FO30,1220 ^FDOrdered quantity:$OrderedQty$^FS
^FO30,1260 ^FDOwner:$InventOwnerId_RU$^FS
^FO30,1300 ^FDPacking quantity:$PackingQty$^FS
^FO30,1340 ^FDPrinted date:$PrintedDate$^FS
^FO30,1380 ^FDPro number:$ProNum$^FS
^FO30,1420 ^FDProduct name:$ItemName$^FS
^FO30,1460 ^FDQuantity:$Qty$^FS
^FO30,1500 ^FDRemaining quantity:$RemainingQty$^FS
^FO30,1540 ^FDSerial number:$InventSerialId$^FS
^FO30,1580 ^FDShipment ID:$ShipmentId$^FS
^FO30,1620 ^FDSite:$InventSiteId$^FS
^FO30,1660 ^FDSize:$InventSizeId$^FS
^FO30,1700 ^FDStyle:$InventStyleId$^FS
^FO30,1740 ^FDTo city:$AddressCityTo$^FS
^FO30,1780 ^FDTo location:$WMSLocationIdTo$^FS
^FO30,1820 ^FDTo name:$ToName$^FS
^FO30,1860 ^FDTo state:$AddressStateIdTo$^FS
^FO30,1900 ^FDTo Street:$AddressStreetTo$^FS
^FO30,1940 ^FDTo ZIP/postal code:$AddressZipCodeIdTo$^FS
^FO30,1980 ^FDTo zone ID:$ZoneIdTo$^FS
^FO30,2020 ^FDUnit:$UnitID$^FS
^FO30,2060 ^FDUser ID:$UserId$^FS
^FO30,2100 ^FDWarehouse:$InventLocationId$^FS
^FO30,2140 ^FDWeight:$Weight$^FS
^FO30,2180 ^FDWork center location:$WorkCenterLocationId$^FS
^FO30,2220 ^FDWork ID:$WorkId$^FS
^FO30,2260 ^FDWork order type:$WorkTransType$^FS
^FO30,2300 ^FDWork template:$WorkTemplateCode$^FS
^XZ
Which will give you a great label to experiment with coming out with a long list of the different field for your setup:
Lastly we are “just” left with making a design for actual consumption – that will have to be left for homework.