A speedway to Continuous Integration and Continuous Deployment for Java, Node or .NET - Yo Team step by step
In this blog post I describe step by step how you set up CI/CD for a Java application in no time. It will take way longer to read this tutorial then actually setting up. I promise.
You might have heard of Yeoman, a great code generation tool. My colleague Donovan Brown created a generator generator-team to allow setup of complete CI/CD chains for a number of languages in minutes. (You can find Donvans original post here).
Here's a quick tutorial how you get going starting from scratch. It's all pretty straight forward however you might get confused when it comes to the credentials. See below. So I thought it's a good idea to provide a more detailed guide.
Hint:
In case you don't want to run step 1-4 and have Docker installed on your machine you can also just pull danielmeixner/yo-team-bash from https://hub.docker.com/r/danielmeixner/yo-team-bash/
However things might behave differently than described here – this is because in docker you're command line only and you should set up your git credentials first. I'll describe some of those specifics in another post.
- docker pull danielmeixner/yo-team-bash
- docker run -it danielmeixner/yo-team-bash
Step by step:
Install NodeJs.
NodeJs provides the runtime required for Yeoman which is the basis for everything else.I found the my old 6.x version didn't work so I recommend using the latest version. On my machine v7.7.3 works like a charm.
You can download a NodeJs installer here.
Install Yeoman.
Yeoman is a based on node so you install it using npm. If you want to know more about Yeoman check out the Yeoman website. It's a fantastic tool so it's worth a look. And by the way it's open source.
Open a commandline and runnpm install -g yo
Install the team generator.
Yeoman needs additional code generators to be able to generate stuff. In this step you install the required generator to be able to automate setup of CI/CD in VSTS. It's called generator-team and it's open source.
Open a commandline and runnpm install -g generator-team
Install Git. [Optional|recommended]
You might have Git already installed anyway. You don't really need git for the setup, but it's good to have it to do the first push into your repo. Also the automation tries to fire some Git commands. If you don't have Git installed you might run into errors, however these are typically not completely stopping the show. I still recommend having Git installed. For this tutorial I supposed Git is installed.
You can download Git here.Install Visual Studio Code. [Optional]
You don't really need Visual Studio Code, but I will use it in this tutorial. It's works cross platform and is open source.
You can download the installer here.
Set up a free Team Services account here. If you already have an account, just use that one.
Set up an Azure trial subscription here. We'll deploy to Azure so we don't have to set up our own hosting in this tutorial. However you could also deploy to a Docker host, if you want. If you already have a subscription that's fine as well.
Start Yo Team
Trigger the yo team generator. Open a command line and typeyo team
Follow the wizard.
Yo asks you for several inputs. I will explain what those inputs are based on a Java application running on Azure. The first thing you might see (only the first time) is this.
This only appears if you're running yo for the first time. For our purposes it's not relevant if you answer with Y or n.
Specify Account Name.
Yo will ask you for an account name.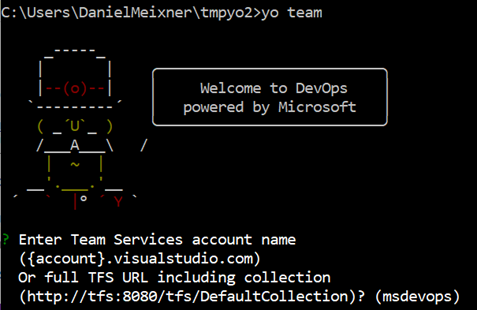
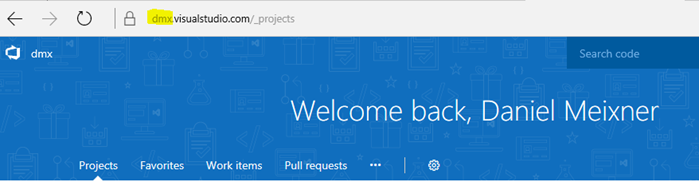
You can use the generator for work with Team Foundation Server. Specify the full URL then as shown. However in our case I consider you have a Visual Studio Team Services account. Then just specify the account name. You can find it in your URL. It's basically the subdomain. In my case it's "dmx". So I respond with dmx.
Now I'm asked for my Personal Access Token.
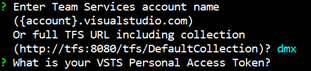
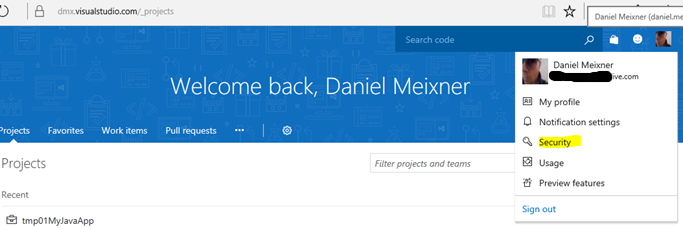
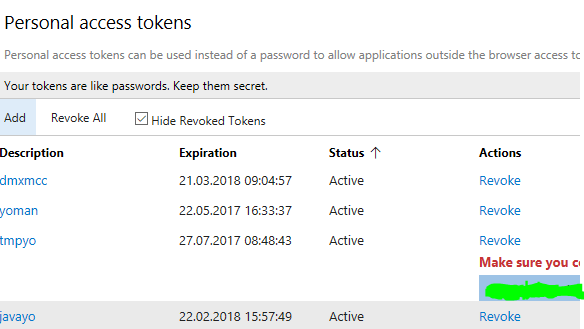
A personal access token (PAT) is required for giving access to my Team Services account for the Yo tool. I have to create a PAT first. So I navigate to my Team Services account (in my case https://dmx.visualstudio.com) and mouse over my icon in the upper right corner and chose "Security". A page opens where I can create a new PAT. Simply click "Add", give the PAT a description and create a token. I choose "All scopes" to make sure Yo can do whatever it takes. You can invalidate our key right after we are finished. But first create it with "Create Token".
You have to copy the token in the next dialog. There won't be another chance so better copy it right now! It's pretty long. Don't show it to anybody and keep it safe like a password!
Provide this PAT as answer.
Configure Build Queue.
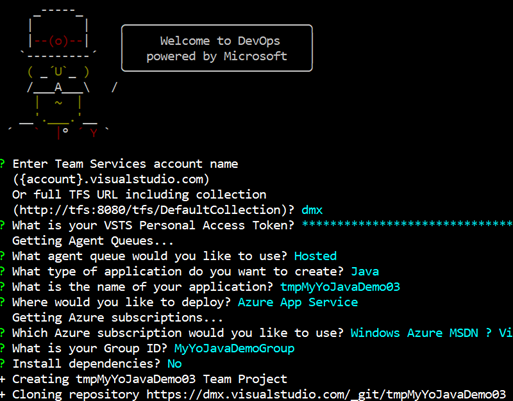
Yo Team will use your PAT to figure out which agent queues are available to build your source code. I prefer to pick "Hosted" here. It certainly depends on what you already have set up, however Hosted should work under all circumstances. You can select using the arrow keys up and down and then just click return.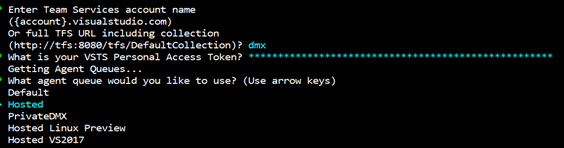
Appliation type
Yo Team will ask you what kind of application you want to set up. I'll pick a Java app for this demo. Again, chose with the arrow keys.
Name of application
Next specify the name of the app. This will be used as Application name and also as name for the team project you'll be creating in VSTS. You can use whatever you want. I recommend avoiding special characters.
I chose tmpMyYoJavaDemo03
Deployment Target
Yo Team will ask you where you want to deploy – to a Docker host or to Azure App Service? For this demo I don't want to set up a Docker host but just be able to deploy. So I pick Azure.
Azure Subscription
Yo Team asks me which subscription I want to use. Maybe you don't have a choice here, maybe you'll see several subscriptions. Just pick the one where you want to deploy to. I'll go with my MSDN subscription here. If I would have chosen Docker I'd had different questions regarding my Docker host here.Group ID
Because we chose a JAVA app we also have to specify our GroupId. I just pick MyYoJavaDemoGroup here.Install Dependencies?
Next you're being asked if you want to install dependencies. I prefer No here otherwise some dependencies will be downloaded on my machine. But I don't need this, I just want to push the code later.Magic starts now. All in all it looks like this and now the magic starts…
Credentials again?
You might be asked for credentials again and this might be confusing to you. This depends on how you've been working with Git already and how it's been set up locally for you. It's important to note that these credentials are credentials to access your Git repo on VSTS. So your default VSTS credentials might not work. If in doubt go to your VSTS account, open the security page again (as before) and set alternate authentication credentials for your account. Use these to login.

When asked for your username use the user name as specified (including @something.com) so e.g. your.name@live.com. You'll be prompted for the password as well.
When everything worked as expected if you get a "Now all you have to do is push when ready" message.
If you're used to Git, you can do the push by using the command line git commands. Or you open Visual Studio Code. First navigate to the brand-new directory containing code. In my case I do so by running
cd tmpMyYoJavaDemo03
Open Visual Studio Code in this folder by typing
code .
Don't forget the ".", otherwise you can navigate to the folder manually in Visual Studio Code.
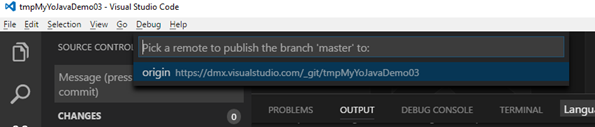
Now navigate to the Git panel in Visual Studio Code and select "Push to …" in the menu.
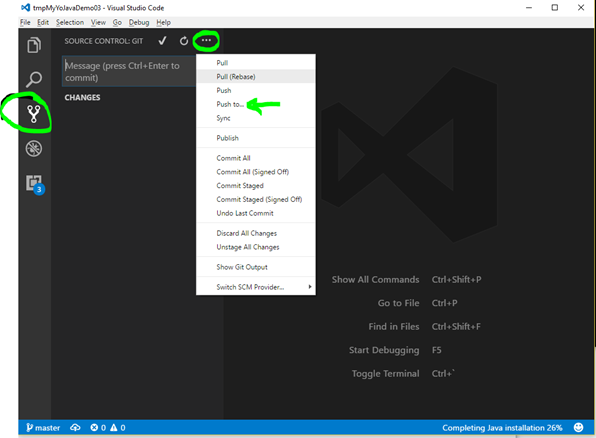
In the subsequent dialog choose "origin" as your target.
This will push the code to your VSTS account. You will find it in the "Code" tab of your account. It will also trigger a build and after the build it will deploy to your Azure subscription into a newly created Azure App Service.