Claims Aware MVC4 App using WIF Identity and Access tool in .Net 4.5 Part I
In this blog, we focus on how to enable MVC4 Application to support claims aware authentication in the Framework 4.5. If you want to know how claims aware authentication works in Framework 4.0, you can refer to the following links:
- WIF: Tips on Adding a Service Reference to a Claims Aware WCF Service
- Create claims aware Wcf Service using WIF on Framework 4.0
- Identity Delegation with AD FS 2.0 Step-by-Step Guide
You can also find some articles on how to create a WCF claims-aware service here:
- Claims Aware WCF using WIF in .Net 4.5
- What do I need to build a claims-aware wcf service in VS 2013
In the versions prior to framework 4.5, you will need to download and install the following tools in order to use the claims aware API in Visual studio 2010:
This action changed in Visual Studio 2012 as WIF has been fully integrated into the framework 4.5. Therefore, there is no need to download the runtime anymore.
However, the tool is not automatically available in Visual Studio environment. You will need to download Identity and Access Tool for Visual Studio 2012 which is an extension to get the tools for WIF 4.5. This tool can be downloaded from this site: Identity and Access
Steps to enable MVC4 Application to support claims aware SAML token:
Once you have the tool downloaded and installed on your Dev machine, you can create a MVC4 application and use the steps below to enable claims aware authentication or Single Sign On.
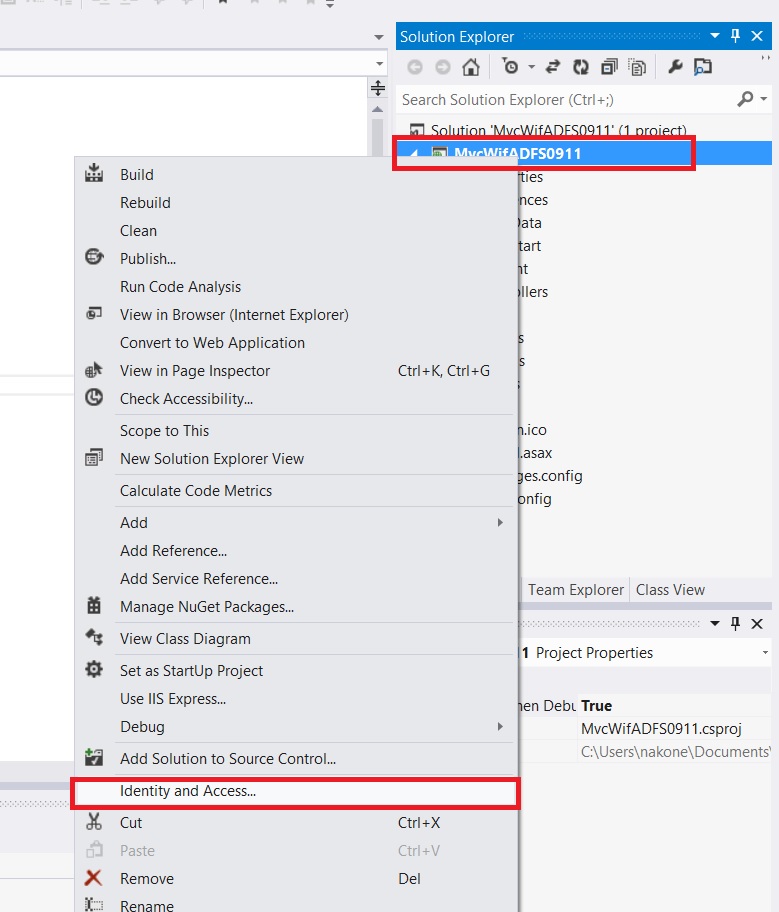
1- Once you have your MVC4 application ready, go to your project solution explorer. Right click on the MVC project and choose “Identity and Access” to make your MVC application a claims aware Web App.
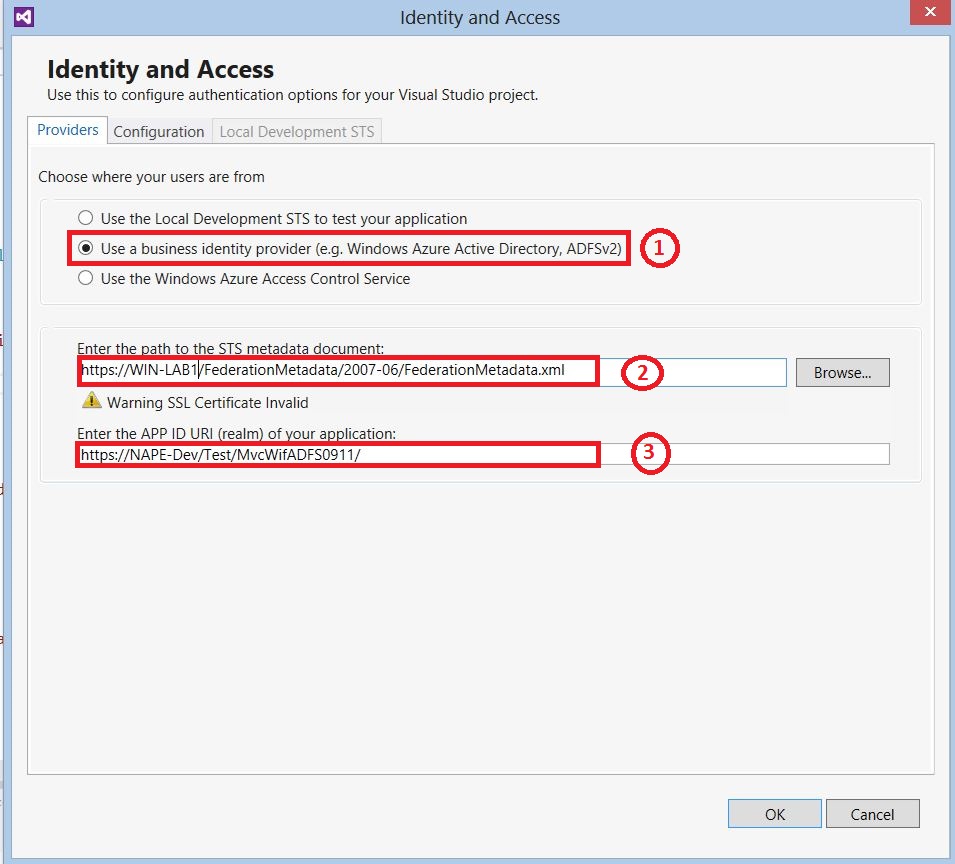
2- In this windows, there are three options to choose from. In our case we will choose “Use a business identity provider” since we are going to externalize the user authentication to ADFS STS. In “Enter the path to the STS Metadata document”, paste the url of the STS (ADFS in our case). The second field contains the url address of the MVC Web App.
3- After you click Ok, the web.config get automatically updated. You can see below that a "System.identityModel" and "System.identityModel.services" tags have been automatically added to the web.config file.

4- In addition to the elements described above, we are interested in the following ones:
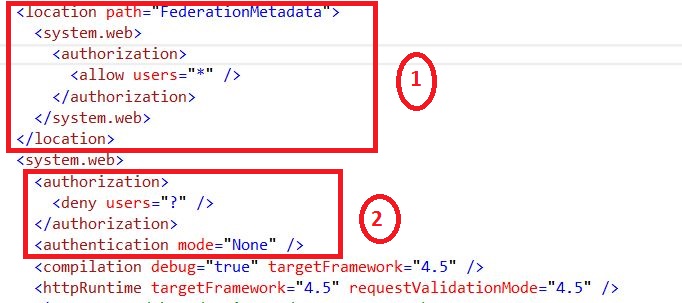
The first set of elements we framed in red contains an authorization tag. The content of this tag means that the unauthorized user will only have access to "FederationMetadata.xml".
The second authorization from the second red frame means that all the resources are denied to the unauthorized user except for the "FederationMetadata.xml".
You can find more information about Control Authorization here: Control Authorization.
5- With the above configurations in place, our MVC application knows the STS to which it should redirect the user for SAML Token acquisition. However, ADFS does not have any information that it can use to trust the Relying Party MVC App. Hence, we need to add the MVC Application as a Relying Party to ADFS.
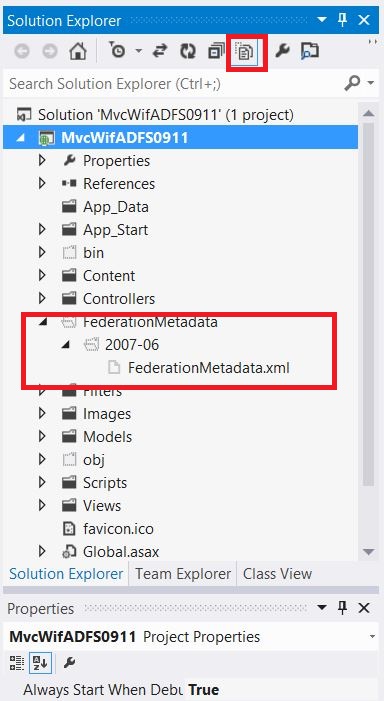
To do so, we will first need to click on “Show all files” to display all the hidden files from MVC control Panel. Then, look for FederationMetadata folder. Once you find this folder, expand it and right click on "FederationMetadata.xml" and choose "View in a browser". IE will automatically open the url. Please copy that url because you will need it in the subsequent steps when we will add the MVC Web App as a Relying Party to ADFS.
Before proceeding further, we need to locate our ADFS server first. Please note that we have assumed from the beginning that ADFS 2.0 was already installed on one of our servers.
If this is not your case, please refer to Install and configure AD FS 2.0 to install ADFS 2.0.
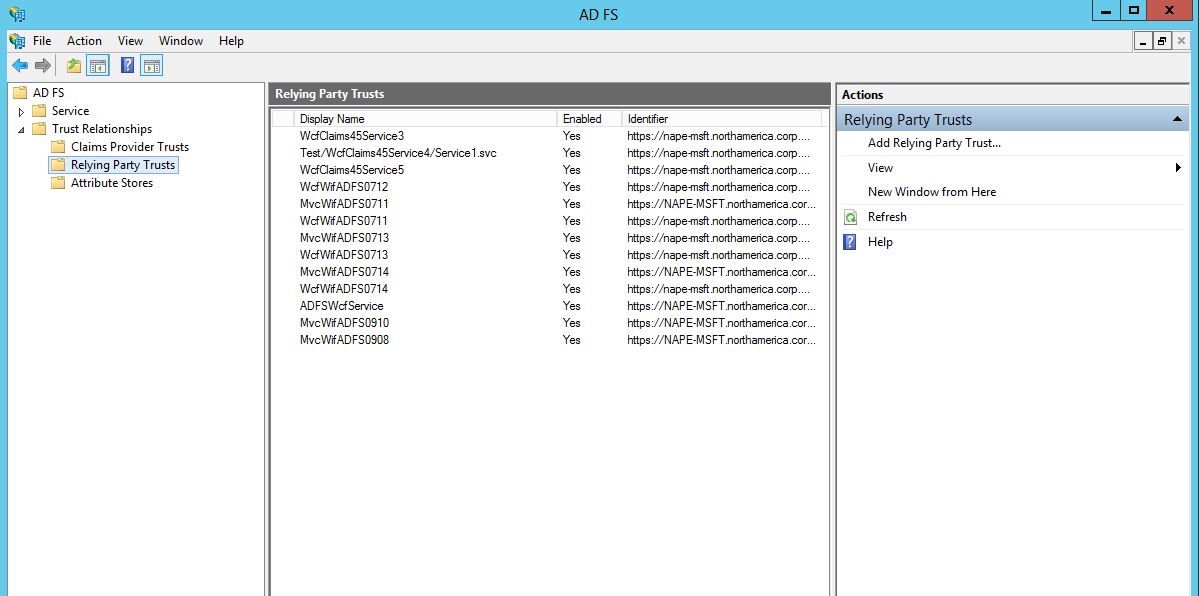
6- Open ADFS and under “Trust Relationships”, right click on “Relying Party Trusts” and choose “Add Relying Party Trust”
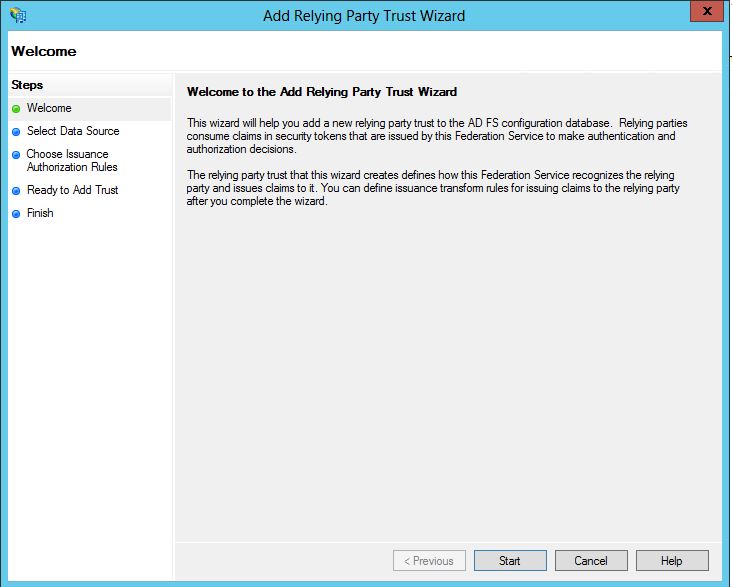
7- Click Start to continue
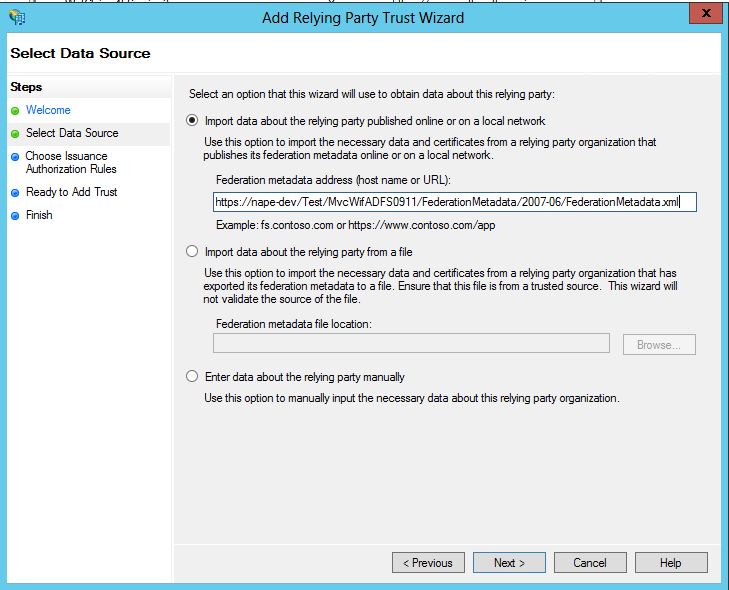
8- Remember in Step 5, I mentioned that you should save the MVC Web App FederationMetadata.xml url somewhere for later use. Thus, you will need to paste this url in “Import data about the relying Party published online or on a local network”
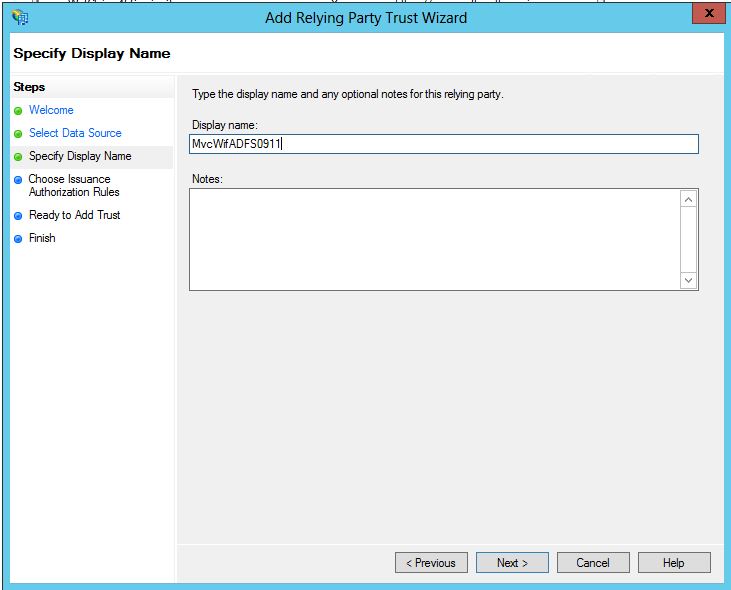
9- Assign a name to your MVC Web App which will be used by ADFS to reference the Web application.
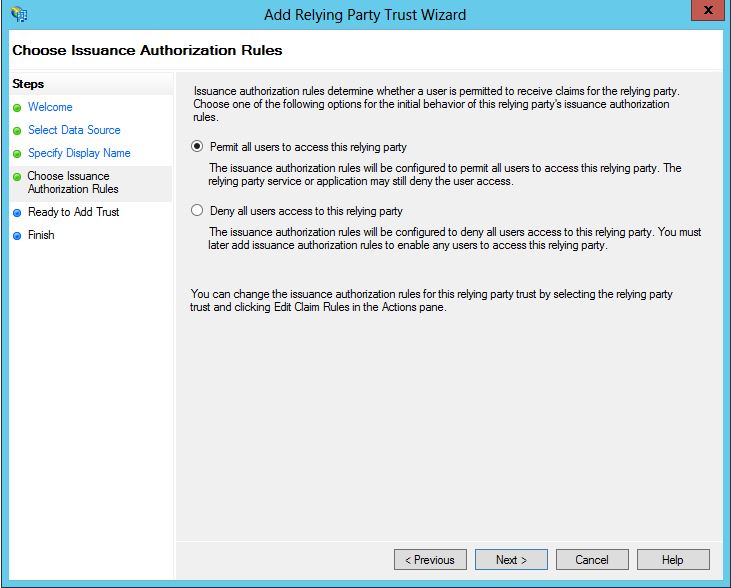
10- Choose "permit all users to access this relying party" and click next.
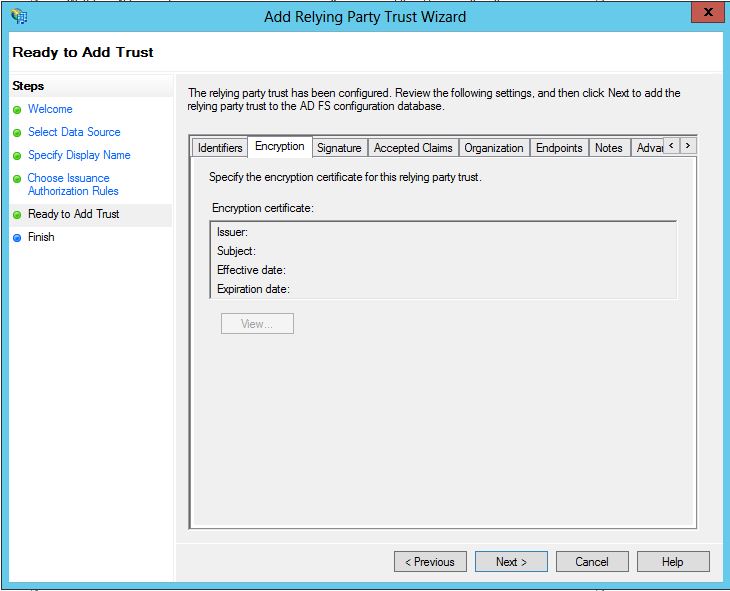
11- This windows display the summary of the configuration used to add the MVC Web App as a relying party to ADFS.
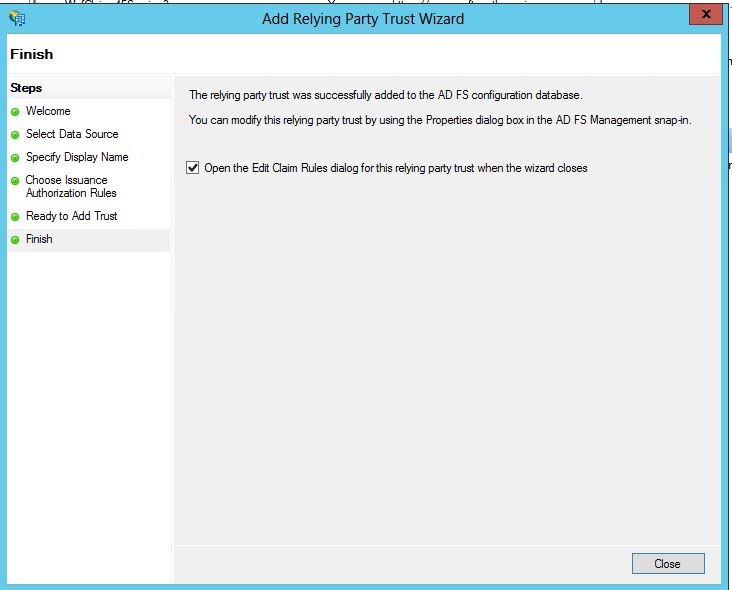
12- Leave “Open the Edit claim rule dialog for this relying party trust when the wizard closes” checked so that you will able to add claims rule.
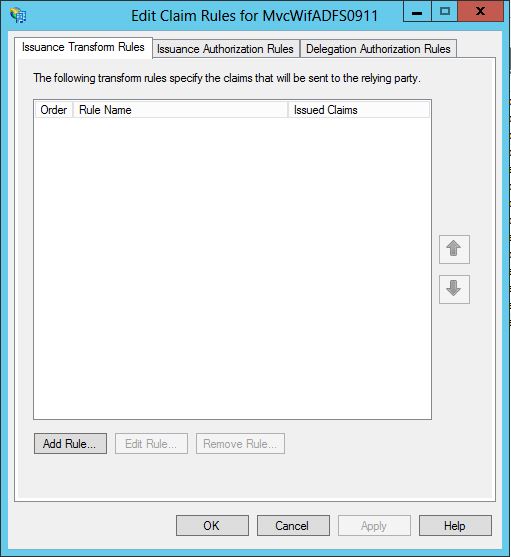
13- Add new Rule.
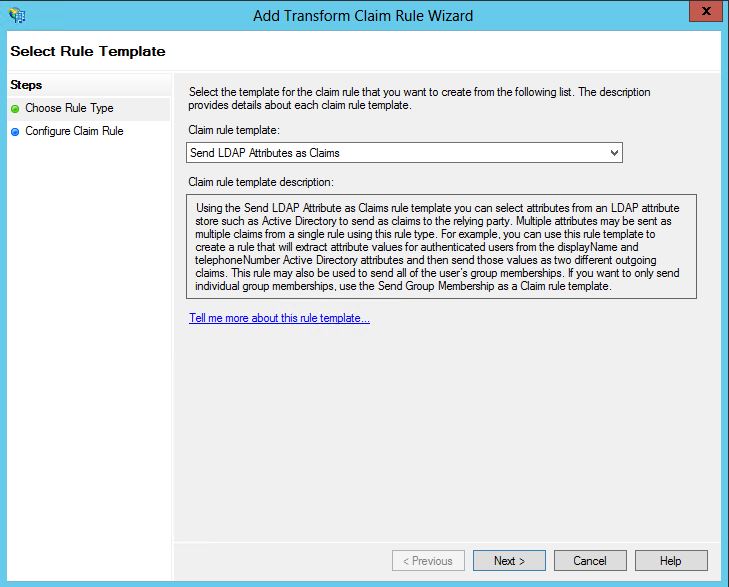
14- Choose “Send LDAP Attributes as Claims”
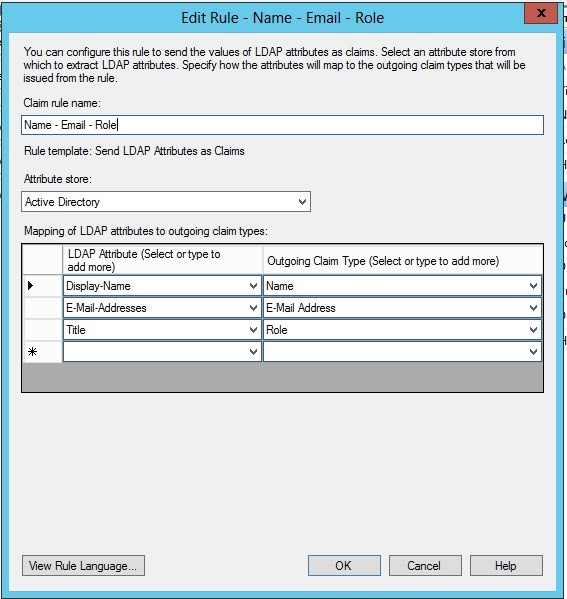
15- In this windows you can choose any rule you would like to see in your application. For example, we chose "Name, Email and Role". Click finish after you are done.
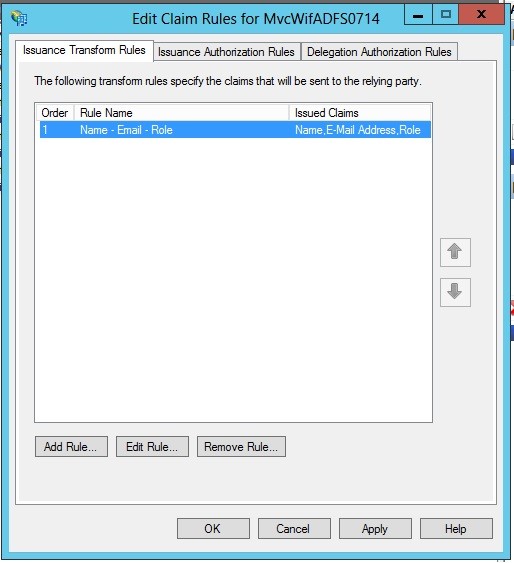
16- Verify the rules you have entered and click OK.
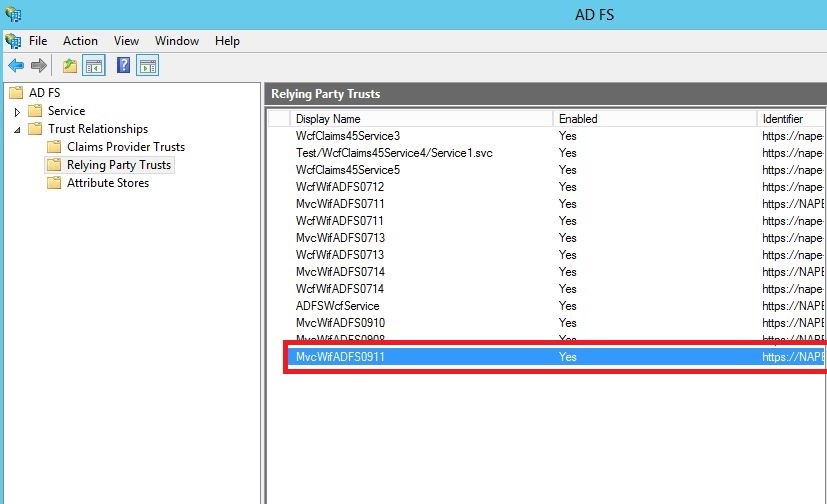
17- After you click OK, you can see the "MVC Relying Party" created in the Relying Party Trusts
18- We now need to go back to our MVC Relying Party Application.
We may think we have done everything at this point.
However, when we run the MVC App we get the following error:
“A claim of type 'https://schemas.xmlsoap.org/ws/2005/05/identity/claims/nameidentifier' or 'https://schemas.microsoft.com/accesscontrolservice/2010/07/claims/identityprovider'
was not present on the provided ClaimsIdentity. To enable anti-forgery token support with claims-based authentication, please verify that the configured claims provider is providing
both of these claims on the ClaimsIdentity instances it generates. If the configured claims provider instead uses a different claim type as a unique identifier,
it can be configured by setting the static property AntiForgeryConfig.UniqueClaimTypeIdentifier.”
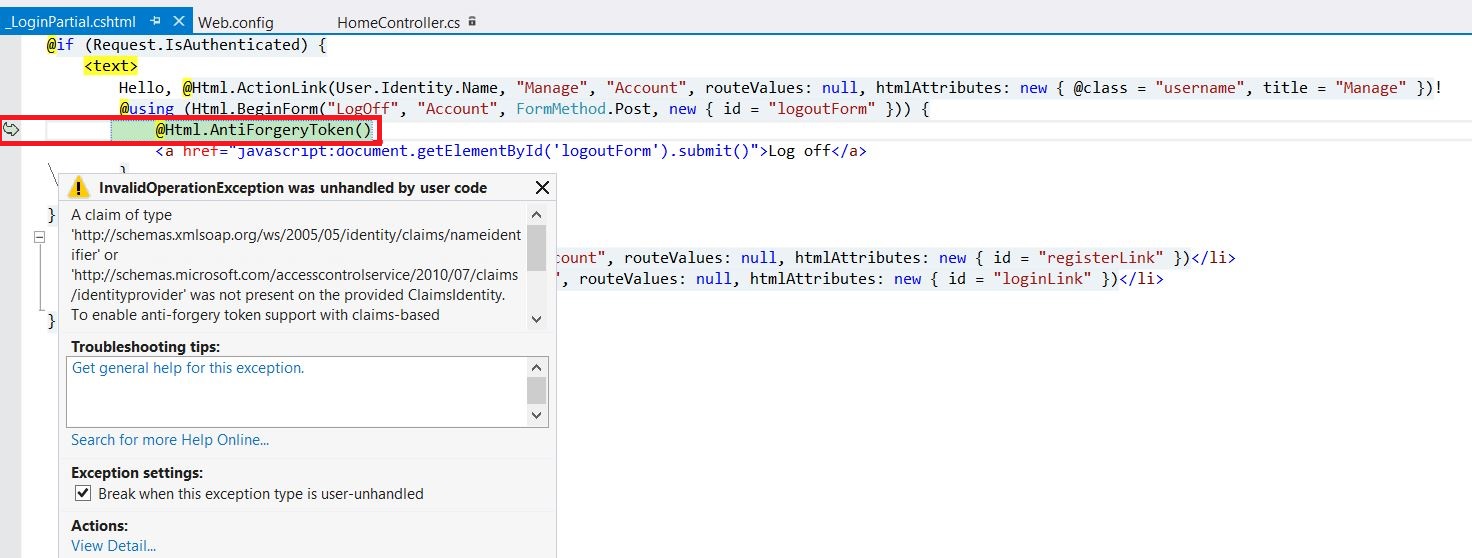
Remember in step 2 after we clicked ok on the “Identity and Access” windows, additional configurations were added to the web.config. In addition to those configurations, a _LoginPartial.cshtml has been created as well. During runtime, a code in _LoginPartial.cshtml is checked when the response to the request for the token acquisition comes back from ADFS. This code contains a call to Html.AntiForgeryToken(). A quick glance at AntiForgeryToken Method in MSDN document gives us this definition:
“Generates a hidden form field (anti-forgery token) that is validated when the form is submitted.”
The above definition means there is a hidden field that is going to be validated against the incoming request. In the WIF case, a SAML Token was returned from ADFS. Thus, AntiForgeryToken function was expecting to find a “name” field from the incoming token represented by the following claims:
https://schemas.xmlsoap.org/ws/2005/05/identity/claims/nameidentifier or https://schemas.microsoft.com/accesscontrolservice/2010/07/claims/identityprovider' field in the token.
However, it could not find those claims as we have selected "Display-Name, Email-Address and Title" fields in ADFS.
To resolve this issue, we need to add to the Application_Start() in the Global.asax.cs anyone of the set of the three fields {Display-Name, Email-Address and Title} that uniquely identity the user. In this example, we have decided to choose the email field and add a code line to Application_Start() as follows:
AntiForgeryConfig.UniqueClaimTypeIdentifier = ClaimTypes.Email;
If claims-based authorization is in use and this property has not been set, the anti-forgery system will automatically look for claim types https://schemas.xmlsoap.org/ws/2005/05/identity/claims/nameidentifier and https://schemas.microsoft.com/accesscontrolservice/2010/07/claims/identityprovider.
Now everything will work fine if we run the application again.
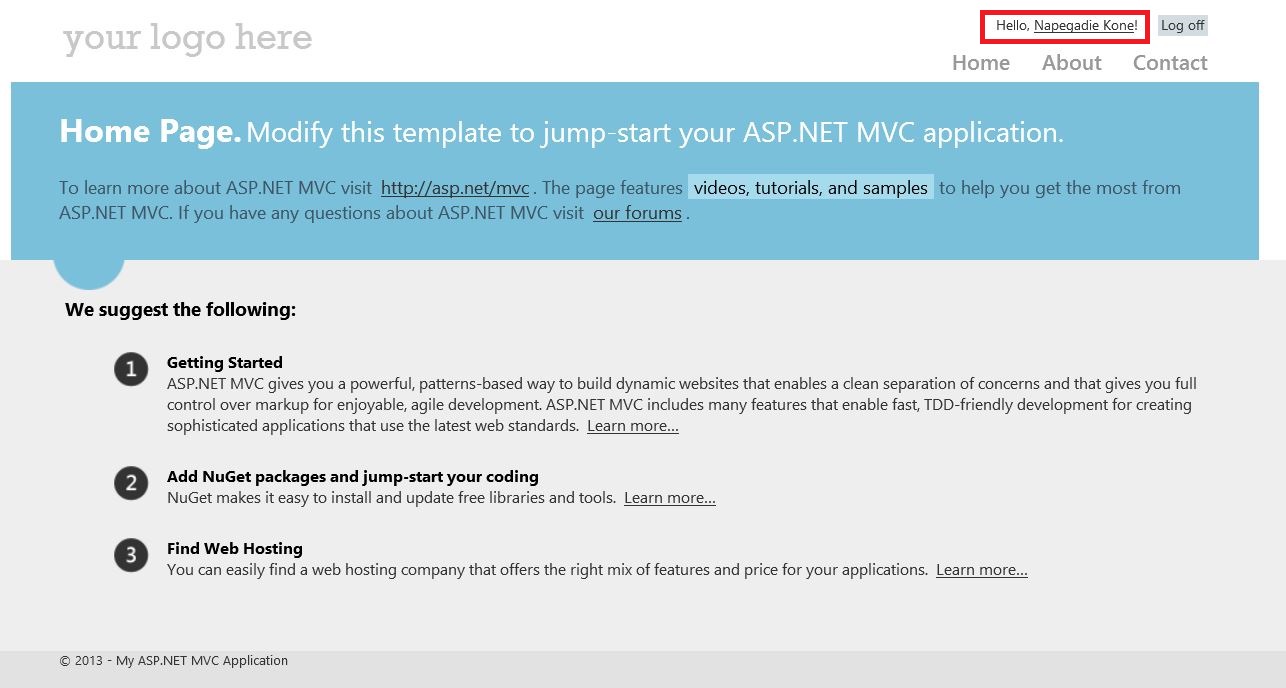
We can see that the user Napegadie Kone has been successfully authenticated.
Please continue to Claims Aware MVC4 App using WIF Identity and Access tool in .Net 4.5 Part II to learn how to enable Login and Logoff on demand in MVC4 using WIF.
NB: This link gives you some tips on how to use WIF: Windows Identity Foundation