Connect to SharePoint Online from SSIS (Insert)
In previous part we saw that how we can use Script Component as Source to pull data from SharePoint Online and push it to any destination that SSIS supports.
In this post we will see how we can take data from SQL and push it into SharePoint Online List.
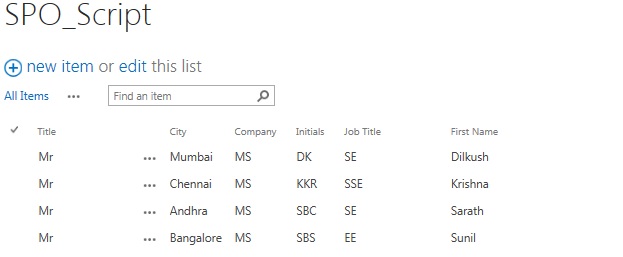
Schema of SharePoint List:
We will pull data from SQL table and push it in this step.
I used OLEDB Source in SSIS as source and pulled data from SQL.
For pushing data in SharePoint Online I used Script Component as destination.
Make sure you import Microsoft.SharePoint.Client.dll, Microsoft.SharePoint.Client.Runtime.dll in script component as without this two dlls you will not be able to interact with Sharepoint.
I have used SecureString for secure password, we need to import System.Security to use SecureString Class.
For destination we do not have to configure any input columns as it will pick it from buffer, only thing is we have to select columns that we want to push in input column section of Script Component.
In Script task we will have three methods mainly which we need to take care of,
PreExecute(), PostExecute() and Input0_ProcessRow(Input0Buffer Row)
In PreExecute we will open connection and use that connection in rest of the code.
We can open connection in ProcessRow as well but that will cause performance issue as for each row it will open new connection.
It will be much more faster if we open connection in pre-execute and close it in PostExecute.
We need to create object of ClientContext and Web classes in ScriptMain class so that all methods can access those objects.
Code:
  ClientContext cont;
 Web web;
Code in PreExecute:
  cont = new ClientContext("https://<my site>.sharepoint.com/");
 SecureString Password = new SecureString();
 foreach (char c in "<Password>".ToCharArray()) Password.AppendChar(c);
 cont.Credentials = new SharePointOnlineCredentials("<user>@<my site>.onmicrosoft.com ", Password);
 web = cont.Web;
 cont.Load(web);
 cont.ExecuteQuery();

 base.PreExecute();
Code in PostExecute:
  cont.Dispose();
 base.PostExecute();
Input0_ProcessRow method is executed for each row passed by source to destination.
We want to push each of this rows in SharePoint online.
I have hard coded values for all columns other than “Title” for simplicity but you can choose appropriate columns from Row object.
Code in Input0_ProcessRow:
  List sstest = web.Lists.GetByTitle("SPO_Script");
 ListItemCreationInformation newItem = new ListItemCreationInformation();
 ListItem listItem = sstest.AddItem(newItem);
 listItem["Title"] = Row.CategoryName;
 listItem["WorkCity"] = "Atlanta";
 listItem["Company"] = "ATT";
 listItem["Initials"] = "JD";
 listItem["JobTitle"] = "Software Engineer";
 listItem["FirstName"] = "Judith";
 listItem.Update();
 cont.ExecuteQuery();
When you execute this package it will fetch data from SQL and push it in SharePoint Online List “SPO_Script”.
I have covered select and insert in this two blog post but we can achieve update and delete as well with equal simplicity. You need to change operation and use ExecuteQuery method of ClientContext object.
Link below has all operations covered
https://www.codeproject.com/Articles/399156/SharePoint-2010-Client-Object-Model-Introduction
If you need help with CAML query use below tool it will give you complete code with CAML query,
https://biwug-web.sharepoint.com/CamlDesigner2013/CamlDesigner2013.zip
Possible Issues you can run into:
When you create custom columns for List there is possibility that SharePoint gives random unique name to such column for identification purpose.
Consider you create column with name “IDs” but as SharePoint already has built in column with same name it will give random name to this custom columns.
Consider it gives name as “c8ea”, in such case if you try to fetch a field with name “IDs” it will not fetch data saved in your custom column. For that you have to use “c8ea” as field name.
If you want to find internal name for column you need to hover on column name in List Setting.
So that’s all I have for you all at this point.
Please go through both parts of this blog to understand it better.
Let me know if you have any suggestions or questions regarding code that I have written or content of blog.
First Part of Blog: