Let’s talk about directives in VC++ in Visual Studio 11 and Windows 8
Anything with a pound symbol in front of a word is used to give direction to the preprocessor. So the first time you run into the pound symbol (#) usually is something like the following:
#include <algorithm>
#include <iostream>
#include <vector>
#include "DirectXMath.h"
#include "DirectXPackedVector.h"
Notice that there are two types of syntax, one with angle brackets and the other quoted form.
I didn’t have to do this in C#!
That would be correct, but if you want to understand C++, you have to understand the preprocessing directive #include. Once you get this, then you will only have a few million more things you have to get used to. But this is at the top of the file and is the one of the things that confuse people. Once we get over this hurdle, then understanding how to organize header files will be the next hurdle. Neither of which are restricted to Windows 8 and Visual Studio 11 Beta.
Quoted Form
The quoted form tells the preprocessor to look in the folder or directory of the file that contains the #include statement, and then downward in the directory structure, then there are environmental variables that can be set in a couple of different ways. One way is through Visual Studio or you can do it at the command line using a batch file. For all of my discussions it will be centered on using the Visual Studio or the default directory structure pathway.
Angled form
Preprocessor searches for include files along the path specified by the /I compiler option or if you are using the command line along the path specified by the INCLUDE environment variables.
See The #include Directive article if you want to check up on my writing (which you should).
Where to make the changes in Visual Studio 11 Beta
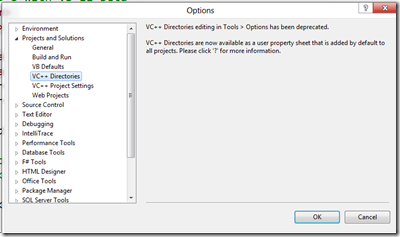
If you use the tools-options approach, you see that this process has been deprecated, as you can see:
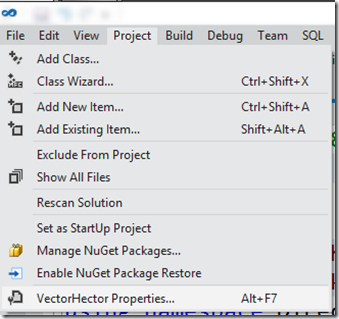
Step 1: Open the Properties options dialog box (Alt+F7):
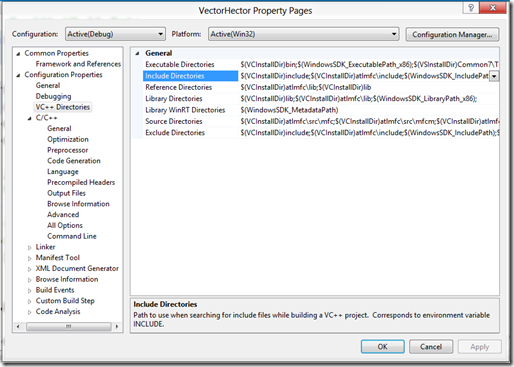
Step 2: Find the include directory:


