Lab: Move an object using Silverlight and XNA in Windows Phone Part 2
In the previous blog:Lab: Move an object using Silverlight and XNA in Windows Phone Part 1
We generated all of the XNA code, less a few important lines of code. In this blog let’s take a look at the XAML and related code behind.
Working with XAML, just in case you are thinking you will never have to use XAML, well that might happen, but it is unlikely. XAML in Silverlight, XAML in WPF, XAML, XAML, XAML, it just more powerful then HTML5. Being able to use the HTML 5 specified code with Javascript is pretty important and you need to learn that as well, but seriously think about it, when was the last time you developed in javascript or ecmascript? You should also know how to develop in C, C++, C#, VB, ADA, TLA+ (just kidding), and so forth.
Ok let’s take a look at the XAML code:
Code Snippet
- <!--*****************XAML Code Added Begins Here****************-->
- <Grid x:Name="LayoutRoot">
- <Grid.RowDefinitions>
- <RowDefinition Height="Auto"/>
- <RowDefinition Height="*"/>
- <RowDefinition Height="Auto"/>
- </Grid.RowDefinitions>
- <!-- Arrange buttons in a horizontal line by using StackPanel. -->
- <StackPanel x:Name="ColorPanel" Grid.Row="2"
- Height="100" Orientation="Horizontal"
- HorizontalAlignment="Center" Visibility="Visible">
- <Image Height="80" Name="image1" Stretch="Fill" Width="71" Source="/CSUDH_Feb_23;component/Images/enemy.png" OpacityMask="#FF3BDB3B" Tap="image1_Tap" />
- </StackPanel>
- </Grid>
- <!--*****************XAML Code Added Ends Here****************-->
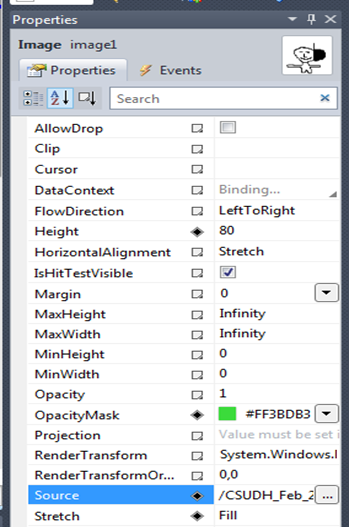
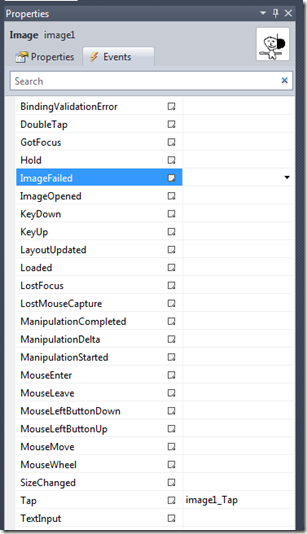
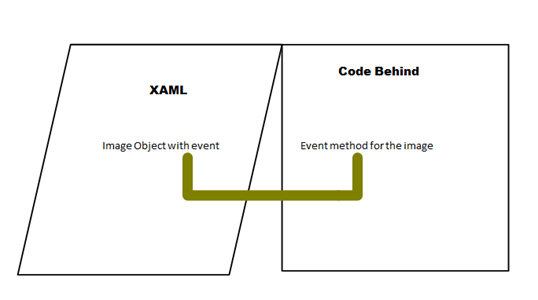
First off you add a Grid, which is like a spreadsheet, then you define the Row Heights for 3 rows. Then you place a stack panel in Grid Row 2, which is the third row since the row count starts with zero. Then you add an Image from the toolbox, using the Properties you set up a “source” for the image and then you use the Events tab to generate a tap event for the image, this way you will simply tap the screen to change to the image. The Tap event will be in the code behind.
The properties box for any control can be brought up by clicking the control one time and then pressing F4. At the top of the Properties there are two “tabs” that say Properties (Hand holding a deed, representing a property, get it?) and then on the right hand side says Events (lightning bolt). Generally speaking the Properties tab looks busy and the Events tab has only one or two things filled in. To automatically create an event in the code behind, simply double click the event and that will create the correct event in the code behind.
 |
 |
Now we need to add the components to implement the UIElementRenderer in the code behind:
In the class scope add the UIElementRenderer variable
Code Snippet
- //This is the class scope area, it is where you place
- //or declare variables that will be used in the entire
- //class
- ContentManager contentManager;
- GameTimer timer;
- SpriteBatch spriteBatch;
- /************Code Added Begin*******************/
- /************Add Textures***********************/
- //Add three textures, one to hold a changing texture and one to hold a specific texture or picture
- /// <summary>
- /// The texture with texture is to be used has a holder
- /// </summary>
- Texture2D holderTexture;
- /// <summary>
- /// Use this for the enenmy image
- /// </summary>
- Texture2D enemyTexture;
- /// <summary>
- /// Use this for the friendly image
- /// </summary>
- Texture2D friendlyTexture;
- /*************End Adding Textures****************/
- /************Add Vector**************************/
- /// <summary>
- /// A vector to show the position of the texture
- /// </summary>
- Vector2 spritePosition;
- /// <summary>
- /// A vector to use for the speed of the texture
- /// </summary>
- Vector2 spriteSpeed = new Vector2(100.0f, 100.0f);
- /*************End Adding Vectors*****************/
- /************Add UIElementRenderer***************/
- // For rendering the XAML onto a texture
- UIElementRenderer elementRenderer;
- /*************End Adding Vectors*****************/
- /*************Code Adding End********************/
In the Class constructor add an eventHandler:
Code Snippet
- public GamePage()
- {
- InitializeComponent();
- // Get the content manager from the application
- contentManager = (Application.Current as App).Content;
- /************Add LayoutUpdated***************/
- // Use the LayoutUpdate event to know when the page layout
- // has completed so that we can create the UIElementRenderer.
- LayoutUpdated += new EventHandler(GamePage_LayoutUpdated);
- /************Add LayoutUpdated***************/
- // Create a timer for this page
- timer = new GameTimer();
- timer.UpdateInterval = TimeSpan.FromTicks(333333);
- timer.Update += OnUpdate;
- timer.Draw += OnDraw;
- }
Now add a method that you use for the eventhandler, do this after any of the methods in the class:
Code Snippet
- /**************************LayoutUpdated Add Start**********************************/
- void GamePage_LayoutUpdated(object sender, EventArgs e)
- {
- // Create the UIElementRenderer to draw the XAML page to a texture.
- if (null == elementRenderer)
- {
- elementRenderer = new UIElementRenderer(this, (int)ActualWidth, (int)ActualHeight);
- }
- }
- /**************************LayoutUpdated Add End**********************************/
In the OnDraw event add the UIRenderer code, this is part of the spriteBatch process and must be placed between the spriteBatch.Begin and the spriteBatch.End. In this case order is not important, often it is, but not this time.
Code Snippet
- private void OnDraw(object sender, GameTimerEventArgs e)
- {
- SharedGraphicsDeviceManager.Current.GraphicsDevice.Clear(Color.CornflowerBlue);
- // TODO: Add your drawing code here
- // Render the Silverlight controls using the UIElementRenderer.
- /***************elementRenderer Added Begin************************/
- elementRenderer.Render();
- /***************elementRenderer Added End**************************/
- /***************Code Added Begin***********************************/
- SharedGraphicsDeviceManager.Current.GraphicsDevice.Clear(Color.GhostWhite);
- // Draw the sprite
- spriteBatch.Begin();
- /***************elementRenderer Added Begin************************/
- // Using the texture from the UIElementRenderer,
- // draw the Silverlight controls to the screen.
- spriteBatch.Draw(elementRenderer.Texture, Vector2.Zero, Color.White);
- /***************elementRenderer Added End**************************/
- // Draw the rectangle in its new position
- spriteBatch.Draw(holderTexture, spritePosition, Color.White);
- spriteBatch.End();
- /***************Code Added End*************************************/
- }
And that should do it!
