Pong: The adventure begins again, join in NOW, ADD Graphics
Article
To use code snippets make sure to download the file attachment to this blog! Use the text to follow along with the video, if possible use two monitors for this to really make sense.
PONG: The adventure continues
Explanation
Steps to Reproduce
“Now let’s add graphics to our game. First, I’ll create a folder called media and in it, I will now add a new ball and paddle. As you can see, the paddle and ball are the same as in the classic game.”
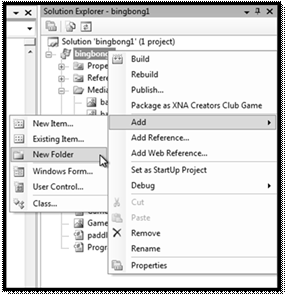
First let’s add a folder to hold the media material for the content pipeline.
· Right-click on Pongproject in Solution Explorer
· Click Add > New Folder
· Call the folder Media
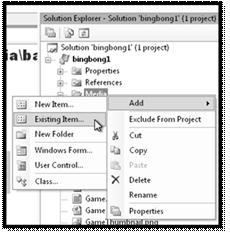
Now we will add the two media files:
Ball.png and paddle.png
· Right-click on Media folder
· Select Add Existing Item
· Using the Ctrl key: Select ball.png and paddle.png from your “DevelopMental XNA Files” folder on your desktop
· Click Add button
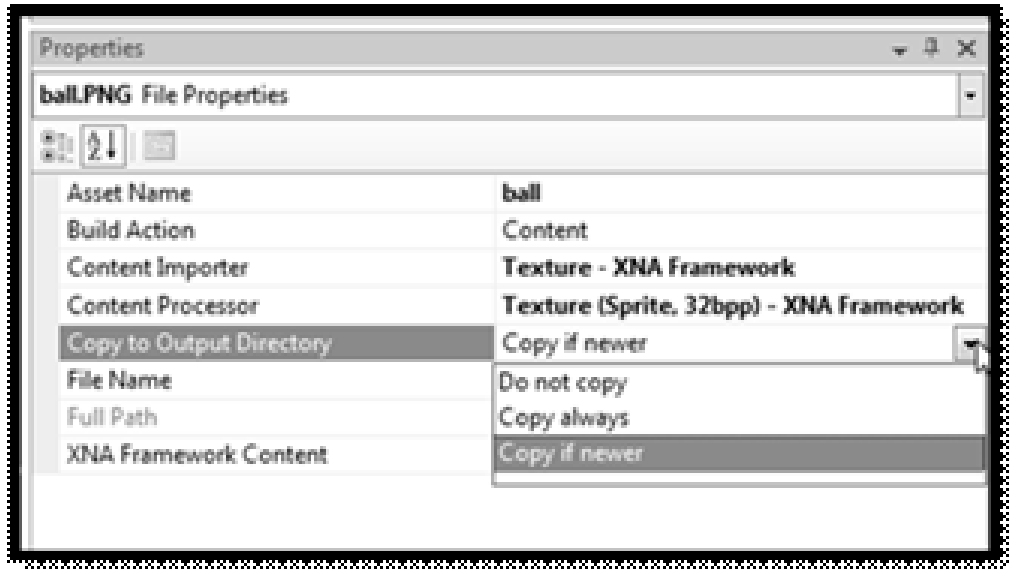
“Now I’m going to change the properties of the images to copy if newer. This specifies if the image will be copied to the output directory when I’m building my solution. I want to make sure that if I decide to make changes to my graphics, that they are reflected in the build.”
· Click on ball.png
· Go to the Properties window
· Select the Copy to Output Directory property
· Set the property to Copy if newer
· Click on ball.png
· Go to the Properties window
· Select the Copy to Output Directory property
· Set the property to Copy if newer
· Repeat for paddle.png
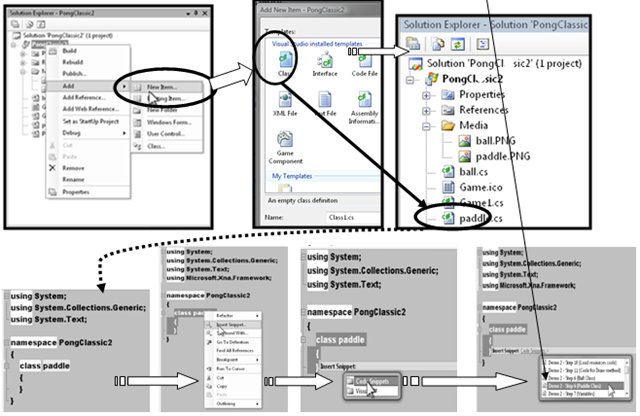
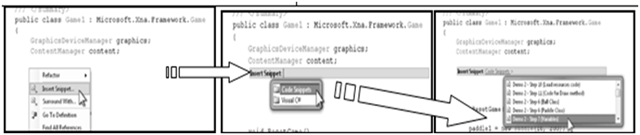
“Now we will create a class called Paddle. In order to do this, we’ll create a new class file called Paddle.cs. Then, we have to add the Xna namespace and our implementation code. We have two variables to set the position of the paddle, one defining the coordinates and the other defining the speed. Next, we have a constructor to set the paddles properties. ”
1. Right-click on the Pong project in Solution Explorer2. Click Add > New Item3. Select a C# Class4. Call the class Paddle.cs5. Edit the file6. Add usingMicrosoft.Xna.Framework; namespace to the namespaces7. Highlight the class code inside Paddle class8. Right-click and select Insert Snippet9. Add the Paddle code snippet, titled:
Demo 2-Step 6 (Paddle Class)
“Then, we’ll create a class called Ball and reproduce the same steps. The difference here is that instead of a constant speed, the horizontal and vertical speed is randomized.”
<<Adding the code is similar to the paddle.cs component, refer to that for instructions, this is the previous demo component.>>
1. Right-click on the Pong project in Solution Explorer2. Click Add > New Item3. Select a C# Class4. Call the class Ball.cs5. Edit the file6. Add using Microsoft.Xna.Framework; namespace to the namespaces7. Highlight the class code inside Ball class8. Right-click and select Insert Snippet9. Add the Ball code snippet, titled
Demo 2- Step 6 (Ball Class)
“The next thing we need to do is add the variables. Let’s open the main class and add variables to initialize graphics in our game.”
1. Edit Game1.cs2. Scroll to right after the ContentManager variable declaration in the Game1 class3. Right-click and select Insert Snippet 4. Add the variables code snippet, titled
Demo 2- Step 7 (Variables)
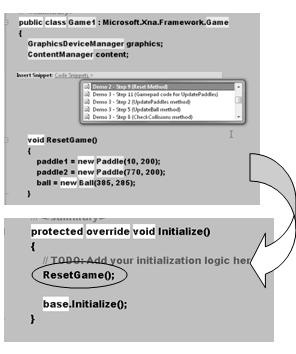
“Next, we’ll add a ResetGame method to initialize the elements in the game.”
Scroll right after the variable declarations in the Game1 constructor
Right-click and select Insert Snippet
Add the ResetGamecode snippet, titled
Demo 2 –Step 9 (Reset Method)
Go to the Intialize method and add ResetGame(); after the TODO comment.
“We need to load the textures and initialize the sprites that we are using in the game. As you can see, the textures are 2D and are referenced from our Media folder.”
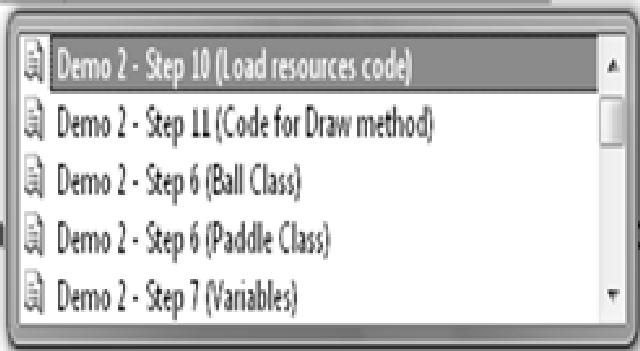
1. Scroll to the LoadGraphicsContent method2. Right-click inside the loadAllContent conditional block3. Right-click and select Insert Snippet 4. Select Code Snippet5. Insert the code to load the Textures and initialize the SpriteBatch
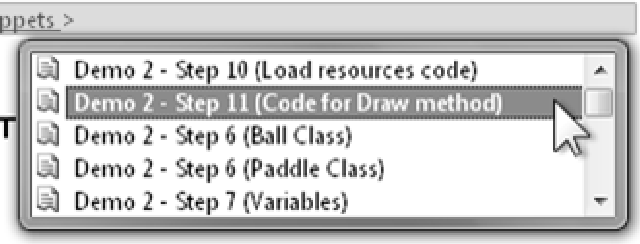
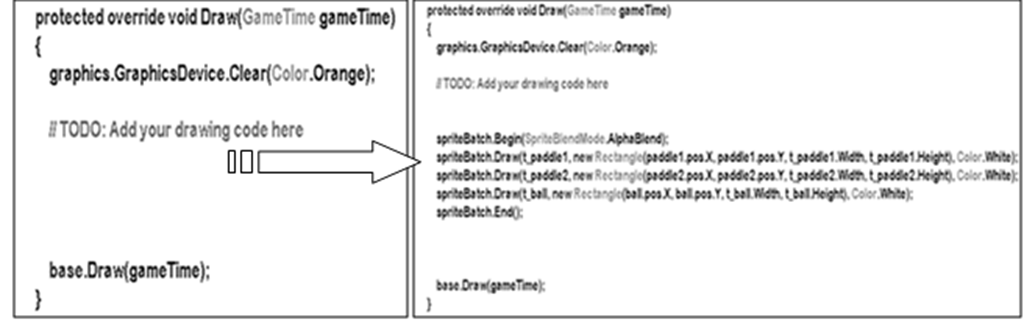
“Finally, we need to add some code to our Draw method. This will draw the graphics on the screen from the SpriteBatch including the two paddles and the ball. ”
Scroll to the Draw method after the TODO comment.
Right-click inside the Draw constructor
Right-click and select Insert Snippet
Select Code Snippet
Insert the snippet titled:
· Demo 2 – Step 11(Code for Draw Method)
“The last step is to build and launch our game. As you can see, the graphics now appear.“
(Remember the game doesn’t move, you have only loaded the graphics.)
1. Click on the F5 function key to launch the application
Yippee, you can now put graphics into your game, the next step will be to make the graphics move and respond to the user input.