Using the latest NuGet in your build
NuGet (both the command-line tool and the accompanying tools built into Visual Studio) continues to iterate rapidly and add support for new .NET Core and .NET Standard target frameworks, among other improvements. Naturally, many users of Team Build in Visual Studio Team Services want to build those apps, and we’ve seen some support issues because the version of NuGet used in the ‘NuGet’ build task by default is 4.0.0, which throws various error messages when trying to build these new project types.
Additionally, on November 10th, NuGet.org will require that packages are pushed by NuGet clients that support protocol version 4.1.0 or greater (e.g. NuGet 4.1 or greater) to push packages.
So, we’ve made a few updates to make it easier to use new versions of NuGet in your builds and releases.
NuGet 4.1+ in VSTS and TFS 2017 Update 3 and later
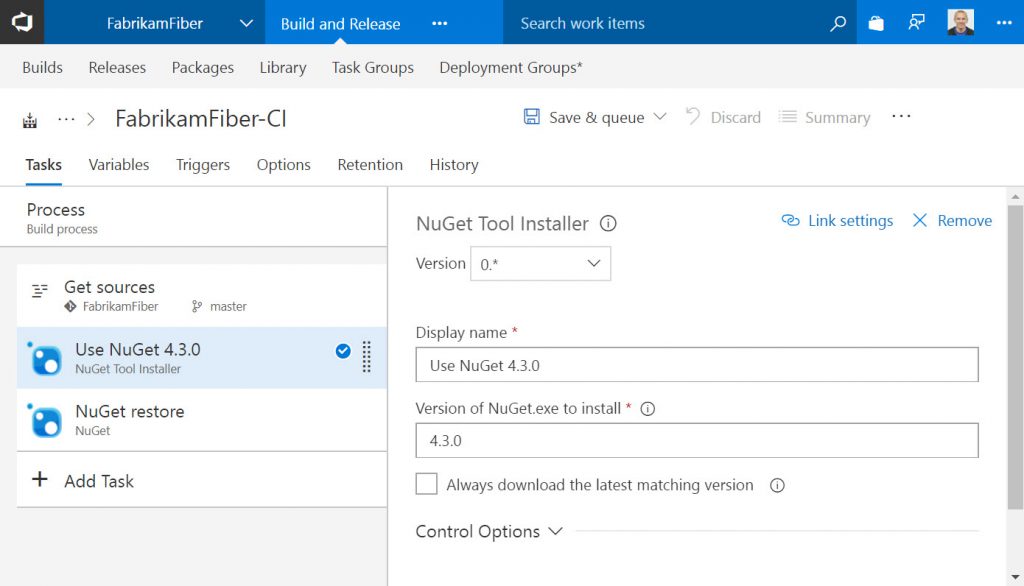
If you’re using VSTS or the upcoming TFS 2018 release, new template-based builds will work automatically thanks to a new “NuGet Tool Installer” task that’s been added to the beginning of all build templates that use the NuGet task. Right now, the templates request NuGet 4.3; we’ll periodically update the default for new builds around the same time we install Visual Studio updates on the Hosted build agents.
For existing builds, just add or update a NuGet Tool Installer step to select the version of NuGet for all the subsequent steps.

NuGet 4.1+ in TFS 2017 Update 2 and earlier
Because the NuGet Tool Installer is not available in TFS versions prior to TFS 2018, there is a recommended workaround to use versions of NuGet > 4.0.0 in Team Build.
- Add the task, if you haven’t already. If you have a “NuGet Restore” step in the catalog (it may be in the Deprecated tasks section), insert it into your build. Otherwise, insert a “NuGet” step.
- For your NuGet/NuGet Installer step, use the version selector under the task name to select version “0.*”.
- In the Advanced section, set the NuGet Version to “Custom” and the Path to NuGet.exe as
$(Build.BinariesDirectory)nuget.exe - Before your NuGet step, add a “PowerShell” step, select “Inline Script” as the Type, enter this PowerShell script as the Inline Script, and enter “4.3.0” (or any version of NuGet from this list) as the Arguments.
Our thanks to GitHub user leftler for creating the original version of the PowerShell script linked above.

 Light
Light Dark
Dark
2 comments
I guess in step 3 there is a forward slash missing: $(Build.BinariesDirectory)/nuget.exe. Correct me if I’m wrong 🙂
Do we know if this information has been updated for Azure DevOps Server 2019? I could not find any docs/links/info on this for AZDO Server 2019. We have been running into various NuGet errors in the Pipeline and have been unable to find a good solution to upgrade/patch the included version to see if that solves any issues. We are seeing several NuGet Version on the Build Servers (3.5, 4.0, 4.1) when the latest is 5.3.