
Deploy artifacts from OnPrem TFS server with Release Management Service
[Update on 5 Apr 2016: This feature is now available again. You’ll need to install the External TFS Tools extension for it to work now. It is recommended to update any Release definitions that have been created using artifacts from an on-premises TFS server.]
[Update on 12 Feb 2016: This feature has been temporarily disabled in VSTS as it requires some more work. Release definitions that have been created using artifacts from an on-premises TFS server will continue to work. You won’t be able to create new release definitions until we re-enable this feature.]
Summary
Did you know you could consume artifacts from build definitions on an OnPrem TFS Server and deploy your applications using the Release management service in Visual Studio Team Services, that too without exposing the TFS Server to the internet?
Did you know that you could also deploy the applications to a OnPrem target environment using the service?
Did you know that all this happens without the artifacts leaving the secure and strict boundaries of your enterprise network, thereby ensuring you are safe from any information leaks?
In this blog, we shall talk about a walkthrough of consuming artifacts from an OnPrem TFS 2015 Server and deploying them to a target machine.
Pre-Requisites
Before we go through the steps, it is assumed that –
- You have configured a build definition on the OnPrem TFS Server that’s publishing artifacts.
- The published artifacts consist of the binaries for the application and a powershell script that can deploy the application on a target server.
- The target server on which the application should be deployed in configured for WinRM
- Additionally, you have another machine prepared with WMF 4.0. This machine (we shall refer to it as the agent machine henceforth) should have access to the TFS Server and the target server.
- In case the artifacts are published to a file share, then the agent should also have access to the file share to which the artifacts are published.
Configuring an Agent
On the agent machine, you must install and configure a release agent. This shall act like a bridge between VS Team Services and your OnPrem network, facilitating the services to perform and monitor the deployments.
Follow the steps mentioned here (you can also watch the agent configuration in action here). Note that it is advised to login as the account owner for VS Team Services while configuring the agent.
Once you’ve done this, you would be able to see the agent listed in the default pool.
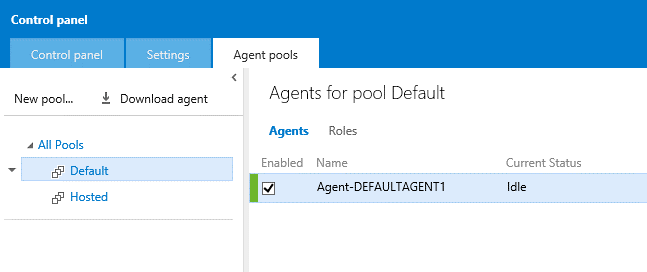
You shall also be able to find it listed with the default queue.
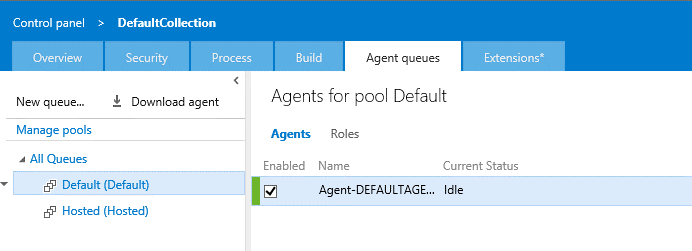
You can read more about agent pools and queues here
Create a Service Endpoint for the TFS Server
To consume builds from TFS server, you must first create a service endpoint with credentials to connect to TFS Server.
In a way, this is an authorization for VS Team Services to request the agent to fetch information from the TFS Server. The information (artifact binaries) is fetched and stored on the agent machine only. It is not shared with VS Team Services.
Also, the credentials are stored in an encrypted form not accessible to anyone.
These facts coupled with all communications to/from VS team services being over HTTPS ensure that the security of the enterprise network/ TFS Server is not compromised by doing so.
Set up the TFS endpoint in the Services tab of the Control Panel for your team project. Use the “External TFS” type, and enter the TFS server URL and credentials to connect to the TFS server. Note that this experience currently works with basic authentication only. You’ll need to enable basic authentication support for the TFS Server.
For more details, see Service endpoints.
- The Server URL needs to be upto the collection. For eg. http://example.com/tfs/DefaultCollection
- The username and password would be domain credentials to authenticate with the TFS server. These would not be tested/validated. Any mistake in theserverse would be detected only when you run the release.
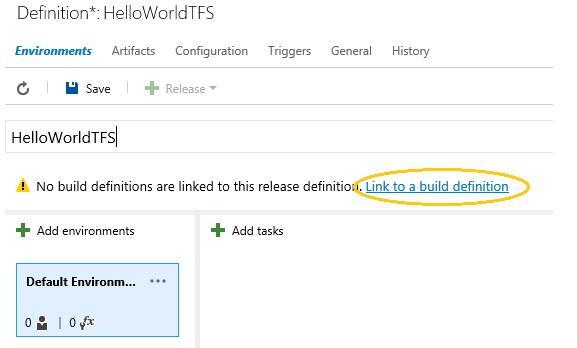
Create a Release Definition
We are now all set of start defining our deployment pipeline and configure continuous delivery for the application.
- Goto the Release hub in a team project on VS Team Services
- Click on New Release Definition and choose to start with an Empty template
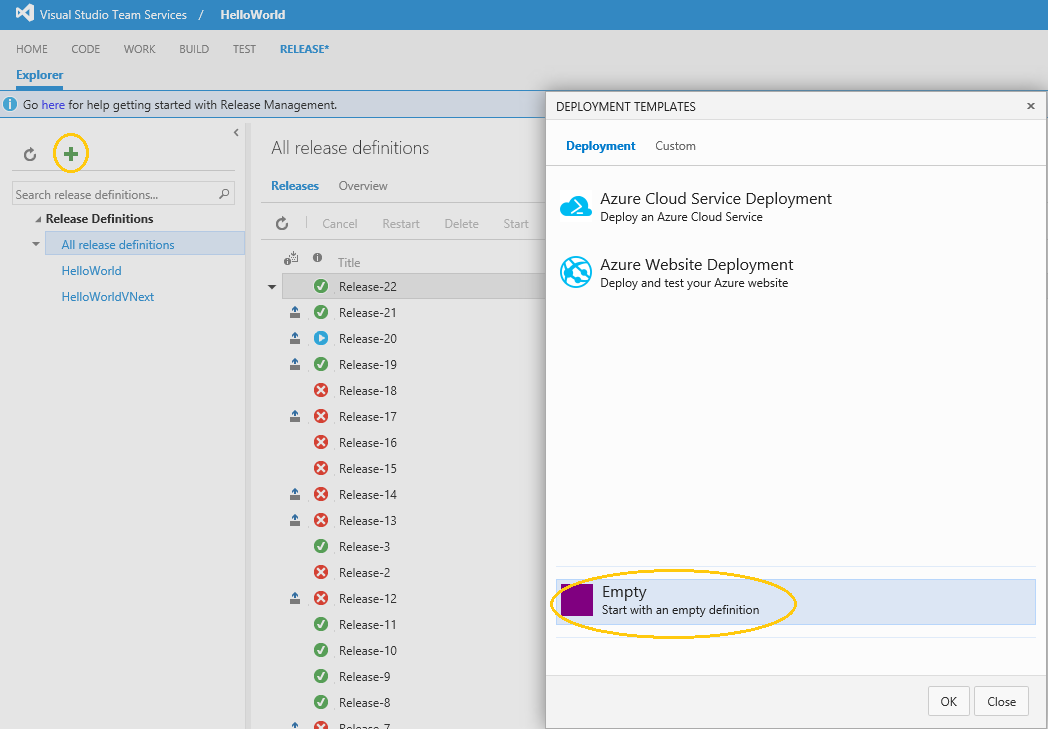
- In the empty release definition, we’ll first link to the build definition and define the source of artifacts to deploy.
- Select the endpoint we defined above and provide the values for the project name on the TFS 2015 server and the build definition defined on it.

-
For the “default environment”, add tasks to configure the deployment steps. In our case, we want to execute a powershell script on the target server with the artifact present locally on the target. We shall add the following two tasks for it and update the task parameters.
-
Windows Machine File Copy
-
The source location for the payload would be “$(System.DefaultWorkingDirectory)
drop”
-
The source location for the payload would be “$(System.DefaultWorkingDirectory)
- Powershell on target machines
-
Windows Machine File Copy
- We need to now make sure the deployment runs on the local agent we configured. We’ll go set the agent queue to “default” for the environment & create more environments in the release definition as per need. Save the release definition giving a name of your choice.

Create a Release

//
 Light
Light Dark
Dark
0 comments