My First Silverlight Behavior
Blend/Silverlight 3 introduces a new powerful feature – Behaviors.
Behaviors allow designers to take advantage of new levels of interactivity declaratively, without writing code.
In short, a behavior is a reusable piece that encapsulates some functionality that can be attached to an object to extend its built-in interactivity capabilities.
For instance, a behavior can be attached to a TextBox to give it auto-complete functionality; or a behavior can be attached to a Canvas to make it reflect its content.
“Behaviors are a great new element of the designer-developer workflow: For developers, they provide a well-supported design pattern that makes it possible to encapsulate interactivity well separated from actual UI instances. For a designer, behaviors are building blocks that make interactivity possible beyond the boundaries and limitations of classical custom controls.”
Blend 3 Behaviors: Interactivity Without Code
You can find on the web great material about behaviors:
- What they are: Product Feature Highlight: Expression Blend 3 – Behaviors; An Introduction to Behaviors, Triggers, and Actions
- How to write them: Silverlight Behaviors
- Where to find them: Expression Gallery - Behaviors
What I’d like to show you is my experience writing my first Silverlight behavior.
I didn’t spend much time reasoning about what behavior I would like to implement: “The popular Reflection effect, of course!”, I thought.
In Silverlight 2 the classic way of implementing reflection is achieved by doubling the XAML we want to reflect, applying a ScaleTransform to flip the copied XAML vertically, and applying an OpacityMask to fade out the copy.
In Silverlight 3 we don’t have yet a way of getting an object XAML programmatically, making it hard to double the object to reflect, but for this scenario we don’t need it anymore - we can use a VisualBrush to render an existing visual into a brush, like in WPF.
These blog entries describe the same technique:
More on Silverlight 3's Writeable Bitmap
Discovering Silverlight 3 – Poor Man’s Visualbrush Behavior
Now that we know how to substitute the flipped duplicated XAML by an image we have all we need - let’s start then.
- Create a new Silverlight Class Library and reference Microsoft.Expression.Interactivity
(C:\Program Files\Microsoft Expression\Blend 3 Preview\Libraries\Silverlight\Microsoft.Expression.Interactivity.dll)
- Declare the behavior class and make it “attachable” to a Canvas.
public class ReflectionBehavior : Behavior<Canvas>
- Nothing to do on the constructor.
public ReflectionBehavior()
{
}
- Do the Wire Up (the real “magic” happens where).
We’re adding a handler to the Canvas (associated object) Loaded Event.
protected override void OnAttached()
{
base.OnAttached();
this.AssociatedObject.Loaded += new RoutedEventHandler(sourceObject_Loaded);
}
protected override void OnDetaching()
{
base.OnDetaching();
}
- To make things a little more interesting we’re adding two properties to our behavior.
These dependency properties will allow us to define declaratively the beginning and end opacity of the reflection.
public static readonly DependencyProperty OpacityFromProperty =
DependencyProperty.Register("OpacityFrom", typeof(double), typeof(ReflectionBehavior), new PropertyMetadata(0.5));
public double OpacityFrom
{
get { return (double)GetValue(OpacityFromProperty); }
set { SetValue(OpacityFromProperty, value); }
}
public static readonly DependencyProperty OpacityToProperty =
DependencyProperty.Register("OpacityTo", typeof(double), typeof(ReflectionBehavior), new PropertyMetadata(0.0));
public double OpacityTo
{
get { return (double)GetValue(OpacityToProperty); }
set { SetValue(OpacityToProperty, value); }
}
- Finally, implement the handler - this is where the real work gets done.
private void sourceObject_Loaded(object sender, System.Windows.RoutedEventArgs e)
{
- Let’s go slowly here…
Get the object (Panel/Canvas) to be reflected and create an Image to render the reflection.
Panel originalCanvas = sender as Panel;
Image reflectedImage = new Image();
Create a WriteableBitmap to render the visual brush (don’t forget to adjust it’s position) and set it as the reflected image source.
System.Windows.Media.Imaging.WriteableBitmap bitmap =
new System.Windows.Media.Imaging.WriteableBitmap((int)originalCanvas.Width, (int)originalCanvas.Height, PixelFormats.Bgr32);
TranslateTransform correctionTransform = new TranslateTransform();
correctionTransform.X = -originalCanvas.Margin.Left - (double)originalCanvas.GetValue(Canvas.LeftProperty);
correctionTransform.Y = -originalCanvas.Margin.Top - (double)originalCanvas.GetValue(Canvas.TopProperty);
bitmap.Render(originalCanvas, correctionTransform);
reflectedImage.Source = bitmap;
Flip the image vertically and position it bellow the canvas.
ScaleTransform transform1 = new ScaleTransform();
transform1.ScaleX = 1.0;
transform1.ScaleY = -1.0;
TranslateTransform transform2 = new TranslateTransform();
transform2.Y = originalCanvas.Height * 2;
TransformGroup transformG = new TransformGroup();
transformG.Children.Add(transform1);
transformG.Children.Add(transform2);
reflectedImage.RenderTransform = transformG;
Construct the Opacity Mask using the behavior gradient opacity properties.
LinearGradientBrush brush = new LinearGradientBrush();
GradientStop grad1 = new GradientStop();
grad1.Color = Color.FromArgb((byte)(OpacityTo * 255), 0, 0, 0);
grad1.Offset = 0.0;
GradientStop grad2 = new GradientStop();
grad2.Color = Color.FromArgb((byte)(OpacityFrom * 255), 0, 0, 0);
grad2.Offset = 1.0;
brush.StartPoint = new Point(0.5, 0);
brush.EndPoint = new Point(0.5, 1);
brush.GradientStops.Add(grad1);
brush.GradientStops.Add(grad2);
reflectedImage.OpacityMask = brush;
Finally, insert the image on Canvas. This way, if the canvas moves or other transform is applied to it the inner reflection image gets it too.
originalCanvas.Children.Add(reflectedImage);
}
- All is set now!
Any user control can use our behavior by referencing it…
xmlns:i="clr-namespace:Microsoft.Expression.Interactivity;assembly=Microsoft.Expression.Interactivity"
xmlns:mybehavior="clr-namespace:MyBehavior;assembly=MyBehavior"
And applying it to a canvas, declaratively …
<Canvas x:Name="MyObject" Width="180" Height="140" Canvas.Left="50" Canvas.Top="50" Background="White">
<i:Interaction.Behaviors>
<mybehavior:ReflectionBehavior OpacityFrom="0.75" OpacityTo="0" />
</i:Interaction.Behaviors>
<Rectangle Width="180" Height="140" Fill="Black" RadiusX="6" RadiusY="6" />
<Image Source="samplepic.png" Width="160" Height="120" Margin="10" />
<TextBlock Margin="15" Text="Reflection Demo" Foreground="White" />
</Canvas>
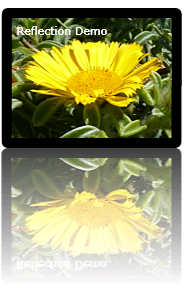
Getting:
Updated 2010-02-15:
I recently noticed (thanks ozzman) this code is no longer working on Silverlight 3 final version.
This article was written when SL3 Beta was released and I haven’t tried it since.
The changes to make it work on final version are:
- Replace Microsoft.Expression.Interactivity with System.Windows.Interactivity
A running sample can be seen here: Reflection Behaviour Demo
Source code is available here: Reflection Behaviour Source Code
Enjoy.