The marvellous SPList.RenderAsHtml
One of these days a customer asked me if there was an easy way to build a Web Part that would be able to switch between the list views, and also wanted it to look and feel like a view of any list in Sharepoint. The first thing that crossed my mind was “huummm, that will not be easy…” , specially the look and feel part, also my skills in design… let’s just say they have much to improve J. So started to think about using list.GetItems(query).GetDataTable() and building a user control with a DataGrid, but then the look and feel would be very difficult to achieve.
So I went looking in the Sharepoint API documentation for what could help me, and I found the “light”… SPList.RenderAsHtml() .
Building the Web Part:
First declare, instantiate and add to the Web Part, the objects which are going to be the user interface objects:
protected PlaceHolder CtPlaceHolder; protected Literal CthtmContainer; protected DropDownList CtddViewsInList; protected override void CreateChildControls() { CtPlaceHolder = new PlaceHolder(); CthtmContainer = new Literal(); CthtmContainer.EnableViewState = false; CtddViewsInList = new DropDownList(); CtddViewsInList.ID = "dd"; CtddViewsInList.AutoPostBack = true; CtPlaceHolder.Controls.Add(CtddViewsInList); CtPlaceHolder.Controls.Add(CthtmContainer); this.Controls.Add(CtPlaceHolder); } |
There is a Literal that will have the html returned by the SPList.RenderAsHtml() to be rendered in the Web Part, there is a DropDownList to be able to select which View to be shown and finally, a PlaceHolder that will contain the Literal and the DropDownList. These are the only three graphic controls we need to build the user interface.
A custom property named ListName was also created, so we can configure what list we will be working with, in a next post maybe I will show how to dynamically load all the SPLists existing in the current Web into a DropDownList so we can choose from the list, but in this example the name of the list to use will be written in a Custom Property Textbox. For more information on how to use Custom Properties refer to https://msdn.microsoft.com/en-us/library/dd584174.aspx.
[Category("Custom Properties")] [WebPartStorage(Storage.Personal)] [FriendlyNameAttribute("List to view")] [Description("Write the name of the list.")] [Browsable(true)] [DefaultValue("Documents")] [XmlElement(ElementName="ListName")] public string ListName { get { return _list; } set { _list = value; } } |
Then an SPWeb object is created from the current context and a reference the SPList object to work with is obtained:
using (SPWeb web = new SPSite(SPContext.Current.Web.Url).OpenWeb()) { SPList list; try { list = web.GetList(ListName); } …
|
The next step is to load the list of views from the SPList into the DropDownList
… foreach (SPView view in list.Views) { CtddViewsInList.Items.Add(new ListItem(view.Title, view.ID.ToString())); } … |
It is also necessary to create a SPQuery based on the selected view so it can be used as the parameter to the SPList.RenderAsHtml(query As SPQuery) method.
… SPQuery query; SPView selectedView; if (!string.IsNullOrEmpty(CtddViewsInList.SelectedValue)) selectedView = list.GetView(new Guid(CtddViewsInList.SelectedValue)); else selectedView = list.DefaultView; selectedView.Scope = SPViewScope.Default; query = new SPQuery(selectedView);
CthtmContainer.Text = list.RenderAsHtml(query); … |
The final Result
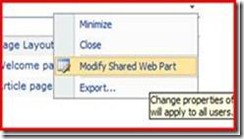
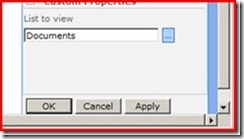
Configure the Which list to use using the Modify Shared Web Part the fill the ListName property with the name of the list. In this case we will use the Documents List.
All documents View
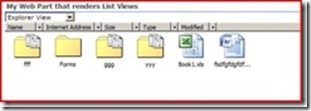
Explorer View
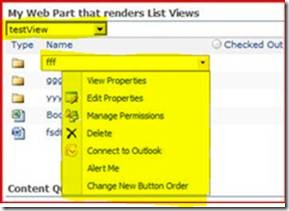
A Custom View and the options menu for an item.
Some considerations
There are some considerations to have in mind that are important. The SPList.RenderAsHtml is really as interesting as described, and as we saw we can easily build a rich user interface with little work, but from the point of view of the user interface and the look and feel.
One may be disappointed when he wants to use some things like ordering, because ordering is not out of the box. You have the UI but the behaviour has to be implemented. In this case one would need to define the order in the SPQuery object, using the query string parameters, so the data is ordered according to the user interface selection. The same happens when you try to filter data using filter data on columns, the action is there, but the behaviour you have to implement it.
Although for these actions you have to do the behaviour implementation for the item menu shown above all the actions are out of the box and work as expected in this scenario.
Another important thing to have in mind is that this method can be potentially dangerous when used to display large sets of items. This method returns a string that may be quite big depending on the number of items of the list returned by the query, so due to the large memory consumption and fragmentation on the .NET large object heap, specially in 32Bit systems, if not used carefully it can lead to OutOfMemory Exceptions and sluggish performance.
Conclusion
As you may see this method can be very useful when you want to give the user, quick different views on the items on a list. This approach worked for me, and it respected the requirements of the scenario in hand. I enjoyed using it a lot, especially because of the time saved, not having to build the entire user interface. For the final user, the experience is also a good one, because he has a brand new feature that works right the same way as everything in SharePoint.
Hope you enjoy this feature
See you next time!


