Silverlight and "Cover Flow" – Revisited (Part III)
On my previous post I wrote about the complexity of implementing perspective projections with Silverlight 2 since it only supports 2D affine transforms.
Well, as you surely already know by now, with Silverlight 3 you’ll be able to apply 3-D projections to any Silverlight UIElement using "perspective transforms", this is, non-affine transforms of objects in space. We can’t yet fully project a three-dimensional object onto a two dimensional plane since UIElements are 2D but we can project them on a 2D plane as if they lived on a 3D world.
I won’t go into much detail here since the pre-release documentation about this subject is available on msdn and it’s extremely rich in illustrations, samples and detail.
What I would like to show in this post is how this can be applied on our cover flow sample and, especially, how can we “amplify” the perspective distortion. Let’s start then.
With Silverlight 3 it’s so simple that it’s almost not fun anymore.
Instead of implementing Polygon triangulation and Texture mapping we just have to apply the right PlaneProjection to our Cover object.
Something like this (Y axis rotation):
<Rectangle x:Name="MyRect" Width="100" Height="100" Fill="Blue" Opacity="0.7" >
<Rectangle.Projection>
<PlaneProjection RotationX="0" RotationY="-45" RotationZ="0"></PlaneProjection>
</Rectangle.Projection>
</Rectangle>

And, as would be expected, we can animate it using a standard storyboard.
<Storyboard x:Name="MyStoryboard">
<DoubleAnimationUsingKeyFrames BeginTime="00:00:00" Storyboard.TargetName="MyRect" Storyboard.TargetProperty="(UIElement.Projection).(PlaneProjection.RotationY)">
<EasingDoubleKeyFrame KeyTime="00:00:00" Value="-45"/>
<EasingDoubleKeyFrame KeyTime="00:00:05" Value="45"/>
</DoubleAnimationUsingKeyFrames>
</Storyboard>
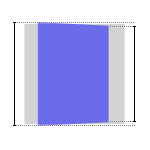
End of story, right? Well, I found it to be not as impressive as I thought it would be. It lacks drama… action. Something seems different.
That’s because the original Coverflow UI has a greater perspective distortion. In our sample we have perspective too but it is almost unnoticeable.
Notice how the closest edge of the rectangle is just a little larger than the distant one.
We can produce a stronger, more exaggerated perspective effect applying a wider angle of view.
When we wide an angle of view the relative sizes of objects are exaggerated (when we narrow an angle of view the objects are all nearly the same relative size and you lose the sense of depth). These effects are very perceptible when you use lens of different focal lengths on a camera.
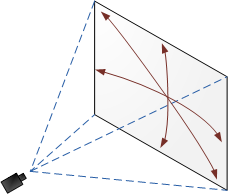
Note: It’s hard to define what a “normal” angle of view is. Our brain is able to interpret a wide range before our perception “fails” to recognize an object because of its strong distortion. See Angle of View vs. Perspective Distortion.
Back to our subject… Since we can’t change our angle of view in Silverlight 3 (as far as I know) how can we dramatize the perspective distortion?
We can do it by artificially increasing the object on a single dimension (X in this sample) and rotating it strongly on other axis (Y in the sample).
<Canvas x:Name="MyCanvasPerspectiveAmplified" Width="100" Height="100">
<Canvas.Projection>
<PlaneProjection RotationX="0" RotationY="-79.6" RotationZ="0" LocalOffsetX="-120" />
</Canvas.Projection>
<Rectangle Width="100" Height="100" Fill="Red" Opacity="0.5">
<Rectangle.RenderTransform>
<ScaleTransform ScaleX="4"/>
</Rectangle.RenderTransform>
</Rectangle>
</Canvas>
Producing:

See the difference:

Sure, it’s not a “pretty” thing to do, but do you prefer triangulation & texture mapping?
If you found out a different way of doing it please tell me.
Updated 2009-04-27:
Willow pointed out that someone has already addressed the Cover Flow interface with Silverlight 3.
You can check it here: https://matarillo.com/blogdata/PseudoCoverFlow (it is in Japanese).
Thank you for that.
The solution the author adopted here to have a greater depth was slightly different (far better in my opinion):
Here we have an outer canvas which does the scaling on both dimensions while the inner projected object has an increased (and proportional) size.
Something like this:
<Canvas>
<Canvas.RenderTransform>
<TransformGroup>
<ScaleTransform ScaleX="0.20" ScaleY="0.20"></ScaleTransform>
<TranslateTransform X="150" Y="100"></TranslateTransform>
</TransformGroup>
</Canvas.RenderTransform>
<Rectangle x:Name="MyRect" Width="500" Height="500" Fill="Green" Opacity="0.7" >
<Rectangle.Projection>
<PlaneProjection RotationX="0" RotationY="-45" RotationZ="0"></PlaneProjection>
</Rectangle.Projection>
</Rectangle>
</Canvas>