DreamSpark and Student Azure Activation - Step-by-Step Walkthrough
![]()
DREAMSPARK ( https://www.dreamspark.com ) is Microsoft's program to get software and services into the hands of students. Qualified students can access training, software downloads, and even Azure based cloud services. Activation of DreamSpark, and especially the Azure benefit can be a bit awkward.
Below is a step by step walkthrough of activating DreamSpark along with associated Azure benefits, and creating a first website. After working through the steps below, you should have an Azure account for creating Web Apps, as well as a first simple website up and ready to go.
WHAT YOU NEED
To activate DreamSpark you'll need a few things. Gather up and make a note of the items you'll need.
- Active email account - it can be any kind of email provider - outlook, gmail, yahoo, whatever...
- Phone - yes you have to have an inbound phone. We will text or call you to verify who you are
- Method of dreamspark activation. EDU based email accounts work best. A full list of verification routes cnan be found at https://www.dreamspark.com/Student/Default.aspx
ACTIVATE DREAMSPARK
- Surf over to https://www.dreamspark.com
- Scroll down until you see DreamSpark for Students
- Click Learn More
- At the bottom of the page click Create Account
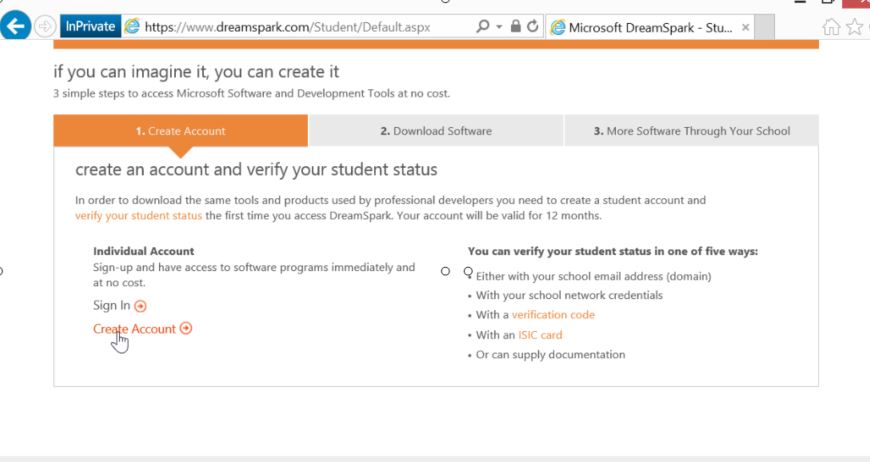
- Clck continue after your account is created to proceed to verification
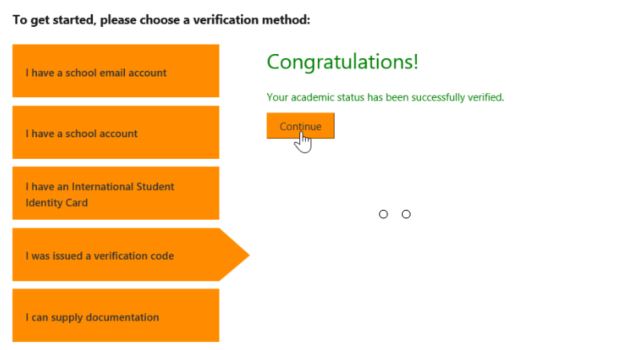
- Pick your verification info and enter the data
- ... and we should be in, Congratulations....
ACTIVATE AZURE BENEFIT
- Navigate to Download Software - You'll wind up in the Student Software Catalog
- Scroll down to Servers and Applications
- click Microsoft Azure for DreamSpark
- Click Register Now - we will be sent to the Azure Portal
- Fill out the information and use the Verification to confirm you are who you are...
- We are now verified
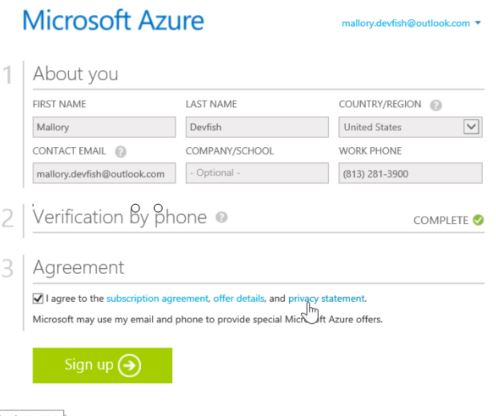
- Click on Sign Up
- Leave the browser up while it sets up your account
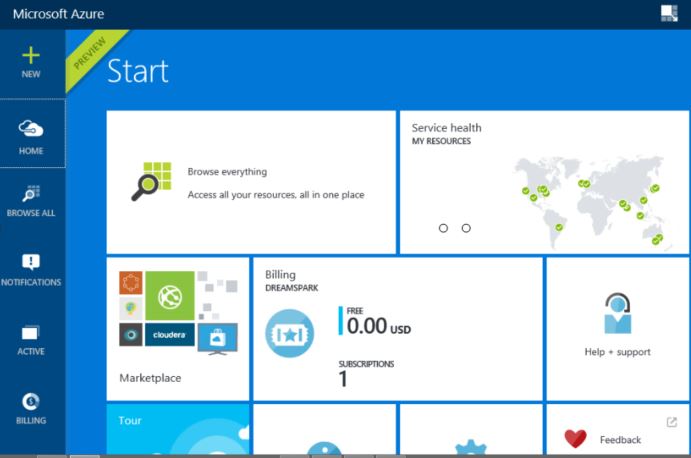
- Click Start Managing My Service
- Take us to the Azure Portal - you'll see a DreamSpark subscription ready to go
CREATE OUR FIRST WEBSITE
- Create a file called Hello.html on your hard drive with the following content on your local drive
 <!DOCTYPE html>

<html>
    <head>
        <title>Index</title>
    </head>
    <body>
        <h1>Hello World (static file)</h1>
    </body>
</html>
- Have the Azure Portal open - https://portal.azure.com
- Click New
- Click Web+Mobile
- Click Web App
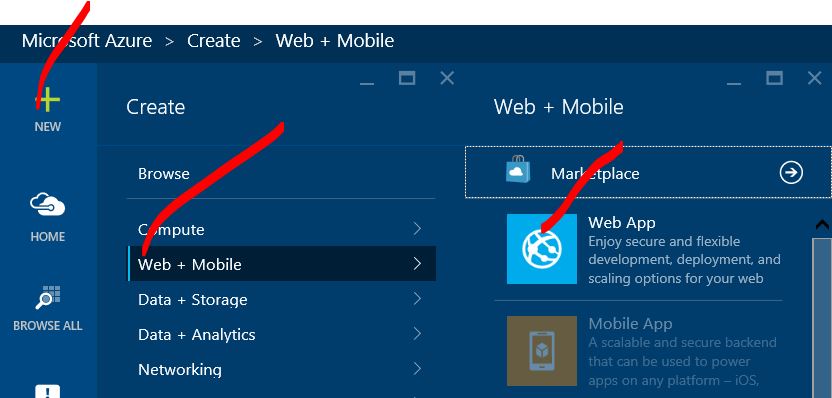
- Enter the domain name for your Web App. This will be how people can surf to it on the Internet. For example: mallory for https://mallory.azurewebsites.net
- Click Create
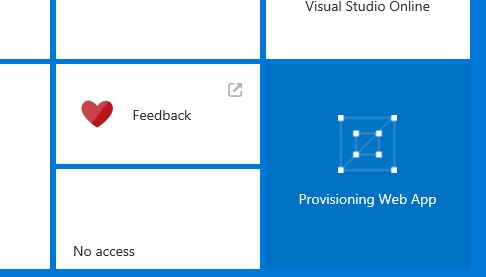
- Wait for the Web App to finish Provisioning
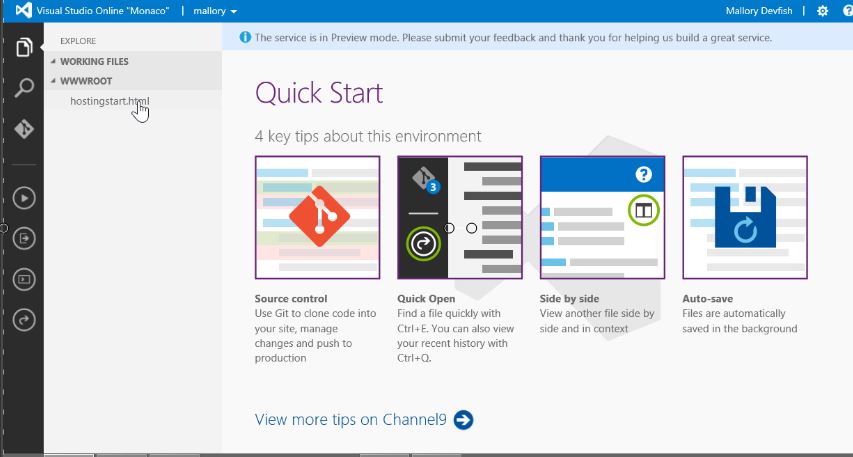
INSTALL VISUAL STUDIO ONLINE EXTENSION
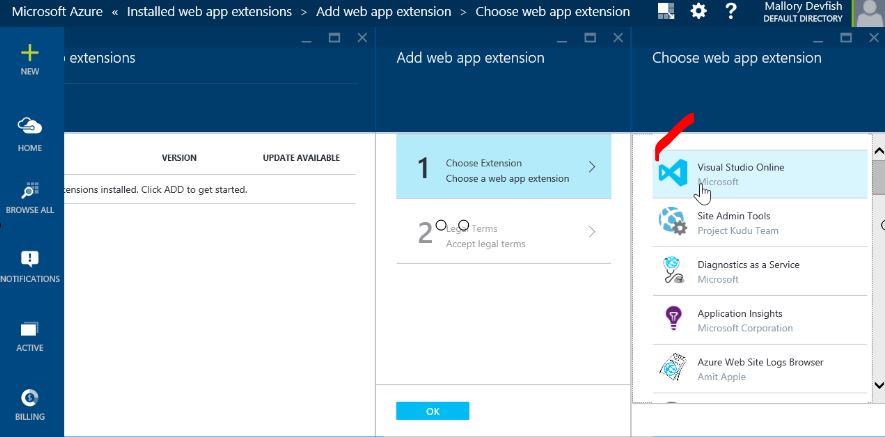
Azure Web Apps can have extensions installed into them to give them extra capabilities. The Visual Studio Online extension allows for you to use an online editing environment to work with and preview files. Let's add it to our Web App
- When the app is provisioning, the blade with information about the Web App will open.
- Click Tools in the blade for your Web App
- Click Extensions
- Add Visual Studio Online
- Accept the various licensing agreements and click OK
- Close all the blades
UPLOAD A FILE
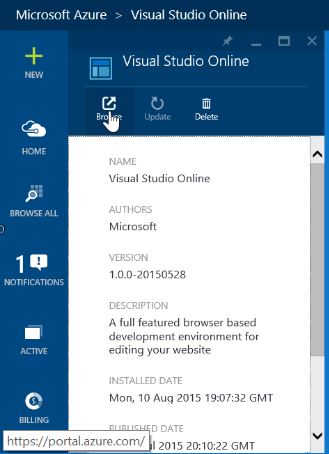
- Open the blade for our Web App again
- Click Tools
- click Extensions
- Click Visual Studio Online
- Click Browse - your Web App will open in Visual Studio Online
- Click on the [...] in VS Online
- Click Upload a File
- Upload the Hello.html you created earlier
- Navigate to the Blade for your Web App
- Click on the Domain Name to bring the Web App up in a browser - mine was mallory.azurewebsites.net
- Change the target URL so the target file is Hello.html on your Web Apps URL - the browser URL should look something like this, but using your domain - https://mallory.azurewebsites.net/hello.html


WRAP UP
So we accomplished a number of things. We activated our student DreamSpark subscription. We added the Azure benefit. And we setup our first Web App with a simple HTML page ready to go. Enjoy!
RESOURCES
- Apply for DreamSpark - https://www.dreamspark.com/
- App Privacy Policies using Visual Studio Online and Free Azure Websites – https://bit.ly/privacypolicystarterkit