Vendor ID field is required on Void Historical Payables Transactions window in Microsoft Dynamics GP 2013 SP2

We have seen a few support cases recently about a change to the Void Historical Payables Transactions and Void Open Payables Transaction windows in Microsoft Dynamics GP 2013 Service Pack 2.
Note: This issue is fixed in GP 2013 R2.
Here are the details of the enhancement from the Inside Microsoft Dynamics GP blog (https://aka.ms/InsideGP):
Previously the two windows were quite different with the Open window only allowing selection of the Vendor ID and the Historical window only allowing selection by Document Number.
Note: Screenshots from my Australian install so they refer to Creditor rather than Vendor.
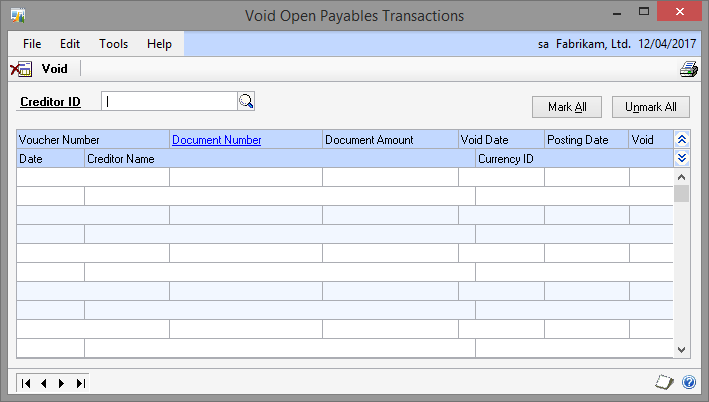 Previous Void Open Payables Transactions window
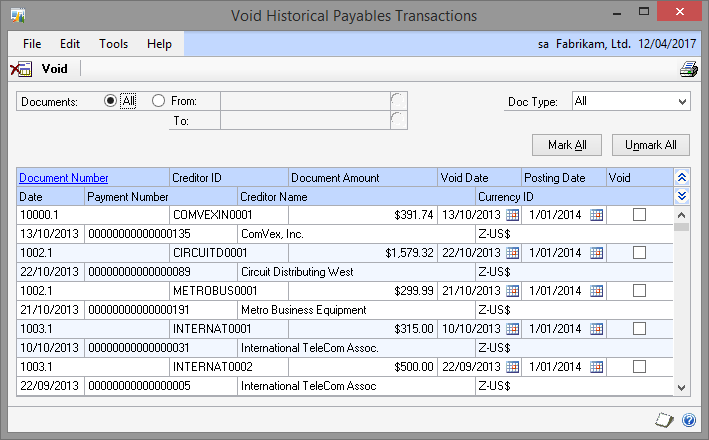
Previous Void Historical Payables Transactions window
In Microsoft Dynamics GP 2013 Service Pack 2, the windows were improved to provide a consistent interface on both windows with selection of Vendor ID, Document Number and Document Date.
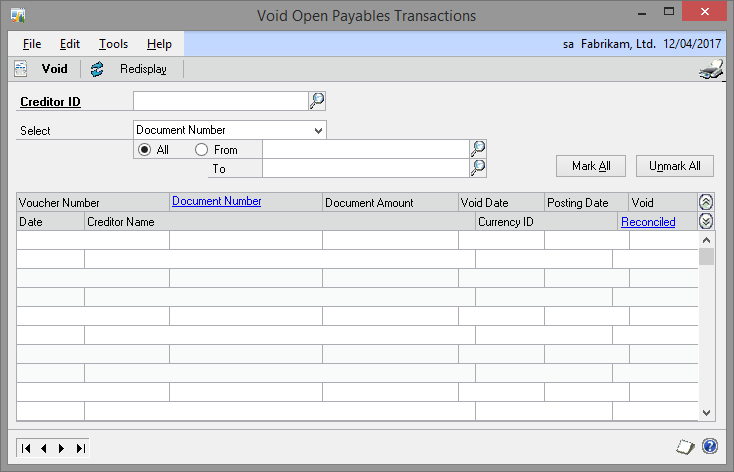
Current Void Open Payables Transactions window
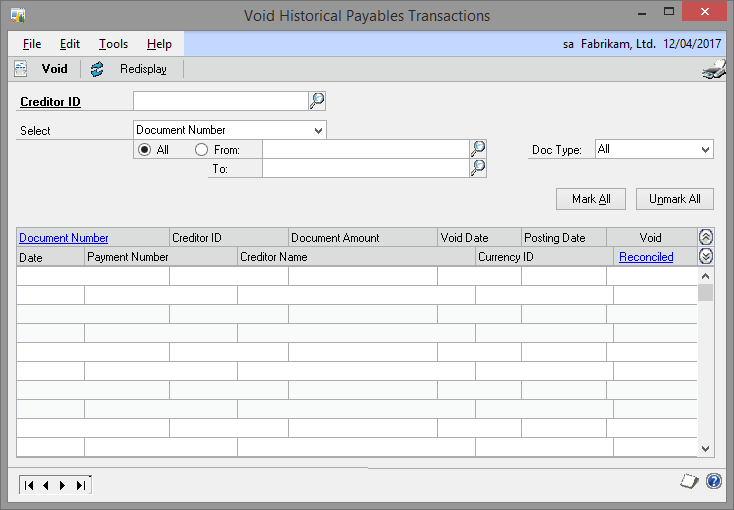
Current Void Historical Payables Transactions window
This improvement in the windows has had an unexpected side effect. Previously the Void Historical Payables Transactions window could work without entering a Vendor ID. This was very useful if you needed to void a check/cheque/EFT run as you could see all the payments in sequence (regardless of Vendor) and mark them to be voided. After this change, you would have to identify the vendor of each of the payments in the run and void it separately.
This side effect has been brought to the attention of the Microsoft Dynamics GP development team and a further change has already been made to allow the Vendor ID field to be left blank and the previous functionality restored. You will now be able to get the best of both worlds with the previous functionality and the new functionality. This fix is scheduled to be released in the March Tax Update 3 hotfix, which should be released in the next couple of weeks or so.
However, one of the partners we were working with locally, Awhina (pronounced Afina) Pouesi-Siakisini from Professional Advantage, did some research and found the following blog post by Sheldon Gitzel from Etelligent Solutions Inc.
In the comments for this article Karen DeZort from Iceburgh Solutions, LLC. mentions that they had used the Support Debugging Tool (https://aka.ms/SDT) to create a fix using non-logging Triggers and to contact her if you were interested.
So, I suggested that the Awhina contact Karen and request the code and CC me so I could see what they had done. Karen quickly responded and sent us the Support Debugging Tool Configuration Settings XML file containing the 5 triggers created by her colleague Chris Marvin also from Iceburgh Solutions, LLC.
I tested and reviewed the code that Chris had created and made some fine tuning changes including using SQL_FormatStrings() and sqlDate() to ensure that the code could handle non-US date formats and Document Numbers with single quotes in them. See Quick Tip blog post below for more information.
With Karen's permission, this updated set of triggers is attached to this article for you to download and use.
Implementing the fix
To use, you want to make sure that the Support Debugging Tool is installed in the Recommended Configuration (see User Guide Manual or FAQ article below). The Recommended Configuration is where the SDT is installed on every workstation and is using a shared folder location for its settings files and logs.
To install, use the Configuration Export/Import window (from menus Microsoft Dynamics GP >> Tools >> Support Debugging Tool, click Options >> Configuration Export/Import). Browse to the file and select it, then click Import and OK on the dialog. Once installed, the triggers will be active on next login.
Note: If using the Recommended Configuration, you only need to install on one workstation and the triggers will be available to all, otherwise you will have to install manually on each workstation.
To disable or un-install, disable the triggers using the Automatic Debugger Mode Status window (Support Debugging Tool >> Options >> Automatic Debugger Mode Status) and click Unregister >> All. Then open Support Debugging Tool Setup (Support Debugging Tool >> Options >> Setup Automatic Debugger Mode) and click Administration. On the Trigger Administration window, multi-select the triggers (VOIDHSTDISPLAY, VOIDHSTMARKALL, VOIDHSTMARKALL2, VOIDHSTOPEN and VOIDHSTUNMRKALL) and either disable (Change State >> Disable Selected) or Delete (Mark to Delete >> Mark to Delete Selected) and click OK. Then close the Support Debugging Tool Setup window.
Note: If using the Recommended Configuration, you only need to disable or un-install on one workstation and the triggers will be available to all, otherwise you will have to disable or un-install manually on each workstation.
Please note that the official fix is in Microsoft Dynamics GP 2013 R2 and so the Triggers should be removed or disabled once this hotfix is installed.
Note: Even though Vendor ID field still shows as required, it is not needed when in Document Number mode, only when you want to use Document Date mode.
Related Articles
- Installing the Support Debugging Tool for Microsoft Dynamics GP FAQ
- Quick Tip: Unusual behaviour when working with SQL Server from Dexterity
- Support Debugging Tool Build 18 released
- Support Debugging Tool Portal
Note: The Support Debugging Tool Configuration Settings XML file is attached to the bottom of this article.
This is a fantastic example of the Microsoft Dynamics GP community pulling together to resolve an issue.
Enjoy
David
08-Aug-2014: Updated article now that issue is fixed in GP 2013 R2.