Test Impact Walk-through
One of the key areas of focus for Visual Studio Team System 2010 is to enhance the experience for testers. There’s already lots of overview information on many of the new features out there so I’m going to dive right in to one of my favorite new features.
In short, the Test Impact Analysis feature gives you a list of recommended tests based on the changes that were made in a build. As you run your tests through Microsoft Test Manager (MTM) you will have the option to run the Test Impact Data Collector which is one of the many built-in Data Collectors available while running tests. This particular data collector will associate the code paths you execute in your application with the test you are running.
When Team Build generates a new build it will analyze what code has been changed since the last build was done and then provide you with a list of the impacted tests. These are the tests that touch the same pieces of code that were changed since the last build.
For a more thorough explanation of the Test Impact Data Collector read this blog post by Amit Chatterjee.
The first thing you need is an Application Under Test, for this walk-through I’ll use a simple calculator application. I’ll have a C# Class Library with some simple Add, Subtract, Multiply, and Divide functions and a C# Windows Forms project that will provide some input fields for the numbers and some buttons that call the library function. I’ll skip the creation of this sample application, you an use the attached sample application, mock up something similar or follow along with your own test application.
- Add your test application to Source Control
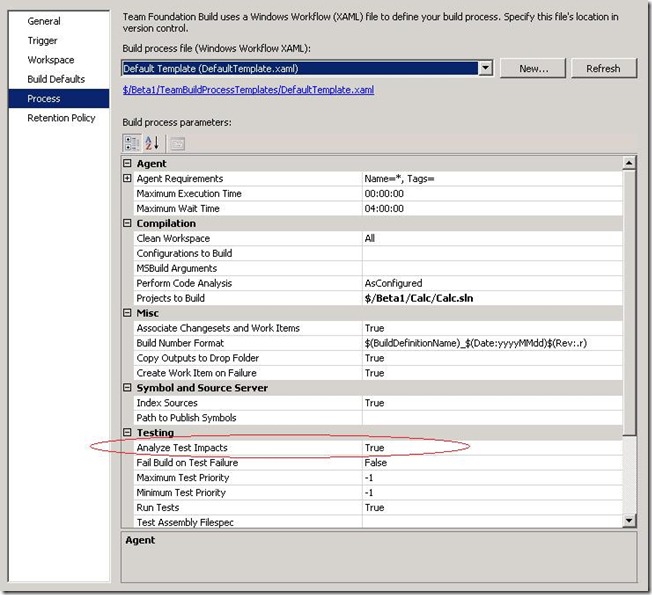
- Create a new Build Definition for your application
- Queue a new build
- Start “Microsoft Test Manager”
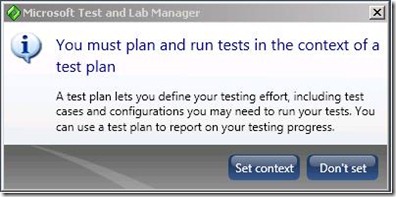
- [Beta1 Specific, note this UI has been removed in the RC and RTM Releases] If the dialog below comes up click “Set context”:
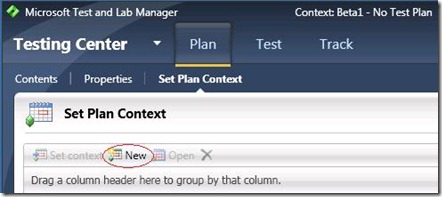
- On the “Set Plan Context” page click “New”
- Enter a name for your Test Plan and click Save & Close
- Go to Testing Center –> Plan –> Contents
- Click “New” in the toolbar to add a new Test case
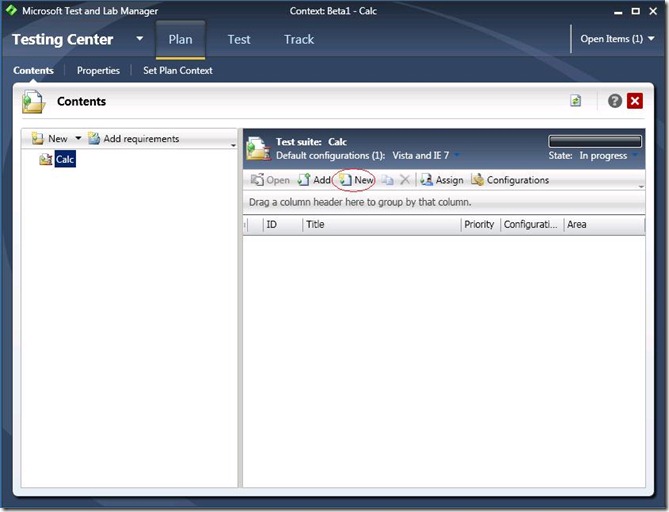
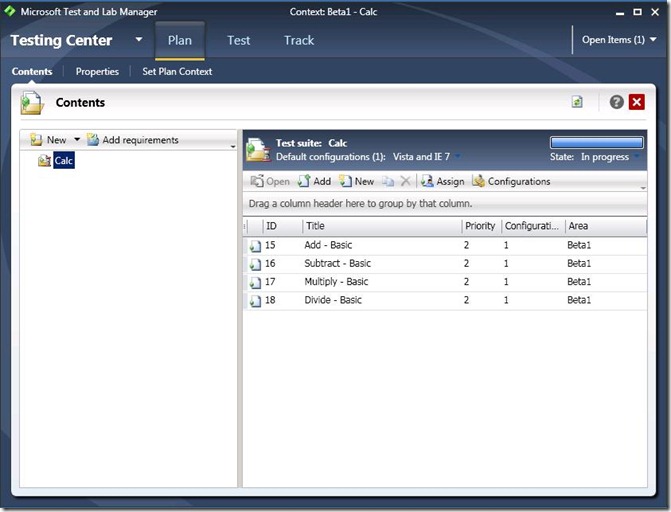
- Add a Title for the Test case, mine is “Add – Basic”, I’ll repeat these steps and add “Subtract – Basic”, “Multiply – Basic”, and “Divide – Basic” as well. Here’s what my Test Plan Contents will look like when I’ve done this.
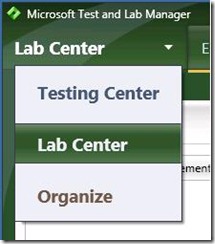
- Now it’s time to switch to the Lab Center so we can set up our Test Settings
- Switch to the Test Settings tab and click “New”
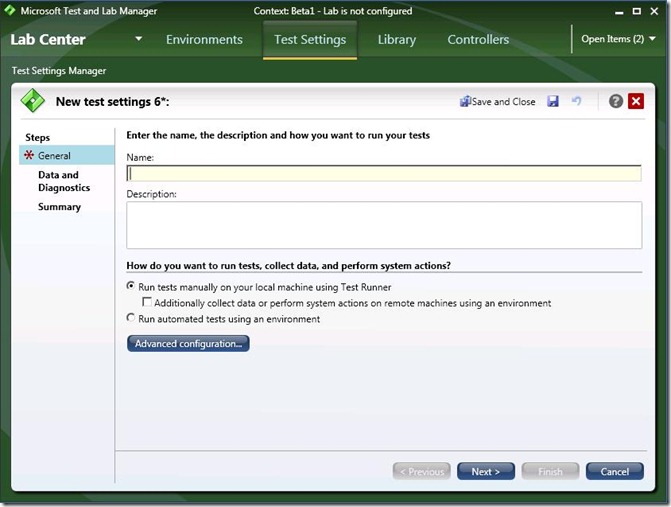
- Enter a Name and click “Next”
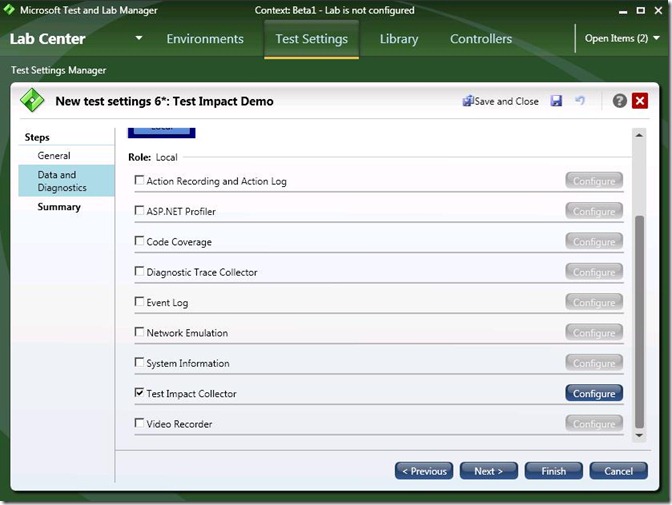
- To keep things simple uncheck all collectors except the “Test Impact Collector” and click “Save and Close”
- Go back to the Testing Center.
- Switch to the Track tab and go to the “Assign Build” activity
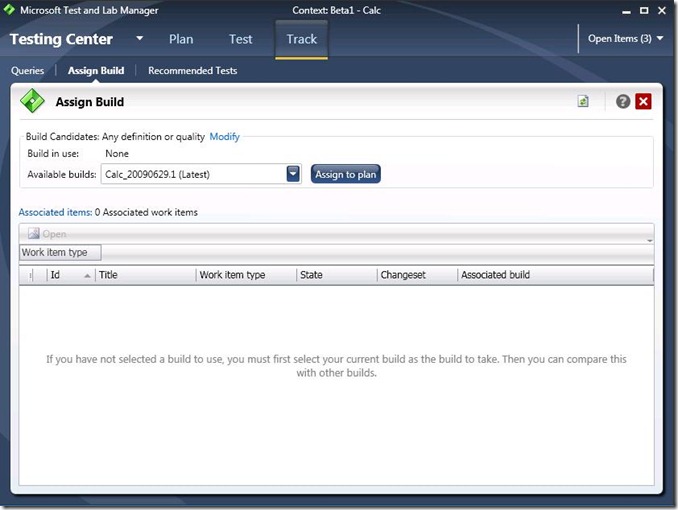
- The build you created earlier will be in the “Available builds” list, select it and click “Assign to plan”.
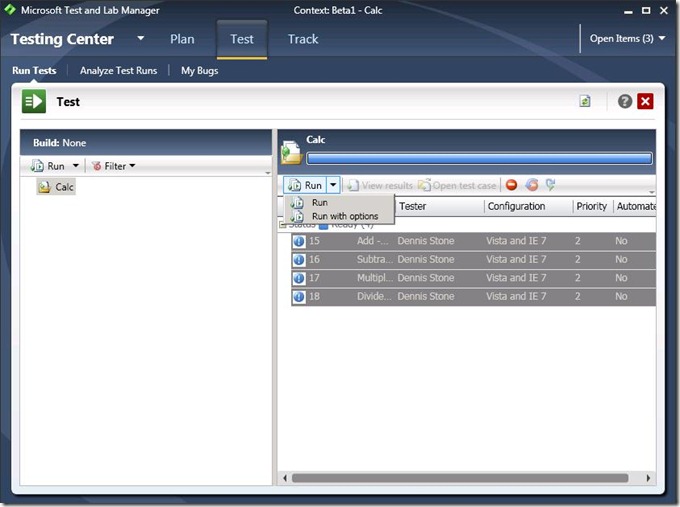
- Now it’s time to run our tests. Switch to Testing Center –> Test –> Run Tests
- Select all of your tests and click “Run with Options”
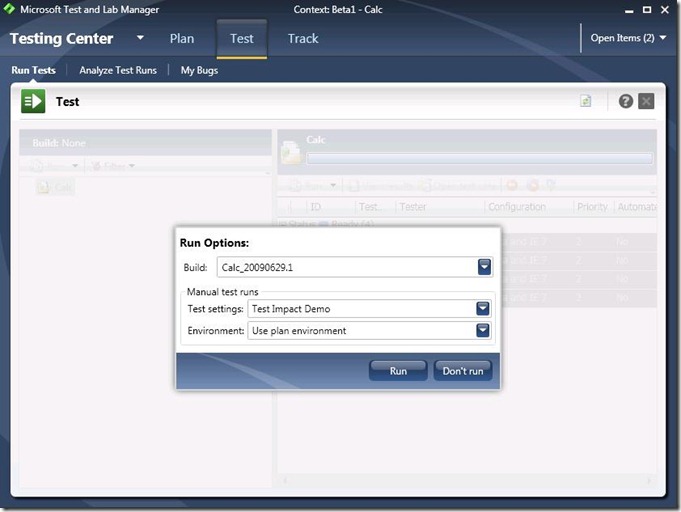
- In the Run Options dialog select your Test Settings and verify that your newest build is selected. Click Run.
- Test Runner will now appear
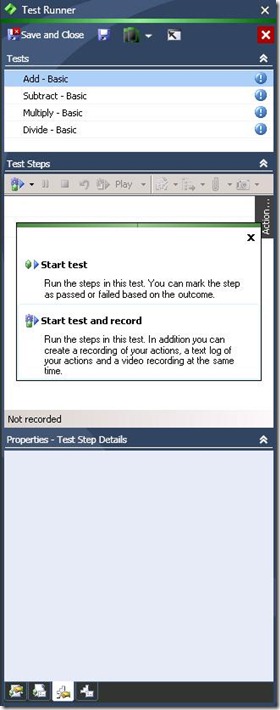
- Click Start test and record, then launch your Application Under Test. This ordering is important, you must start the test before launching the test application or the impact data will not be collected.
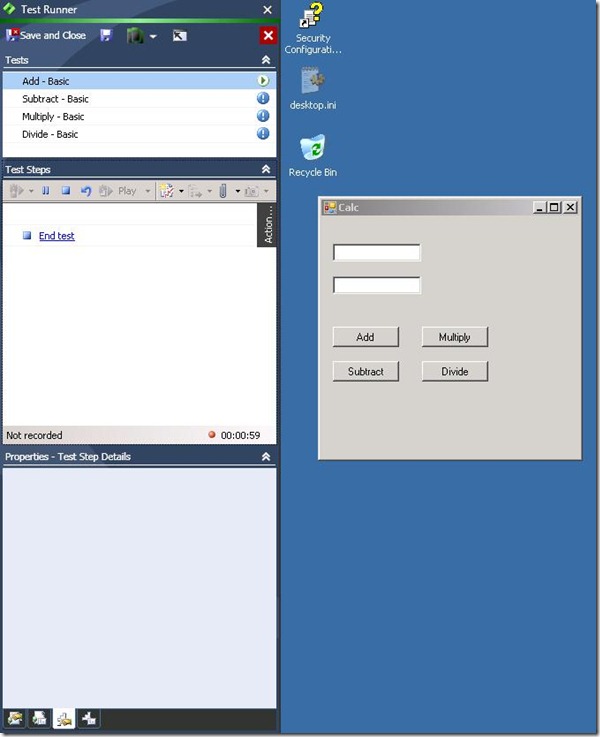
- Perform each test now. For my Add test I’ll set 2 numbers in my text boxes and click Add, for Subtract test I’ll set 2 numbers and click Subtract, etc. etc. Run your test then click “End Test”, then start the next test. There’s no need to re-launch your application between every test. When you’re done click “Save and Close” to return to Microsoft Test Manager (MTM). It should look something like this:
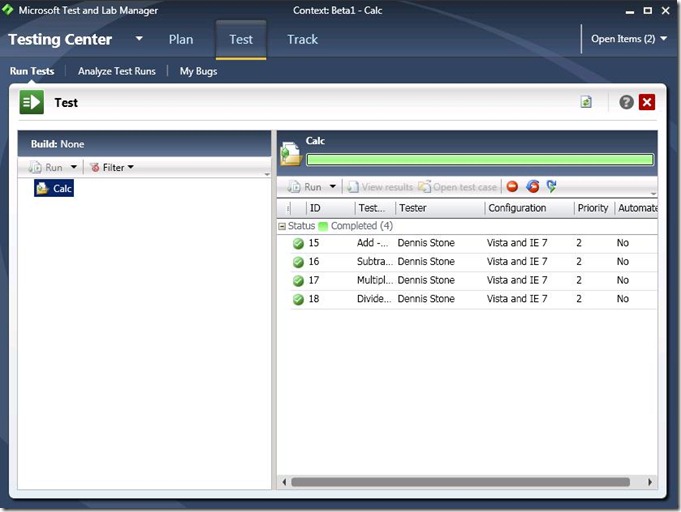
- To verify the Test Impact Collector worked correctly you can open up one of your test results and look at it’s attachments, there should be an impact xml file listed there. If there isn’t, re-check your steps above.
- Now, switch to Visual Studio and make a change to your application under test. I’m going to make a change to my “Add” method and check it in.
- Queue a new build and wait for it to complete.
- Switch back to MTM
- Go to Testing Center –> Track –> Assign Build and assign your new build to your plan. (See Step #12 if you need help)
- Now switch to Testing Center –> Track –> Recommended Tests
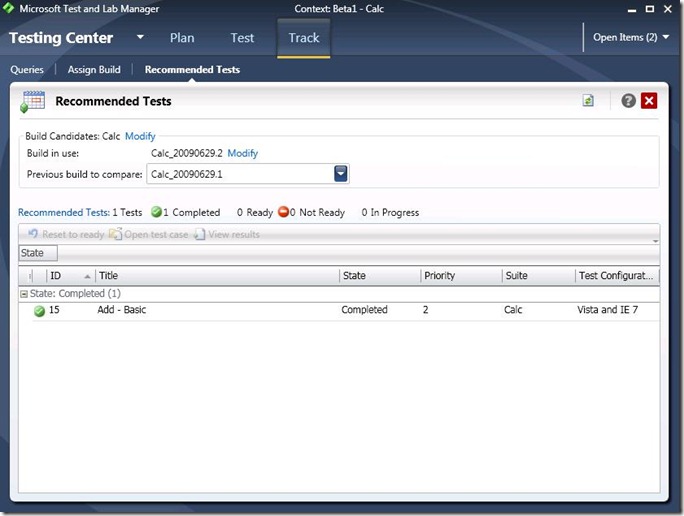
- Notice the “Add – Basic” test is now listed.
- [Beta1 Specific, note this UI has been removed in the RC and RTM Releases] If the dialog below comes up click “Set context”:
That’s it for this post, I look forward to any questions or comments you may have. If you have any questions on some of the steps above try looking them up on the MSDN site. Topics such as creating builds, queuing builds, etc. should be well covered there.
