3D Level Editing for Windows Phone 7 Games (#XNA)
For future reference, everything discussed here is in the context of Windows Phone Developer Tools April Refresh, so it’s all CTP stuff and can/probably will change.
CODE: here
What You Need
- Visual Studio 2010 RTM (www.microsoft.com/express)
- Windows Phone Developer Tools April Refresh (https://developer.windowsphone.com)
- 3D World Studio ($49, no saving from trial) (https://www.thegamecreators.com/?m=view_product&id=2100)
The Problem
There is a saying in the programming community along the lines of “Use the right tool for the job.” If you’ve ever tried using a full-featured 3D modeling tool like Softimage XSI in order to create simple geometry for levels, you probably have wanted something a bit simpler. Don’t get me wrong, these tools are great for creating complex hi-polygon stuff, but for a basic level, it’s overkill and a little time consuming.
Here’s something else you have to worry about: entities. Lights, spawn points, AI paths, et cetera. You’d need to write a script to get all of that to import correctly, plus you’d need to have some kind of mapping on the game engine (XNA) side.
Speaking of lights, let’s talk shaders for a second. Windows Phone 7 supports only five shaders out-of-the-box, with no support for custom shaders (yet). The five effects are:
- BasicEffect
- SkinnedEffect
- EnvironmentMapEffect
- DualTextureEffect
- AlphaTestEffect
All of these are very useful for various things. However, I have come to find that BasicEffect is not quite as nice as I’d like for a lot of things. More on this in a little bit.
Editing Levels for XNA
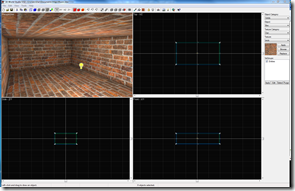
 There are multiple options for level editing, but I am currently enamored with 3D World Studio ($49.99 USD) because of its UnrealEd-like interface (before Microsoft, I spent a ton of time in that tool). It’s very simple to use, and the texturing is quick. It also supports export to .X, which is XNA friendly. Plus, you can drop all your basic entities in there, define your own, etc. It’s a very familiar workflow to any level designer.
I was investigating this tool when I stumbled upon the XNA 3D World Studio Content Pipeline project on CodePlex, which is based on this project by John Wells.
The great thing about this content processor is that it actually reads the native format of 3D World Studio (*.3dw) and processes all the models, textures, lightmaps, entities etc. in a way that you can expose to your game engine. So you don’t need to write any fancy exporter script from your modeling tool; you just save it and go!
I downloaded the content pipeline project and ran it, inspecting it as I went to see how it all worked. I’m vaguely familiar with content pipeline extensions since I wrote a chapter on them in my book, but this is far more detailed than I ever got. So what I set out to do next was create a port of the solution for Windows Phone 7.
The process was about the same as any other “porting” project, with the exception that I had to create all new project formats to account for XNA 4.0 and add the files in manually. There were some things I had to change. One change of note was the transition to DualTextureEffect from generic Effect.
 The Importance of DualTextureEffect
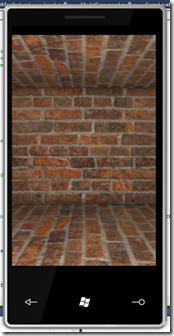
This may or may not change as this project progresses, but right now, all of the effects in the level get imported as DualTextureEffects. The reason for this is that when you bake the lightmaps and save it in 3D World Studio, you can then set the effect’s primary texture to the base layer diffuse texture (or the “base” texture) and the secondary texture to the lightmap (which is read and computed from the file by the content processor).
In other words, 3D World Studio generates the lighting for you (in the form of lightmaps) and you use lightmaps to tell the Effect how to shade the texture.
Had I chosen BasicEffect, we’d only really have the default lighting to work with, and who really wants that? The light mapping looks so much better.
Get the code here and start playing with it today. Also check out 3D World Studio. For only 50 bucks, it is a great piece of software!