How to: See SharePoint 2010 Data Connections from Excel 2010
Recently I tore my hair out trying to create a great end-user experience for my Excel 2010 users when they access SharePoint.
Eventually I found a way to get it to work. This is not a perfect post. I’m far from an expert in SharePoint & I’m hoping a sharepoint expert will comment & show me a slicker way. But given I found nothing on the net, I hope this may assist you.
The Goal.
A Sharepoint person should publish a set of connections to data sources & provide permissions to all who need them. All end users automatically see them. Some time later as IT moves the databases & data to new servers, they update the sharepoint data connection libraries & the hundreds of business users don’t notice & don’t care.
What I wanted the Business user to experience
Step 1: Open Excel & click on Existing Connections

Step 2: See something in the “Connection files on the Network”. Double click on one of the Sharepoint Data Connection Libraries listed.
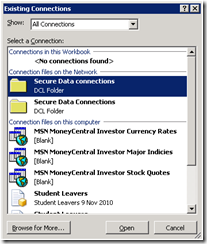
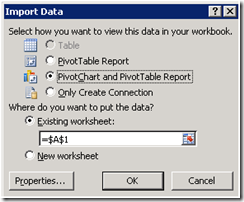
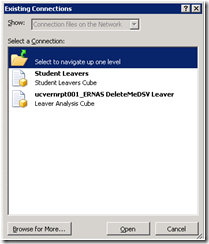
Step 3: Select the Data Source they want.
How to do it – Sharepoint Site Admin.
Step 1: Open Sharepoint 2010 Central Administration app & click Manage Service Applications
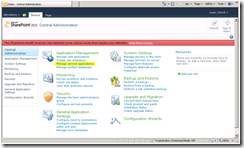
Step 2: Check the Excel Services Application has been installed & started.
(As this process is reasonably well documented elsewhere I’ll not repeat it here)
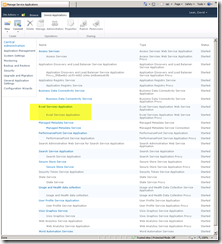
Step 3: Click User Profile Service Application
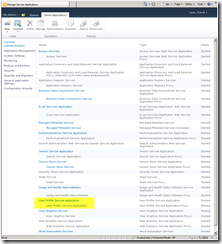
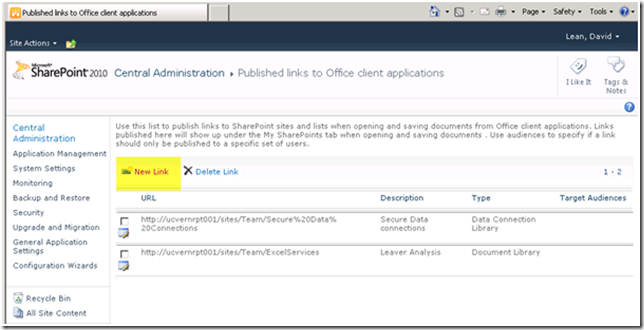
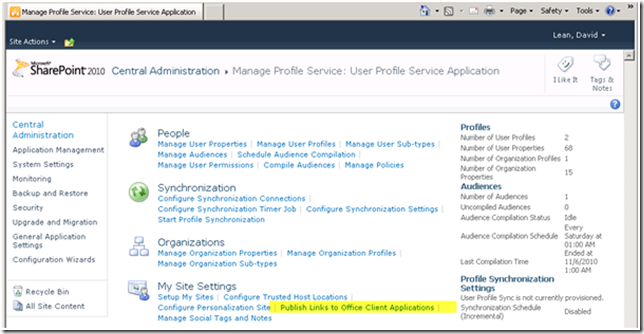
Step 4: Click “Publish links to Office Client Applications”
This bit took me ages to find, as it was in a different location in Sharepoint 2007 & all the 2010 doc’s I found still had Sharepoint 2007 pictures in it.
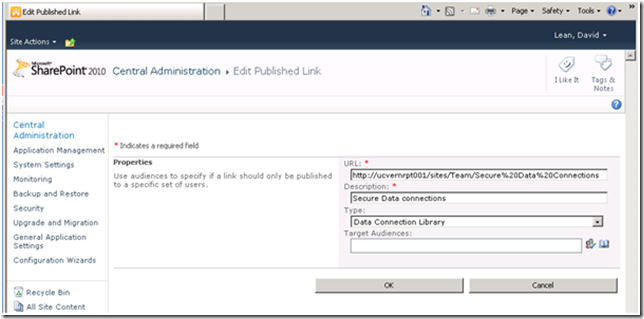
Step 6: Paste in the URL to the Sharepoint Data Connection Library that you’ve created earlier.
NB: If you don’t have one, now would be a very good time to
a) Create a Data Connection Library (DCL),
b) Create a Data Connection
c) Upload it into Sharepoint &
d) Give permissions & Approve both the Library & the Data Connection.
(As these steps are also well doc’ed I’ll not repeat them here. )
How to do it – Excel Client Admin.
Note: This is the part I think it insane. It works, it is in the official documentation for older versions of Sharepoint. But I suspect there is much better way to do this. Some have told me “Yes we do that, but we push it out via group policy”. I can’t imaging anyone in the Sharepoint team architecting this & deciding it was the recommended way to do this. So there is probably a script or button somewhere but I’ve not found it.
Step 1. Open up RegEdit.Exe.
(Note: You are about to edit the Windows Registry. Good idea to back it up first. If you stuff it up you may create serious issues that may prevent your computer from starting & cause you to reinstall windows.)
Step 2: Move to Key HKEY_CURRENT_USER\Software\Microsoft\Office\14.0\Common\Server Links\Published
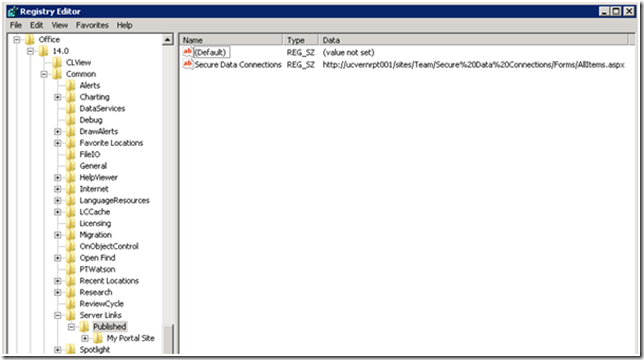
Step 3: Right Click on Published & add a new String Key.
Call it anything you like, this will be the name that appears in the Excel “Existing Connections” Dialog. As you can see above I called mine “Secure Data Connections” as that was the name of the Sharepoint DCL I created & management liked the idea of it being secure.
Step 4: Set the value to the key to URL to point to the Sharepoint Data Connection Library you created. 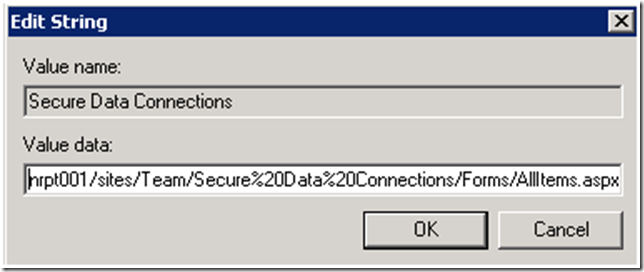
Step 5: Enjoy.
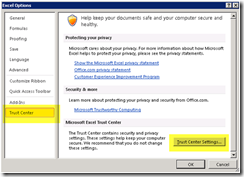
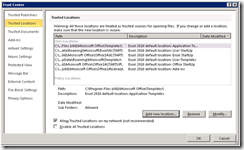
Note: The environment I set this up was had a crazy design for the Windows Authentication in their Test domain. So I’m unsure if some of the Trust & Security warnings I was receiving from Excel was something others would see. If you also get “Click here to trust this data” try looking in the Excel Trust Centre & Trusted Locations / Documents areas.
Like I said at the start. I usually prefer to present well researched material & have a “this is the way to do it” blog. But in this case the goal is to help you break thru a few of the issues I had & maybe move you closer to a solution.
Feel free to add comments if you have more insight on this process.
Thanks Dave.
