HDV Recipe for Expression Encoder 2
If you shoot HD video using a tape-based camera, you're probably shooting HDV. Assuming you don't need to do extensive editing to your video, you can ingest these HDV tapes directly into Expression Encoder 2 using a couple of readily available programs.
HDVSplit
HDVSplit captures the HDV stream from your camcorder into MPEG-2 transport streams (.m2t files).
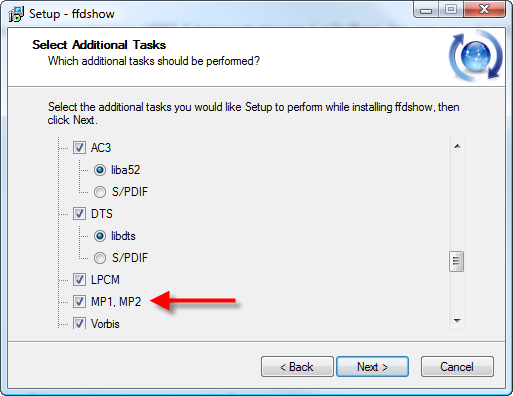
Once you have installed HDVSplit, you also need to install a media decoder called ffdshow. All we actually need from ffdshow for is to decode the audio stream in the HDV file. When you install ffdshow, make sure that it is set to decode MP1, MP2 audio types (see below):
Here's how you use it:
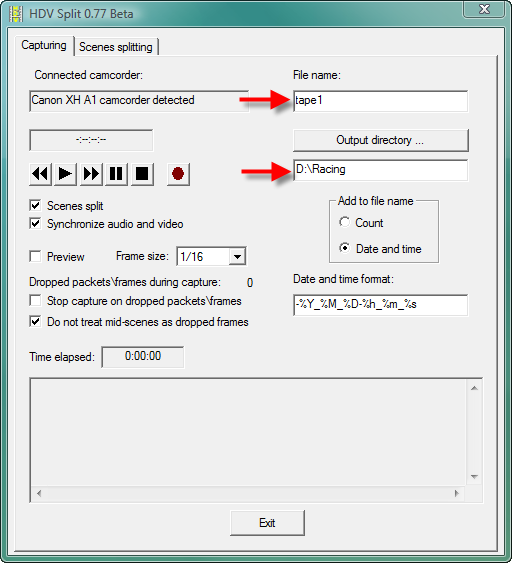
1. Connect your camcorder using Firewire and start HDVSplit.
2. Set an appropriate output directory with plenty of free space.
3. Set a filename (I use tape1, tape2, etc.) The filename you supply will have a timestamp automatically appended to it.
4. Start the tape playing using the transport controls on the camera or in HDVSplit. Once you see video on the camera, press the record button on the HDVSplit transport window. If you don't do this way and you capture from the very beginning of a tape, HDVSplit may time out waiting for a video signal.
Using Expression Encoder 2
Now you'll have a directory with a bunch of .m2t files in, which is your raw HDV footage. Using these with Expression Encoder 2 is now as simple as dragging and dropping them on the Encoder window, or doing File->Import. Here's an example below that also shows off the A/B comparison feature. This feature enables you to compress a portion of your video with the current compression settings and compare them using the sliding vertical yellow line with either the original video or a different compression setting.
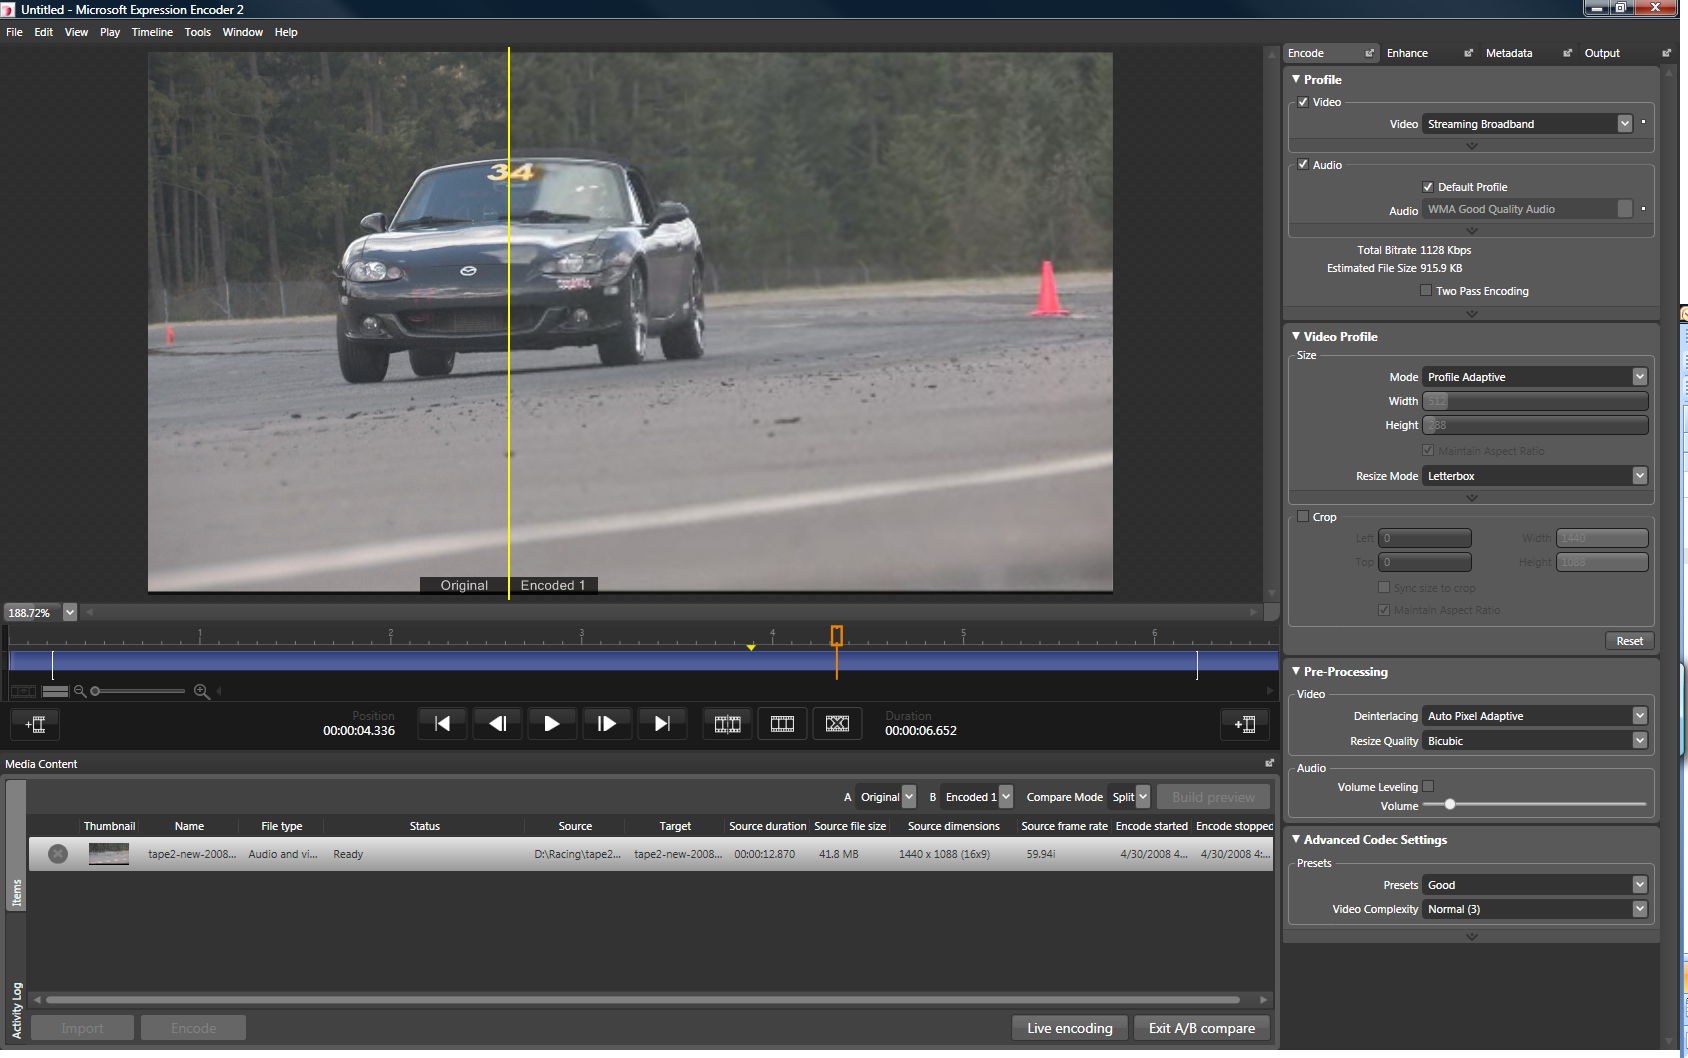
The following two cropped areas show the power of A/B compare when creating your compressed video:
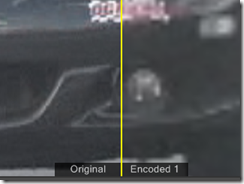
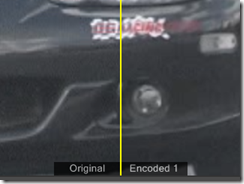
In these two comparisons, the one on the left is the Streaming Broadband profile (512*384, 1Mbps CBR) and the one on the right is the HD 720p Intranet profile (1280*720, 6Mbps average)
A final comment and thanks: the images you see here are from video that was shot yesterday by me at Pacific Raceways in Kent, Washington on a Canon XH-A1 camera. One of my Microsoft buddies was kind enough to invite me along to his track day and I thought it was a good opportunity to get some nice HD footage to use with Encoder. Here's a very short clip showing a couple of cars heading back to the pits.
It should go without saying that the third party software mentioned in this article is not endorsed in any way by Microsoft, you accept all risk, do not attempt, beverage will be hot and the drivers are on a closed course :)