Add SSL Security to your Azure Webrole
As the new Azure toolkit allows upload of certificates to be associated with the roles, and multiple web roles, it is possible to set up 2 sites (2 webroles) one which would be secure, and one which would be unsecured.
The first thing you will need is some testing certificates on your local machine which you can generate with the steps found here:
https://msdn.microsoft.com/en-us/library/cc949011.aspx
I had a slight problem with step 5, as I could not directly put in “localmachine\my” certificate store from my command prompt, if you find this is an issue, change from
makecert -sk MyKeyName -iv RootCATest.pvk -n "CN=tempCert" -ic RootCATest.cer -sr localmachine -ss my -sky exchange -pe
to
makecert -sk MyKeyName -iv RootCATest.pvk -n "CN=tempCert" -ic RootCATest.cer -sr currentuser -ss my -sky exchange –pe
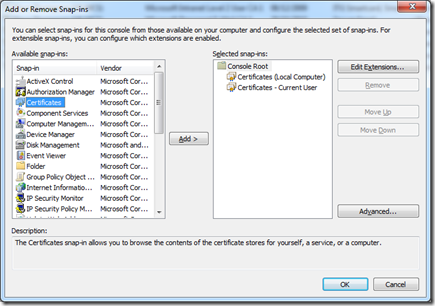
(changed on the –sr switch from localmachine to current user, and so you will find the certificate installed if you open MMC in Certificates – Current User, in the Personal Store, rather than in the Local Computer, Personal Store)
Now you should have your certificates installed, and we can start a new azure project, remember that Visual Studio still needs to run in Administrator mode to run a cloud project.
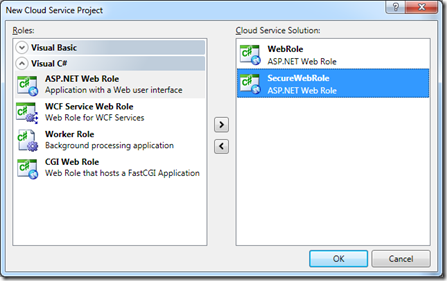
I will add 2 asp.net web roles, one to add ssl security and the other to keep as standard (note this is for demo purposes, you can create a single webrole which it is possible to connect through http and https)
Now you will have 2 default.aspx pages and if you run the cloud project at this time, as both are http, one will open on port 81 (as expected) and the other will open on port 8080.
To differentiate between the two, I am just going to add some text on the default.aspx pages one saying “Secure” and the other saying “Unsecure”.
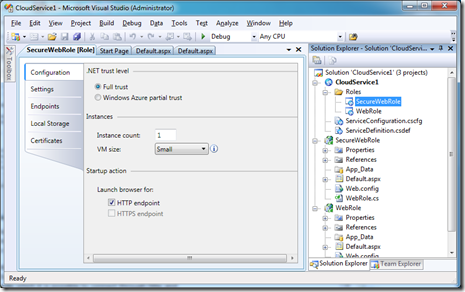
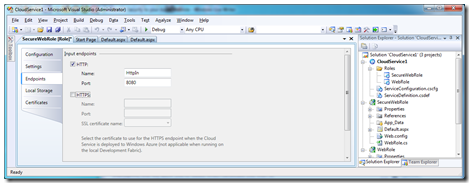
Double clicking the SecureWebRole in the CloudService project will bring up the configuration of that webrole:
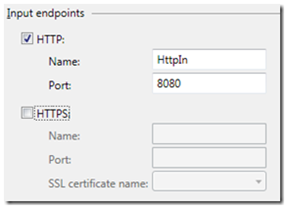
You can see from this that we have a HTTP endpoint, but the HTTPS endpoint is greyed out, as we have not yet configured a certificate for it to run with.
By selecting the certificates tab on the left and then clicking the Add Certificate button on the top of the section will allow you to set up a certificate to be used for SSL.
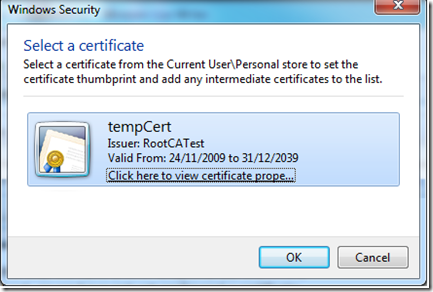
I will just leave the name as Certificate1 now, but I still need to configure it to use a certificate. By clicking the ellipsis (…) button on thumbprint, this will allow you to select which certificate you wish to use from your certificate store.
Choose the certificate you just created (probably tempCert unless you changed the CN=”tempCert” in the final command when generating certificates)
makecert -sk MyKeyName -iv RootCATest.pvk -n "CN=tempCert" -ic RootCATest.cer -sr localmachine -ss my -sky exchange –pe
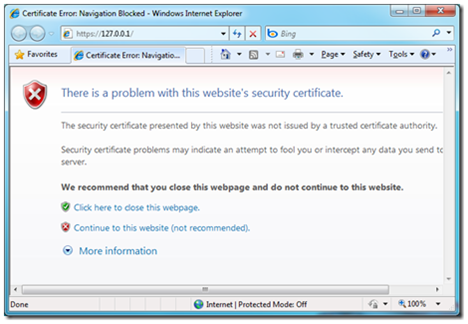
also note that IE will display a red bar across the address if this is not the domain name it will run in, and also prompt that there is a problem with the certificate. To fix this, run the above command again with your machine name instead of tempCert.
Now we need to configure our endpoints for our web service, so click the Endpoints tab, here you will see why this webrole (assuming this is the correct webrole) ran under port 8080
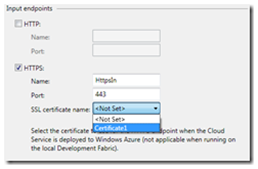
As this is our secure webrole, I will untick http endpoint and tick HTTPS.
this will set the https port (443) and the name automatically, but we still need to select which certificate we want to use, using the dropdown we can select the certificate we just created.
Saving this and running the cloud project will launch 2 instances of IE along with the Azure Development Environment.
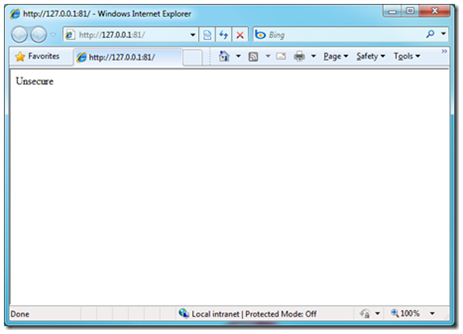
One instance will have the unsecured (http) site:
and our other on https showing the certificate error as I mentioned before.
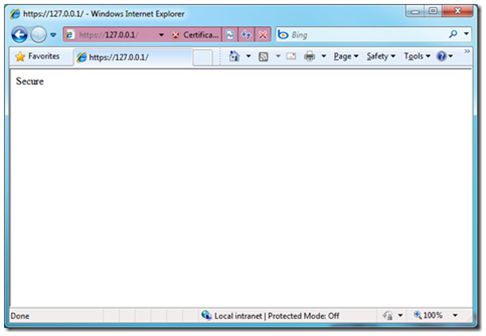
by clicking Continue to this website we are taken to the page we expected:
What this is all doing behind the scenes is altering the csdef config file and cscfg to:
ServiceDefinition.csdef
 <?xml version="1.0" encoding="utf-8"?>
 <ServiceDefinition name="CloudService1" xmlns="https://schemas.microsoft.com/ServiceHosting/2008/10/ServiceDefinition">
   <WebRole name="WebRole">
     <InputEndpoints>
       <InputEndpoint name="HttpIn" protocol="http" port="80" />
     </InputEndpoints>
     <ConfigurationSettings>
       <Setting name="DiagnosticsConnectionString" />
     </ConfigurationSettings>
   </WebRole>
   <WebRole name="SecureWebRole">
     <ConfigurationSettings>
       <Setting name="DiagnosticsConnectionString" />
     </ConfigurationSettings>
     <Certificates>
       <Certificate name="Certificate1" storeLocation="LocalMachine" storeName="My" />
     </Certificates>
     <InputEndpoints>
       <InputEndpoint name="HttpsIn" protocol="https" port="443" certificate="Certificate1" />
     </InputEndpoints>
   </WebRole>
 </ServiceDefinition>
ServiceConfiguration.cscfg
 <?xml version="1.0"?>
 <ServiceConfiguration serviceName="CloudService1" xmlns="https://schemas.microsoft.com/ServiceHosting/2008/10/ServiceConfiguration">
   <Role name="WebRole">
     <Instances count="1" />
     <ConfigurationSettings>
       <Setting name="DiagnosticsConnectionString" value="UseDevelopmentStorage=true" />
     </ConfigurationSettings>
   </Role>
   <Role name="SecureWebRole">
     <Instances count="1" />
     <ConfigurationSettings>
       <Setting name="DiagnosticsConnectionString" value="UseDevelopmentStorage=true" />
     </ConfigurationSettings>
     <Certificates>
       <Certificate name="Certificate1" thumbprint="170B0C2EB8C9E450D4B43272C184F47A47BE0534" thumbprintAlgorithm="sha1" />
     </Certificates>
   </Role>
 </ServiceConfiguration>
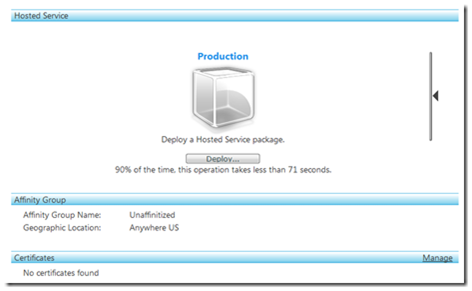
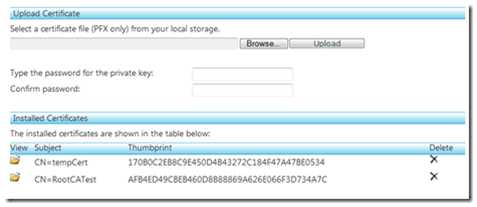
To deploy this to the cloud, first we are going to have to install our certificates to the cloud, otherwise we won’t be able to deploy the solution. In the Azure portal when about to deploy the services we have a Certificates section:
currently saying “No certificates found”. Back in our MMC with the certificates snap-in still enabled, we can export the temp cert to a file by right clicking the certificate and clicking export. Give it a password and a location and you will find a .pfx file containing the private certificate to put to the cloud.
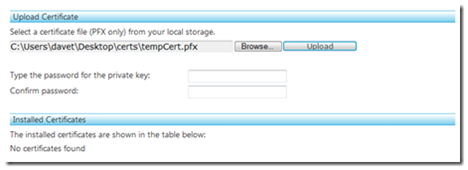
type in the password you generated it with and click the upload button and shortly it will install the certificates:
now we can deploy the service as normal, by right clicking the project selecting publish, navigating through the azure portal, clicking deploy and selecting the cspkg and cscfg files the publish generated.
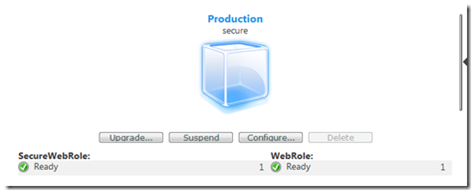
Given a couple of minutes for the roles to deploy and initialize we should see this within the cloud.
