Hadoop for .NET Developers: Implementing a Simple MapReduce Job
NOTE This post is one in a series on Hadoop for .NET Developers.
In this exercise, we will write and execute a very simple MapReduce job using C# and the .NET SDK. The purpose of this exercise is to illustrate the most basic concepts behind MapReduce.
The job we will create will operate off the integers.txt sample file loaded to the local desktop development environment in previous blog posts. You may remember that file consists of a list of integer values from 1 through 10,000 with each integer occupying its own line.
The map function we will write will accept a line (a single integer), determine whether the value is even or odd, and emit the integer value with a key of “even” or “odd”, accordingly. The reduce function we will write will accept all of integer values associated with a given key, i.e. “even” or “odd”, and then count and sum those values. The reduce function will then emit results in a key-value format with “even” or “odd” again serving as the key and the associated count and sum separated by a simple tab as the value.
To get started, perform the following steps:
1. Launch Visual Studio and open a new C# console application project.
2. Add the following packages to the project using NuGet:
Microsoft .NET Map Reduce API forHadoop
Microsoft ASP.NET Web API
3. Open the Program.cs file if it is not already open.
4. Add the following directives to the program:
using Microsoft.Hadoop;
using Microsoft.Hadoop.MapReduce;
using Microsoft.Hadoop.WebClient.WebHCatClient;
The environment is now ready to write a MapReduce routine. Our next step will be to write a Mapper class:
1. In the program, navigate to the curly brace that defines the end of the Program class.
2. Add the following class to the code:
public class MySimpleMapper : MapperBase
{
public override void Map(string inputLine, MapperContext context)
{
//interpret the incoming line as an integer value
int value = int.Parse(inputLine);
//determine whether value is even or odd
string key = (value % 2 == 0) ? "even" : "odd";
//output key assignment with value
context.EmitKeyValue(key, value.ToString());
}
}
In this code, you will notice the Mapper class is inherits the MapperBase class. We override the Map method of that class to write our own Map method. The Map method accepts data from the input file as a string and a reference to a MapperContext object which is the means by which we will communicate back to the MapReduce environment.
As the incoming data consists of a single integer value, we simply cast it to an int data type and then use a simple modulo calculation to determine whether the value is even or odd, writing “even” or “odd” to the key string variable based on the outcome. This key value along with the original integer value are returned to the MapReduce environment through the context object using the EmitKeyValue function. Note that the EmitKeyValue function only accepts strings so that the integer value is cast to a string data type as part of the call.
Now we will write the reduce function:
1. In the program, navigate to the curly brace that defines the end of the Mapper class.
2. Add the following class to the code:
public class MySimpleReducer : ReducerCombinerBase
{
public override void Reduce(
string key, IEnumerable<string> values, ReducerCombinerContext context
)
{
//initialize counters
int myCount = 0;
int mySum = 0;
//count and sum incoming values
foreach (string value in values)
{
mySum += int.Parse(value);
myCount++;
}
//output results
context.EmitKeyValue(key, myCount + "t" + mySum);
}
Our Reducer class inherits the ReducerCombiner class and overrides the Reduce method. The Reduce method accepts a single key value (as a string) and an innumerable collection of its associated values. The Reduce method also receives a reference to the MapReduce environment through the context object.
The code in the Reduce method is very simple. We loop through the collection of values, incrementing a count and adding up the values as we loop. Once this is done, the original key is returned along with the count and sum values we calculated earlier. Notice that the myCount and mySum variables are not explicitly cast to strings. By concatenating these values with a tab-string delimiter, the + operator performs an implicit conversion for us.
Now that we have our Mapper and Reducer classes defined, we can create a MapReduce job. To do this, follow these steps:
1. Navigate to the Main method in the Program class.
2. To that class, add the following code:
//establish job configuration
HadoopJobConfiguration myConfig = new HadoopJobConfiguration();
myConfig.InputPath = "/demo/simple/in";
myConfig.OutputFolder = "/demo/simple/out";
//connect to cluster
Uri myUri = new Uri("https://localhost");
string userName = "hadoop";
string passWord = null;
IHadoop myCluster = Hadoop.Connect(myUri, userName, passWord);
//execute mapreduce job
MapReduceResult jobResult =
myCluster.MapReduceJob.Execute<MySimpleMapper, MySimpleReducer>(myConfig);
//write job result to console
int exitCode = jobResult.Info.ExitCode;
string exitStatus = "Failure";
if (exitCode == 0) exitStatus = "Success";
exitStatus = exitCode + " (" + exitStatus + ")";
Console.WriteLine();
Console.Write("Exit Code = " + exitStatus);
Console.Read();
At the top of the code, we define a HadoopJobConfiguration object to hold job configuration information such as the folder holding our input files and the folder to where output should be directed. Note that by default a MapReduce job will access all files in the input folder and delete all files in the destination folder. As a result, it is a best practice to use a folder structure and naming scheme that keeps like input files together and outputs from different jobs isolated.
Next, we connect to our local Hadoop cluster. The connection is very simple and in this example we are just using the default user, hadoop, which has a null password.
Next, we execute a MapReduceJob on the cluster and identify our Mapper and Reducer classes as the sources of the Map and Reduce methods it will call. The Execute method has a few implementations which allow us to employ just a Mapper, a Mapper and a Reducer, or a Mapper, Reducer, or Combiner. For this simple job, we want the version that uses the Mapper and Reducer. Configuration information is passed to the Execute method and results are captured by the MapReduceResult object.
The remaining code is just for presentation purposes. We inspect the exit code for the job, post a message about it to our console, and hold the console in place until the user presses a key.
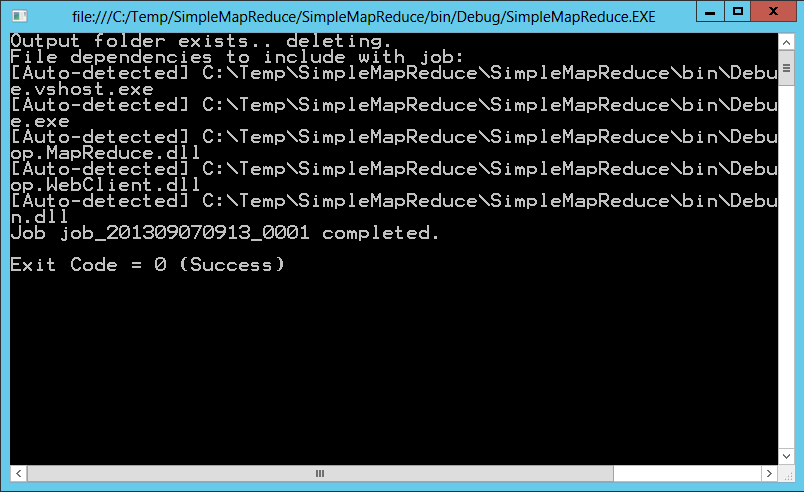
Now it’s time to run the job:
1. From Visual Studio, click the Start button.
2. After a few seconds, the console should appear.
3. Once the job has completed, review the console to verify the job completed successfully.
Now that the job is completed, it’s time to inspect the results:
1. From the desktop, launch the Hadoop Command Prompt.
2. Inspect the contents of the /demo/simple/out folder using the ls function as described in previous posts.
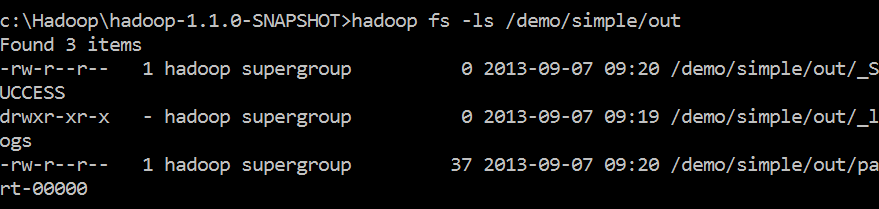
3. Inspect the contents of the /demo/simple/out/part-00000 file using the cat function as described in previous posts.

In this example, MapReduce determined that a single reduce task was adequate to execute that phase of this job. For that reason, there is only one part- file in the output folder.