POC - Part 2: Search - Configuring the connector/Indexing Content
Hard to believe it has taken us 4 parts to get to the point where we could finally index some content, but Rome wasn't built in a day (or for that matter neither was an OS installation). Besides, 1 part was planning and 3 were VM set-up. We are fine.
The Reader's Digest version of the process is as follows:
- Configure a connector to read your content repository
- Index a sample of your content
- Create a Fast Search Center
- Execute a query
Is it really that simple in real life? From a mechanical perspective: yes. From a business solution perspective: probably not. Questions someone needs to ask are things like:
- What problem are you trying to solve?
- Which refiners (metadata categories) would make searching easier for your users?
- Have you indexed the correct corpus of content?
- Is a plain vanilla result page sufficient for your users or is a search-driven application appropriate?
These are questions equivalent to discovering the Meaning of Life so I will leave them for another day (or never, whichever comes first).
Once our content is indexed we will search it using a new search page. We will create a new Fast Search Center once everything is crawled and searchable.
The Short Version
- Install the Advanced Filter Pack
- Create a new Fast Search Center
- Open the Central Administration page.
- Open the Content Sources page, configure and run a new crawler on your content
- Execute a search in the Fast Search Center withkeyword #
- Copy any other files you have into the folder holding the documents to be indexed (in this case, neurobiology-files).
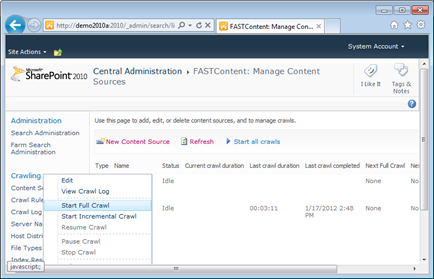
- Return to the browser with the Central Administration page and hover your cursor over the File System Crawl label. An arrow will appear next to it.
- Click the arrow to open the popup menu. Click Start Full Crawl.
- Refresh.
- Wait.
- Refresh.
- Wait.
- Refresh.
- Wait.
- When the Status turns to Idle return to the Fast Search Center page and rerun the query with # (hash).
- Click on the refiner Site --> vboxsvr. The total results will be the total number of documents, the root folder and any sub-folders. My total for 80 documents, 1 root folder, and 149 sub-folders is 230 (if the number haven't changed give SharePoint more time; it will catch up).
The Long Version
Install the Advanced Filter Pack
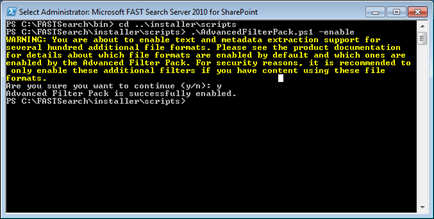
Start --> Fast Search Server 2010 for SharePoint (right click --> Run as Administrator)
From the PowerShell window:
> cd ..\installer\scripts
> .\AdvancedFilterPack.ps1 -enable
[answer y to the only question it asks]
There is no need to restart the machine or any of the services.
Create a new Fast Search Center
- Open IE
- Site Actions --> New Site --> Search --> FAST Search Center
- Title: TechNet VM Fast Search Page
- URL: fast-search
- Click Create
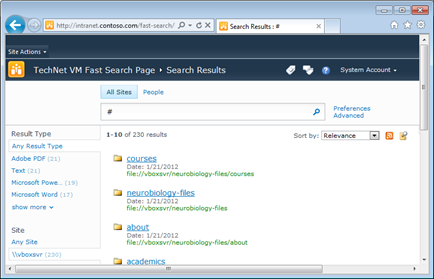
- When the Fast Search Center page opens enter a keyword of # (hash, or sharp if you're a music major). If you have not ben experimenting with the VM a result total of 95 documents should be returned.

Open the Central Administration page.
Start --> SharePoint 2010 Central Administration
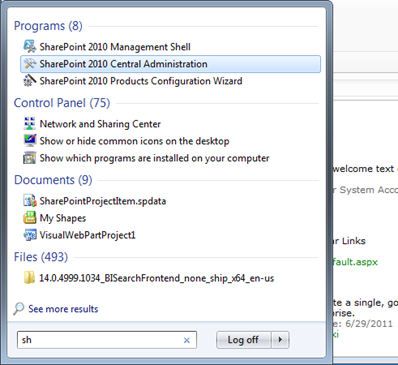
Click on SharePoint 2010 Central Administration. This will open the main admin page in another IE window.
Open the Content Sources page, configure and run a new crawler on your content
General Application Settings (the list to the left) --> Search --> Farm Search Administration --> FASTContent --> Crawling (list to the left) --> Content Sources
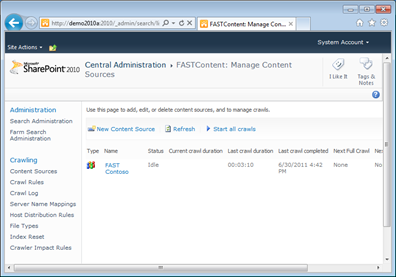
Click on New Content Source
- Name: File system crawl
- Content Source Type: File Shares
- Start Addresses: \\VBOXSVR\neurobiology-files
- Crawl Settings: Crawl the folder and all subfolders of each start address
- Crawl Schedules: None [Full and Incremental]
- Content Source Priority: Normal
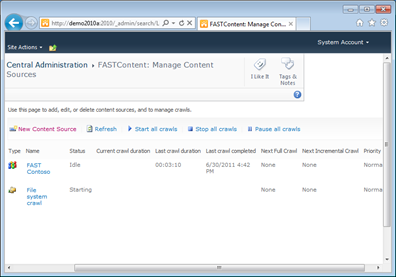
- FileStart Full Crawl: [check the box]
As it so happens I have 1 plain text file in the folder named neurobiology-files. I moved all of the folders so that the 1 file is sitting there waiting to be crawled. More files later; first let's prove we can index 1 file.
Click OK to start the crawl. The Status column should read Starting. Click the Refresh link every so often until the Status changes from Starting to Crawling Full to Completing to Idle. This will take 3-4 minutes.
Execute a search in the Fast Search Center withkeyword #
- Return to the IE at https://intranet.contoso.com/fast-search and re-execute the search using # (hash).
- A result set with the full contents of the collection (in this case collection sp) is displayed. The results will be 2 more than before (97 vs. 95).
- Under the Site refiner click vboxsvr. The results will now number 2 (one file and one folder). Success!
Copy any other files you have into the folder holding the documents to be indexed (in this case, neurobiology-files).
Return to the browser with the Central Administration page and hover your cursor over the File System Crawl label. An arrow will appear next to it.
Click the arrow to open the popup menu. Click Start Full Crawl.
Refresh.
Wait.
Refresh.
Wait.
Refresh.
Wait.
When the Status turns to Idle return to the Fast Search Center page and rerun the query with # (hash).
Click on the refiner Site --> vboxsvr. The total results will be the total number of documents, the root folder and any sub-folders. My total for 80 documents, 1 root folder, and 149 sub-folders is 230 (if the number haven't changed give SharePoint more time; it will catch up).
If you want to be really cool then change the query to:
# AND isdocument=true
Click on Site --> vboxsvr and you should see just the number of documents you indexed minus the folders they live in (if you had subfolders to begin with).
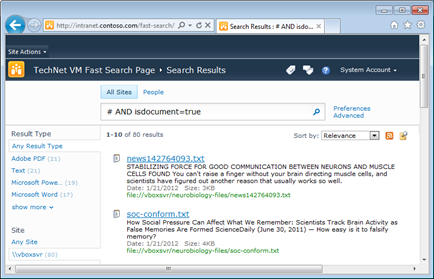
How cool is that?
Examine your handy work. Take a good look at the page. Look at the refiners. Try various searches based on the keywords you know should be in the content. Look at the Sort By.
Want to know how to configure the search results to ignore folders? Read Part 2a .
How would you do this using PowerShell? Read Part 2b .
Important pages (your appids will vary)
- Central Admin
- Farm Search Administration
- Content Sources
- Crawl Logs: if something goes wrong this is the place to start looking
- https://demo2010a:2010/_admin/search/LogContentSources.aspx?appid=5c78b149%2D0a27%2D44f3%2Db240%2Dbb7da0f2ab42
- There are a number of useful pages here: specifically URL and Crawl History
Easter eggs
- Want to see the XML output from the Fast QRServer (Query/Response server)? Try this at home, but not at work.
- URL: https://localhost:13280/
- FQL Query: meta.collection:sp and #
- Should return 281 items
- FQL Query: meta.collection:sp and # and isdocument:true
- Should return 98 items
- To view the status of the running Fast processes
Open the PowerShell window the same way described above and enter on the command line:
nctrl status
Much thanks to Leo Souza for helping me with answers to various questions/problems I was having that were mostly self-inflicted.
Next: Crawling an External Web Site with the SharePoint 2010 Web Crawler